Crisp Meringue Cookies

Dessert · Snack

Crisp Meringue Cookies

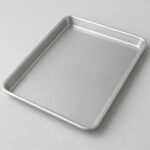
Whip part of the sugar into the whites, then fold in the remaining sugars gently. A slow bake dries the piped cookies without relying on their surface appearance alone.

Yield
1 small batch
Cuisine
French-inspired

Bring it to the table

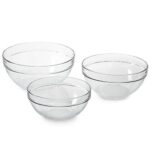
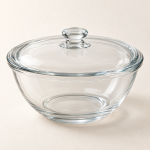
Keep the bowl grease-free

Traces of yolk or fat make the whites harder to whip. Use clean, dry equipment and pipe the finished mixture promptly.

At the table

Serve plain or alongside a dessert, keeping the cookies away from moisture until serving.

Before you start

Gather your ingredients.

Full quantities and serving adjustments are in the recipe card below.

See the ingredient checklist
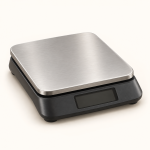
  • 100 g egg whites — weighed without yolks
  • 50 g fine granulated sugar
  • 80 g fine granulated sugar
  • 50 g confectioners sugar — sifted
  • confectioners sugar — for two light dustings

A few useful notes.

Cookie count depends on the piping size.

Optional flavor variations for the base batch: fold in 12 g coffee extract at the end; or sift 26 g cocoa powder with the folding sugars; or add a small pinch of food-grade ground lavender to the dry mixture. Use one variation at a time. Extra moisture or cocoa can change the drying time.

Store away from moist fillings and toppings until serving.

The cooking plan

How to make Crisp Meringue Cookies.

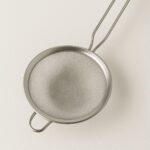
  1. Heat the oven to 200°F and line baking sheets with parchment. Sift the folding-mixture confectioners sugar, then combine it with the 80 g granulated sugar.

  2. Beat the egg whites in a clean, grease-free bowl until foamy and beginning to hold their shape. Gradually add the 50 g whipping sugar and continue until the whites are glossy and hold firm peaks.

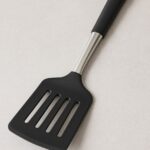
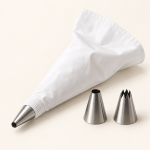
  3. Fold the remaining sugar mixture into the whites gently with a spatula, stopping when evenly combined. Pipe small mounds or kisses about 1 inch wide onto the prepared sheets, leaving space between them. Dust lightly with confectioners sugar, let it absorb briefly, then dust lightly again.

  4. Bake until firm, dry through the center and easily released from the parchment, starting to check at about 1 1/2 hours and continuing as needed for their size. Break a cooled test cookie to check that the middle is dry rather than wet or sticky.

  5. Turn off the oven and let the cookies cool inside with the door closed. Once completely cold, transfer to an airtight container away from humidity.

Let’s cook

The full recipe.

Check off ingredients as you get them ready.

Changing servings? The ingredient list scales automatically. Adjust quantities named in the steps to match, and choose pans and cooking times for your batch.

Crisp Meringue Cookies

No ratings yet
Crisp piped meringues made with egg whites, granulated sugar and confectioners sugar.
Servings: 1 small batch
Course: Dessert, Snack
Cuisine: French-inspired

Some ingredient links are affiliate links. We may earn a commission at no extra cost to you. As an Amazon Associate I earn from qualifying purchases.

Ingredients
  

Whipping mixture
Folding mixture
Finish
  •  
    confectioners sugar for two light dustings

Equipment images are illustrative. Exact products may vary.
Instructions
 

  1. Heat the oven to 200°F and line baking sheets with parchment. Sift the folding-mixture confectioners sugar, then combine it with the 80 g granulated sugar.
  2. Beat the egg whites in a clean, grease-free bowl until foamy and beginning to hold their shape. Gradually add the 50 g whipping sugar and continue until the whites are glossy and hold firm peaks.
  3. Fold the remaining sugar mixture into the whites gently with a spatula, stopping when evenly combined. Pipe small mounds or kisses about 1 inch wide onto the prepared sheets, leaving space between them. Dust lightly with confectioners sugar, let it absorb briefly, then dust lightly again.
  4. Bake until firm, dry through the center and easily released from the parchment, starting to check at about 1 1/2 hours and continuing as needed for their size. Break a cooled test cookie to check that the middle is dry rather than wet or sticky.
  5. Turn off the oven and let the cookies cool inside with the door closed. Once completely cold, transfer to an airtight container away from humidity.

Notes

Cookie count depends on the piping size.
Optional flavor variations for the base batch: fold in 12 g coffee extract at the end; or sift 26 g cocoa powder with the folding sugars; or add a small pinch of food-grade ground lavender to the dry mixture. Use one variation at a time. Extra moisture or cocoa can change the drying time.
Store away from moist fillings and toppings until serving.

Tried this recipe?

Let us know how it was!

A couple of useful answers.

Why are there two granulated sugar amounts?

One portion is beaten into the whites and the other is folded in with the confectioners sugar.

Are they finished when the outside feels firm?

Check a cooled test cookie too. The center should be dry rather than wet or sticky.

Keep the good food going

Similar Recipes

Find another recipe to bring to the table.

Almond and Walnut Crumble

Dessert · Garnish

Almond and Walnut Crumble

Mix the nut flours with butter, sugar and wheat flour, then bake in a thin layer. Let it cool before breaking it into crumbs.

Yield
1 small batch
Cuisine
Contemporary

Bring it to the table

Use fine nut meal

Finely ground walnuts should look like meal, not an oily nut butter. Pulse in short bursts if grinding the nuts yourself.

At the table

Sprinkle over a finished dessert just before serving to keep the crumbs crisp.

Before you start

Gather your ingredients.

Full quantities and serving adjustments are in the recipe card below.

See the ingredient checklist
  • 50 g unsalted butter — softened
  • 50 g confectioners sugar
  • 70 g almond flour
  • 50 g all-purpose flour
  • 37.5 g finely ground walnuts

A few useful notes.

This crumble contains almonds, walnuts and wheat.

The control represents a small batch rather than a measured cup yield.

The cooking plan

How to make Almond and Walnut Crumble.

  1. Heat the oven to 325°F and line a baking tray with a silicone baking mat or parchment.

  2. Mix the softened butter and confectioners sugar until combined. Add the almond flour, all-purpose flour and ground walnuts. Mix just until the mixture holds together; do not beat into an oily paste.

  3. Spread or press into a thin, even layer about 1/4 inch thick on the prepared tray. Bake, starting to check around 15 minutes, until lightly golden and cooked through. Continue as needed for the thickness and tray.

  4. Cool completely on the tray, then break into small crumbs. Store airtight once cold, or freeze for longer keeping. Keep separate from moist toppings until serving.

Let’s cook

The full recipe.

Check off ingredients as you get them ready.

Changing servings? The ingredient list scales automatically. Adjust quantities named in the steps to match, and choose pans and cooking times for your batch.

Almond and Walnut Crumble

No ratings yet
A baked almond-and-walnut crumble for adding a nutty, buttery crunch to desserts.
Servings: 1 small batch
Course: Dessert, Garnish
Cuisine: Contemporary

Some ingredient links are affiliate links. We may earn a commission at no extra cost to you. As an Amazon Associate I earn from qualifying purchases.

Ingredients
  

  • 50 g unsalted butter softened
  •  
    50 g confectioners sugar
  •  
    70 g almond flour
  • 50 g all-purpose flour
  •  
    37.5 g finely ground walnuts

Equipment images are illustrative. Exact products may vary.

Instructions
 

  1. Heat the oven to 325°F and line a baking tray with a silicone baking mat or parchment.
  2. Mix the softened butter and confectioners sugar until combined. Add the almond flour, all-purpose flour and ground walnuts. Mix just until the mixture holds together; do not beat into an oily paste.
  3. Spread or press into a thin, even layer about 1/4 inch thick on the prepared tray. Bake, starting to check around 15 minutes, until lightly golden and cooked through. Continue as needed for the thickness and tray.
  4. Cool completely on the tray, then break into small crumbs. Store airtight once cold, or freeze for longer keeping. Keep separate from moist toppings until serving.

Notes

This crumble contains almonds, walnuts and wheat.
The control represents a small batch rather than a measured cup yield.

Tried this recipe?

Let us know how it was!

A couple of useful answers.

Does it use both almonds and walnuts?

Yes. Almond flour and finely ground walnuts are separate ingredients in this version.

When do I break it into crumbs?

Let it cool completely first so the baked mixture can firm.

Keep the good food going

Similar Recipes

Find another recipe to bring to the table.

Citrus Bugnes Fried Pastries

Dessert · Snack

Citrus Bugnes Fried Pastries

Mix the butter into the dry ingredients before adding eggs and milk. Rest the dough overnight in the refrigerator, then roll thinly and fry in small batches.

Yield
1 small batch
Cuisine
French-inspired

Bring it to the table

Roll thinly and evenly

Thick pieces take longer to cook through. Roll a small portion first and fry one piece to check its thickness and doneness before cutting the rest.

At the table

Drain well and serve freshly fried, with a little confectioners sugar if desired.

Before you start

Gather your ingredients.

Full quantities and serving adjustments are in the recipe card below.

See the ingredient checklist
  • 250 g all-purpose flour — plus a little for rolling
  • 1.5 g salt
  • 30 g unsalted butter — softened
  • 37.5 g granulated sugar
  • 12.5 g milk
  • 1/4 lemon — finely grated zest only
  • 1/4 orange — finely grated zest only
  • 2 large eggs
  • neutral oil — for deep-frying
  • confectioners sugar — optional, for finishing

A few useful notes.

The number of pastries depends on how thinly the dough is rolled and how it is cut.

The dough has no yeast or baking powder; roll thin rather than expecting a bread-like rise.

Do not taste raw dough.

The cooking plan

How to make Citrus Bugnes Fried Pastries.

  1. Mix the flour, salt, sugar and citrus zests in a bowl. Work in the softened butter until distributed. Add the eggs and milk and mix just until a dough forms, without prolonged beating.

  2. Flatten, wrap and refrigerate overnight. Let the dough soften only enough to roll, keeping unused portions covered.

  3. Roll thinly on a lightly floured surface, about 1/16 inch thick. Cut into narrow strips or small diamonds. Shake off loose flour.

  4. Heat neutral oil in a deep, heavy pot to 325°F, using a frying thermometer. Leave ample room above the oil and keep the pot less than half full. Fry one small piece first, turning until evenly golden, then drain and check that its center is cooked rather than doughy.

  5. Fry the remaining pieces in small batches, turning for even color and allowing the oil to return to temperature between batches. Drain on paper towel or a rack and dust lightly with confectioners sugar if desired. Serve promptly.

Let’s cook

The full recipe.

Check off ingredients as you get them ready.

Changing servings? The ingredient list scales automatically. Adjust quantities named in the steps to match, and choose pans and cooking times for your batch.

Citrus Bugnes Fried Pastries

No ratings yet
Thin fried pastries with lemon and orange zest, finished with a light dusting of confectioners sugar.
Servings: 1 small batch
Course: Dessert, Snack
Cuisine: French-inspired

Some ingredient links are affiliate links. We may earn a commission at no extra cost to you. As an Amazon Associate I earn from qualifying purchases.

Ingredients
  

  • 250 g all-purpose flour plus a little for rolling
  • 1.5 g salt
  • 30 g unsalted butter softened
  • 37.5 g granulated sugar
  • 12.5 g milk
  • ¼ lemon finely grated zest only
  •  
    ¼ orange finely grated zest only
  • 2 large eggs
  •  
    neutral oil for deep-frying
  •  
    confectioners sugar optional, for finishing

Equipment images are illustrative. Exact products may vary.

Instructions
 

  1. Mix the flour, salt, sugar and citrus zests in a bowl. Work in the softened butter until distributed. Add the eggs and milk and mix just until a dough forms, without prolonged beating.
  2. Flatten, wrap and refrigerate overnight. Let the dough soften only enough to roll, keeping unused portions covered.
  3. Roll thinly on a lightly floured surface, about 1/16 inch thick. Cut into narrow strips or small diamonds. Shake off loose flour.
  4. Heat neutral oil in a deep, heavy pot to 325°F, using a frying thermometer. Leave ample room above the oil and keep the pot less than half full. Fry one small piece first, turning until evenly golden, then drain and check that its center is cooked rather than doughy.
  5. Fry the remaining pieces in small batches, turning for even color and allowing the oil to return to temperature between batches. Drain on paper towel or a rack and dust lightly with confectioners sugar if desired. Serve promptly.

Notes

The number of pastries depends on how thinly the dough is rolled and how it is cut.
The dough has no yeast or baking powder; roll thin rather than expecting a bread-like rise.
Do not taste raw dough.

Tried this recipe?

Let us know how it was!

A couple of useful answers.

Can I roll them thick like doughnuts?

This version is intended for thin fried pastries. Thick pieces may color outside before cooking through.

Why cook one piece first?

It lets you check the thickness and oil temperature before frying the full batch.

Keep the good food going

Similar Recipes

Find another recipe to bring to the table.
Butter-Rich Tart Pastry (Pâte Brisée)

Pastry

Butter-Rich Tart Pastry (Pâte Brisée)

Keep the butter cold, pulse only enough to combine and give the dough a chilled rest before lining a tart pan. The filling is prepared separately.

Yield
1 small batch
Cuisine
French-inspired

Bring it to the table

Stop before it turns into a paste

Pulse the butter into the flour in short bursts, then add cold water just until the mixture holds together when pressed.

At the table

Use as a tart shell with a separately prepared filling, baking the shell as that filling requires.

Before you start

Gather your ingredients.

Full quantities and serving adjustments are in the recipe card below.

See the ingredient checklist
  • 125 g all-purpose flour — plus a little for rolling
  • 102.5 g unsalted butter — cold, in small cubes
  • 1.5 g salt
  • 37.5 g cold water

A few useful notes.

This is an unsweetened dough component, not a complete tart.

The control represents one small dough batch; shell size and thickness determine how much is needed.

Do not taste raw dough.

The cooking plan

How to make Butter-Rich Tart Pastry (Pâte Brisée).

  1. Pulse the flour, salt and cold butter in a food processor until the butter is distributed in small pieces. Add the measured cold water and pulse briefly, stopping as soon as the mixture holds when pressed together.

  2. Gather gently into a disc without prolonged kneading. Wrap and refrigerate for at least 1 hour. Keep refrigerated and use within 2 days, or freeze promptly for later use.

  3. Let the dough soften just enough to roll. Roll about 1/8 inch thick on a lightly floured surface or between parchment. Line the chosen tart pan without stretching the dough, trim and chill again until firm, about 30 minutes.

  4. Follow your filling recipe for baking. If an empty shell needs a partial bake, heat the oven to 375°F, set the pan on a baking sheet, line the chilled shell with parchment and fill with pie weights. Start checking around 20 minutes and continue until the sides are set and the lining lifts cleanly.

  5. Remove the weights carefully. For a fully baked shell, continue until the base looks dry and golden, checking after another 5–15 minutes as needed for the pan and thickness. Cool before adding a no-bake filling.

Let’s cook

The full recipe.

Check off ingredients as you get them ready.

Changing servings? The ingredient list scales automatically. Adjust quantities named in the steps to match, and choose pans and cooking times for your batch.

Butter-Rich Tart Pastry (Pâte Brisée)

No ratings yet
An unsweetened butter-rich tart pastry made with flour, cold butter, salt and water.
Servings: 1 small batch
Course: Pastry
Cuisine: French-inspired

Some ingredient links are affiliate links. We may earn a commission at no extra cost to you. As an Amazon Associate I earn from qualifying purchases.

Ingredients
  

  • 125 g all-purpose flour plus a little for rolling
  • 102.5 g unsalted butter cold, in small cubes
  • 1.5 g salt
  •  
    37.5 g cold water

Equipment images are illustrative. Exact products may vary.

Instructions
 

  1. Pulse the flour, salt and cold butter in a food processor until the butter is distributed in small pieces. Add the measured cold water and pulse briefly, stopping as soon as the mixture holds when pressed together.
  2. Gather gently into a disc without prolonged kneading. Wrap and refrigerate for at least 1 hour. Keep refrigerated and use within 2 days, or freeze promptly for later use.
  3. Let the dough soften just enough to roll. Roll about 1/8 inch thick on a lightly floured surface or between parchment. Line the chosen tart pan without stretching the dough, trim and chill again until firm, about 30 minutes.
  4. Follow your filling recipe for baking. If an empty shell needs a partial bake, heat the oven to 375°F, set the pan on a baking sheet, line the chilled shell with parchment and fill with pie weights. Start checking around 20 minutes and continue until the sides are set and the lining lifts cleanly.
  5. Remove the weights carefully. For a fully baked shell, continue until the base looks dry and golden, checking after another 5–15 minutes as needed for the pan and thickness. Cool before adding a no-bake filling.

Notes

This is an unsweetened dough component, not a complete tart.
The control represents one small dough batch; shell size and thickness determine how much is needed.
Do not taste raw dough.

Tried this recipe?

Let us know how it was!

A couple of useful answers.

Does this dough contain sugar?

No. It uses flour, butter, salt and water.

Do I need to bake it before filling?

That depends on the filling. Follow the complete tart recipe for a partial or full bake.

Keep the good food going

Similar Recipes

Find another recipe to bring to the table.

Ricotta and Parmesan Spoon Gnocchi

Pasta

Ricotta and Parmesan Spoon Gnocchi

Use very dry ricotta and mix only until combined after adding flour. Poach a small test dumpling before shaping the rest so you can check how the mixture holds together.

Yield
4 servings
Cuisine
Italian-inspired

Bring it to the table

Dry ricotta matters

Use ricotta impastata or thoroughly drained whole-milk ricotta. Weigh after draining; wet cheese changes how much flour the dough needs.

At the table

Lift the cooked dumplings directly into a sauce prepared separately and serve hot.

Before you start

Gather your ingredients.

Full quantities and serving adjustments are in the recipe card below.

See the ingredient checklist
  • 500 g ricotta impastata — or very dry, thoroughly drained whole-milk ricotta; weigh after draining
  • 70 g Parmesan — finely grated
  • 1 large egg
  • 2 large egg yolks
  • 70 g all-purpose flour — sifted; a little extra only if needed after the test dumpling
  • salt — to taste, plus some for the poaching water
  • ground black pepper — to taste
  • 1 pinch ground nutmeg

A few useful notes.

Four servings are a home portion suggestion.

These are spoon-shaped dumplings, so the soft mixture does not have to be rolled into ropes.

Use only enough extra flour to help a test dumpling hold; too much makes the dumplings heavier.

The cooking plan

How to make Ricotta and Parmesan Spoon Gnocchi.

  1. Briefly process or beat the dry ricotta, Parmesan, whole egg and yolks until smooth. Add the sifted flour, salt, pepper and nutmeg. Mix just until combined, then cover and refrigerate for about 30 minutes.

  2. Bring a wide pan of lightly salted water to a gentle simmer. With two teaspoons, form a small oval dumpling and lower it into the water. Cook until it holds together and is cooked through. If it breaks up, mix a teaspoon of extra flour into the chilled dough and test again before proceeding.

  3. Form small spoon-sized dumplings and poach in batches, keeping the water at a gentle simmer rather than a rough boil. Once they float, continue cooking until the centers are set and at least 160°F; floating alone is not the final doneness check.

  4. Lift with a slotted spoon, drain well and transfer to your prepared sauce. Serve promptly. Keep uncooked mixture refrigerated while working, and cook it the same day.

Let’s cook

The full recipe.

Check off ingredients as you get them ready.

Changing servings? The ingredient list scales automatically. Adjust quantities named in the steps to match, and choose pans and cooking times for your batch.

Ricotta and Parmesan Spoon Gnocchi

No ratings yet
Soft ricotta and Parmesan dumplings gently poached from small spoonfuls of dough.
Servings: 4 servings
Course: Pasta
Cuisine: Italian-Inspired

Some ingredient links are affiliate links. We may earn a commission at no extra cost to you. As an Amazon Associate I earn from qualifying purchases.

Ingredients
  

  •  
    500 g ricotta impastata or very dry, thoroughly drained whole-milk ricotta; weigh after draining
  •  
    70 g Parmesan finely grated
  • 1 large egg
  •  
    2 large egg yolks
  • 70 g all-purpose flour sifted; a little extra only if needed after the test dumpling
  • salt to taste, plus some for the poaching water
  • ground black pepper to taste
  •  
    1 pinch ground nutmeg

Equipment images are illustrative. Exact products may vary.

Instructions
 

  1. Briefly process or beat the dry ricotta, Parmesan, whole egg and yolks until smooth. Add the sifted flour, salt, pepper and nutmeg. Mix just until combined, then cover and refrigerate for about 30 minutes.
  2. Bring a wide pan of lightly salted water to a gentle simmer. With two teaspoons, form a small oval dumpling and lower it into the water. Cook until it holds together and is cooked through. If it breaks up, mix a teaspoon of extra flour into the chilled dough and test again before proceeding.
  3. Form small spoon-sized dumplings and poach in batches, keeping the water at a gentle simmer rather than a rough boil. Once they float, continue cooking until the centers are set and at least 160°F; floating alone is not the final doneness check.
  4. Lift with a slotted spoon, drain well and transfer to your prepared sauce. Serve promptly. Keep uncooked mixture refrigerated while working, and cook it the same day.

Notes

Four servings are a home portion suggestion.
These are spoon-shaped dumplings, so the soft mixture does not have to be rolled into ropes.
Use only enough extra flour to help a test dumpling hold; too much makes the dumplings heavier.

Tried this recipe?

Let us know how it was!

A couple of useful answers.

Why poach one first?

It shows whether the ricotta is dry enough for the dough to hold. Make small flour adjustments before poaching the full batch.

Are they done as soon as they float?

Let them cook through after floating and check a center for set texture and at least 160°F.

Keep the good food going

Similar Recipes

Find another recipe to bring to the table.

Chestnut and Egg-Yolk Pasta

Pasta

Chestnut and Egg-Yolk Pasta

Knead until the dough is smooth, let it rest, then roll and cut into noodles. Chestnut flour makes up one-quarter of the flour blend; the rest is wheat flour.

Yield
4 servings
Cuisine
Italian-inspired

Bring it to the table

Rest before rolling

A covered rest lets the flour hydrate. Roll in small portions, keeping the remaining dough covered so it does not dry at the edges.

At the table

Cook the noodles promptly and toss with a sauce prepared separately.

Before you start

Gather your ingredients.

Full quantities and serving adjustments are in the recipe card below.

See the ingredient checklist
  • 188 g all-purpose flour — plus a little for rolling
  • 63 g chestnut flour
  • 188 g egg yolks — weighed without whites
  • water — only a little if needed to bring a dry dough together
  • salt — for the pasta cooking water

A few useful notes.

Four servings are a home portion suggestion for the dough.

This is a wheat-and-chestnut flour blend, not a gluten-free pasta.

The cooking time depends on the noodle thickness and shape.

The cooking plan

How to make Chestnut and Egg-Yolk Pasta.

  1. Mix the all-purpose and chestnut flours together. Add the weighed yolks and work into a rough dough. Knead until smooth and firm, adding moisture only with lightly dampened hands if the dough remains crumbly.

  2. Wrap and rest for 30 minutes. For a longer pause, refrigerate promptly and use within 24 hours, letting the dough become pliable before rolling.

  3. Divide into four pieces. Keep unused pieces covered. Roll each piece through the widest setting of a pasta machine, folding and repeating until smooth, then work through thinner settings. Alternatively roll by hand to an even thin sheet.

  4. Dust lightly with flour and cut into noodles. Separate them on a lightly floured tray. Cook promptly, or refrigerate and cook the same day; freeze separated portions promptly for longer keeping.

  5. Bring a large pot of salted water to a boil. Add the noodles and stir gently. Start checking thin noodles after about 2 minutes, then continue until cooked through with no raw, floury center. Drain and toss with your prepared sauce.

Let’s cook

The full recipe.

Check off ingredients as you get them ready.

Changing servings? The ingredient list scales automatically. Adjust quantities named in the steps to match, and choose pans and cooking times for your batch.

Chestnut and Egg-Yolk Pasta

No ratings yet
A fresh egg-yolk pasta made with chestnut flour blended into all-purpose flour.
Servings: 4 servings
Course: Pasta
Cuisine: Italian-Inspired

Some ingredient links are affiliate links. We may earn a commission at no extra cost to you. As an Amazon Associate I earn from qualifying purchases.

Ingredients
  

  • 188 g all-purpose flour plus a little for rolling
  •  
    63 g chestnut flour
  •  
    188 g egg yolks weighed without whites
  • water only a little if needed to bring a dry dough together
  • salt for the pasta cooking water

Equipment images are illustrative. Exact products may vary.

Instructions
 

  1. Mix the all-purpose and chestnut flours together. Add the weighed yolks and work into a rough dough. Knead until smooth and firm, adding moisture only with lightly dampened hands if the dough remains crumbly.
  2. Wrap and rest for 30 minutes. For a longer pause, refrigerate promptly and use within 24 hours, letting the dough become pliable before rolling.
  3. Divide into four pieces. Keep unused pieces covered. Roll each piece through the widest setting of a pasta machine, folding and repeating until smooth, then work through thinner settings. Alternatively roll by hand to an even thin sheet.
  4. Dust lightly with flour and cut into noodles. Separate them on a lightly floured tray. Cook promptly, or refrigerate and cook the same day; freeze separated portions promptly for longer keeping.
  5. Bring a large pot of salted water to a boil. Add the noodles and stir gently. Start checking thin noodles after about 2 minutes, then continue until cooked through with no raw, floury center. Drain and toss with your prepared sauce.

Notes

Four servings are a home portion suggestion for the dough.
This is a wheat-and-chestnut flour blend, not a gluten-free pasta.
The cooking time depends on the noodle thickness and shape.

Tried this recipe?

Let us know how it was!

A couple of useful answers.

Is all the flour chestnut flour?

No. Chestnut flour is one-quarter of the flour blend, with all-purpose wheat flour making up the rest.

Can I use the same time for every cut?

No. Check the center of a noodle and continue until cooked through; thicker cuts need longer.

Keep the good food going

Similar Recipes

Find another recipe to bring to the table.