Hard-Cooked Egg Gribiche Sauce

Condiment

Hard-Cooked Egg Gribiche Sauce

Mash the cooked yolks with mustard and lemon, then whisk in the oil before folding in the chopped whites and pickles. This home version uses fully cooked eggs.

Yield
1 small batch
Cuisine
French-inspired

Bring it to the table

Cool the eggs before mixing

Cook until both yolks and whites are firm, then cool promptly in ice water. Dry the peeled eggs before separating and chopping.

At the table

Spoon a little over cooked vegetables, potatoes or a finished fish dish.

Before you start

Gather your ingredients.

Full quantities and serving adjustments are in the recipe card below.

See the ingredient checklist
  • 2 large eggs
  • 30 g capers — drained and chopped
  • 30 g cornichons — drained and chopped
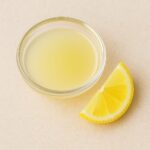
  • 2 tbsp lemon juice
  • 150 ml extra-virgin olive oil
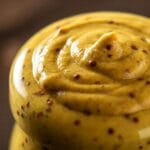
  • 1 1/2 tsp Dijon mustard
  • 2 1/4 tsp shallot — finely diced
  • 1 tbsp flat-leaf parsley — finely chopped
  • 1 pinch Espelette pepper
  • salt — to taste

A few useful notes.

This version uses hard-cooked eggs rather than soft or raw yolks.

Capers and cornichons contribute salt; taste before adding more.

The cooking plan

How to make Hard-Cooked Egg Gribiche Sauce.

  1. Lower the eggs gently into simmering water and cook until both yolks and whites are completely firm, about 10–12 minutes for large eggs. Transfer to ice water to cool promptly, then peel and pat dry.

  2. Separate the yolks from the whites. Mash the yolks smoothly with the mustard and lemon juice. Chop the whites separately.

  3. Whisk the olive oil into the yolk mixture slowly, beginning a little at a time. Continue until evenly combined, then fold in the chopped whites, capers, cornichons, shallot and parsley.

  4. Add Espelette pepper and salt to taste. Refrigerate promptly in a clean covered container at 40°F or below and use within 3–4 days. Stir before serving.

Let’s cook

The full recipe.

Check off ingredients as you get them ready.

Changing servings? The ingredient list scales automatically. Adjust quantities named in the steps to match, and choose pans and cooking times for your batch.

Hard-Cooked Egg Gribiche Sauce

No ratings yet
A tangy French-style sauce with hard-cooked eggs, capers, cornichons, shallot and parsley.
Servings: 1 small batch
Course: Condiment
Cuisine: French-inspired

Some ingredient links are affiliate links. We may earn a commission at no extra cost to you. As an Amazon Associate I earn from qualifying purchases.

Ingredients
  

  • 2 large eggs
  •  
    30 g capers drained and chopped
  •  
    30 g cornichons drained and chopped
  • 2 tbsp lemon juice
  • 150 ml extra-virgin olive oil
  • 1 ½ tsp Dijon mustard
  • 2 ¼ tsp shallot finely diced
  •  
    1 tbsp flat-leaf parsley finely chopped
  •  
    1 pinch Espelette pepper
  • salt to taste

Equipment images are illustrative. Exact products may vary.

Instructions
 

  1. Lower the eggs gently into simmering water and cook until both yolks and whites are completely firm, about 10–12 minutes for large eggs. Transfer to ice water to cool promptly, then peel and pat dry.
  2. Separate the yolks from the whites. Mash the yolks smoothly with the mustard and lemon juice. Chop the whites separately.
  3. Whisk the olive oil into the yolk mixture slowly, beginning a little at a time. Continue until evenly combined, then fold in the chopped whites, capers, cornichons, shallot and parsley.
  4. Add Espelette pepper and salt to taste. Refrigerate promptly in a clean covered container at 40°F or below and use within 3–4 days. Stir before serving.

Notes

This version uses hard-cooked eggs rather than soft or raw yolks.
Capers and cornichons contribute salt; taste before adding more.

Tried this recipe?

Let us know how it was!

A couple of useful answers.

Does this contain raw eggs?

No. Cook both yolks and whites until completely firm before making the sauce.

Should the finished sauce be perfectly smooth?

The yolk-and-oil base is mixed first, then chopped egg whites and pickles provide texture.

Keep the good food going

Similar Recipes

Find another recipe to bring to the table.

Vanilla Ladyfinger Sponge Biscuits

Dessert

Vanilla Ladyfinger Sponge Biscuits

Weigh the yolks and whites separately, then keep the folded mixture airy as you pipe it. The baked biscuits can be served plain or used in a dessert prepared separately.

Yield
1 small batch
Cuisine
French-inspired

Bring it to the table

Work gently after whipping

Use a clean, grease-free bowl for the whites. Fold rather than beat once the foam is ready, and pipe the batter promptly.

At the table

Serve plain or use in a layered dessert, adjusting any soaking liquid to the texture of the cooled biscuits.

Before you start

Gather your ingredients.

Full quantities and serving adjustments are in the recipe card below.

See the ingredient checklist
  • 125 g egg yolks — weighed without whites
  • 50 g granulated sugar
  • 2.5 g vanilla powder
  • 5 g invert sugar — such as Trimoline
  • 125 g all-purpose flour — sifted
  • 150 g egg whites
  • 25 g granulated sugar
  • confectioners sugar — for two light dustings

A few useful notes.

Biscuit count depends on the piping size; the control represents one small batch.

These are a baked sponge component, not a complete tiramisu or other layered dessert.

The two measured granulated sugar amounts go into separate mixtures.

The cooking plan

How to make Vanilla Ladyfinger Sponge Biscuits.

  1. Heat the oven to 350°F and line baking sheets with parchment. Fit a piping bag with a plain round tip about 1/2 inch wide.

  2. Beat the yolks, 50 g sugar, vanilla powder and invert sugar until pale and thick enough to fall from the whisk in a ribbon. Gently fold in the sifted flour.

  3. In a clean bowl, beat the whites until foamy. Gradually add the remaining 25 g sugar and beat until glossy peaks hold their shape. Fold a little into the yolk mixture to loosen it, then gently fold in the rest.

  4. Pipe short fingers about 3 inches long, leaving space between them. Sift a light layer of confectioners sugar over the tops, let it absorb briefly, then dust lightly a second time.

  5. Bake until golden and set, with tops that spring back lightly. Start checking small fingers at about 18 minutes and continue as needed for their thickness; larger shapes take longer. Do not rely on a fixed time for every piping size.

  6. Cool briefly on the tray, loosen carefully from the parchment and let cool completely on a rack. Store airtight once cold, or freeze if keeping for later use.

Let’s cook

The full recipe.

Check off ingredients as you get them ready.

Changing servings? The ingredient list scales automatically. Adjust quantities named in the steps to match, and choose pans and cooking times for your batch.

Vanilla Ladyfinger Sponge Biscuits

No ratings yet
Piped vanilla sponge biscuits made with separately whipped yolks and whites and a dusting of confectioners sugar.
Servings: 1 small batch
Course: Dessert
Cuisine: French-inspired

Some ingredient links are affiliate links. We may earn a commission at no extra cost to you. As an Amazon Associate I earn from qualifying purchases.

Ingredients
  

Yolk mixture
  •  
    125 g egg yolks weighed without whites
  • 50 g granulated sugar
  •  
    2.5 g vanilla powder
  •  
    5 g invert sugar such as Trimoline
  • 125 g all-purpose flour sifted
White mixture
  • 150 g egg whites
  • 25 g granulated sugar
Finish
  •  
    confectioners sugar for two light dustings

Equipment images are illustrative. Exact products may vary.

Instructions
 

  1. Heat the oven to 350°F and line baking sheets with parchment. Fit a piping bag with a plain round tip about 1/2 inch wide.
  2. Beat the yolks, 50 g sugar, vanilla powder and invert sugar until pale and thick enough to fall from the whisk in a ribbon. Gently fold in the sifted flour.
  3. In a clean bowl, beat the whites until foamy. Gradually add the remaining 25 g sugar and beat until glossy peaks hold their shape. Fold a little into the yolk mixture to loosen it, then gently fold in the rest.
  4. Pipe short fingers about 3 inches long, leaving space between them. Sift a light layer of confectioners sugar over the tops, let it absorb briefly, then dust lightly a second time.
  5. Bake until golden and set, with tops that spring back lightly. Start checking small fingers at about 18 minutes and continue as needed for their thickness; larger shapes take longer. Do not rely on a fixed time for every piping size.
  6. Cool briefly on the tray, loosen carefully from the parchment and let cool completely on a rack. Store airtight once cold, or freeze if keeping for later use.

Notes

Biscuit count depends on the piping size; the control represents one small batch.
These are a baked sponge component, not a complete tiramisu or other layered dessert.
The two measured granulated sugar amounts go into separate mixtures.

Tried this recipe?

Let us know how it was!

A couple of useful answers.

Why are there two amounts of granulated sugar?

One amount is beaten with the yolks and the other with the whites. Keep them separate while preparing the mixtures.

Can I use the original time for every size?

No. Thin individual fingers and larger piped shapes bake at different speeds, so check color, set texture and spring-back.

Keep the good food going

Similar Recipes

Find another recipe to bring to the table.

Small-Batch Sweet Tart Dough (Pâte Sucrée)

Dessert · Pastry

Small-Batch Sweet Tart Dough (Pâte Sucrée)

Cream softened butter with confectioners sugar, mix in weighed eggs, then add flour only until the dough comes together. Chill thoroughly before lining a tart pan.

Yield
1 small batch
Cuisine
French-inspired

Bring it to the table

Weigh the egg mixture

Lightly beat whole egg before weighing 25 g. Weigh the extra yolks separately so the small batch keeps its balance.

At the table

Use with a tart filling prepared separately, choosing a partially or fully baked shell to suit that filling.

Before you start

Gather your ingredients.

Full quantities and serving adjustments are in the recipe card below.

See the ingredient checklist
  • 70 g unsalted butter — softened
  • 62.5 g confectioners sugar
  • 32.5 g egg yolks — weighed without whites
  • 25 g whole egg — lightly beaten, weighed without shell
  • 168 g all-purpose flour — plus a little for rolling

A few useful notes.

The control represents one small dough batch; tart size and thickness determine how much is needed.

Baking times are checking points and depend on the pan and thickness.

Keep unbaked dough refrigerated and use within 2 days, or freeze promptly. Do not taste raw dough.

The cooking plan

How to make Small-Batch Sweet Tart Dough (Pâte Sucrée).

  1. Mix the softened butter and confectioners sugar until smooth. Lightly beat the measured whole egg and yolks together, then mix into the butter in small additions, scraping the bowl.

  2. Add the flour and mix on low speed or by hand just until the dough comes together. Do not keep beating once combined. Flatten into a disc, wrap and refrigerate for at least 2 hours.

  3. Let the dough soften just enough to roll. Roll about 1/8 inch thick on a lightly floured surface or between parchment sheets. Fit into a tart pan without stretching and trim; save spare dough. The amount used depends on the pan. Prick the base lightly and freeze the lined pan for about 30 minutes.

  4. For an unfilled shell, heat the oven to 375°F. Set the pan on a baking sheet, line with parchment and fill with pie weights. Bake, checking around 20–25 minutes, until the sides are set and the lining lifts without pulling away raw dough.

  5. Remove lining and weights carefully. For a fully baked shell, return to the oven until the base is dry and golden, checking after another 5–10 minutes. For a filling that needs further baking, follow that tart recipe after the initial bake. Cool before adding a no-bake filling.

Let’s cook

The full recipe.

Check off ingredients as you get them ready.

Changing servings? The ingredient list scales automatically. Adjust quantities named in the steps to match, and choose pans and cooking times for your batch.

Small-Batch Sweet Tart Dough (Pâte Sucrée)

No ratings yet
A sweet butter-and-egg pastry dough for lining a tart pan, with a rest before rolling.
Servings: 1 small batch
Course: Dessert, Pastry
Cuisine: French-inspired

Some ingredient links are affiliate links. We may earn a commission at no extra cost to you. As an Amazon Associate I earn from qualifying purchases.

Ingredients
  

  • 70 g unsalted butter softened
  •  
    62.5 g confectioners sugar
  •  
    32.5 g egg yolks weighed without whites
  •  
    25 g whole eggs lightly beaten, weighed without shell
  • 168 g all-purpose flour plus a little for rolling

Equipment images are illustrative. Exact products may vary.

Instructions
 

  1. Mix the softened butter and confectioners sugar until smooth. Lightly beat the measured whole egg and yolks together, then mix into the butter in small additions, scraping the bowl.
  2. Add the flour and mix on low speed or by hand just until the dough comes together. Do not keep beating once combined. Flatten into a disc, wrap and refrigerate for at least 2 hours.
  3. Let the dough soften just enough to roll. Roll about 1/8 inch thick on a lightly floured surface or between parchment sheets. Fit into a tart pan without stretching and trim; save spare dough. The amount used depends on the pan. Prick the base lightly and freeze the lined pan for about 30 minutes.
  4. For an unfilled shell, heat the oven to 375°F. Set the pan on a baking sheet, line with parchment and fill with pie weights. Bake, checking around 20–25 minutes, until the sides are set and the lining lifts without pulling away raw dough.
  5. Remove lining and weights carefully. For a fully baked shell, return to the oven until the base is dry and golden, checking after another 5–10 minutes. For a filling that needs further baking, follow that tart recipe after the initial bake. Cool before adding a no-bake filling.

Notes

The control represents one small dough batch; tart size and thickness determine how much is needed.
Baking times are checking points and depend on the pan and thickness.
Keep unbaked dough refrigerated and use within 2 days, or freeze promptly. Do not taste raw dough.

Tried this recipe?

Let us know how it was!

A couple of useful answers.

Why rest the dough?

Chilling firms the butter and lets the dough relax before rolling and lining.

Should I fully bake it before adding a filling?

That depends on the filling. A no-bake filling needs a fully baked shell; a filling that cooks in the tart may call for a partial bake.

Keep the good food going

Similar Recipes

Find another recipe to bring to the table.
Small-Batch Caramel Syrup

Dessert

Small-Batch Caramel Syrup

Melt the sugar until amber, then loosen it carefully with hot water. A roomy pan gives the bubbling caramel space when the water is added.

Yield
1 batch
Cuisine
Contemporary

Bring it to the table

Prepare the water first

Heat the measured water separately and have it ready before the sugar changes color. Hot caramel splashes and steam can burn; keep your hands and face clear.

At the table

Cool completely before tasting or spooning a little over a dessert.

Before you start

Gather your ingredients.

Full quantities and serving adjustments are in the recipe card below.

See the ingredient checklist
  • 250 g granulated sugar
  • 150 g water — heated separately

A few useful notes.

This is a water-based caramel syrup, not a cream-based caramel sauce.

The finished thickness depends on evaporation; it thickens as it cools.

Never touch or taste hot caramel.

The cooking plan

How to make Small-Batch Caramel Syrup.

  1. Heat the measured water in a separate small saucepan and keep it hot. Put the sugar in an even layer in a wide, heavy saucepan with high sides and plenty of extra room.

  2. Cook the sugar over low to medium-low heat, gently moving it with a heatproof spatula as it melts. Continue until smooth and evenly amber; reduce the heat if patches darken too fast. Stay beside the pan throughout.

  3. Remove from the heat. Wearing oven mitts and keeping your face away, add the hot water very slowly in small portions. It will bubble and release steam vigorously. Pause between additions so it does not rise over the pan.

  4. If caramel hardens into pieces, return to low heat and stir gently until dissolved. Let cool fully before tasting; the syrup is extremely hot even after the bubbling stops.

  5. Transfer to a clean heatproof container, cool promptly and refrigerate within 2 hours. Keep covered at 40°F or below and use within 4 days, or freeze portions promptly.

Let’s cook

The full recipe.

Check off ingredients as you get them ready.

Changing servings? The ingredient list scales automatically. Adjust quantities named in the steps to match, and choose pans and cooking times for your batch.

Small-Batch Caramel Syrup

No ratings yet
An amber caramel syrup made with sugar and water, with no cream or butter.
Servings: 1 batch
Course: Dessert
Cuisine: Contemporary

Some ingredient links are affiliate links. We may earn a commission at no extra cost to you. As an Amazon Associate I earn from qualifying purchases.

Ingredients
  

  • 250 g granulated sugar
  • 150 g water heated separately

Equipment images are illustrative. Exact products may vary.

Instructions
 

  1. Heat the measured water in a separate small saucepan and keep it hot. Put the sugar in an even layer in a wide, heavy saucepan with high sides and plenty of extra room.
  2. Cook the sugar over low to medium-low heat, gently moving it with a heatproof spatula as it melts. Continue until smooth and evenly amber; reduce the heat if patches darken too fast. Stay beside the pan throughout.
  3. Remove from the heat. Wearing oven mitts and keeping your face away, add the hot water very slowly in small portions. It will bubble and release steam vigorously. Pause between additions so it does not rise over the pan.
  4. If caramel hardens into pieces, return to low heat and stir gently until dissolved. Let cool fully before tasting; the syrup is extremely hot even after the bubbling stops.
  5. Transfer to a clean heatproof container, cool promptly and refrigerate within 2 hours. Keep covered at 40°F or below and use within 4 days, or freeze portions promptly.

Notes

This is a water-based caramel syrup, not a cream-based caramel sauce.
The finished thickness depends on evaporation; it thickens as it cools.
Never touch or taste hot caramel.

Tried this recipe?

Let us know how it was!

A couple of useful answers.

Why did the caramel turn hard when I added water?

Some caramel can seize as the water is added. Gentle reheating dissolves those pieces into the syrup.

Does it contain cream or butter?

No. This version uses only sugar and water.

Keep the good food going

Similar Recipes

Find another recipe to bring to the table.
Cassis and Raspberry Dessert Syrup

Dessert

Cassis and Raspberry Dessert Syrup

Stir crème de cassis and smooth raspberry coulis into cooled citrus-peel syrup. There is no cooking step after the liqueur is added, so its alcohol remains part of the mixture.

Yield
1 small batch
Cuisine
French-inspired

Bring it to the table

Use a cold base

Let the base syrup cool completely before mixing. Stir the fruit coulis smooth so it blends evenly.

At the table

Drizzle sparingly over a finished dessert or stir in a little at a time, tasting as you go.

Base recipe: Citrus-Peel Dessert Syrup

Before you start

Gather your ingredients.

Full quantities and serving adjustments are in the recipe card below.

See the ingredient checklist
  • 125 ml citrus-peel dessert syrup — cooled; prepared separately
  • 15 ml crème de cassis — blackcurrant liqueur
  • 15 ml raspberry coulis — smooth and seedless

A few useful notes.

This syrup contains alcohol and is not an alcohol-free topping.

It is a flavoring component, not a finished sorbet formula.

Mixing the ingredients does not restart the storage life of a previously prepared base.

The cooking plan

How to make Cassis and Raspberry Dessert Syrup.

  1. Measure the cooled dessert syrup into a clean bowl or jug. Stir in the crème de cassis and raspberry coulis until evenly combined.

  2. Transfer to a clean covered container and refrigerate promptly at 40°F or below. Use within 4 days, counting from the oldest homemade syrup or coulis preparation date. Stir before using.

Let’s cook

The full recipe.

Check off ingredients as you get them ready.

Changing servings? The ingredient list scales automatically. Adjust quantities named in the steps to match, and choose pans and cooking times for your batch.

Cassis and Raspberry Dessert Syrup

No ratings yet
A blackcurrant liqueur and raspberry syrup for adding a small sweet-tart accent to desserts.
Servings: 1 small batch
Course: Dessert
Cuisine: French-inspired

Some ingredient links are affiliate links. We may earn a commission at no extra cost to you. As an Amazon Associate I earn from qualifying purchases.

Ingredients
  

  • 125 ml citrus-peel dessert syrup cooled; prepared separately
  • 15 ml crème de cassis blackcurrant liqueur
  • 15 ml raspberry coulis smooth and seedless

Equipment images are illustrative. Exact products may vary.

Instructions
 

  1. Measure the cooled dessert syrup into a clean bowl or jug. Stir in the crème de cassis and raspberry coulis until evenly combined.
  2. Transfer to a clean covered container and refrigerate promptly at 40°F or below. Use within 4 days, counting from the oldest homemade syrup or coulis preparation date. Stir before using.

Notes

This syrup contains alcohol and is not an alcohol-free topping.
It is a flavoring component, not a finished sorbet formula.
Mixing the ingredients does not restart the storage life of a previously prepared base.
Base recipe: Citrus-Peel Dessert Syrup

Tried this recipe?

Let us know how it was!

A couple of useful answers.

Does heating remove the alcohol?

This recipe does not heat the liqueur after mixing, and the syrup contains alcohol.

How much should I add to a dessert?

Start with a small amount and taste. The appropriate amount depends on the dessert and the sweetness of the coulis.

Keep the good food going

Similar Recipes

Find another recipe to bring to the table.
Citrus-Peel Dessert Syrup

Dessert

Citrus-Peel Dessert Syrup

Dissolve the sugar gently rather than reducing it into a thick candy syrup. Thin strips of citrus peel add flavor without the bitterness of the white pith.

Yield
1 small batch
Cuisine
Contemporary

Bring it to the table

Take thin strips

Use a vegetable peeler to remove a little colored zest from each fruit. Trim away thick white pith before adding the strips to the pan.

At the table

Cool before adding a little at a time to fruit or another dessert, tasting as you go.

Before you start

Gather your ingredients.

Full quantities and serving adjustments are in the recipe card below.

See the ingredient checklist
  • 338 g granulated sugar
  • 250 g water
  • 1 thin strip lemon peel — about 2 inches long; colored zest only
  • 1 thin strip orange peel — about 2 inches long; colored zest only

A few useful notes.

This is richer than equal-weight simple syrup; add gradually rather than substituting it without adjusting a recipe.

This is a dessert component, not a complete sorbet recipe.

Keep refrigerated; no room-temperature preservation or canning method is intended.

The cooking plan

How to make Citrus-Peel Dessert Syrup.

  1. Combine the sugar, water and citrus strips in a small saucepan. Warm over low heat, stirring, until all the sugar has dissolved.

  2. Bring just to a simmer, then remove from the heat. Do not boil down or cook to a candy stage. Leave the peel in the syrup while it cools briefly, then strain it out.

  3. Cool promptly in a shallow heatproof container, then refrigerate in a clean covered container at 40°F or below within 2 hours. Date and use within 4 days, or freeze small portions promptly.

Let’s cook

The full recipe.

Check off ingredients as you get them ready.

Changing servings? The ingredient list scales automatically. Adjust quantities named in the steps to match, and choose pans and cooking times for your batch.

Citrus-Peel Dessert Syrup

No ratings yet
A sugar syrup lightly infused with lemon and orange peel for sweetening desserts.
Servings: 1 small batch
Course: Dessert
Cuisine: Contemporary

Some ingredient links are affiliate links. We may earn a commission at no extra cost to you. As an Amazon Associate I earn from qualifying purchases.

Ingredients
  

  • 338 g granulated sugar
  • 250 g water
  •  
    1 thin strip lemon peel about 2 inches long; colored zest only
  •  
    1 thin strip orange peel about 2 inches long; colored zest only

Equipment images are illustrative. Exact products may vary.

Instructions
 

  1. Combine the sugar, water and citrus strips in a small saucepan. Warm over low heat, stirring, until all the sugar has dissolved.
  2. Bring just to a simmer, then remove from the heat. Do not boil down or cook to a candy stage. Leave the peel in the syrup while it cools briefly, then strain it out.
  3. Cool promptly in a shallow heatproof container, then refrigerate in a clean covered container at 40°F or below within 2 hours. Date and use within 4 days, or freeze small portions promptly.

Notes

This is richer than equal-weight simple syrup; add gradually rather than substituting it without adjusting a recipe.
This is a dessert component, not a complete sorbet recipe.
Keep refrigerated; no room-temperature preservation or canning method is intended.

Tried this recipe?

Let us know how it was!

A couple of useful answers.

Is this equal-parts simple syrup?

No. The sugar weight is higher than the water weight, so add it gradually to taste.

Should I reduce it until thick?

Only dissolve the sugar and bring briefly to a simmer. Do not cook it down to a candy stage.

Keep the good food going

Similar Recipes

Find another recipe to bring to the table.