Crisp Orange Tuiles

Dessert · Garnish

Crisp Orange Tuiles

Orange juice, sugar, flour and melted butter come together in a simple batter. Chill before portioning and allow plenty of room for each tuile to spread.

Yield
1 small batch
Cuisine
French-inspired

Bring it to the table

Watch the edges

These thin cookies can darken quickly near the end. Look for golden edges, then let them firm on the mat before lifting.

At the table

Use as a crisp garnish beside fruit, custard or ice cream, adding at the last moment.

Before you start

Gather your ingredients.

Full quantities and serving adjustments are in the recipe card below.

See the ingredient checklist
  • 125 g granulated sugar
  • 31 g all-purpose flour
  • 50 g orange juice
  • 50 g unsalted butter — melted

A few useful notes.

This orange version has no nuts added.

The recipe control represents one small batch; cookie count depends on portion size.

The mixture may be soft even when cold. Spoon it rather than forcing it into hand-rolled balls.

The cooking plan

How to make Crisp Orange Tuiles.

  1. Mix the sugar and flour together. Stir in the orange juice and melted butter until evenly combined. Cover and refrigerate until cold and thickened.

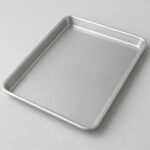
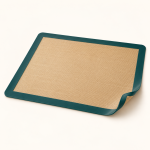
  2. Heat the oven to 350°F. Line a baking tray with a silicone baking mat. Place a small teaspoon-sized mound on the mat and bake it first to judge how far the mixture spreads.

  3. Arrange more small mounds with generous space between them. Bake for about 6–8 minutes, watching closely until spread thin and golden at the edges; adjust for the actual portion size and oven.

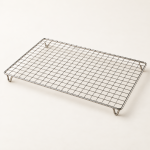
  4. Let the tuiles firm on the mat before lifting carefully onto a rack. Cool completely, then store airtight away from moisture and add to desserts just before serving.

Let’s cook

The full recipe.

Check off ingredients as you get them ready.

Changing servings? The ingredient list scales automatically. Adjust quantities named in the steps to match, and choose pans and cooking times for your batch.

Crisp Orange Tuiles

No ratings yet
Thin orange-juice tuiles with a crisp, golden edge for finishing desserts.
Servings: 1 small batch
Course: Dessert, Garnish
Cuisine: French-inspired

Some ingredient links are affiliate links. We may earn a commission at no extra cost to you. As an Amazon Associate I earn from qualifying purchases.

Ingredients
  

  • 125 g granulated sugar
  • 31 g all-purpose flour
  •  
    50 g orange juice
  • 50 g unsalted butter melted

Equipment images are illustrative. Exact products may vary.

Instructions
 

  1. Mix the sugar and flour together. Stir in the orange juice and melted butter until evenly combined. Cover and refrigerate until cold and thickened.
  2. Heat the oven to 350°F. Line a baking tray with a silicone baking mat. Place a small teaspoon-sized mound on the mat and bake it first to judge how far the mixture spreads.
  3. Arrange more small mounds with generous space between them. Bake for about 6–8 minutes, watching closely until spread thin and golden at the edges; adjust for the actual portion size and oven.
  4. Let the tuiles firm on the mat before lifting carefully onto a rack. Cool completely, then store airtight away from moisture and add to desserts just before serving.

Notes

This orange version has no nuts added.
The recipe control represents one small batch; cookie count depends on portion size.
The mixture may be soft even when cold. Spoon it rather than forcing it into hand-rolled balls.

Tried this recipe?

Let us know how it was!

A couple of useful answers.

Does this version include hazelnuts?

No. The orange batter contains sugar, flour, orange juice and butter.

Can I lift the tuiles straight from the oven?

Let them firm briefly on the mat first, then lift gently with a thin spatula.

Keep the good food going

Similar Recipes

Find another recipe to bring to the table.

Raspberry and Hazelnut Tuiles

Dessert · Garnish

Raspberry and Hazelnut Tuiles

Chill the fruit-and-butter mixture before portioning it into small mounds. Leave generous space on the baking mat, since these tuiles spread as they bake.

Yield
1 small batch
Cuisine
French-inspired

Bring it to the table

Start with one small portion

Bake one small mound first to judge its spread in your oven. Keep the rest of the batter chilled while you work in batches.

At the table

Add to a plated dessert just before serving, or enjoy as a small crisp cookie.

Before you start

Gather your ingredients.

Full quantities and serving adjustments are in the recipe card below.

See the ingredient checklist
  • 50 g confectioners sugar
  • 13 g all-purpose flour
  • 25 g hazelnuts — finely chopped; or almonds
  • 25 g raspberry coulis — smooth and seedless
  • 19 g unsalted butter — melted

A few useful notes.

This version contains hazelnuts, or almonds if using the substitution.

The number of tuiles depends on the portion size and spread.

Use a silicone mat and let the tuiles firm before lifting; they are fragile while hot.

The cooking plan

How to make Raspberry and Hazelnut Tuiles.

  1. Stir the confectioners sugar and flour together. Mix in the raspberry coulis and melted butter, then fold in the finely chopped hazelnuts.

  2. Cover and refrigerate until cold and firm enough to portion. Heat the oven to 350°F and line a baking tray with a silicone baking mat.

  3. Place a small mound, about a teaspoon, on the mat. Bake this first portion to judge the spread, then arrange further small mounds with plenty of space between them. Flatten slightly if needed for even thickness.

  4. Bake for about 6–8 minutes, watching closely near the end, until the tuiles have spread and their edges are golden. Adjust as needed for the size of each portion.

  5. Let them cool on the mat until firm enough to lift, then transfer carefully to a rack to cool completely. Once crisp and cold, keep airtight and add to moist desserts only at serving time.

Let’s cook

The full recipe.

Check off ingredients as you get them ready.

Changing servings? The ingredient list scales automatically. Adjust quantities named in the steps to match, and choose pans and cooking times for your batch.

Raspberry and Hazelnut Tuiles

No ratings yet
Thin raspberry and hazelnut cookies baked into delicate, crisp dessert garnishes.
Servings: 1 small batch
Course: Dessert, Garnish
Cuisine: French-inspired

Some ingredient links are affiliate links. We may earn a commission at no extra cost to you. As an Amazon Associate I earn from qualifying purchases.

Ingredients
  

  •  
    50 g confectioners sugar
  • 13 g all-purpose flour
  •  
    25 g hazelnuts finely chopped; or almonds
  •  
    25 g raspberry coulis smooth and seedless
  • 19 g unsalted butter melted

Equipment images are illustrative. Exact products may vary.

Instructions
 

  1. Stir the confectioners sugar and flour together. Mix in the raspberry coulis and melted butter, then fold in the finely chopped hazelnuts.
  2. Cover and refrigerate until cold and firm enough to portion. Heat the oven to 350°F and line a baking tray with a silicone baking mat.
  3. Place a small mound, about a teaspoon, on the mat. Bake this first portion to judge the spread, then arrange further small mounds with plenty of space between them. Flatten slightly if needed for even thickness.
  4. Bake for about 6–8 minutes, watching closely near the end, until the tuiles have spread and their edges are golden. Adjust as needed for the size of each portion.
  5. Let them cool on the mat until firm enough to lift, then transfer carefully to a rack to cool completely. Once crisp and cold, keep airtight and add to moist desserts only at serving time.

Notes

This version contains hazelnuts, or almonds if using the substitution.
The number of tuiles depends on the portion size and spread.
Use a silicone mat and let the tuiles firm before lifting; they are fragile while hot.

Tried this recipe?

Let us know how it was!

A couple of useful answers.

Can I use almonds?

Yes. Finely chopped almonds are an alternative to the hazelnuts in this batter.

Why keep them away from a moist dessert until serving?

Moisture softens their crisp texture, so add them at the last moment.

Keep the good food going

Similar Recipes

Find another recipe to bring to the table.

Light Vanilla Sponge Cakes

Dessert

Light Vanilla Sponge Cakes

The batter gets its lift from whipped whites as well as a little baking powder. Mix some of the foam into the cooled melted butter first, then fold everything together gently.

Yield
1 small batch
Cuisine
French-inspired

Bring it to the table

Cool the melted butter

The butter should be fluid but cool, not hot. A portion of the whipped whites loosens it before it is folded into the rest of the batter.

At the table

Serve the little cakes on their own or with fruit and whipped cream prepared separately.

Before you start

Gather your ingredients.

Full quantities and serving adjustments are in the recipe card below.

See the ingredient checklist
  • 80 g unsalted butter — melted and cooled until fluid but not hot; plus a little for the molds
  • 60 g all-purpose flour — plus a little for the molds
  • 1/4 tsp baking powder
  • 150 g egg whites
  • 100 g granulated sugar
  • 1/2 tsp vanilla paste

A few useful notes.

The number of cakes depends on mold size; the recipe control represents one small batch.

Use the batter promptly after folding so it retains its air.

Keep fruit or cream toppings separate until serving.

The cooking plan

How to make Light Vanilla Sponge Cakes.

  1. Heat the oven to 355°F. Butter and flour small ovenproof cake molds or muffin cups. Sift the measured flour and baking powder together.

  2. Stir the vanilla into the cooled, fluid melted butter. In a clean, grease-free bowl, beat the egg whites at medium speed until foamy. Gradually add the sugar, then increase the speed and beat until glossy peaks stand up when the whisk is lifted.

  3. Stir about one-quarter to one-third of the whipped whites into the vanilla butter to lighten it.

  4. Gently fold the sifted flour mixture into the remaining whites in two or three additions. Fold in the lightened butter mixture just until evenly combined, scraping along the bottom without knocking out more air than necessary.

  5. Spoon into the prepared molds, filling about two-thirds full. Bake, starting to check small cakes at about 10 minutes, until golden, set and springy in the center, with no wet batter on a tester. Larger molds will need longer.

  6. Let the cakes settle briefly in their molds, then turn out carefully onto a rack to cool.

Let’s cook

The full recipe.

Check off ingredients as you get them ready.

Changing servings? The ingredient list scales automatically. Adjust quantities named in the steps to match, and choose pans and cooking times for your batch.

Light Vanilla Sponge Cakes

No ratings yet
Small vanilla butter cakes lightened with whipped egg whites and baked until golden and springy.
Servings: 1 small batch
Course: Dessert
Cuisine: French-inspired

Some ingredient links are affiliate links. We may earn a commission at no extra cost to you. As an Amazon Associate I earn from qualifying purchases.

Ingredients
  

  • 80 g unsalted butter melted and cooled until fluid but not hot; plus a little for the molds
  • 60 g all-purpose flour plus a little for the molds
  •  
    ¼ tsp baking powder
  • 150 g egg whites
  • 100 g granulated sugar
  •  
    ½ tsp vanilla paste

Equipment images are illustrative. Exact products may vary.

Instructions
 

  1. Heat the oven to 355°F. Butter and flour small ovenproof cake molds or muffin cups. Sift the measured flour and baking powder together.
  2. Stir the vanilla into the cooled, fluid melted butter. In a clean, grease-free bowl, beat the egg whites at medium speed until foamy. Gradually add the sugar, then increase the speed and beat until glossy peaks stand up when the whisk is lifted.
  3. Stir about one-quarter to one-third of the whipped whites into the vanilla butter to lighten it.
  4. Gently fold the sifted flour mixture into the remaining whites in two or three additions. Fold in the lightened butter mixture just until evenly combined, scraping along the bottom without knocking out more air than necessary.
  5. Spoon into the prepared molds, filling about two-thirds full. Bake, starting to check small cakes at about 10 minutes, until golden, set and springy in the center, with no wet batter on a tester. Larger molds will need longer.
  6. Let the cakes settle briefly in their molds, then turn out carefully onto a rack to cool.

Notes

The number of cakes depends on mold size; the recipe control represents one small batch.
Use the batter promptly after folding so it retains its air.
Keep fruit or cream toppings separate until serving.

Tried this recipe?

Let us know how it was!

A couple of useful answers.

How many cakes does this make?

That depends on the molds. Fill them about two-thirds full and check doneness rather than relying on a fixed count.

Why mix some whites into the butter first?

It lightens the butter mixture so it can be folded into the remaining foam more evenly.

Keep the good food going

Similar Recipes

Find another recipe to bring to the table.

Pineapple and Vanilla Custard Bake

Dessert

Pineapple and Vanilla Custard Bake

Sauté the pineapple first to cook away some of its moisture. Arrange it in one layer, pour over the vanilla custard and bake gently until set.

Yield
6 servings
Cuisine
French-inspired

Bring it to the table

Cook the fruit first

Peel and core the pineapple, then sauté the wedges until their released liquid has evaporated and the edges begin to turn golden.

At the table

Spoon into dessert bowls after chilling. The fruit stays in the dish beneath the custard.

Before you start

Gather your ingredients.

Full quantities and serving adjustments are in the recipe card below.

See the ingredient checklist
  • 500 ml whole milk
  • 1 vanilla bean — split lengthwise; or 1 teaspoon vanilla paste
  • 150 g whole eggs — weighed without shells and lightly beaten
  • 60 g egg yolks — weighed without whites
  • 135 g granulated sugar
  • 15 g all-purpose flour
  • 29 g heavy cream
  • 1/2 pineapple — peeled, cored and cut into wedges about 1 inch wide
  • 1 tbsp unsalted butter — for sautéing, plus a little for the baking dish

A few useful notes.

Six portions are a home serving suggestion.

This is a spoonable baked fruit custard, with no caramel layer or pastry crust.

Weigh the eggs and yolks for the intended proportions rather than relying on egg count.

The cooking plan

How to make Pineapple and Vanilla Custard Bake.

  1. Heat the oven to 300°F. Butter a shallow ovenproof baking dish of about 2-quart capacity.

  2. Put the milk and split vanilla bean in a saucepan, scraping the seeds into the milk. Bring just to a boil, then remove from the heat and let infuse until lukewarm. If using vanilla paste, stir it into the warm milk instead. Remove the bean pod before mixing the custard.

  3. Melt the tablespoon of butter in a skillet. Add the pineapple wedges and sauté until softened at the edges, lightly golden and no longer surrounded by released liquid. Let the fruit cool briefly, then arrange in one layer in the prepared baking dish.

  4. Whisk the weighed eggs, yolks, sugar, flour and cream until smooth. Gradually whisk in the lukewarm vanilla milk. Pour over the pineapple.

  5. Bake, starting to check at about 45 minutes, until the custard is set around the edges and the center trembles gently rather than flowing. Check that the center reaches at least 160°F with a food thermometer; continue baking as needed for the dish and fruit thickness.

  6. Let the initial heat subside, then refrigerate within 2 hours of baking. Chill until cold and set before spooning into portions. Keep refrigerated and use within 3–4 days.

Let’s cook

The full recipe.

Check off ingredients as you get them ready.

Changing servings? The ingredient list scales automatically. Adjust quantities named in the steps to match, and choose pans and cooking times for your batch.

Pineapple and Vanilla Custard Bake

No ratings yet
Golden sautéed pineapple baked under a vanilla custard made with milk, cream, eggs and a little flour.
Servings: 6 servings
Course: Dessert
Cuisine: French-inspired

Some ingredient links are affiliate links. We may earn a commission at no extra cost to you. As an Amazon Associate I earn from qualifying purchases.

Ingredients
  

  •  
    500 ml whole milk
  •  
    1 vanilla bean split lengthwise; or 1 teaspoon vanilla paste
  •  
    150 g whole eggs weighed without shells and lightly beaten
  •  
    60 g egg yolks weighed without whites
  • 135 g granulated sugar
  • 15 g all-purpose flour
  • 29 g heavy cream
  •  
    ½ pineapple peeled, cored and cut into wedges about 1 inch wide
  • 1 tbsp unsalted butter for sautéing, plus a little for the baking dish

Equipment images are illustrative. Exact products may vary.

Instructions
 

  1. Heat the oven to 300°F. Butter a shallow ovenproof baking dish of about 2-quart capacity.
  2. Put the milk and split vanilla bean in a saucepan, scraping the seeds into the milk. Bring just to a boil, then remove from the heat and let infuse until lukewarm. If using vanilla paste, stir it into the warm milk instead. Remove the bean pod before mixing the custard.
  3. Melt the tablespoon of butter in a skillet. Add the pineapple wedges and sauté until softened at the edges, lightly golden and no longer surrounded by released liquid. Let the fruit cool briefly, then arrange in one layer in the prepared baking dish.
  4. Whisk the weighed eggs, yolks, sugar, flour and cream until smooth. Gradually whisk in the lukewarm vanilla milk. Pour over the pineapple.
  5. Bake, starting to check at about 45 minutes, until the custard is set around the edges and the center trembles gently rather than flowing. Check that the center reaches at least 160°F with a food thermometer; continue baking as needed for the dish and fruit thickness.
  6. Let the initial heat subside, then refrigerate within 2 hours of baking. Chill until cold and set before spooning into portions. Keep refrigerated and use within 3–4 days.

Notes

Six portions are a home serving suggestion.
This is a spoonable baked fruit custard, with no caramel layer or pastry crust.
Weigh the eggs and yolks for the intended proportions rather than relying on egg count.

Tried this recipe?

Let us know how it was!

A couple of useful answers.

Should I add the pineapple raw?

Sauté it first to soften the fruit and cook away some of its moisture.

Is this an unmolded caramel flan?

This version is baked over pineapple and spooned from its baking dish; it has no caramel layer.

Keep the good food going

Similar Recipes

Find another recipe to bring to the table.

Red Pepper and Lobster Bisque

Soup

Red Pepper and Lobster Bisque

Cook the peppers slowly with the aromatics before adding the lobster stock. Blending the softened vegetables gives the soup body without adding cream.

Yield
4 servings
Cuisine
French-inspired

Bring it to the table

Use lobster stock

The lobster flavor comes from the stock. Choose a prepared lobster stock you enjoy, and check its seasoning before adding salt.

At the table

Serve hot in bowls, with bread alongside if desired.

Before you start

Gather your ingredients.

Full quantities and serving adjustments are in the recipe card below.

See the ingredient checklist
  • 4 red bell peppers — stems, cores and seeds removed; chopped
  • 1/4 large onion — chopped
  • 1 1/2 shallots — peeled and chopped
  • 2 1/2 cloves garlic — chopped
  • 1/4 tsp ground ginger
  • 1 small pinch saffron threads
  • 3 cups lobster stock
  • 1 small sprig fresh rosemary
  • 2 small sprigs fresh thyme
  • 1 small bay leaf
  • 1 tbsp olive oil
  • salt — to taste
  • ground black pepper — to taste

A few useful notes.

This soup contains shellfish through the lobster stock; it is not vegetarian.

Four bowl servings are a home serving suggestion, not a measured finished yield.

No cream is needed in this version.

The cooking plan

How to make Red Pepper and Lobster Bisque.

  1. Warm the olive oil in a soup pot over medium-low heat. Add onion, shallots, garlic and saffron. Cook gently, stirring, until the aromatics soften without browning.

  2. Add chopped peppers, ginger, rosemary, thyme and bay leaf. Cover and cook over low heat for about 1 hour, stirring regularly, until the peppers are very soft. If the bottom starts to catch, add a small splash of the measured stock.

  3. Add the remaining lobster stock. Bring to a gentle simmer and cook for about 30 minutes so the flavors combine.

  4. Remove the bay leaf and herb stems. Blend smooth with an immersion blender. If using a countertop blender, follow its hot-liquid instructions, work in small batches, vent safely and never seal hot soup in a closed blender.

  5. Strain if you want a finer texture. Return to the pot, heat through and season with salt and pepper. Cool leftovers promptly in shallow containers and refrigerate within 2 hours; use within 3–4 days.

Let’s cook

The full recipe.

Check off ingredients as you get them ready.

Changing servings? The ingredient list scales automatically. Adjust quantities named in the steps to match, and choose pans and cooking times for your batch.

Red Pepper and Lobster Bisque

No ratings yet
A smooth red pepper soup made with lobster stock, shallots, garlic, ginger and a little saffron.
Servings: 4 servings
Course: Soup
Cuisine: French-inspired

Some ingredient links are affiliate links. We may earn a commission at no extra cost to you. As an Amazon Associate I earn from qualifying purchases.

Ingredients

  

  • 4 Red Bell Pepper stems, cores and seeds removed; chopped
  •  
    ¼ large onion chopped
  • 1 ½ Shallot peeled and chopped
  • 2 ½ cloves garlic chopped
  •  
    ¼ tsp ground ginger
  •  
    1 small pinch saffron threads
  •  
    3 cups lobster stock
  •  
    1 small sprig fresh rosemary
  •  
    2 small sprigs fresh thyme
  •  
    1 small bay leaf
  • 1 tbsp olive oil
  • salt to taste
  • ground black pepper to taste

Equipment images are illustrative. Exact products may vary.

Instructions
 

  1. Warm the olive oil in a soup pot over medium-low heat. Add onion, shallots, garlic and saffron. Cook gently, stirring, until the aromatics soften without browning.
  2. Add chopped peppers, ginger, rosemary, thyme and bay leaf. Cover and cook over low heat for about 1 hour, stirring regularly, until the peppers are very soft. If the bottom starts to catch, add a small splash of the measured stock.
  3. Add the remaining lobster stock. Bring to a gentle simmer and cook for about 30 minutes so the flavors combine.
  4. Remove the bay leaf and herb stems. Blend smooth with an immersion blender. If using a countertop blender, follow its hot-liquid instructions, work in small batches, vent safely and never seal hot soup in a closed blender.
  5. Strain if you want a finer texture. Return to the pot, heat through and season with salt and pepper. Cool leftovers promptly in shallow containers and refrigerate within 2 hours; use within 3–4 days.

Notes

This soup contains shellfish through the lobster stock; it is not vegetarian.
Four bowl servings are a home serving suggestion, not a measured finished yield.
No cream is needed in this version.

Tried this recipe?

Let us know how it was!

A couple of useful answers.

Where does the lobster flavor come from?

The recipe uses lobster stock rather than pieces of lobster meat.

Do I need to strain it?

Straining is optional. It makes the blended soup finer by removing bits of pepper skin and other fibers.

Keep the good food going

Similar Recipes

Find another recipe to bring to the table.

Saffron, White Wine and Rosemary Cream Sauce

Condiment

Saffron, White Wine and Rosemary Cream Sauce

Soften the aromatics, reduce the wine, then add the cream and allow the saffron and rosemary to infuse. Straining leaves a smooth sauce for spooning around a finished dish.

Yield
1 batch
Cuisine
French-inspired

Bring it to the table

Reduce by one-third

Cook away about one-third of the wine before adding cream, leaving roughly two-thirds of the original wine volume in the pan.

At the table

Spoon a little around cooked fish, shellfish or vegetables rather than drowning the plate.

Before you start

Gather your ingredients.

Full quantities and serving adjustments are in the recipe card below.

See the ingredient checklist
  • 31 g shallot — thinly sliced
  • 6 g garlic — thinly sliced
  • 2 g fresh rosemary sprig
  • 190 ml dry white wine
  • 1/8 tsp saffron threads
  • 2 cups heavy cream
  • 1 tsp olive oil
  • 1 tsp unsalted butter
  • salt — to taste

A few useful notes.

White wine is part of the recipe; reducing it does not make the sauce alcohol-free.

For this batch, two cups of cream is the starting quantity, not a promised finished yield.

The cooking plan

How to make Saffron, White Wine and Rosemary Cream Sauce.

  1. Warm the olive oil and butter in a small saucepan over medium-low heat. Add shallot and garlic and cook gently until soft without browning.

  2. Add rosemary and saffron, stir briefly, then add the wine. Simmer until the wine has reduced by about one-third.

  3. Add the cream and bring carefully to a gentle boil, watching so it does not rise over the pan. Reduce the heat and simmer gently for 5 minutes, stirring occasionally.

  4. Remove from the heat, cover and let the aromatics infuse for 1 hour. Strain through a fine sieve, discarding the solids. Taste and add salt as needed.

  5. If serving now, reheat gently until hot. Otherwise cool promptly in a shallow container set in an ice-water bath, then refrigerate at 40°F or below within 2 hours of cooking, including the infusion time. Use refrigerated sauce within 3–4 days.

Let’s cook

The full recipe.

Check off ingredients as you get them ready.

Changing servings? The ingredient list scales automatically. Adjust quantities named in the steps to match, and choose pans and cooking times for your batch.

Saffron, White Wine and Rosemary Cream Sauce

No ratings yet
A strained cream sauce infused with saffron, rosemary, shallot, garlic and reduced white wine.
Servings: 1 batch
Course: Condiment
Cuisine: French-inspired

Some ingredient links are affiliate links. We may earn a commission at no extra cost to you. As an Amazon Associate I earn from qualifying purchases.

Ingredients
  

  • 31 g shallot thinly sliced
  • 6 g garlic thinly sliced
  •  
    2 g fresh rosemary sprig
  •  
    190 ml dry white wine
  •  
    ⅛ tsp saffron threads
  • 2 cups heavy cream
  • 1 tsp olive oil
  • 1 tsp unsalted butter
  • salt to taste

Equipment images are illustrative. Exact products may vary.

Instructions
 

  1. Warm the olive oil and butter in a small saucepan over medium-low heat. Add shallot and garlic and cook gently until soft without browning.
  2. Add rosemary and saffron, stir briefly, then add the wine. Simmer until the wine has reduced by about one-third.
  3. Add the cream and bring carefully to a gentle boil, watching so it does not rise over the pan. Reduce the heat and simmer gently for 5 minutes, stirring occasionally.
  4. Remove from the heat, cover and let the aromatics infuse for 1 hour. Strain through a fine sieve, discarding the solids. Taste and add salt as needed.
  5. If serving now, reheat gently until hot. Otherwise cool promptly in a shallow container set in an ice-water bath, then refrigerate at 40°F or below within 2 hours of cooking, including the infusion time. Use refrigerated sauce within 3–4 days.

Notes

White wine is part of the recipe; reducing it does not make the sauce alcohol-free.
For this batch, two cups of cream is the starting quantity, not a promised finished yield.

Tried this recipe?

Let us know how it was!

A couple of useful answers.

Do I reduce the wine to one-third?

Reduce it by one-third, leaving about two-thirds before adding the cream.

Why strain the sauce?

Straining removes the rosemary, shallot and garlic pieces after they have flavored the cream.

Keep the good food going

Similar Recipes

Find another recipe to bring to the table.