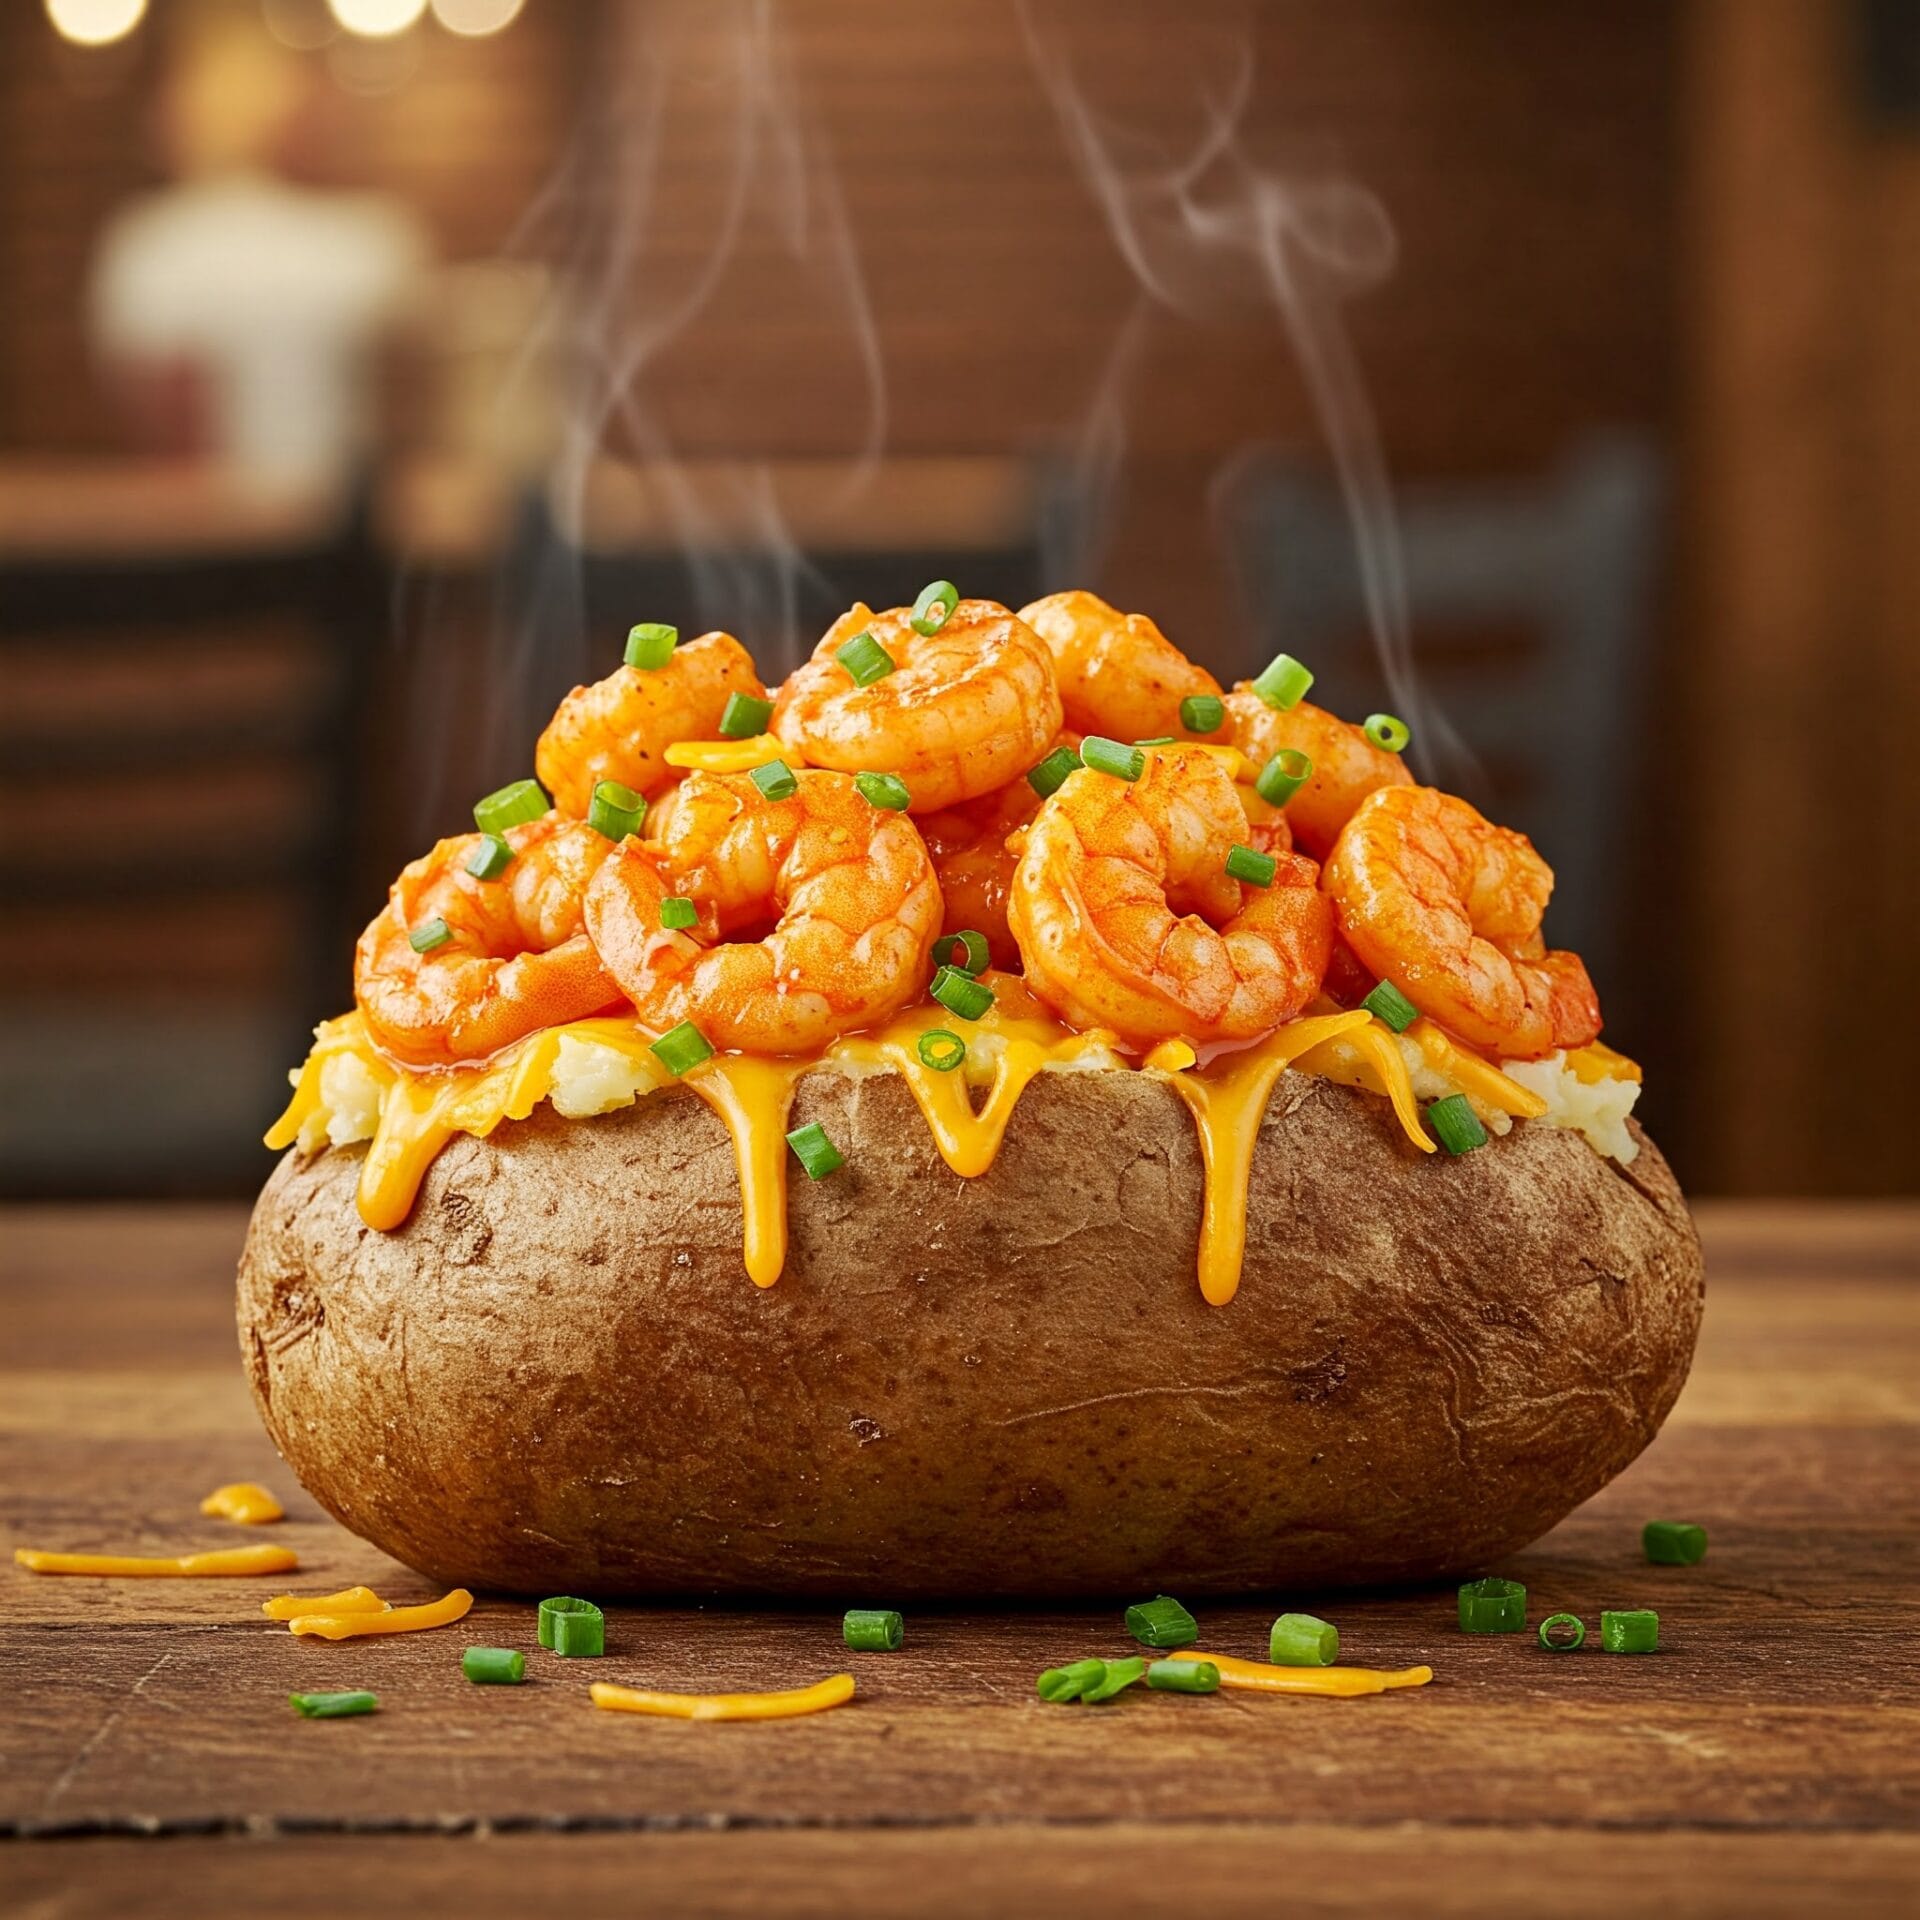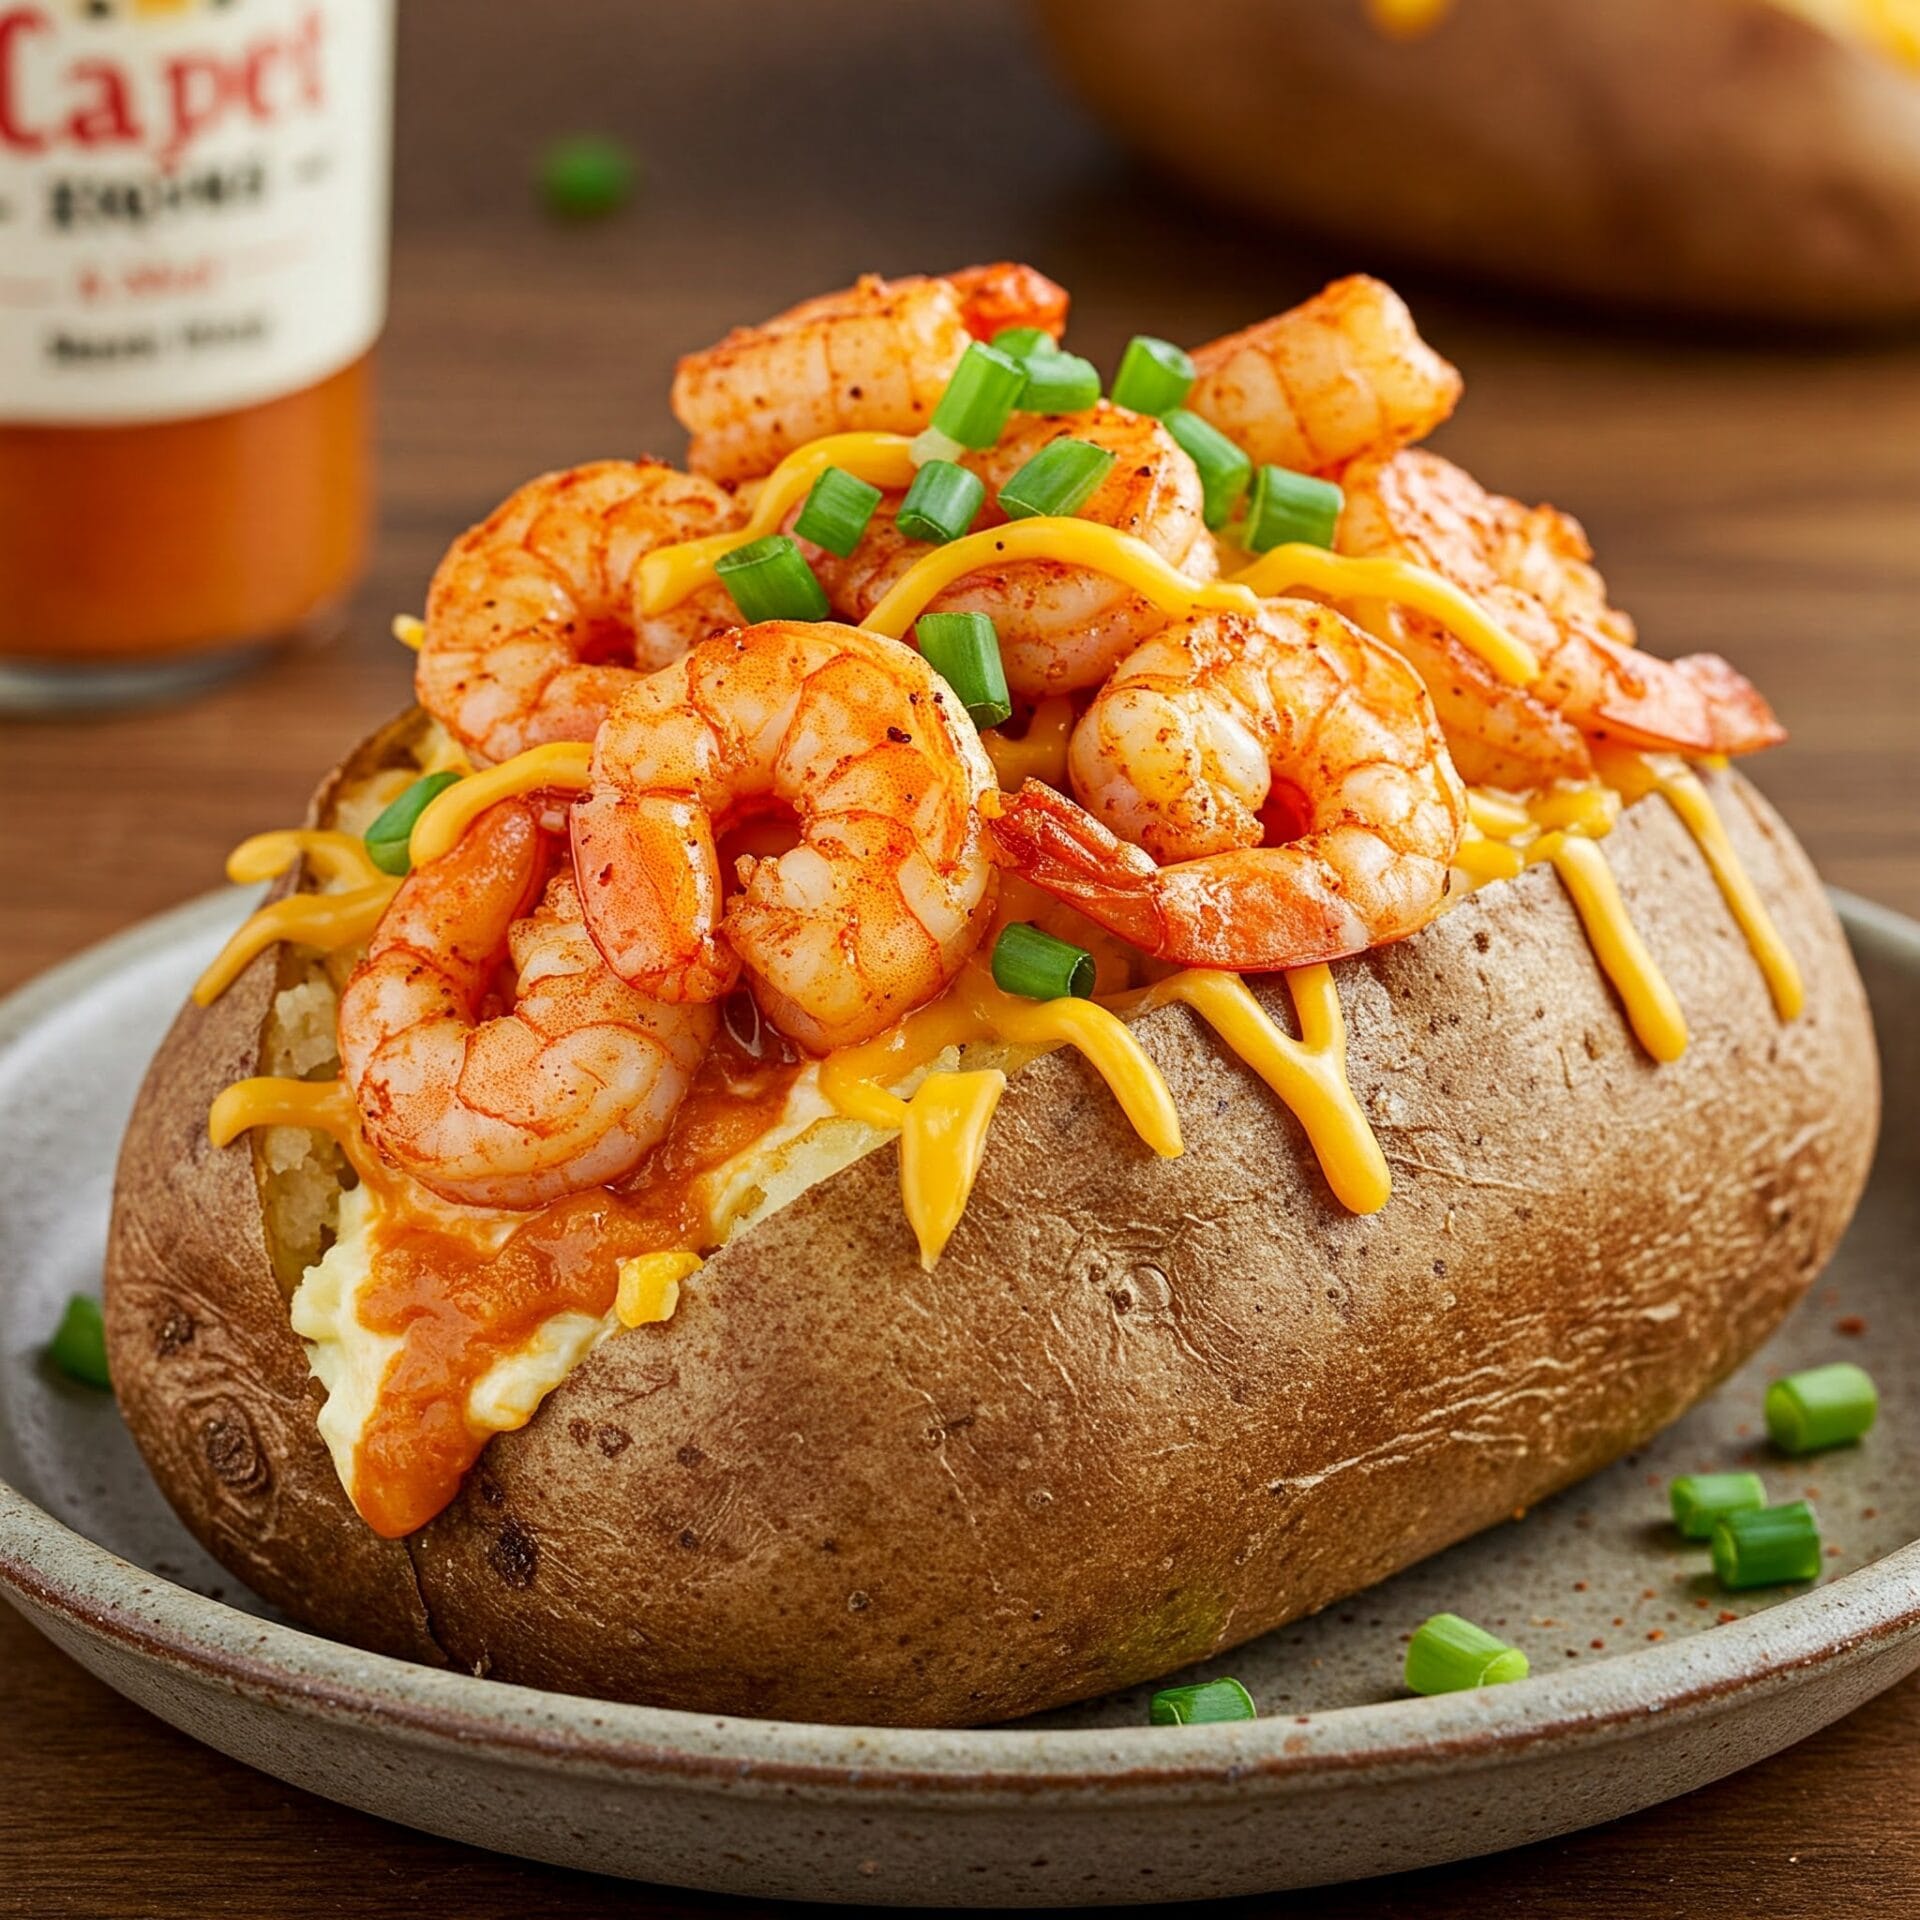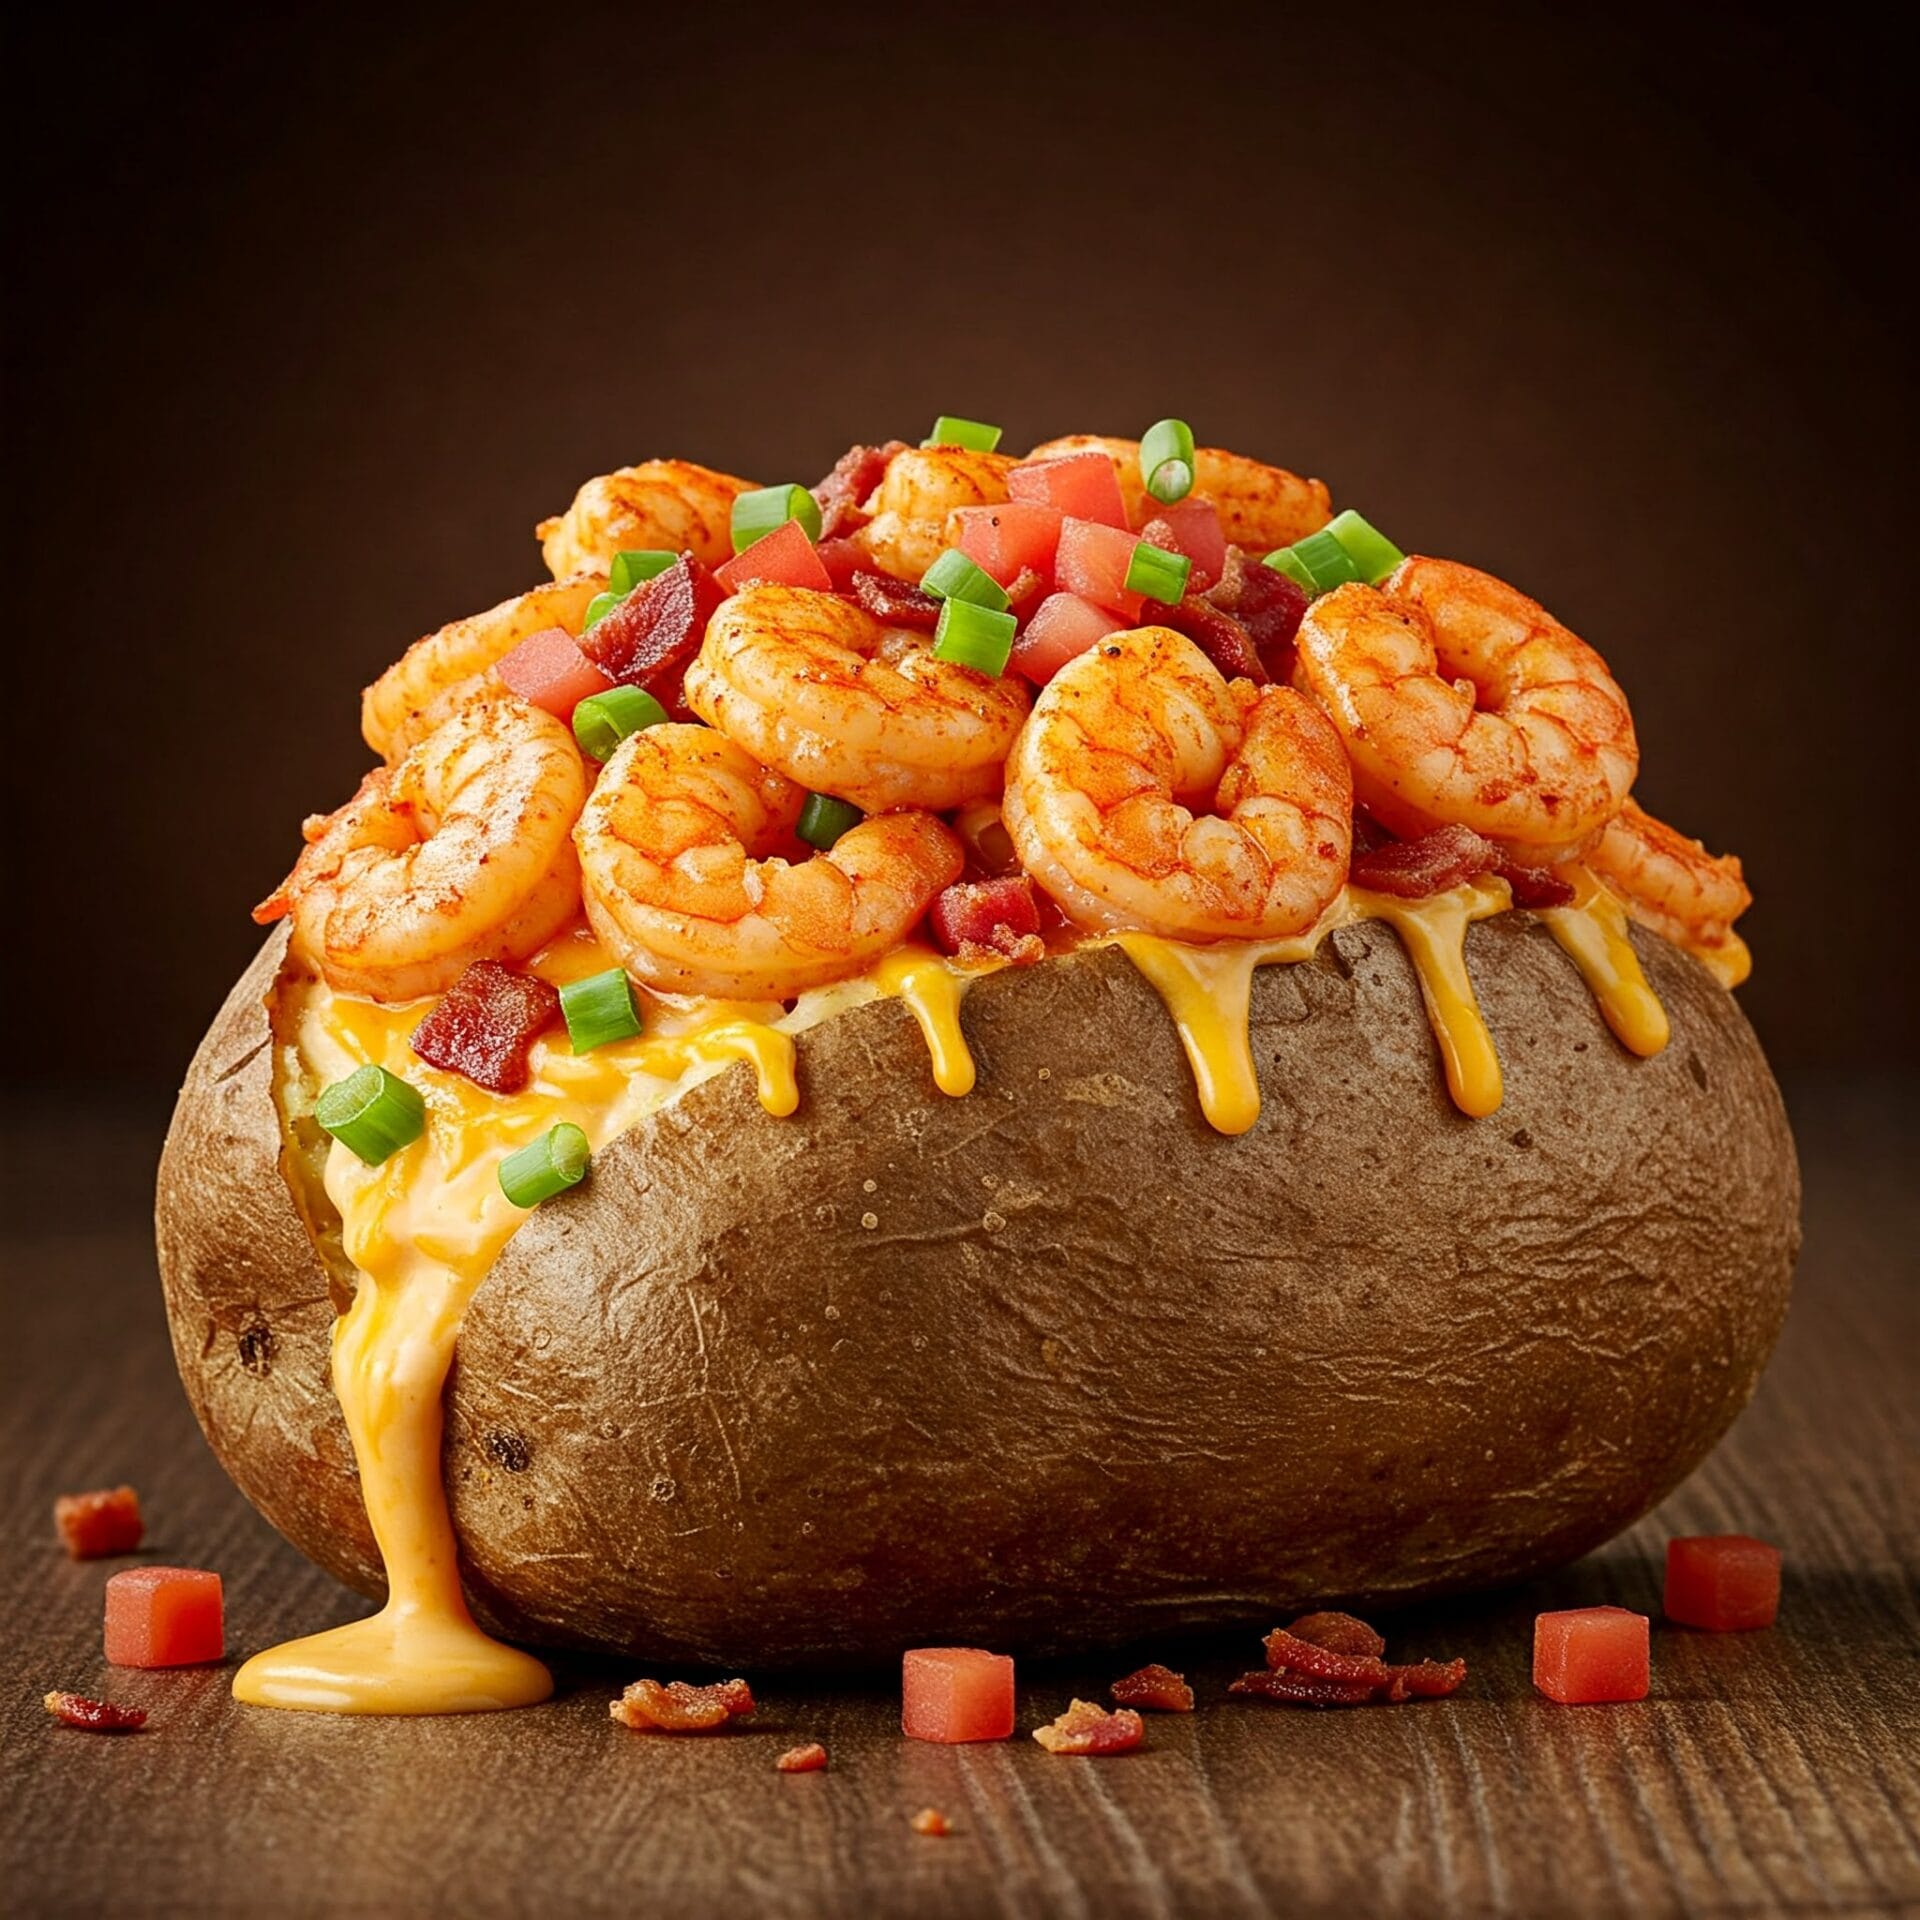
Cajun Shrimp Loaded Baked Potato

Cajun Shrimp Loaded Baked Potato
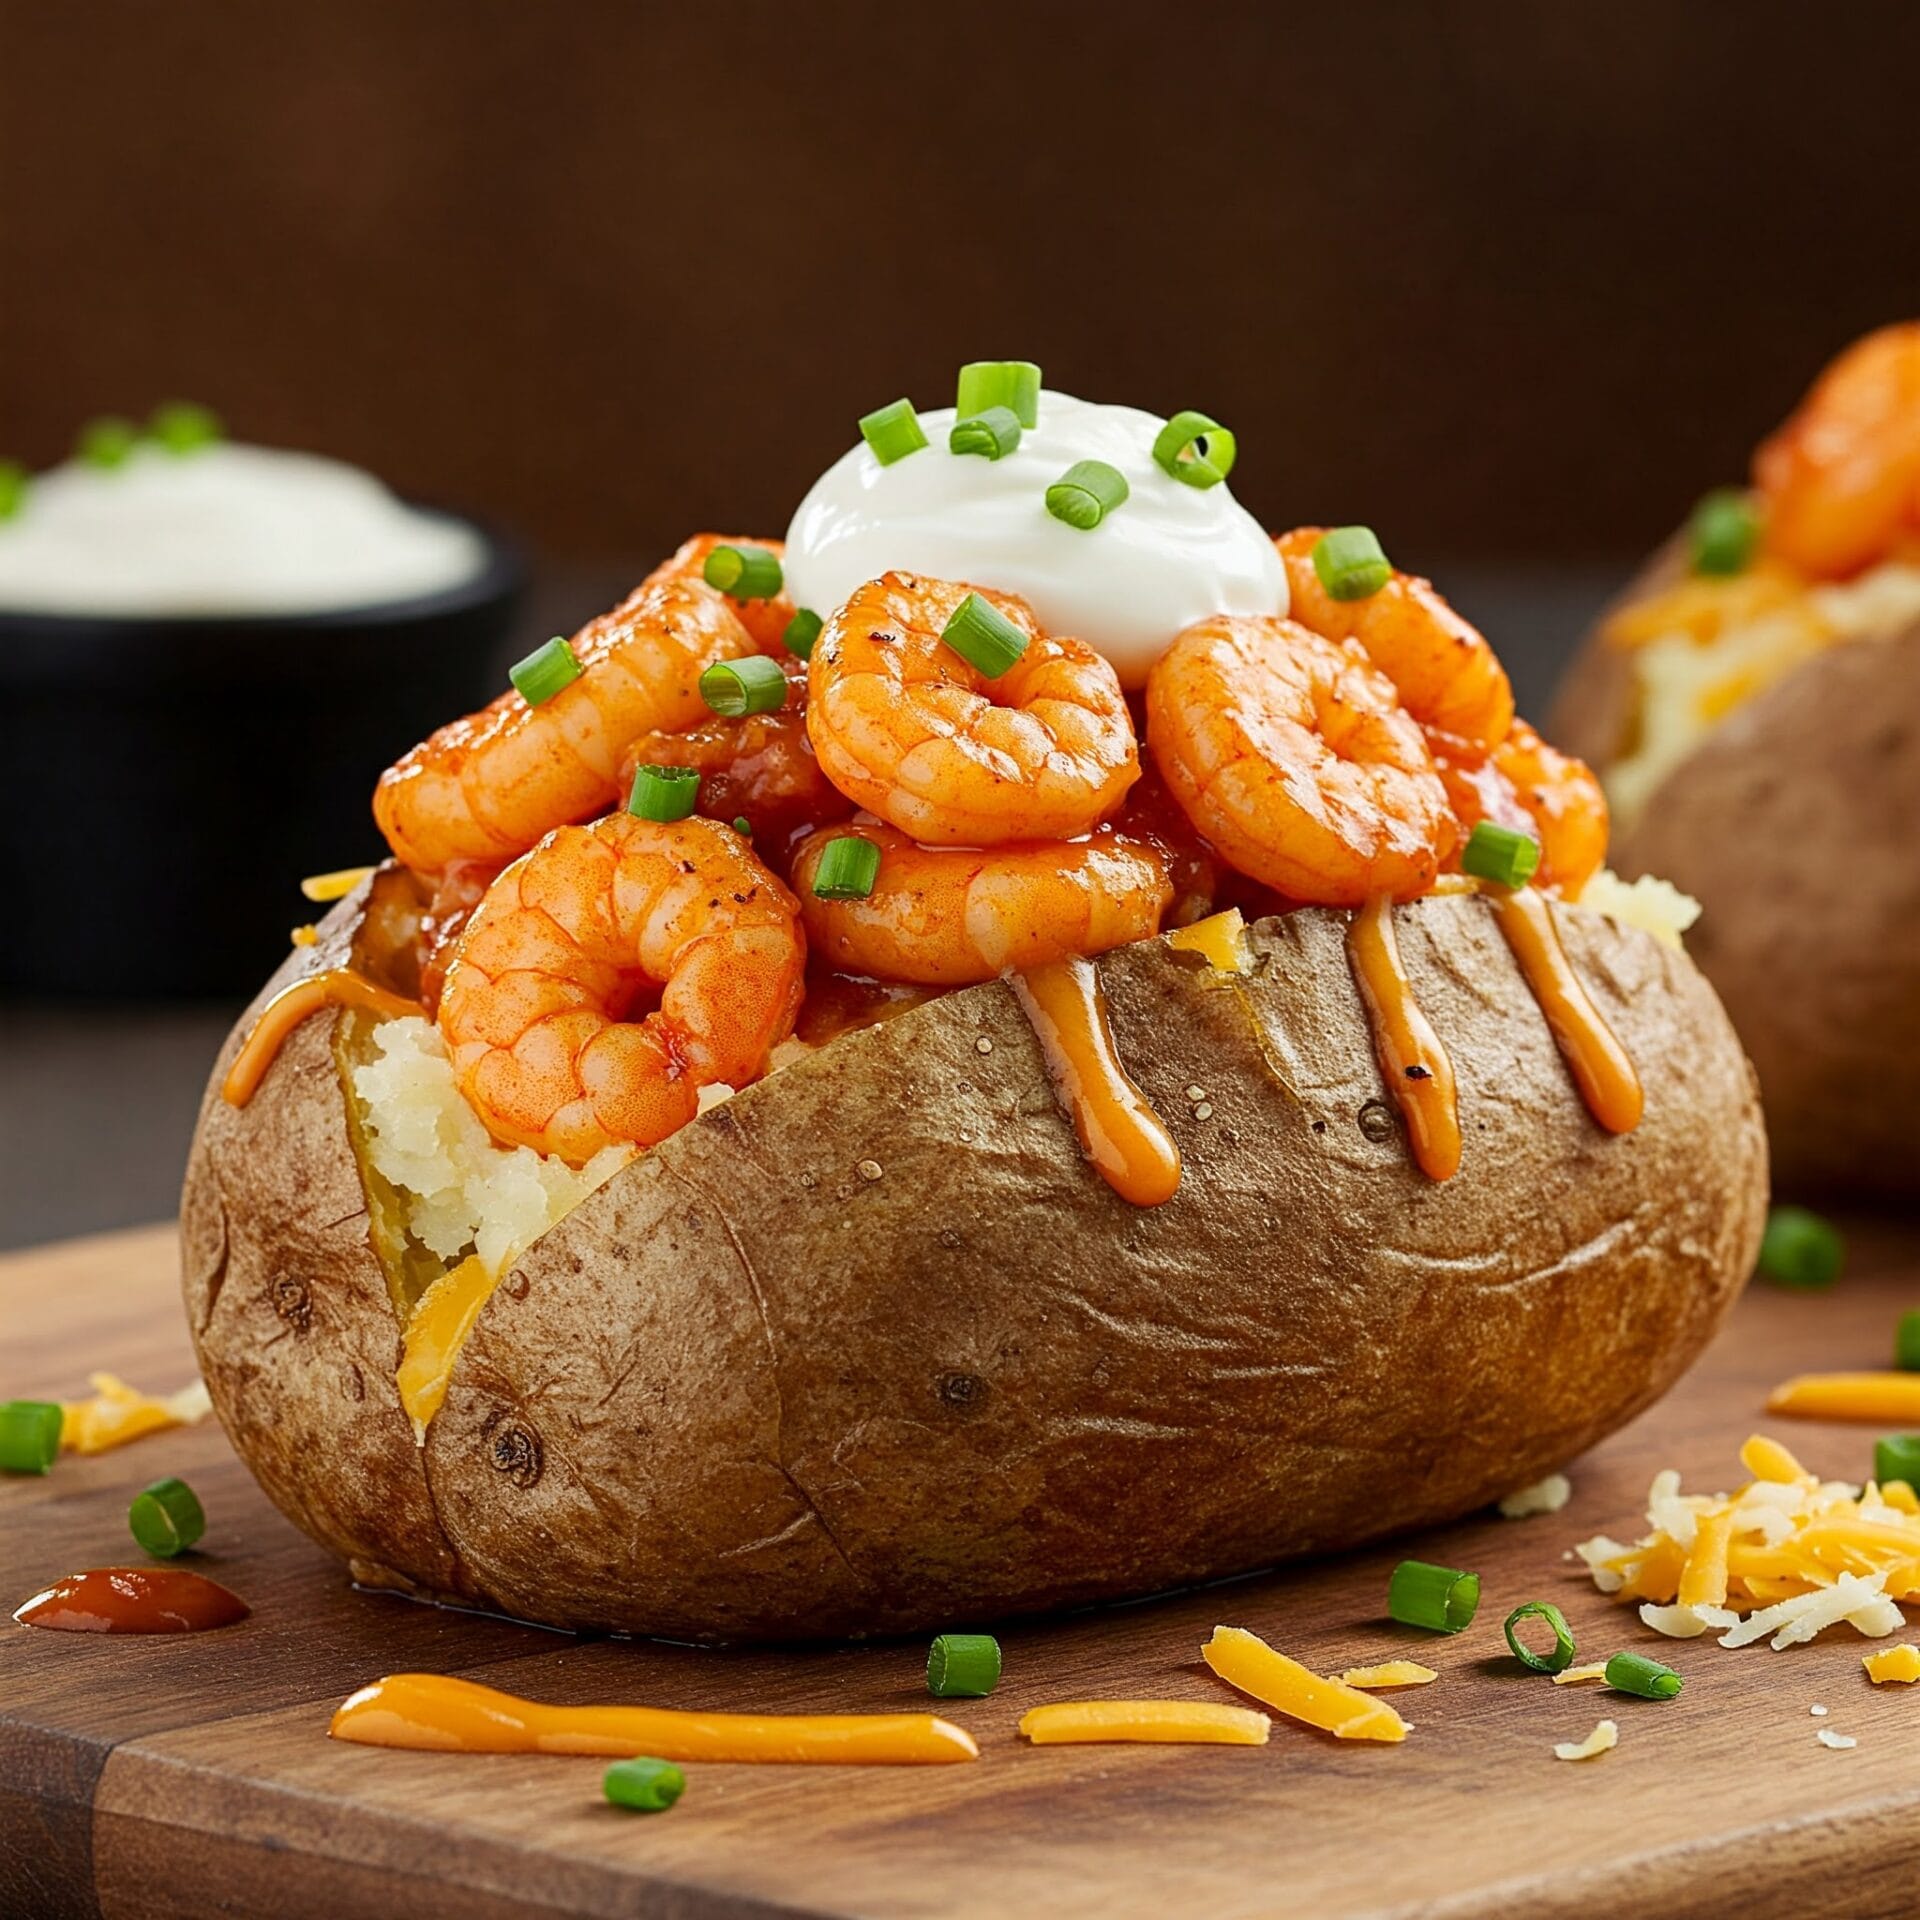
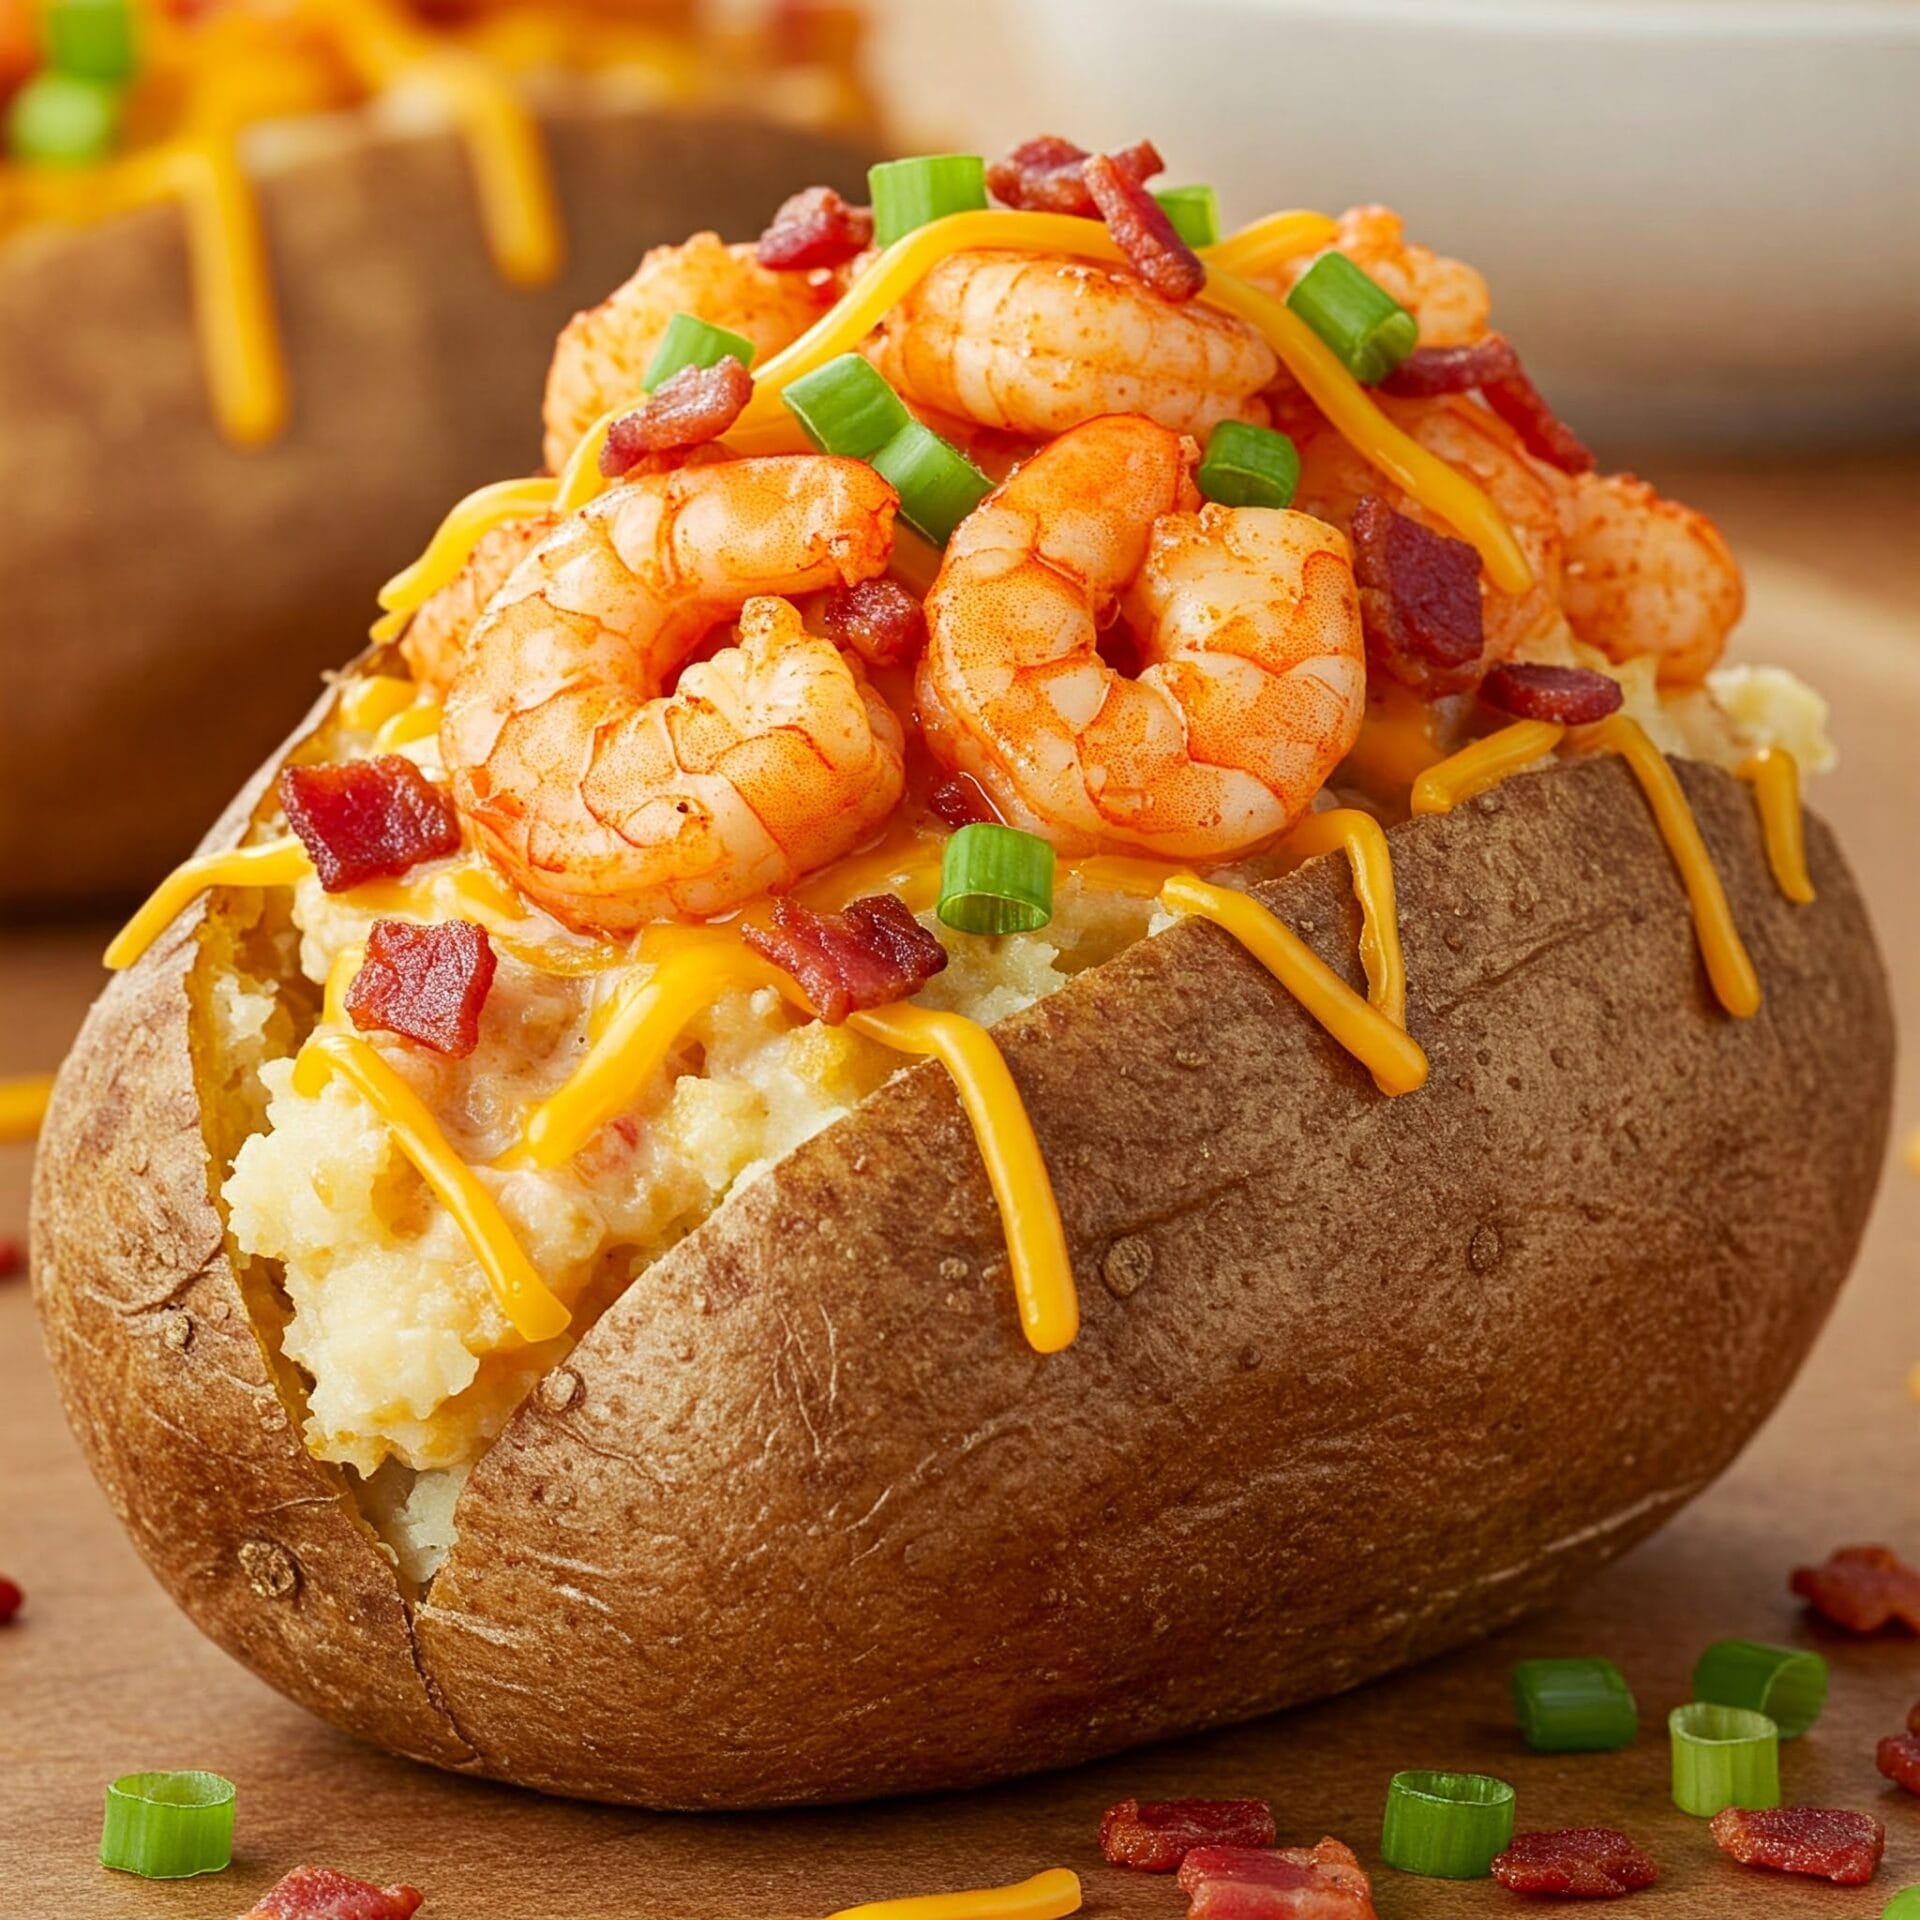
Spice up your comfort food game with this bold and satisfying Cajun Shrimp Loaded Baked Potato! A fluffy, oven-baked potato is split open and generously stuffed with creamy, seasoned mashed potato filling, then piled high with juicy Cajun-spiced shrimp sautéed to perfection. Finished with a drizzle of zesty garlic butter, a sprinkle of shredded cheese, crisp green onions, and smoky crumbled bacon, this dish is the ultimate fusion of Southern heat and cozy indulgence. Whether it’s a weeknight dinner or a hearty weekend treat, this recipe delivers big flavor in every bite.
Cajun Shrimp Loaded Baked Potato

No ratings yet
This isn't your average loaded potato. We're talking about a flavor explosion where Cajun spice meets fluffy potato goodness! Imagine tender, juicy shrimp coated in a fiery Cajun spice blend, piled high on a perfectly baked potato. It's a symphony of textures and tastes that will transport you straight to the heart of Louisiana!
Prep Time 25 minutes
Cook Time 1 hour 20 minutes

Servings: 4 people
Course: Dinner, Main Course
Cuisine: American, Cajun
Calories: 3784

Ingredients
  

POTATO & STUFFING
  • 4 Large Russet Potatoes
  • ½ lb Medium shrimp peeled & deveined, leaving tail on
  •  
    8 oz Italian Blend Cheese shredded
  • 1 Olive oil
  • Cajun Seasoning to taste
SHERRY CREAM SAUCE
  • 3 tbsp Butter unsalted
  • 2 lg Garlic minced
  •  
    2 med Shallots diced
  •  
    ¼ cup Brandy flambeed (ignite) is optional
  •  
    2 cups Sherry wine
  •  
    1 cup Shrimp stock
  •  
    ¼ cup Crawfish juice drained from crawfish packaging
  • 1 cup Heavy Cream
  •  
    1 cup Crawfish tail meat save the juice
  • ½ cup Green onions sliced for garnish
  • 3 Tbsp Lemon Juice

Method
 

  1. Before you start on the sauce, get those potatoes baking! Preheat your oven to 400°F (200°C). Wash and dry your potatoes, then prick them all over with a fork. Place them on a baking sheet lined with parchment paper or foil, giving them some space to breathe. Gently coat with olive oil. Then bake for 50-60 minutes, or until a fork slides easily into the center. You want those potatoes soft and fluffy, ready for their delicious toppings.
    4 Large Russet Potatoes, 1 Olive oil
  2. let's get that sauce started! Melt 1 tablespoon of butter in a saucepan over medium-high heat. Once the butter is melted and bubbly, add the garlic and shallots. Now, for a touch of drama (and flavor!), pour in the brandy. Carefully ignite the brandy to flambé it, stirring constantly until the flames subside. This will create a wonderful depth of flavor in the sauce.
    3 tbsp Butter, 2 lg Garlic, 2 med Shallots, 1/4 cup Brandy
  3. Pour in the wine, shrimp stock, and crawfish juice. Bring the mixture to a boil, then reduce the heat to maintain a gentle simmer. Cook until the liquid has reduced by half, which will concentrate the flavors. Then, stir in the heavy cream and continue to simmer until the sauce reaches a smooth, velvety consistency. Remove the pan from the heat and swirl in the remaining butter, stirring until it's fully incorporated and the sauce is glossy.
    3 tbsp Butter, 2 cups Sherry wine, 1 cup Shrimp stock, 1/4 cup Crawfish , 1 cup Heavy Cream
  4. Now, let's get those shrimp sizzling! Heat a tablespoon of butter in a medium-sized skillet over high heat. Once the butter is hot and shimmering, add the shrimp in a single layer. As the shrimp sizzle and start to turn pink, sprinkle them with Cajun seasoning and a squeeze of fresh lemon juice. Stir everything together to ensure the shrimp are evenly coated and infused with that vibrant Cajun flavor. Keep a close eye on them—shrimp cook quickly! As soon as they turn opaque and curl up, remove the skillet from the heat to prevent overcooking. Set the shrimp aside while you finish preparing the other components of this dish.
    1/2 lb Medium shrimp, 3 tbsp Butter, 3 Tbsp Lemon Juice, Cajun Seasoning
  5. Gently fold in the remaining crawfish tail meat. Cook for just 2 minutes more, allowing the crawfish to warm through and absorb the flavors of the sauce. The sauce should have a lovely, smooth consistency, similar to Alfredo sauce. Mix 1/2 of the sauce with the cooked shrimp. keep the shrimp warm.
    1 cup Crawfish
  6. If you find the sauce is a bit too thick for your liking, you can easily adjust the consistency by stirring in a little warm chicken broth, a tablespoon at a time, until it reaches the desired thickness.
  7. Spoon a generous amount of that luscious crawfish sauce over each prepared potato. Then, sprinkle a layer of shredded cheese on top. Place the potatoes on a baking sheet and bake in the preheated 400°F (200°C) oven for about 6 to 8 minutes, or until the cheese is melted, bubbly, and golden brown.
    8 oz Italian Blend Cheese
PLATING
  1. It's time to plate this masterpiece! Divide the remaining crawfish sauce among 4 plates, spooning it directly onto the middle of each plate. Place a glorious baked potato in the center of the sauce. Then, generously spoon the sauce mixed with the shrimp over each potato, ensuring every nook and cranny is coated. For a final touch of freshness and color, garnish with a sprinkle of chopped green onions.
    1/2 cup Green onions

Nutrition

Serving: 12ozCalories: 3784kcalCarbohydrates: 292gProtein: 200gFat: 187gSaturated Fat: 88gPolyunsaturated Fat: 8gMonounsaturated Fat: 33gTrans Fat: 1gCholesterol: 1185mgSodium: 1972mgPotassium: 8334mgFiber: 21gSugar: 19gVitamin A: 5774IUVitamin C: 117mgCalcium: 1262mgIron: 21mg

Notes

Potato Perfection:
  • Potato choice: Russet potatoes are ideal for baking because of their fluffy interior and sturdy skin.  
  • Wash and dry: Give those potatoes a good scrub and pat them dry before baking. This helps create a crispy skin.
  • Prick it: Don't forget to prick the potatoes with a fork before baking. This allows steam to escape and prevents them from exploding in the oven.  
  • Oil and salt: Rubbing the potatoes with oil and salt helps create a crispy skin and seasons the flesh.  
  • Baking time: Baking time can vary depending on the size of your potatoes. Start checking for doneness at around 50 minutes. A fork should easily slide into the center of a fully baked potato.  
  • Rest them: Once baked, let the potatoes rest for a few minutes before slicing them open. This allows the steam to escape and makes them easier to handle.
Shrimply the Best:
  • Shrimp size: Medium-sized shrimp are perfect for this recipe. They cook quickly and are easy to eat.
  • Pat them dry: Before cooking, pat the shrimp dry with paper towels. This helps them sear properly and prevents excess moisture in the sauce.
  • Don't overcrowd the pan: Cook the shrimp in a single layer to ensure even cooking. If you have too many shrimp, cook them in batches.
  • Watch the clock: Shrimp cook quickly! Keep a close eye on them to avoid overcooking. They should be opaque and slightly curled when done.
Sauce Savvy:
  • Stock matters: Using homemade shrimp stock or crawfish juice adds a depth of flavor that you can't get from store-bought broth.
  • Reduce for richness: Simmering the sauce until it reduces by half concentrates the flavors and creates a richer consistency.
  • Creamy dreamy: Use full-fat heavy cream for the best results. It creates a luscious, velvety sauce.
  • Butter me up: Don't skip the final swirl of butter! It adds richness and glossiness to the sauce.
  • Adjust as needed: If the sauce becomes too thick, thin it out with a little warm chicken broth.
Topping Tips:
  • Cheese choices: Use a combination of cheeses for a more complex flavor. Cheddar, Monterey Jack, and Gruyère are all good options.
  • Bacon bliss: Crispy bacon bits add a salty, smoky crunch.
  • Green onions: Chopped green onions provide a fresh, oniony bite.
  • Other toppings: Get creative with your toppings! Jalapeños, sour cream, chives, and avocado are all delicious additions.
Bonus Tip:
  • Make it ahead: The potatoes and sauce can be made ahead of time and reheated when ready to serve. This makes it a great option for entertaining.
With these tips and tricks, you'll be well on your way to creating the ultimate Cajun Shrimp Loaded Baked Potato! Enjoy! 🥔🍤🔥

Tried this recipe?

Let us know how it was!

Related Recipes

Ingredients

Ingredients:

Potato & Stuffing:

  • 4 large Russet Potatoes
  • ½ lb Medium Shrimp, peeled & deveined (tails on)
  • 8 oz shredded Italian Blend Cheese
  • Olive Oil
  • Cajun Seasoning, to taste

Sherry Cream Sauce:

  • 3 tbsp unsalted Butter
  • 2 large cloves Garlic, minced
  • 2 medium Shallots, diced
  • ¼ cup Brandy (optional, for flambéing)
  • 2 cups Sherry Wine
  • 1 cup Shrimp Stock
  • ¼ cup Crawfish Juice (drained from crawfish packaging)
  • 1 cup Heavy Cream
  • 1 cup Crawfish Tail Meat (reserve the juice)
  • ½ cup Green Onions, sliced (for garnish)
  • 3 Tbsp Lemon Juice

A few notes:

  • Shrimp: It’s great idea to keep the tails on for presentation!
  • Crawfish: Using both crawfish tail meat and the juice from the packaging will add a ton of flavor to the sauce.
  • Sherry: This is an interesting twist! Using sherry instead of white wine will add a nutty complexity to the sauce.

Image Gallery Shrimp Chowder

Storage & Leftovers

Storage Smarts:

  • Separate is best: Store the potato, shrimp, and sauce separately in airtight containers. This helps maintain the texture of each component and prevents the potato from becoming soggy.
  • Potato prep: If you have leftover baked potatoes, let them cool completely before storing. You can also scoop out the flesh and store it separately from the skins.
  • Fridge life: Your leftovers will be good in the fridge for 3-4 days.

Reheating Hacks:

  • Potato power: Reheat the potato in the oven or microwave until warmed through. For a crispier skin, reheat in the oven.
  • Shrimp revival: Gently reheat the shrimp and sauce in a saucepan over low heat, stirring occasionally. You can add a splash of water or broth if the sauce needs thinning.
  • Microwave magic: If you’re short on time, you can reheat individual portions in the microwave. Just be sure to use a microwave-safe dish and heat in short bursts, stirring in between, to prevent overcooking.

Leftover Love:

  • Twice-baked potatoes: Scoop out the flesh of the leftover potatoes, mash it with some butter and cheese, then stuff it back into the skins and bake until golden brown.
  • Shrimp salad: Chop the leftover shrimp and mix it with mayonnaise, celery, and onion for a delicious shrimp salad.
  • Soup-erb idea: Add leftover shrimp and sauce to a creamy potato soup for a flavor boost.

Extra Tips:

  • Freeze the sauce: The sauce freezes beautifully! Just let it cool completely and store it in a freezer-safe container for up to 3 months. Thaw it in the fridge overnight before reheating.
  • Portion control: Store leftovers in individual portions for grab-and-go lunches or quick dinners.

With these tips, your Cajun Shrimp Loaded Baked Potatoes will be a hit, whether you’re enjoying them fresh or as delicious leftovers! 😋

Please follow and like us:
onpost_follow
fb-share-icon197
Tweet120

Pinterest20
Share 20
submit to reddit

Subscribe for New Recipes

* indicates required

Intuit Mailchimp

Cuban Picadillo

Cuban Picadillo

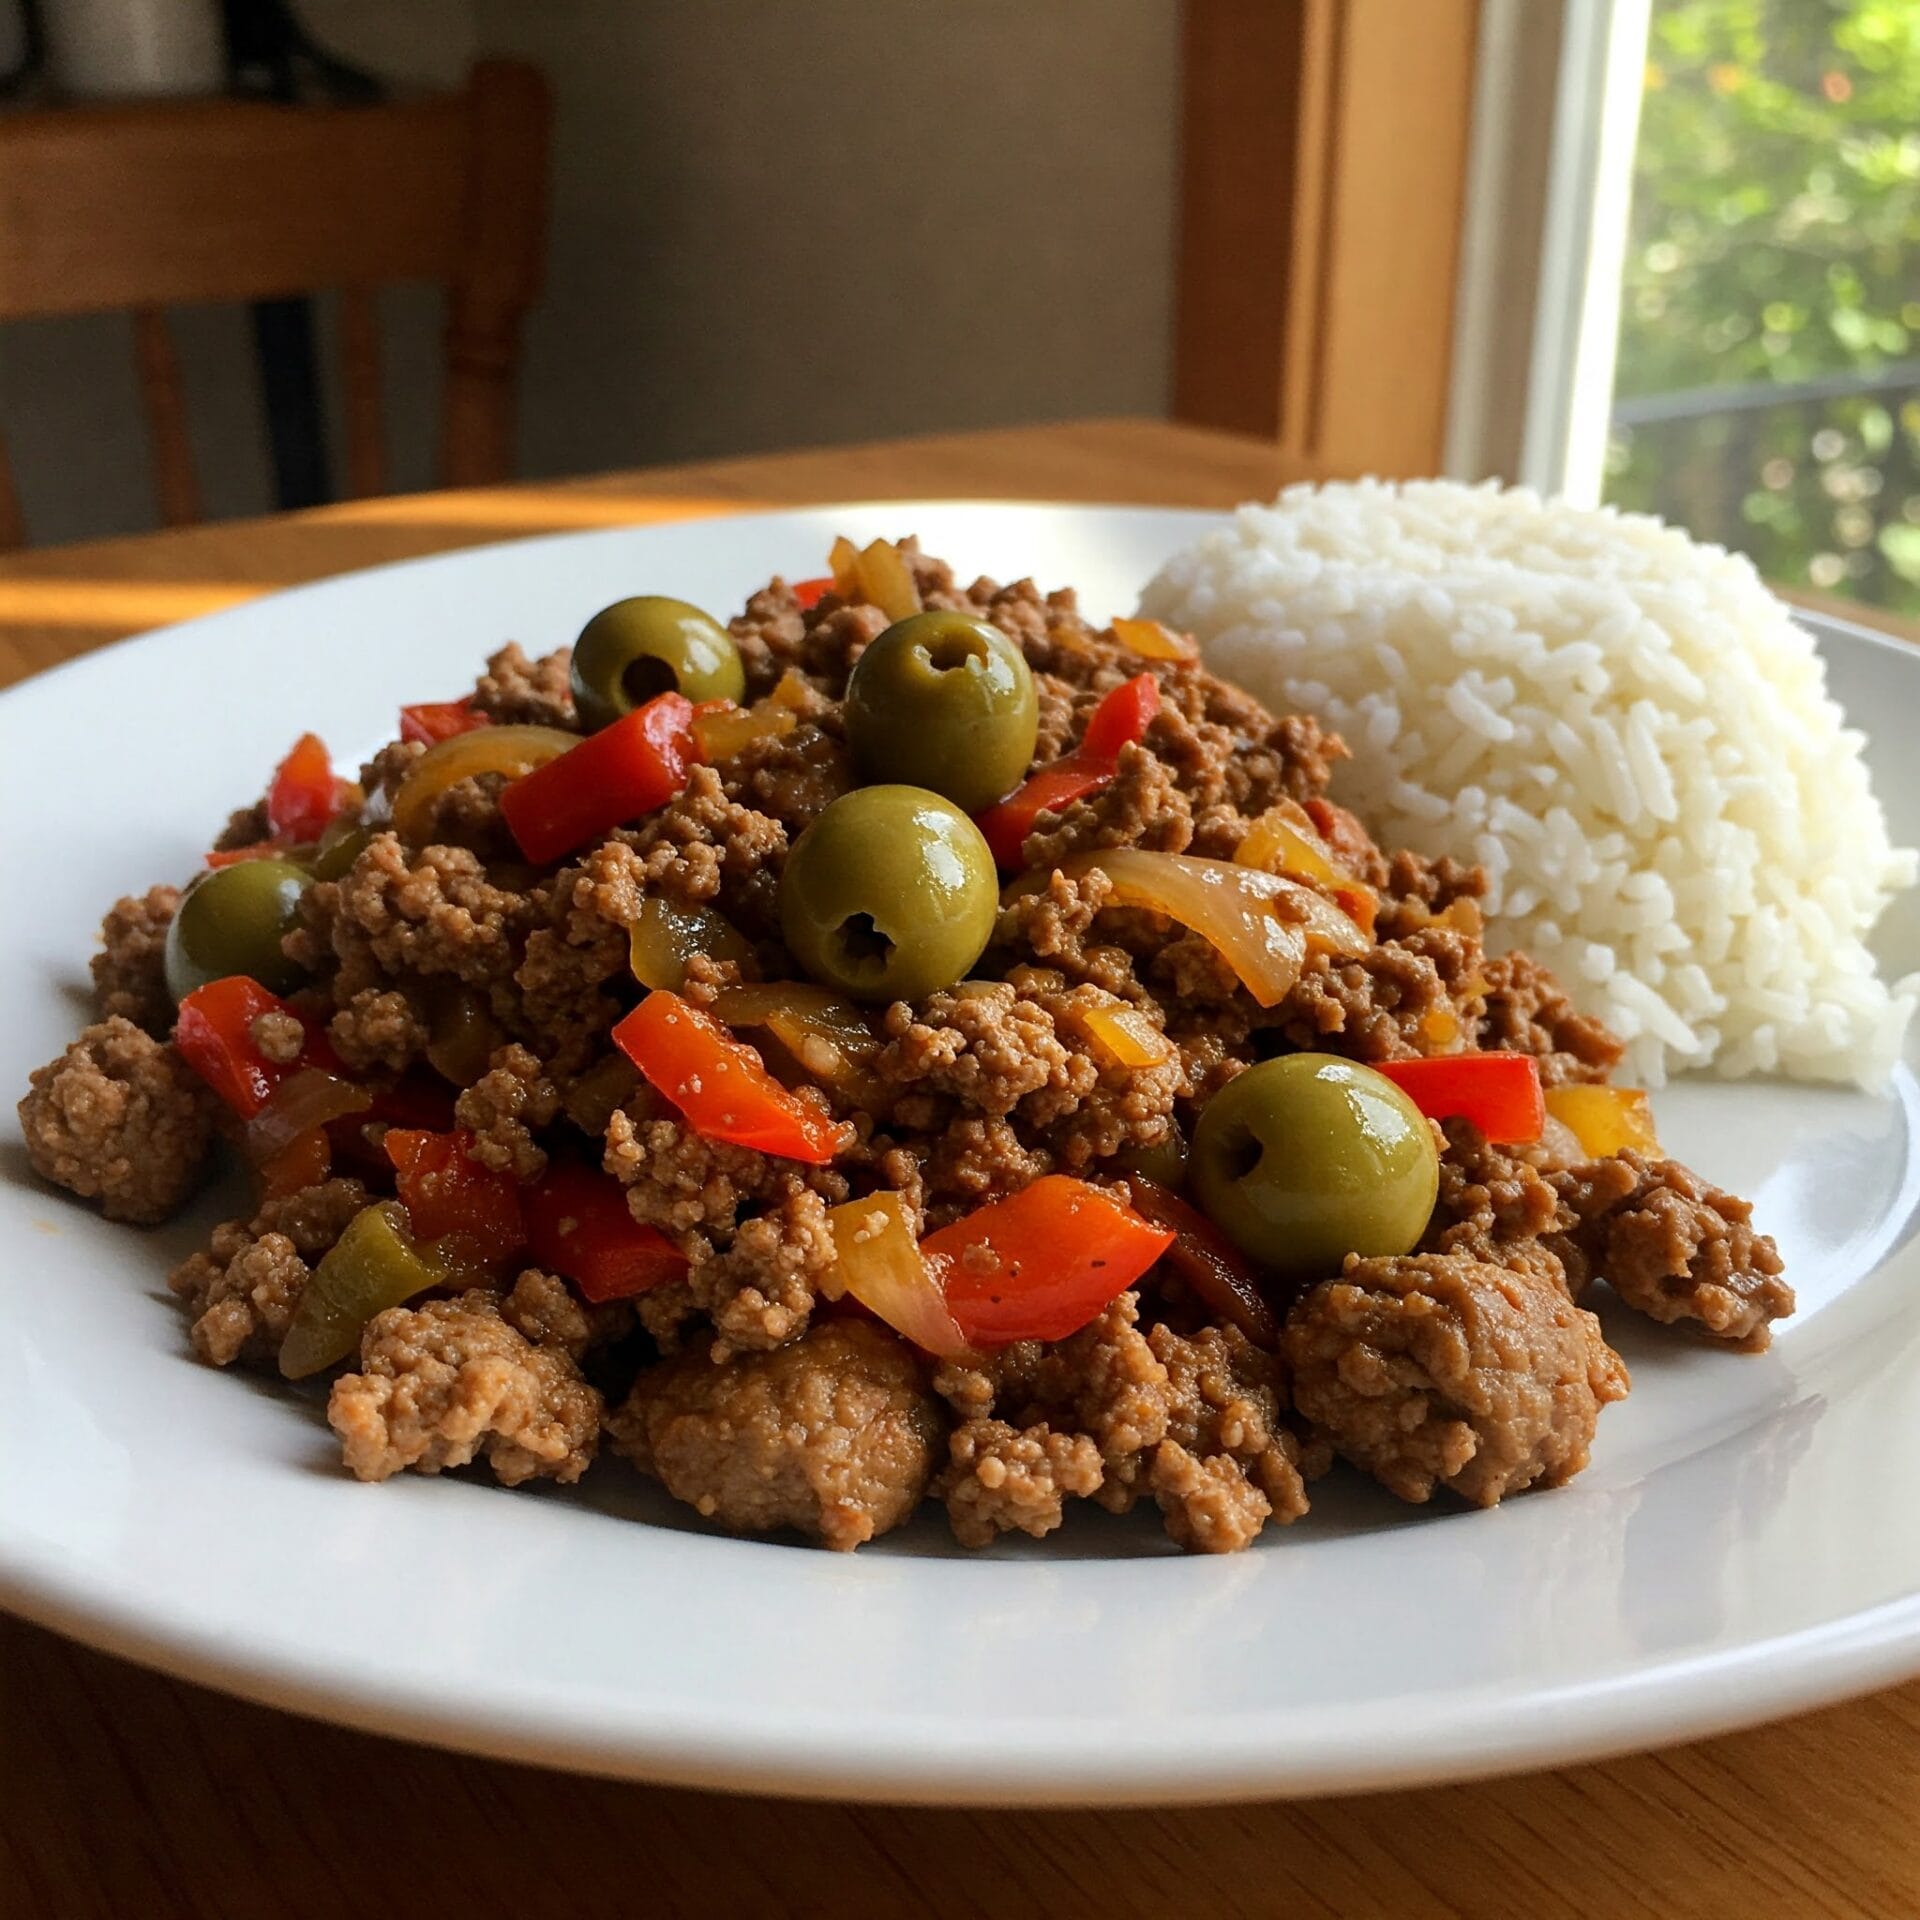
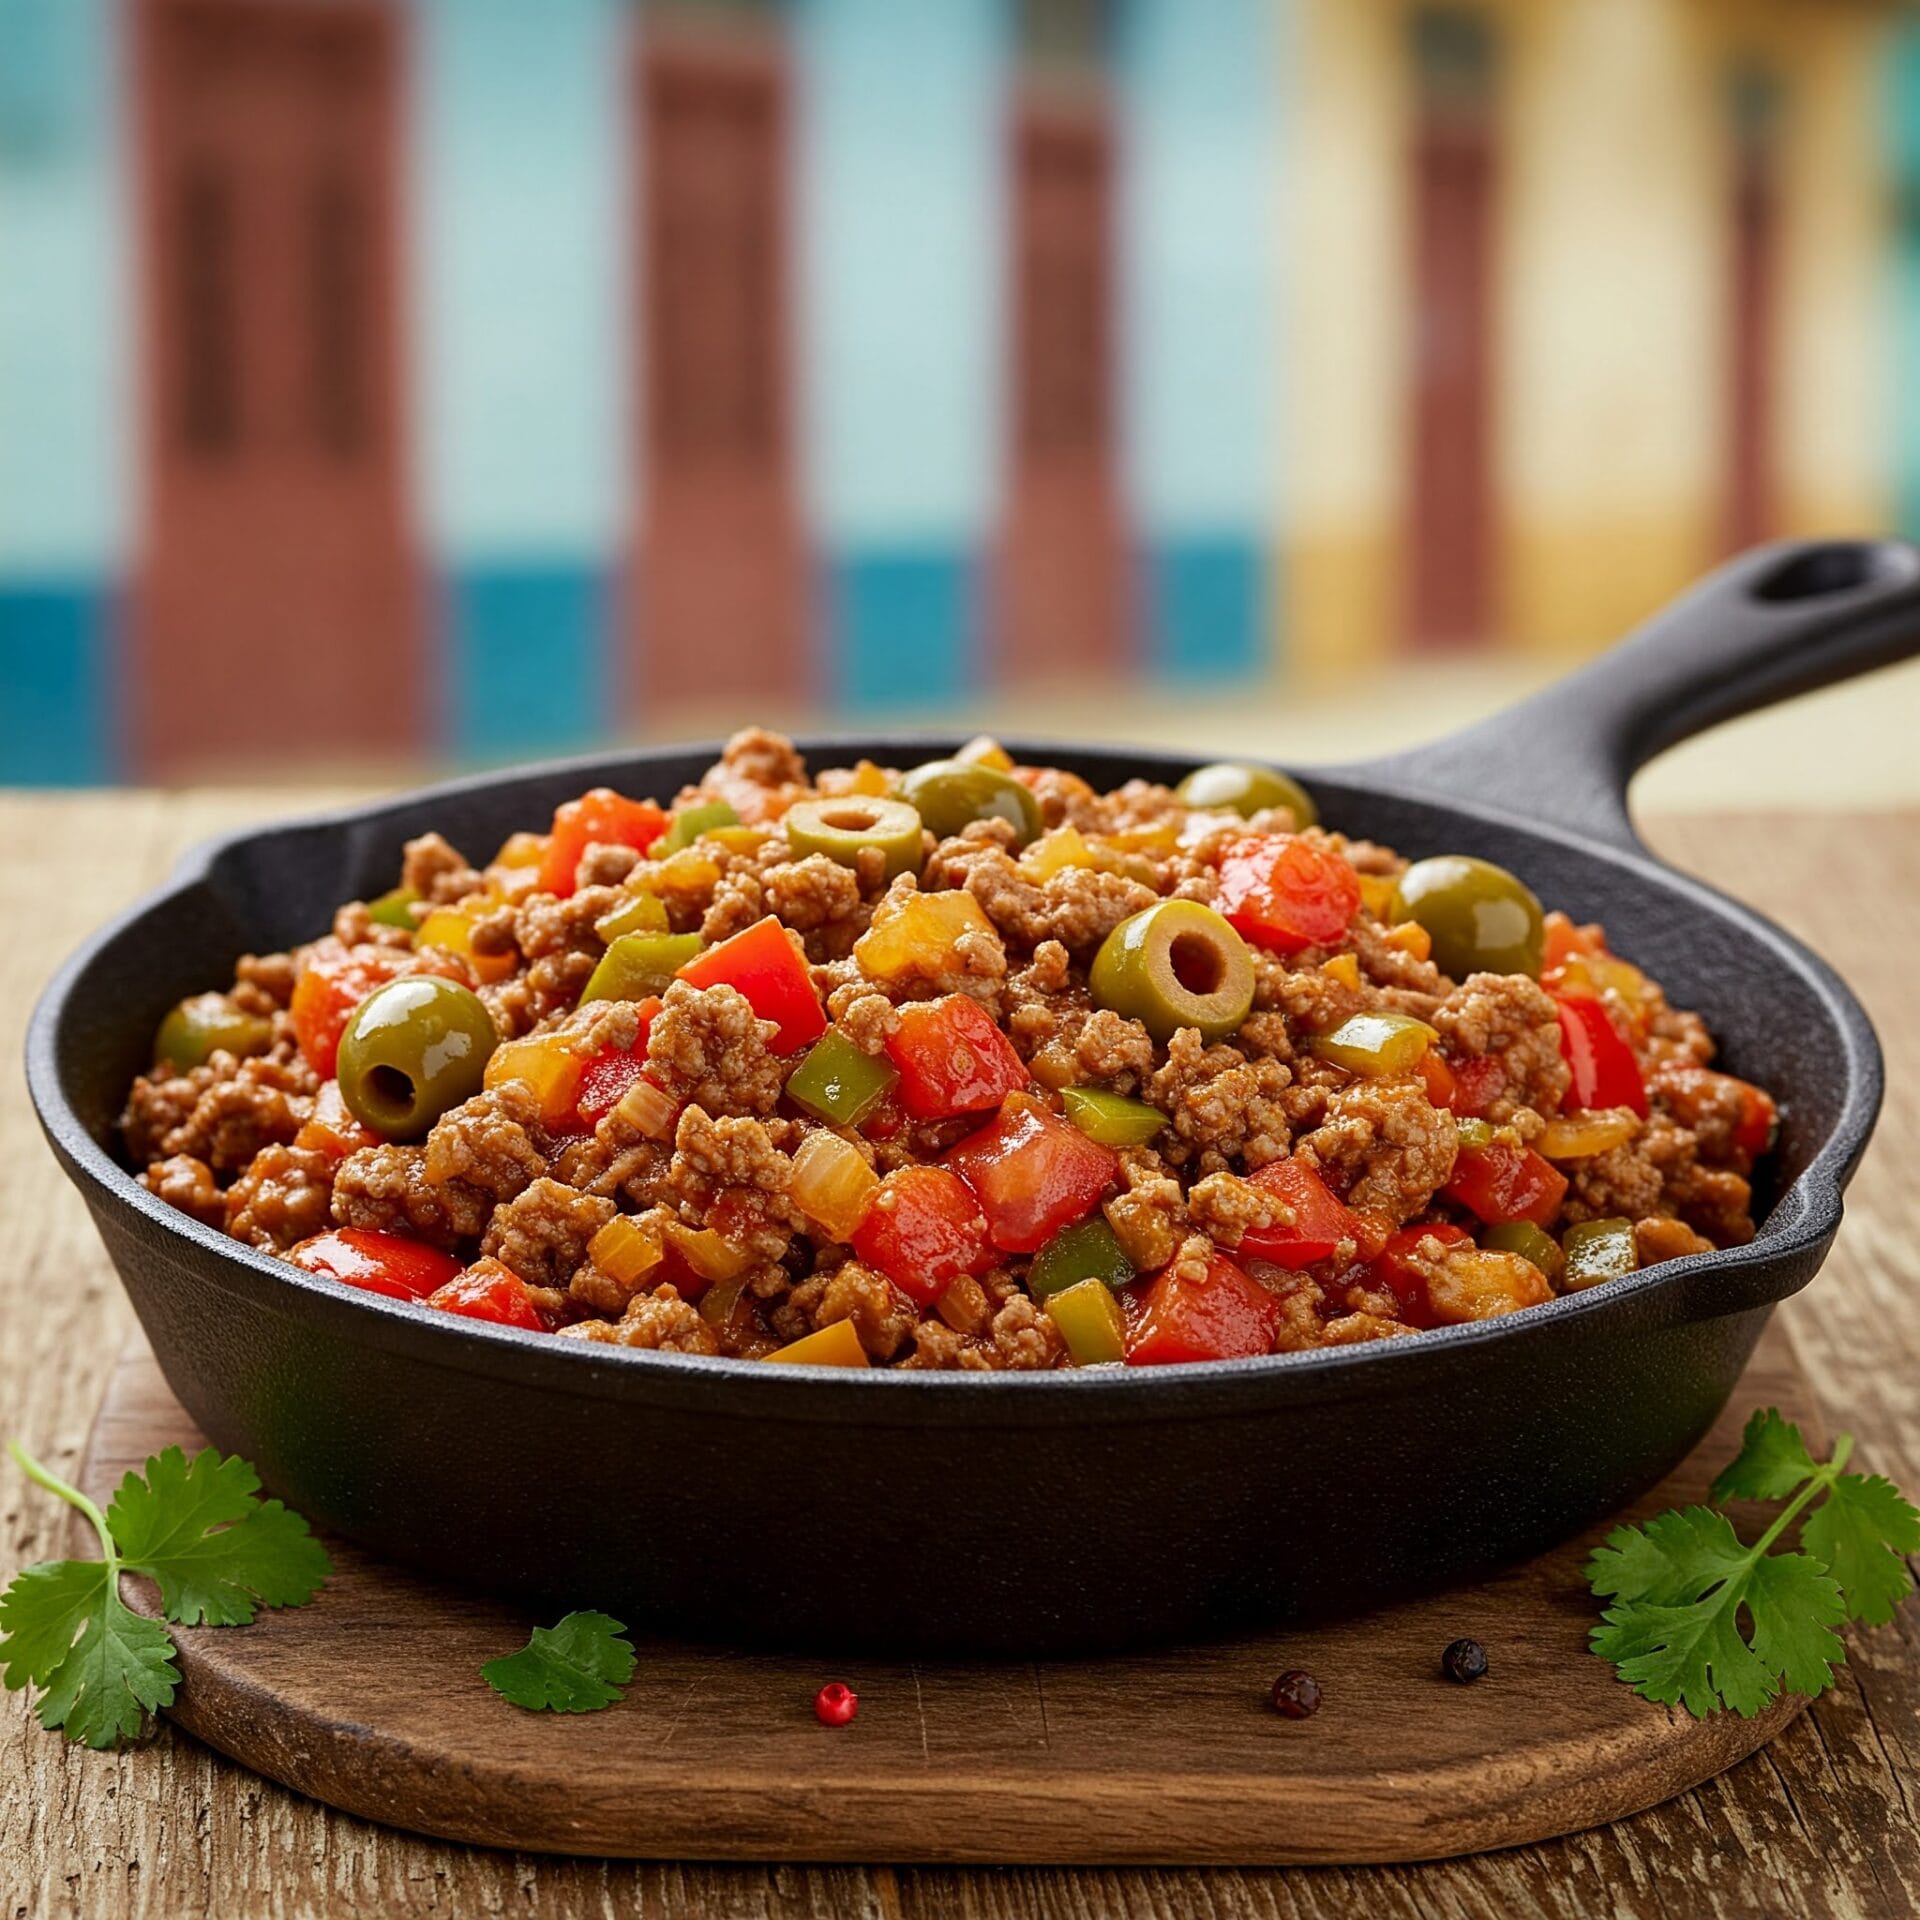
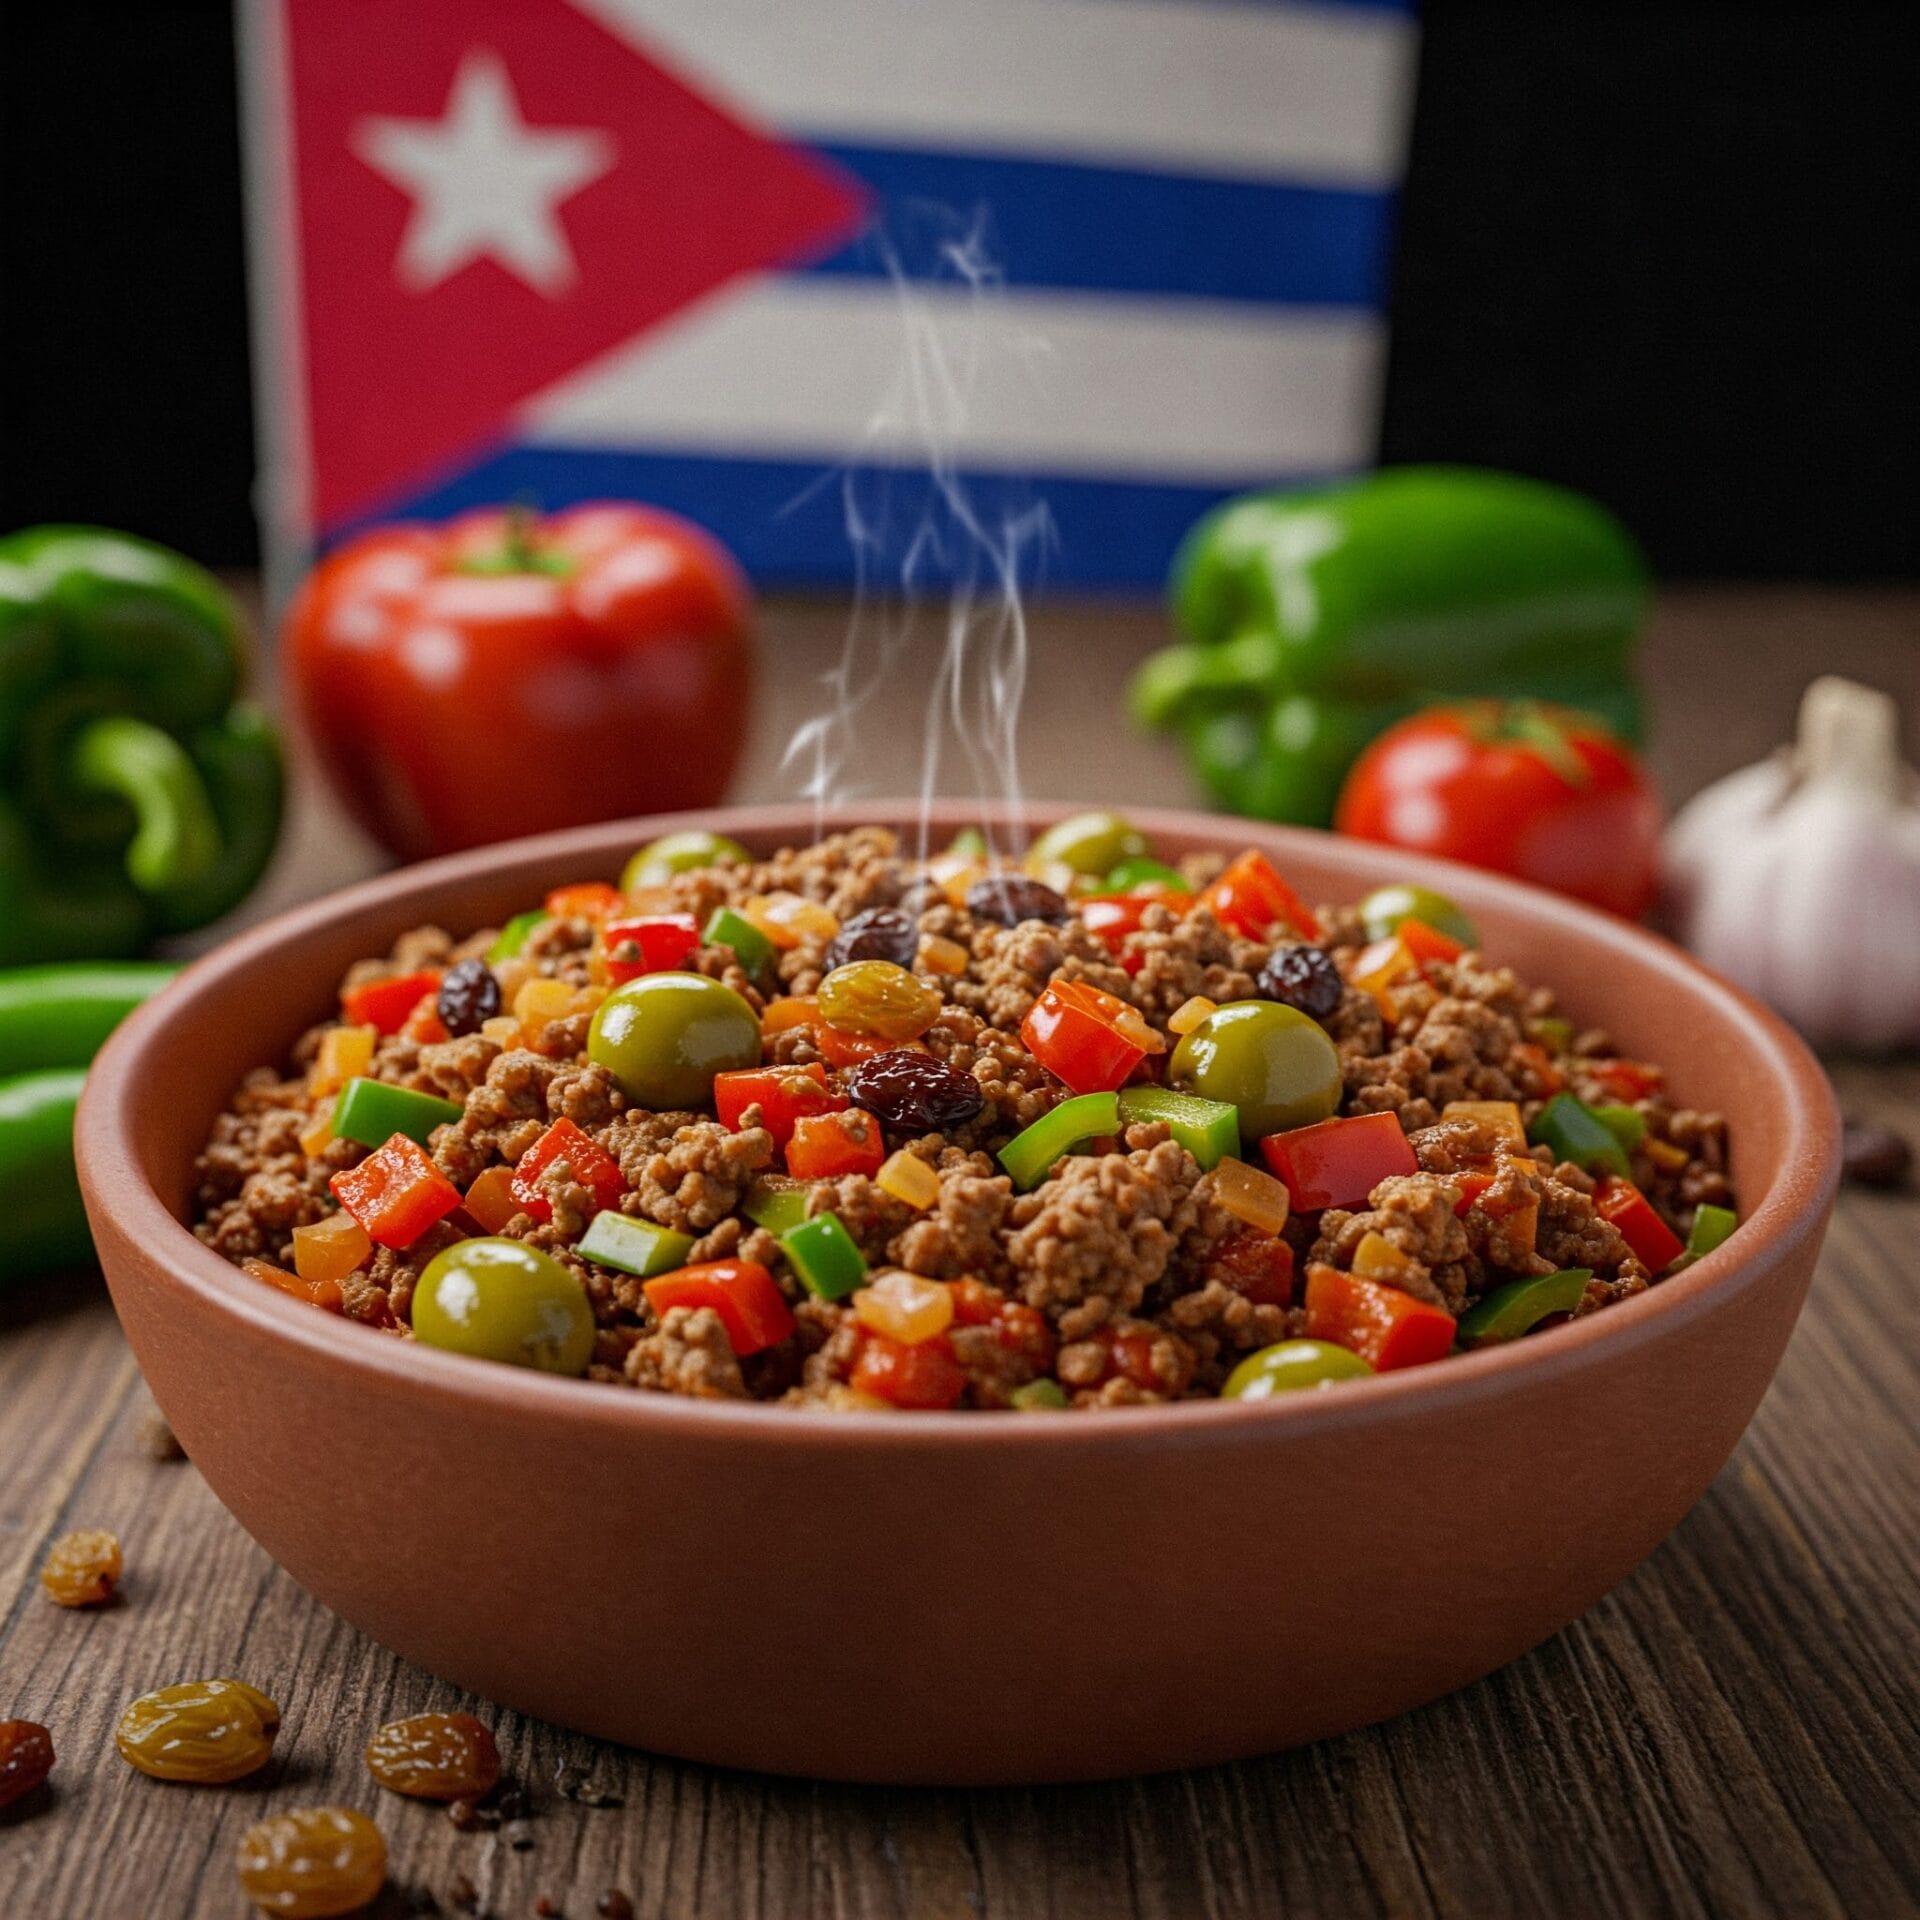
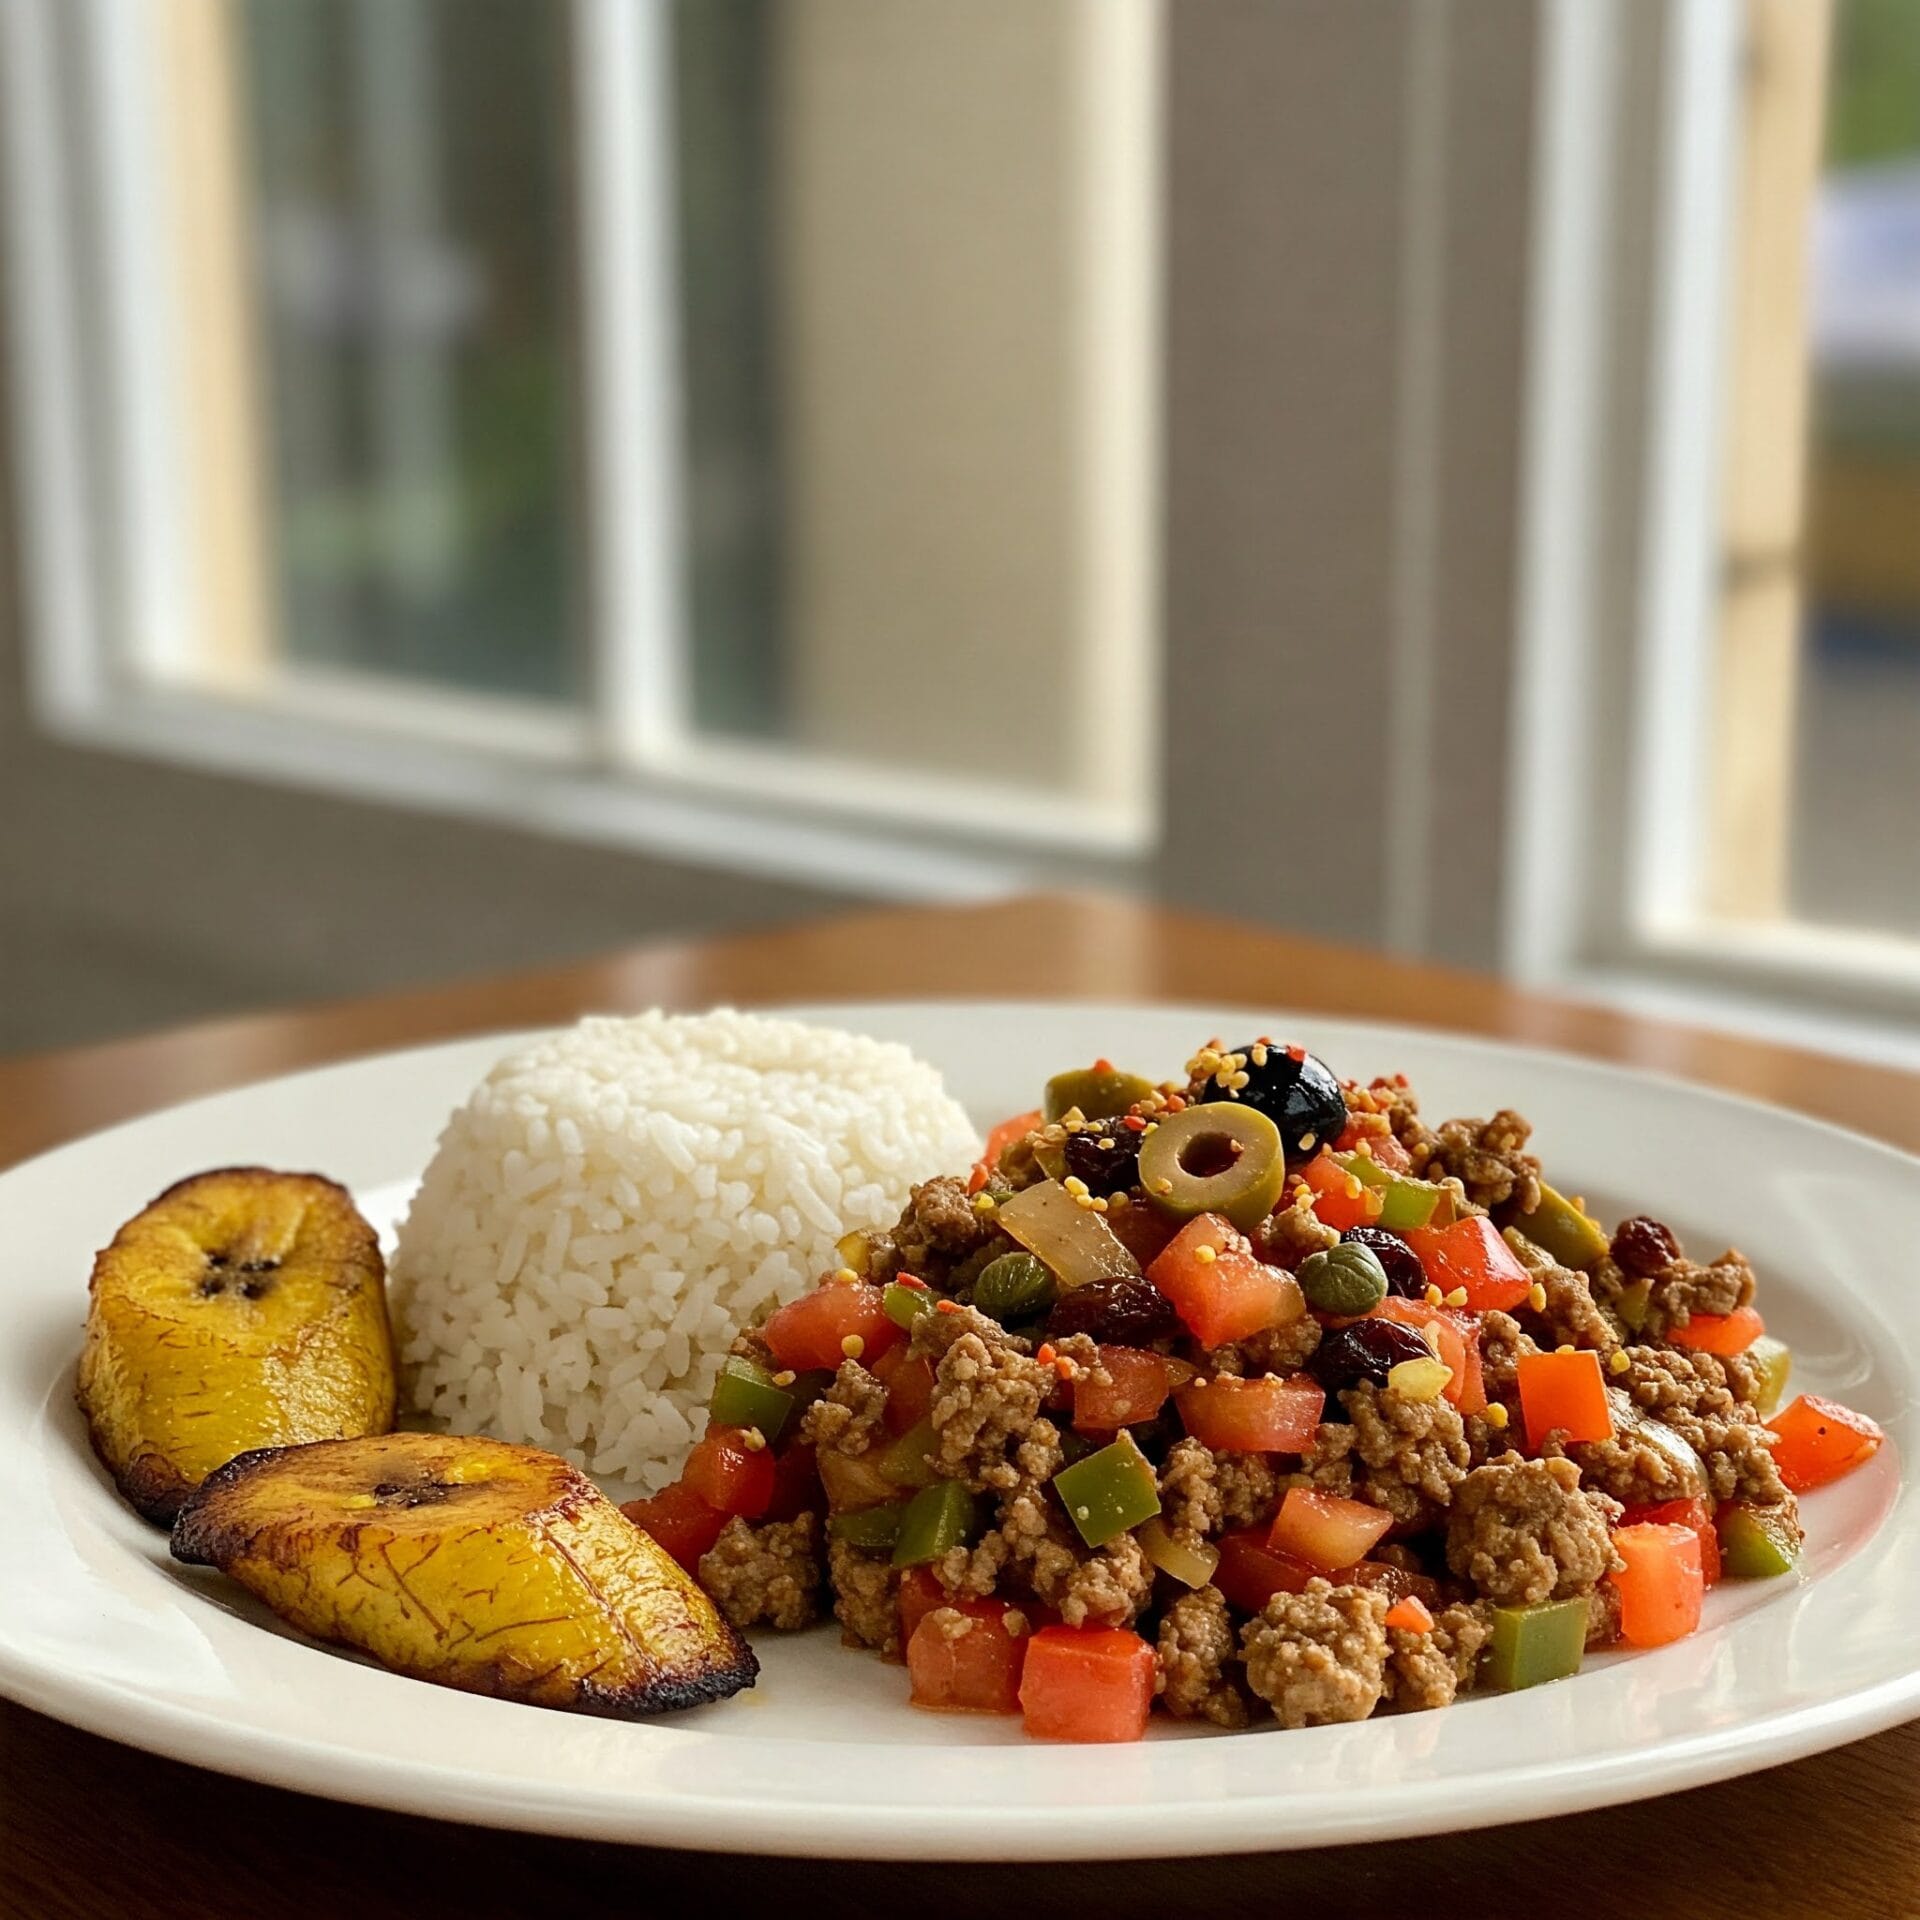
Cuban Picadillo is a comforting, savory dish that brings bold, home-cooked flavor to your table with every bite. Ground beef is simmered with onions, garlic, bell peppers, and tomatoes, then infused with the signature sweetness of raisins and the briny bite of green olives for a perfectly balanced dish. Warm spices like cumin and oregano give it authentic depth, while a splash of vinegar adds a subtle tang. Traditionally served over fluffy white rice or alongside fried plantains, this one-pan wonder is both hearty and deeply satisfying — a taste of Cuba’s rich culinary soul.

Cuban Picadillo

No ratings yet
Ah, Picadillo! A classic Cuban dish that's as comforting as it is flavorful. It's basically a savory ground beef hash, simmered with tomatoes, onions, garlic, and a touch of sweetness from raisins and olives.
Prep Time 10 minutes
Cook Time 35 minutes
Servings: 6 people
Course: Dinner, Main Course
Cuisine: Cuban
Calories: 411

Ingredients
  

  • 3 Tbsp Vegetable Oil
  • 1 medium Yellow Onion diced
  • 1 Green Bell Pepper diced
  • 2 lg Garlic minced
  • 2 tsp Oregano dried
  • 1 tsp Salt
  • ¼ tsp Black pepper
  • lbs Ground Beef (ground chuck or ground sirloin)
  •  
    1 8 oz Tomato sauce can
  • ¼ cup White Wine
  • ¼ cup Water
  •  
    ½ cup Green Olives Pimento Stuffed, sliced in half crosswise
  •  
    cup Raisins

Method
 

  1. Place a medium-sized pot over medium heat and add the oil. Once hot, add the onion and green pepper, cooking and stirring them until they soften slightly (about 5 minutes). Stir in the garlic and cook for another minute.
    3 Tbsp Vegetable Oil, 1 medium Yellow Onion, 1 Green Bell Pepper, 2 lg Garlic
  2. Sprinkle in the oregano, salt, and pepper, and sauté for 30 seconds more, until fragrant. Add the ground beef to the pot. As it cooks, use the side of a spoon to break it down into very fine pieces. Continue cooking until the beef loses most of its pink color, about 5 minutes.
    2 tsp Oregano, 1 tsp Salt, ¼ tsp Black pepper, 1½ lbs Ground Beef
  3. It's time to add the remaining ingredients: tomato sauce, white wine, and water will create the sauce, while the olives and raisins bring a touch of sweetness and acidity. Bring to a boil, then cover and simmer over low heat for 35-40 minutes. This allows the flavors to meld and deepen. Serve over rice for a complete and satisfying meal.
    1 8 oz Tomato sauce, ¼ cup White Wine, 1/4 cup Water, ½ cup Green Olives, ⅓ cup Raisins

Nutrition

Serving: 12ozCalories: 411kcalCarbohydrates: 10gProtein: 20gFat: 31gSaturated Fat: 10gPolyunsaturated Fat: 5gMonounsaturated Fat: 13gTrans Fat: 1gCholesterol: 81mgSodium: 744mgPotassium: 457mgFiber: 2gSugar: 1gVitamin A: 131IUVitamin C: 18mgCalcium: 48mgIron: 3mg

Notes

Flavor Boosters:
  • Toast the spices: Before adding them to the pot, toast your cumin and oregano in a dry skillet for a minute or two until fragrant. This intensifies their flavor and adds depth to the dish.
  • Don't be afraid of the sofrito: Take your time building a flavorful sofrito. Cook the onions, garlic, and peppers slowly over medium heat until they're softened and slightly caramelized. This creates a delicious foundation for the Picadillo.
  • Wine matters: Use a dry white wine like Sauvignon Blanc or Pinot Grigio for a bright acidity that complements the other flavors.
  • Tomato paste power: For a richer, more intense tomato flavor, add a tablespoon or two of tomato paste to the sofrito along with the garlic.
  • Adjust the sweetness: Taste the Picadillo as it simmers and adjust the sweetness by adding a pinch of sugar or a splash of dry sherry if needed.
Texture Tips:
  • Ground beef choice: Use ground beef with a higher fat content (like 80/20) for a juicier and more flavorful Picadillo.
  • Break it down: Make sure to break up the ground beef into very small pieces as it cooks. This creates a finer texture that's characteristic of Cuban Picadillo.
  • Simmer, simmer, simmer: Don't rush the simmering process. The longer the Picadillo simmers, the more the flavors will meld and deepen.
Serving Suggestions:
  • Rice is king: Serve your Picadillo over fluffy white rice to soak up all the delicious sauce.
  • Plantain perfection: Fried sweet plantains (maduros) are a classic accompaniment to Picadillo.
  • Add some crunch: For a textural contrast, top your Picadillo with some toasted almonds or chopped cilantro.
  • Get creative: Use Picadillo as a filling for empanadas, arepas, or even baked potatoes for a fun twist.
Bonus Tip:
  • Make it ahead: Picadillo tastes even better the next day! Make a big batch and enjoy it for leftovers throughout the week.
With these tips and tricks, you'll be well on your way to making a truly delicious and authentic Cuban Picadillo. ¡Buen provecho! 😋

Tried this recipe?

Let us know how it was!

Related Recipes

Ingredients

  • 3 Tbsp Vegetable Oil
  • 1 medium Yellow Onion, diced
  • 1 Green Bell Pepper, diced
  • 2 large cloves Garlic, minced
  • 2 tsp dried Oregano
  • 1 tsp Salt
  • ¼ tsp Black Pepper
  • 1 ½ lbs Ground Beef (ground chuck or ground sirloin)
  • 1 (8 oz) can Tomato Sauce
  • ¼ cup White Wine
  • ¼ cup Water
  • ½ cup Green Olives (pimento-stuffed), sliced in half crosswise
  • ⅓ cup Raisins

Image Gallery Cuban Picadillo

Storage & Leftovers

Please follow and like us:
onpost_follow
fb-share-icon197
Tweet120
Pinterest20
Share 20
submit to reddit

Subscribe for New Recipes

* indicates required

Intuit Mailchimp

Bagel And Cheese Bake

Bagel & Cheese Breakfast Bake

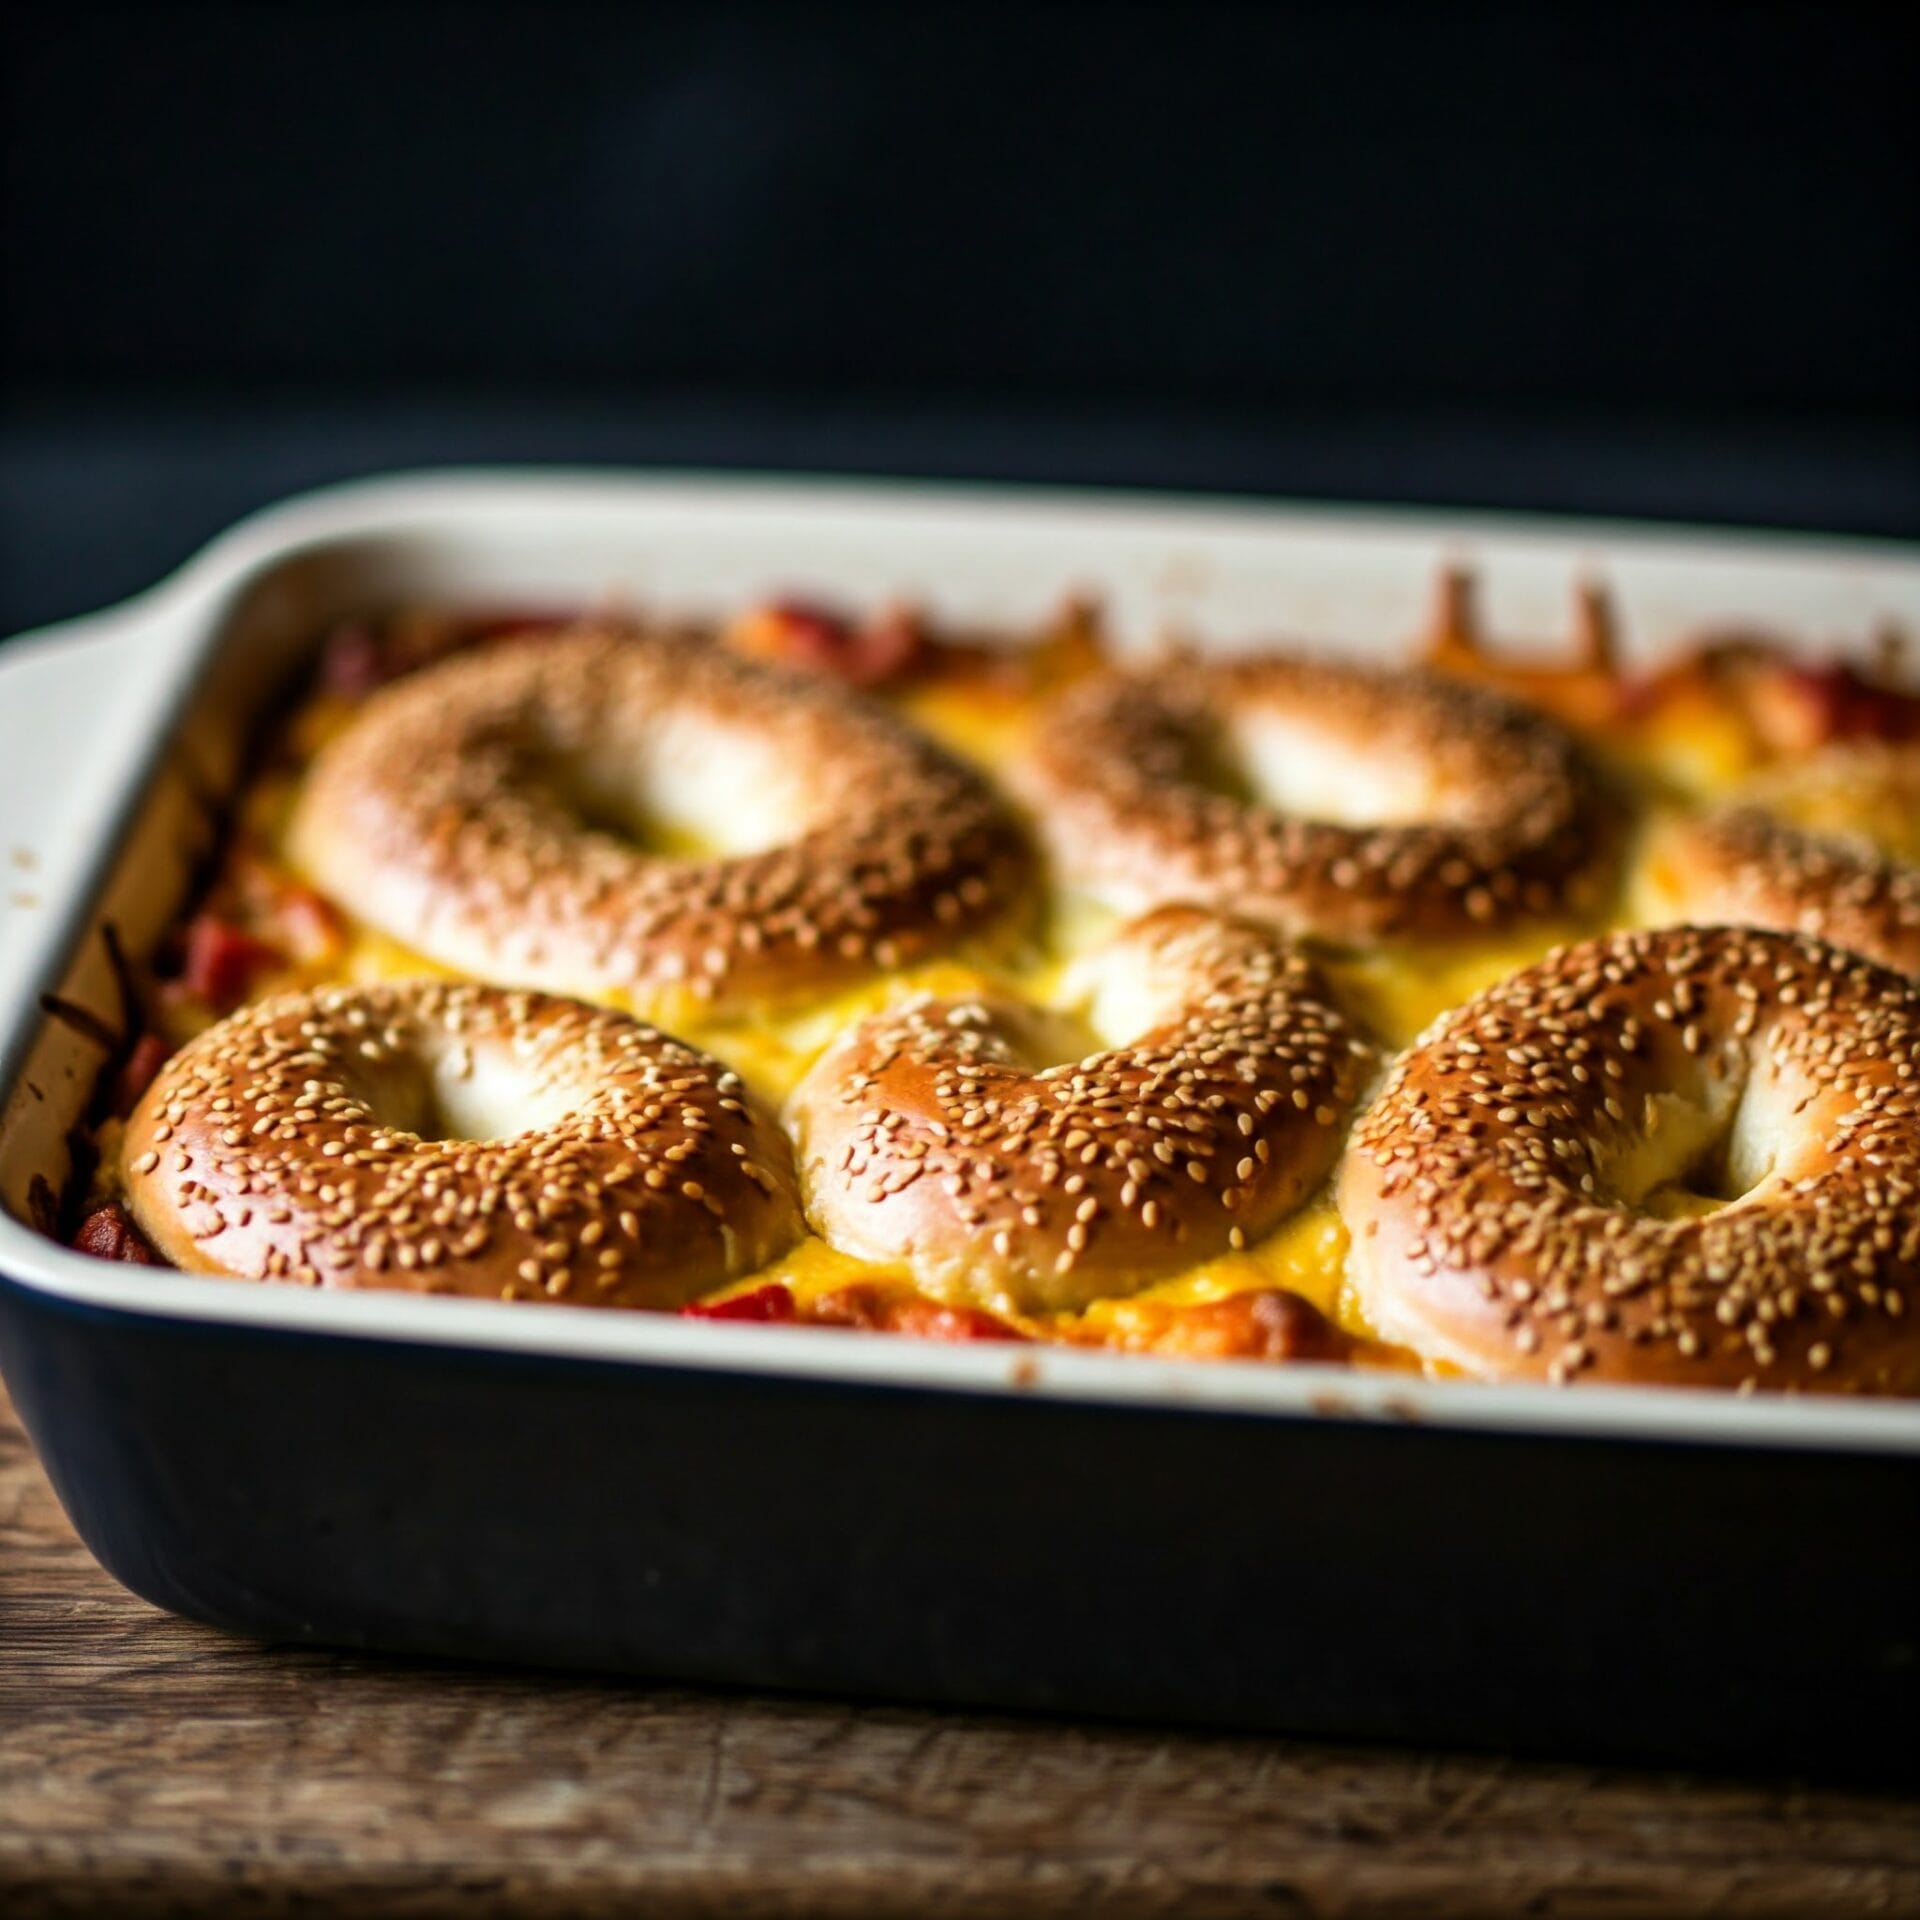
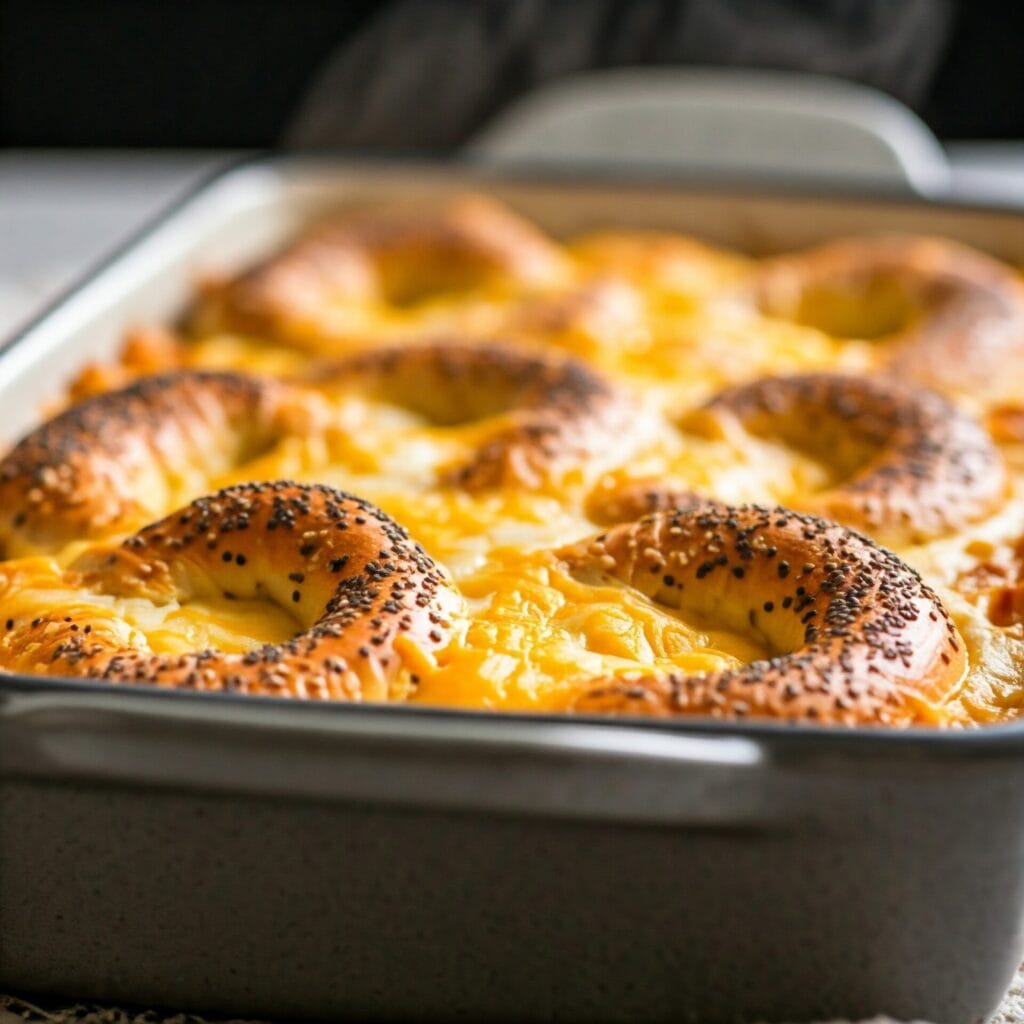
This easy bagel & cheese breakfast bake turns leftover bagels into a warm, golden, cheesy casserole. 🧀🥯 Perfect for weekend brunch, holidays, or make-ahead mornings!

If you’ve got a few leftover bagels sitting on the counter, don’t toss them—transform them into this Bagel & Cheese Breakfast Bake. This cozy, crowd-pleasing casserole layers crispy bagel pieces, fluffy eggs, and loads of melted cheese for a comforting dish that’s perfect for brunch or breakfast-for-dinner.

Not only is this recipe a smart way to reduce food waste, but it’s also incredibly easy to throw together. You can prep it in advance, let it chill overnight, and bake it fresh in the morning. As a result, it’s ideal for hosting, meal prepping, or lazy weekends when you want something warm and satisfying—without the stress.

In addition, the ingredients are flexible. Choose your favorite bagel flavor, mix up the cheeses, or even toss in cooked bacon, veggies, or sausage for extra protein and texture. No matter how you customize it, this casserole always bakes up golden and bubbly, with just the right mix of crunch and creaminess in every bite.

🔥 Why You’ll Love This Bagel & Cheese Breakfast Bake

  • 🥯 Smart use of leftover bagels – No more stale bagels going to waste!

  • 🧀 Loaded with melty cheese – Every bite is rich, gooey, and comforting.

  • 🍳 Hearty and filling – Perfect for feeding a hungry family or brunch crowd.

  • ⏱️ Make-ahead friendly – Assemble it the night before and just bake in the morning.

  • 🔁 Totally customizable – Use your favorite bagel flavors, cheeses, and mix-ins like bacon, sausage, or veggies.

  • 🧊 Freezer-safe – Prep in advance and freeze portions for easy weekday breakfasts.

  • 👩‍🍳 No special skills required – If you can chop a bagel and whisk some eggs, you’ve got this.

  • Kid-friendly, brunch-worthy, and meal-prep approved – It checks all the boxes.

🔪 How to Make Bagel & Cheese Breakfast Bake

Preheat and Prep
Start by preheating your oven to 350°F (175°C). Grease a 9×13-inch baking dish with butter or non-stick spray.

Chop and Toast the Bagels
Slice your bagels into bite-sized cubes. Toast them in the oven for 5–8 minutes until lightly crisp. This helps them hold up better in the egg mixture.

Whisk the Egg Mixture
In a large mixing bowl, whisk together eggs, milk, salt, pepper, and any optional seasonings like garlic powder or dried herbs.

Layer the Bake
Spread half the toasted bagel pieces in the bottom of your dish. Sprinkle with shredded cheese, then pour over half the egg mixture. Repeat with remaining bagels, cheese, and eggs.

Let It Soak (Optional)
For best texture, let the bake sit for 20–30 minutes—or cover and refrigerate overnight for a make-ahead breakfast.

Bake Until Golden
Bake uncovered for 35–40 minutes, or until the center is set and the top is golden brown. Let cool slightly before slicing and serving.

Serve and Customize
Serve warm, topped with fresh herbs, hot sauce, or a dollop of sour cream. It pairs perfectly with fruit, coffee, or crispy bacon on the side!

Jump to Section

📱 Follow Us 

📬 Subscribe for Updates

* indicates required

Intuit Mailchimp

Bagel and Cheese Bake

No ratings yet
A Bagel & Cheese Bake is a hearty and comforting casserole made with layers of bagels, cheese, and eggs. It's a simple yet satisfying dish that's perfect for a quick and easy breakfast or brunch.
Prep Time 25 minutes
Cook Time 30 minutes
Additional Time 8 hours
Total Time 8 hours 55 minutes
Servings: 6 people
Course: Appetizer, Breakfast
Cuisine: American, American Fusion
Calories: 310

Ingredients
  

  • ½ Lb Bacon diced
  • ½ Cup Yellow Onion chopped
  • 6 Each Bagels Plain
  • 1 Cup Cheddar Cheese shredded
  • 12 Large Eggs beaten
  • 2 Cups Milk
  • 2 tsp Parsley chopped
  • ¼ tsp Ground Black Pepper
  • ½ Cup Parmesan Cheese

Equipment

1 9x13 Baking Dish (The ideal size for layering and baking your casserole evenly.)
1 Large mixing bowl (For combining the egg mixture, bagels, and cheese.)
1 Whisk (Helps blend eggs, milk, and seasonings smoothly)
1 Chef's knife (To slice bagels and chop any mix-ins like bacon or vegetables.)
1 Cutting board (A clean, sturdy surface for prepping your ingredients.)
1 Measuring cups & spoons (Ensures consistent flavor in the egg mixture and topping)
1 Serving Spatula (For portioning and serving the baked casserole neatly.)
1 Aluminum Foil (For covering the dish if the top is browning too quickly.)

Method
 

  1. Fry the bacon and onion in a large skillet over medium-high heat until they are crisp and golden brown. Drain the excess grease on paper towels and set aside. Slice each bagel in half.
    ½ Lb Bacon, ½ Cup Yellow Onion, 6 Each Bagels
  2. Arrange 6 bagel slices in the bottom of a lightly greased 9x13 inch baking dish. Top with the cooked bacon and onion mixture, then sprinkle with Cheddar cheese. Cover with the remaining bagel slices.
    1 Cup Cheddar Cheese
  3. In a medium bowl, whisk eggs, milk, parsley, and pepper. Pour the egg mixture evenly over the bagel layers. Cover and refrigerate for at least 8 hours, or preferably overnight.
    12 Large Eggs, 2 Cups Milk, 2 tsp Parsley, ¼ tsp Ground Black Pepper
  4. Preheat the oven to 400°F. Uncover the chilled casserole dish. Bake for 25-30 minutes, or until the eggs are set and the top is lightly golden brown. Sprinkle with Parmesan cheese and serve immediately.
    ½ Cup Parmesan Cheese

Nutrition

Serving: 12ozCalories: 310kcalCarbohydrates: 13gProtein: 15gFat: 22gSaturated Fat: 9gPolyunsaturated Fat: 6gMonounsaturated Fat: 5gCholesterol: 36mgSodium: 949mgPotassium: 204mgFiber: 2gSugar: 6gVitamin A: 399IUVitamin C: 1mgCalcium: 360mgIron: 2mg

Notes

Here are some tips and tricks for making a delicious Bagel & Cheese Bake:
Ingredient Choices:
  • Bagel Variety: Experiment with different types of bagels! Everything bagels add extra flavor and texture.
  • Cheese: Use a combination of cheeses for a richer flavor profile. Try cheddar, Monterey Jack, Gruyere, or even some crumbled feta.
  • Add-ins: Get creative with add-ins! Consider chopped spinach, diced bell peppers, sautéed mushrooms, or even cooked sausage.
Preparation Tips:
  • Even Layers: Ensure even layers of bagels, cheese, and bacon for consistent baking.
  • Soaking: Letting the bagels soak in the egg mixture for a bit longer (up to 30 minutes) can help them absorb more flavor.
  • Refrigeration: Refrigerating overnight allows the flavors to meld together and makes for easier slicing.
Baking Tips:
  • Baking Time: Monitor closely towards the end of baking to prevent overcooking.
  • Golden Brown: Bake until the top is golden brown and the eggs are set.
  • Resting: Let the casserole rest for a few minutes after baking before serving to allow the flavors to settle.
Serving Suggestions:
  • Garnish: Sprinkle with fresh herbs like chives or parsley before serving.
  • Sides: Serve with fresh fruit, a side salad, or breakfast potatoes.
  • Dipping Sauce: Offer a side of salsa, hot sauce, or your favorite dipping sauce.
Leftovers:
  • Storage: Store leftovers in an airtight container in the refrigerator for up to 3-4 days.
  • Reheating: Reheat individual portions in the microwave or gently in the oven.
By following these tips and tricks, you can create a delicious and satisfying Bagel & Cheese Bake that will be a hit with your family and friends.

Tried this recipe?

Let us know how it was!

🍽️ What to Serve with Bagel & Cheese Breakfast Bake

This savory breakfast casserole is rich, cheesy, and filling—so pairing it with lighter, fresh, or tangy sides is the perfect way to balance your plate. Whether you’re hosting brunch or meal-prepping for the week, these ideas will round out your breakfast beautifully.


🥗 Fresh & Bright Sides

  • Fresh fruit salad – A mix of berries, citrus, or melons adds natural sweetness and color to the plate.

  • Sliced avocado or guacamole – Creamy and satisfying, with a dose of healthy fats.

  • Simple green salad – A light arugula or spinach salad with lemon vinaigrette adds a crisp contrast.


🥓 Savory & Hearty Add-Ons

  • Crispy bacon or sausage links – Add a salty, smoky side to the cheesy casserole.

  • Roasted breakfast potatoes – Seasoned with herbs and baked until crispy for a comforting touch.

  • Grilled tomatoes or sautéed mushrooms – A warm, savory vegetable side to round out the meal.


Drinks That Pair Well

  • Hot coffee or cold brew – Bold coffee pairs perfectly with eggs and cheese.

  • Fresh orange juice or grapefruit juice – Bright and citrusy to cut through the richness.

  • Bloody Mary or mimosa – If you’re serving brunch, these classics are always a hit!

❓ Bagel & Cheese Bake FAQ


Q: Can I make this casserole the night before?
A: Yes! In fact, letting the casserole sit overnight allows the bagels to soak up the egg mixture even better. Simply assemble, cover, and refrigerate. In the morning, bring it to room temperature for 20–30 minutes, then bake as directed.


Q: Do I need to toast the bagels first?
A: Toasting the bagels helps them stay firm and slightly crispy after baking. It’s optional, but recommended—especially if you’re using soft or fresh bagels.


Q: What kind of bagels work best?
A: Plain, everything, onion, and even whole wheat bagels work great. Avoid overly sweet ones (like cinnamon raisin) unless you’re going for a sweet-savory combo.


Q: Can I freeze leftovers?
A: Absolutely. Let the casserole cool completely, then slice into portions. Wrap tightly or store in airtight containers and freeze for up to 2 months. Reheat in the oven or microwave until warmed through.


Q: How do I reheat it without drying it out?
A: Reheat covered in a 325°F oven for 10–15 minutes, or microwave slices with a damp paper towel on top to keep moisture in.


Q: Can I add meat or vegetables?
A: Definitely! Try adding cooked bacon, sausage, ham, or sautéed veggies like spinach, onions, or mushrooms for extra flavor and texture.


Q: Is this recipe vegetarian?
A: Yes, if you skip any meat additions, this bake is totally vegetarian as-is.

Please follow and like us:
onpost_follow
fb-share-icon197
Tweet120
Pinterest20
Share 20
submit to reddit

NYC Deli Style Bacon, Egg, & Cheese Sandwich

Big Apple Classic: NYC Deli-Style Bacon, Egg & Cheese 🥓🍳🧀🗽

Start your morning the NYC way! 🗽🥓 Fluffy eggs, crispy bacon, and gooey cheese stacked on a warm roll—this iconic deli sandwich brings big city flavor in every bite.

Start your day like a true New Yorker—with a sandwich that’s just as bold and iconic as the city itself. The NYC Deli-Style Bacon, Egg & Cheese isn’t just breakfast—it’s a lifestyle. Found on nearly every street corner from Brooklyn to the Bronx, this powerhouse of flavor is wrapped in foil, handed through steamy bodega windows, and devoured on subway platforms, office desks, and front stoops across the five boroughs. Now, you can bring that unmistakable energy and flavor home to your own kitchen.

At the heart of this legendary sandwich is a soft Kaiser roll stacked with crispy bacon, fluffy scrambled or fried eggs, and a perfectly melted slice of American cheese. The result is a satisfying, gooey, crispy, and savory bite that hits all the right notes. Moreover, the combination of textures—the crunch of bacon, the creaminess of eggs, and the melty cheese—offers an experience that’s both indulgent and comforting. In addition, the roll soaks up just enough of that savory richness, giving you a breakfast that’s hearty and deeply satisfying.

Even better, this sandwich is incredibly easy to customize. Whether you prefer sausage over bacon, want to add avocado, hot sauce, caramelized onions, or even swap in a different cheese, it adapts beautifully. Because of its flexibility and quick prep time, it’s perfect for busy mornings, lazy weekends, or brunches that call for something bold and crave-worthy. And let’s be honest—once you’ve had a real NYC-style bacon, egg & cheese, breakfast just isn’t the same without it.

So grab your spatula, fire up the skillet, and bring some serious New York flavor to your table. With every bite, you’ll taste the hustle, soul, and comfort of the city that never sleeps.

🗽 Why This Sandwich Is So Iconic:

🥯 A True NYC Staple – Found in nearly every bodega, food cart, and deli across the five boroughs, it’s the unofficial breakfast of New Yorkers on the go.

🥓 Crispy, Savory Bacon – Adds that satisfying crunch and smoky flavor that makes every bite irresistible.

🍳 Fluffy Eggs, Perfectly Cooked – Whether scrambled or fried, the eggs are soft, warm, and hold everything together.

🧀 Melted American Cheese – Creamy, gooey, and just the right amount of salty, it brings all the flavors into harmony.

🥖 Toasty Roll or Kaiser Bun – Soft on the inside, slightly crisp on the outside—this sandwich base is built for bold bites.

💨 Grab-and-Go Convenience – Wrapped in foil, it’s made to be eaten on the move—whether you’re rushing to work or heading to the park.

🗣️ Bodega Culture in a Bite – It’s not just a sandwich—it’s a symbol of city life, corner store charm, and community flavor.

🔄 Endlessly Customizable – From ketchup and hot sauce to avocado and sausage swaps, there’s no wrong way to NYC your sandwich.

⏱️ Fast, Affordable, and Filling – Quick to make, easy on the wallet, and guaranteed to keep you full until lunch.

❤️ Comfort Food with Character – Each bite delivers nostalgia, flavor, and a little piece of that famous New York attitude.

🔪 How to Make a NYC Deli-Style Bacon, Egg & Cheese Sandwich

Craving that classic bodega flavor? Here’s how to recreate the ultimate New York breakfast sandwich at home—no MetroCard required.

Start with the Roll

Grab a classic kaiser roll or soft deli roll—something sturdy enough to hold all the melty goodness. Slice it in half and lightly toast or griddle both sides for that perfect golden crust.

Cook the Bacon
Fry up 3–4 slices of thick-cut bacon until crispy. Drain on paper towels, but don’t toss the bacon fat just yet—you’ll use it to flavor the eggs.

Scramble or Fry the Eggs
In the same skillet, crack 2 eggs and cook them how you like—scrambled soft or fried over medium is the NYC standard. Season lightly with salt and pepper.

Melt the Cheese
While the eggs are still hot, lay a slice (or two!) of American cheese right on top. Let it melt slightly so it’s gooey and ready to drip down the sides.

Assemble the Sandwich
On the bottom half of your toasted roll, layer on the eggs and melted cheese, followed by the bacon. Top with the other half of the roll and give it a gentle press.

Wrap & Rest (Optional but Authentic)
For that true deli feel, wrap the sandwich in foil and let it sit for 2–3 minutes. This steams the inside slightly and brings everything together.

Enjoy Like a New Yorker
Unwrap, take a big bite, and savor the bold, greasy-spoon flavors of the city that never sleeps. Add hot sauce or ketchup if you like it your way!

Jump to Section

📱 Follow Us 

📬 Subscribe for Updates

* indicates required

Intuit Mailchimp

NYC Deli Style Bacon, Egg, & Cheese Sandwich

No ratings yet
This 🗽 NYC Deli-Style Bacon, Egg & Cheese Sandwich 🥓🍳🧀 is a bold, satisfying breakfast classic made with crispy bacon, fluffy eggs, and melty American cheese on a toasted kaiser roll 🥯. Inspired by iconic New York bodegas 🚕, it’s quick ⏱️, comforting ❤️, and full of big city flavor in every bite!
Prep Time 5 minutes
Cook Time 15 minutes
Servings: 2 people
Course: Breakfast
Cuisine: American, New York City
Calories: 541

Ingredients
  

  • 4 Strips Bacon
  • 2 Kaiser Rolls sliced in half horizontally
  • 4 Tbsp Unsalted Butter divided
  • 4 Large Eggs lightly whisked
  • 4 Slices American Cheese
  • 1 Ketchup optional for serving

Equipment

1 Nonstick Skillet or Griddle ( A flat-top griddle gets you closest to the true deli vibe.)
1 Spatula (For flipping eggs, scrambling, and assembling with ease.)
1 Cutting board (Ideal for prepping and assembling without the mess.)
1 Bread Knife (For slicing the roll cleanly without tearing it.)
1 Foil (Wrap the sandwich for that classic NYC steam-and-go feel. It also keeps it warm.)
1 Small mixing bowl (If you prefer to scramble the eggs before cooking.)
1 Tongs (Helpful for flipping and draining bacon with precision.)

Method
 

  1. Arrange the bacon strips in a single layer in a large skillet. Cook the bacon over medium-high heat, turning the slices occasionally so they cook evenly, until they reach your desired level of crispiness. This should take about 10 minutes. Once the bacon is cooked, transfer the slices to a plate lined with paper towels to drain off any excess grease.
    4 Strips Bacon
  2. In a large nonstick pan or griddle, melt 2 tablespoons of butter over low heat. Once the butter is melted, place the Kaiser rolls, cut sides down, in the pan. Make sure the rolls are arranged in a single layer so they toast evenly. Toast the rolls until they are lightly golden brown and slightly crispy, about 3 minutes. Remove the rolls from the pan and set them aside.
    4 Tbsp Unsalted Butter, 2 Kaiser Rolls
  3. For each sandwich, melt 1 tablespoon of butter in the skillet over medium heat. Pour half of the whisked eggs into the pan. Cook the eggs as if you were making an omelet, using a spatula to push the cooked egg to the side of the pan and allowing the uncooked egg to flow underneath. Once the eggs are mostly cooked but still slightly runny on top, layer 1 slice of cheese, 2 slices of bacon, and another slice of cheese onto one half of the cooked egg. Using the spatula, gently fold the other half of the egg over the top of the cheese and bacon. Carefully slide the folded egg onto a toasted Kaiser roll. Wrap the sandwich in aluminum foil to steam it and melt the cheese. Repeat this process with the remaining sandwich ingredients.
    4 Tbsp Unsalted Butter, 4 Large Eggs, 4 Slices American Cheese
  4. For a beautiful presentation, slice the sandwich in half diagonally. Serve with a side of ketchup for dipping or spreading.
    1 Ketchup

Nutrition

Serving: 16ozCalories: 541kcalCarbohydrates: 33gProtein: 14gFat: 40gSaturated Fat: 23gPolyunsaturated Fat: 3gMonounsaturated Fat: 10gTrans Fat: 1gCholesterol: 102mgSodium: 1050mgPotassium: 127mgFiber: 1gSugar: 3gVitamin A: 1104IUVitamin C: 0.1mgCalcium: 505mgIron: 2mg

Notes

📝 Recipe Notes:

  • 🥓 Bacon Tips: Cook the bacon until crisp but not burnt. Drain it well on paper towels to avoid a greasy sandwich.
  • 🍳 Egg Style Matters: Scrambled eggs are most common in NYC delis, but you can also use fried eggs (over-medium works best to avoid runny yolks soaking the roll).
  • 🧀 Cheese Choice: American cheese is traditional for its meltability and flavor, but feel free to try cheddar, pepper jack, or Swiss.
  • 🥯 Roll Options: A Kaiser roll is the NYC standard, but brioche buns, Portuguese rolls, or bagels work great too!
  • 🔥 Don’t Skip the Toast: Lightly toasting the roll adds structure and prevents sogginess—especially if you’re wrapping it in foil.
  • 🌯 Wrap It Like a Deli Pro: Wrap your sandwich in foil after assembling and let it sit for 2–3 minutes. This helps the cheese melt and the flavors meld together like the real deal.
  • 🌶️ Spice It Up: Add hot sauce, sriracha, or a dash of cayenne to your eggs for extra heat.
  • 🍅 Optional Add-ons: Tomato slices, avocado, sautéed onions, or even hash browns can turn this into a loaded breakfast sandwich.
  • ⏱️ Make-Ahead Friendly: Cook the bacon and eggs ahead of time and reheat gently for busy mornings—just assemble fresh for best texture.
  • 🍽️ Serve With: Pair it with iced coffee, hash browns, or fresh fruit for a full NYC-style breakfast experience.

Tried this recipe?

Let us know how it was!

🥗 What to Serve with a NYC Bacon, Egg & Cheese Sandwich

🥔 Classic Sides:

  • Hash Browns or Home Fries – Crispy, golden potatoes make the perfect savory partner.

  • Tater Tots – Bite-sized and fun, they add crunch to every plate.

  • Bagel Chips or Kettle Chips – For that authentic NYC deli crunch on the side.

  • Fruit Salad – A fresh, light contrast to the richness of the sandwich.

🥤 Drinks:

  • Iced Coffee or Hot Coffee (Light & Sweet!) – No NYC breakfast is complete without a deli-style coffee.

  • Orange Juice or Apple Juice – A refreshing, bright pairing to balance out the salty bacon and cheese.

  • Bodega-Style Iced Tea – Sweet, cold, and classic—grab a bottle or brew your own.

🍩 Sweet Options:

  • Black & White Cookie – A New York classic to finish off your breakfast in style.

  • Muffins or Danish Pastries – For a sweet and satisfying brunch combo.

  • Cinnamon Roll or Coffee Cake – Rich, moist, and made for sharing.

🧂 Extras & Upgrades:

  • Pickles or Deli Pickled Veggies – For a salty, tangy bite on the side.

  • Hot Sauce or Sriracha – Add a spicy kick if you’re feeling bold.

  • Extra Cheese or Avocado – Want to level up? These are top-tier sandwich add-ons.

FAQ: NYC Deli-Style Bacon, Egg & Cheese Sandwich

Q: What kind of bread is best for a bacon, egg & cheese sandwich?
A: A classic Kaiser roll is the traditional NYC choice—it’s soft inside, slightly crusty outside, and sturdy enough to hold all the fillings. Brioche buns, bagels, or Portuguese rolls also work great.


Q: Should I scramble or fry the eggs?
A: It’s up to you! Most New York delis use soft scrambled eggs, but fried eggs (over-medium or over-hard) are also popular. Just avoid overly runny yolks if you’re wrapping it to-go.


Q: Can I use a different cheese?
A: Yes! While American cheese is the classic choice for its melty texture, you can substitute cheddar, Swiss, pepper jack, or whatever you love—just make sure it melts well.


Q: What’s the best way to cook the bacon?
A: Pan-frying until crispy is the go-to method. For a less greasy option, you can bake it in the oven at 400°F for 15–20 minutes on a foil-lined sheet.


Q: Can I make this sandwich ahead of time?
A: Yes—but for best results, assemble it fresh. You can pre-cook the bacon and eggs, then reheat and assemble quickly in the morning. Wrapping it in foil helps keep it warm.


Q: Is ketchup or hot sauce typical?
A: In true NYC fashion—yes, both! Many people add ketchup, hot sauce, or both. Don’t be afraid to ask for it “SPK” (Salt, Pepper, Ketchup) like a local.


Q: Can I make this sandwich vegetarian?
A: Definitely! Swap the bacon for veggie bacon, avocado, or sautéed mushrooms. Keep the eggs and cheese, or go fully plant-based with tofu scramble and vegan cheese.


Q: What’s the NYC deli secret?
A: It’s all about the foil wrap and rest time! After assembling, wrap the sandwich in foil and let it sit for a few minutes. This allows the cheese to melt and everything to meld into a hot, steamy, flavorful bite.

Please follow and like us:
onpost_follow
fb-share-icon197
Tweet120
Pinterest20
Share 20
submit to reddit

Chicken Ranch Tacos

🌮 Chicken Ranch Tacos: Creamy, Crispy, Crowd-Pleasing

These Chicken Ranch Tacos are loaded with juicy chicken, tangy ranch, and your favorite toppings for a fast, flavorful meal everyone will love. 🌮🔥

🌮 Zesty, Creamy, Ranchy Goodness – In a Taco

Are you looking for a quick and flavorful way to elevate taco night? If so, these Chicken Ranch Tacos are exactly what you need. As a result of combining juicy shredded chicken, cool and creamy ranch, and fresh toppings, they’re bold, satisfying, and simple to prepare. In particular, the contrast of warm tortillas with crisp lettuce and tangy sauce makes every bite memorable.

Furthermore, this recipe is easy to customize. For example, you can add sliced jalapeños for heat, toss in avocado for creaminess, or use lettuce wraps for a low-carb option. Because of this flexibility, it’s perfect for both picky eaters and adventurous food lovers.

In addition, these tacos are ideal for meal prep or weeknight dinners. Thanks to the use of simple ingredients and minimal cooking, you’ll have dinner on the table in no time. Therefore, if you’re short on time but still want something crave-worthy, Chicken Ranch Tacos are the answer. As a bonus, they’re guaranteed to be a crowd-pleaser.

🐔 Protein-Packed Chicken

🥬 Fresh & Crunchy Toppings

🧄 Zesty Ranch Flavor

⏱️ 30-Minute Meal

🌮 Taco Night Favorite

🔥 Optional Heat Kick

🧀 Cheesy & Creamy

🍽️ Family-Approved

🔪 How to Make Chicken Ranch Tacos

Step 1: Prepare the Chicken
In a bowl, toss the cooked, shredded or chopped chicken with ranch dressing. For extra flavor, mix in taco seasoning or ranch seasoning if desired.

Step 2: Warm the Tortillas
Heat tortillas in a dry skillet over medium heat for about 30 seconds per side, or microwave them in a damp towel for 20–30 seconds until soft and pliable.

Step 3: Build Your Tacos
Spoon the ranch-coated chicken into each tortilla. Top with shredded cheese, lettuce, tomatoes, red onions, and jalapeños.

Step 4: Add Finishing Touches
Drizzle with more ranch or a spicy sauce if you like. Garnish with chopped cilantro and a squeeze of fresh lime juice.

Step 5: Serve & Enjoy
Serve immediately while warm. Great with tortilla chips, rice, or a crisp side salad.

Jump to Section

📱 Follow Us 

📬 Subscribe for Updates

* indicates required

Intuit Mailchimp

Chicken Ranch Tacos

No ratings yet
Creamy, Zesty, Totally Craveable 🌮🐔🥗Juicy chicken tossed in ranch seasoning, loaded into warm tortillas, and topped with all your favorite fixings. These tacos are quick, flavorful, and a guaranteed hit on any night! 🎉🔥
Prep Time 15 minutes
Cook Time 10 minutes
Servings: 6 people
Course: Appetizer, Main Course
Cuisine: American, American Fusion
Calories: 520

Ingredients
  

  • ½ Cup Ranch Dressing
  • ¼ Cup Sour Cream
  • 1 oz Taco Seasoning Mix divided
  • 1 Tbsp Salsa mild chunky
  • 2 Cups Rotisserie chicken shredded
  • 8 Corn Tortillas 6 inch
  • 1 Cup Lettuce Shredded
  • 1 Large Tomato chopped
  • 4 Large Green Onions sliced
  • 4 oz Black Olives slices
  • 1 Large Avocado peeled, pitted and diced (optional)
  •  
    1 Cup Colby-Monterey Jack Cheese shredded

Equipment

1 Non Stick Pan (Flip it, fry it, love it 🍳🧼🔥Cook without the mess! This non-stick pan makes flipping, searing, and cleanup a total breeze—no sticking, no scrubbing.)
1 Cutting board (Chop it like it’s hot 🔪🥕🍗A sturdy cutting board keeps your prep clean, safe, and smooth—veggies, meats, and everything in between. Kitchen must-have!)
1 Chef's knife (Slice, dice, and chop like a pro 🔪🌿🍗A sharp chef’s knife makes prep fast and easy—perfect for herbs, meats, and veggies. Balanced, reliable, and ready for anything.)

Method
 

  1. In a small bowl, combine the ranch dressing, sour cream, 1 teaspoon of the taco seasoning, and salsa. Stir well to ensure all the ingredients are evenly distributed. Cover the bowl and refrigerate the sauce until you're ready to serve the tacos.
    ½ Cup Ranch Dressing, ¼ Cup Sour Cream, 1 oz Taco Seasoning Mix, 1 Tbsp Salsa
  2. In a separate bowl, add the cooked chicken and the remaining taco seasoning. Toss the chicken to coat it evenly in the seasoning. Cover the bowl loosely with wax paper or plastic wrap to prevent splattering. In a skillet, heat oil over medium heat. Add chicken and remaining taco seasoning; cook until heated through.
    2 Cups Rotisserie chicken, 1 oz Taco Seasoning Mix
  3. Warm the tortillas in a dry skillet over medium heat for about a minute on each side, or until they are soft and pliable. This will make them easier to fold and prevent them from cracking.
    8 Corn Tortillas
  4. Place a warm tortilla on a plate. Add a generous scoop of the seasoned chicken to the center of the tortilla. Top the chicken with your desired toppings, such as shredded lettuce, diced tomatoes, chopped green onions, sliced olives, diced avocado, shredded cheese, and a spoonful of the creamy ranch dressing mixture.
    1 Cup Lettuce, 1 Large Tomato, 4 Large Green Onions, 4 oz Black Olives, 1 Large Avocado, 1 Cup Colby-Monterey Jack Cheese

Nutrition

Serving: 10ozCalories: 520kcalCarbohydrates: 27gProtein: 31gFat: 34gSaturated Fat: 10gPolyunsaturated Fat: 7gMonounsaturated Fat: 10gCholesterol: 109mgSodium: 1315mgPotassium: 430mgFiber: 7gSugar: 4gVitamin A: 1350IUVitamin C: 13mgCalcium: 228mgIron: 2mg

Notes

Ingredients:
  • Chicken: Use cooked chicken. Leftovers or rotisserie chicken are great options.
  • Tortillas: Use your favorite type of tortillas, such as corn or flour.
  • Ranch Dressing: Use your favorite brand of ranch dressing or make your own.
  • Sour Cream: Sour cream adds a creamy tanginess to the sauce. You can substitute with Greek yogurt for a lighter option.
  • Taco Seasoning: Use a store-bought packet or make your own blend of spices.
  • Salsa: Choose your favorite type of salsa, from mild to spicy.
  • Toppings: Common toppings include shredded lettuce, diced tomatoes, chopped green onions, sliced olives, diced avocado, and shredded cheese.
Cooking Tips:
  • Prepare the Sauce: Combine the ranch dressing, sour cream, taco seasoning, and salsa in a bowl. Cover and refrigerate until ready to serve.
  • Season and Heat the Chicken: Toss the cooked chicken with taco seasoning and heat it in a skillet with a drizzle of oil until warmed through and fragrant.
  • Warm the Tortillas: Warm the tortillas in a dry skillet over medium heat to make them pliable and prevent them from cracking.
  • Assemble the Tacos: Fill the tortillas with the seasoned chicken and your favorite toppings.
  • Don't Overcrowd: When cooking the chicken in the skillet, avoid overcrowding the pan. This will ensure that the chicken heats evenly and doesn't steam.
Serving Suggestions:
  • Garnish: Garnish with extra chopped cilantro, a squeeze of lime juice, or a dollop of guacamole.
  • Sides: Serve with rice, beans, or a side salad for a complete meal.
  • Presentation: Arrange the tacos on a platter or in a basket for a fun and casual presentation.
Variations:
  • Spicy: Add more hot sauce or jalapeños to the chicken or the sauce.
  • Vegetarian: Use a plant-based chicken substitute or omit the chicken altogether and add more vegetables to the tacos.
  • Different Proteins: Try using ground beef, pork, or shrimp instead of chicken.
With these tips, you'll be able to create delicious and satisfying Ranch Chicken Tacos that are perfect for any occasion!

Tried this recipe?

Let us know how it was!

🧂 What to Serve with Chicken Ranch Tacos

These tacos are bold, creamy, and bursting with flavor — but they’re even better when paired with the right sides. Whether you’re putting together a taco night for family or serving a crowd, here are some quick and tasty ideas to round out your meal:

🌽 Fresh & Crunchy

  • Mexican Street Corn (Elote): Sweet corn with cotija, mayo, lime, and chili powder — messy, spicy, and irresistible.

  • Simple Corn Salsa: A refreshing mix of corn, red onion, lime, and cilantro. Bonus: it doubles as a topping and a side.

  • Southwest Coleslaw: Creamy slaw with cabbage, carrots, and lime to balance the richness of the ranch.

🍚 Hearty & Filling

  • Cilantro Lime Rice: A zesty rice side that complements ranch flavors and soaks up any leftover sauce.

  • Refried Beans or Black Beans: Warm, comforting, and budget-friendly — a classic for taco night.

  • Taco Pasta Salad: Add ranch-flavored pasta salad to echo the main flavor theme.

🥑 Dips & Add-Ons

  • Homemade Guacamole: Creamy avocado with lime and garlic brings freshness to every bite.

  • Queso Dip + Chips: Because cheese makes everything better.

  • Pico de Gallo or Chunky Salsa: Bright, acidic, and perfect to spoon over your tacos or scoop up with chips.

🍹 Drinks to Pair

  • Pineapple Agua Fresca: Refreshing, light, and fruity — perfect for cooling down.

  • Sparkling Limeade or Margaritas: If you’re celebrating, go all out.

Chicken Ranch Tacos FAQ

Q: Can I make these tacos ahead of time?
A: Yes! You can prep the chicken filling up to 3 days in advance. Store it in an airtight container and warm it up when ready to assemble. For best results, add toppings just before serving.


Q: What kind of chicken works best?
A: Shredded rotisserie chicken, grilled chicken breasts, or baked thighs all work well. Just make sure it’s cooked and seasoned before adding ranch dressing.


Q: Can I use store-bought ranch?
A: Absolutely. Bottled ranch works great, but you can also use homemade for a fresher flavor. For a twist, try chipotle ranch or avocado ranch.


Q: Are these tacos spicy?
A: Not by default, but you can easily turn up the heat with jalapeños, hot sauce, or spicy ranch.


Q: What sides go well with these tacos?
A: Serve them with tortilla chips, Mexican rice, black bean salad, or a simple corn salsa.

Please follow and like us:
onpost_follow
fb-share-icon197
Tweet120
Pinterest20
Share 20
submit to reddit