Chorizo And Bean Stew

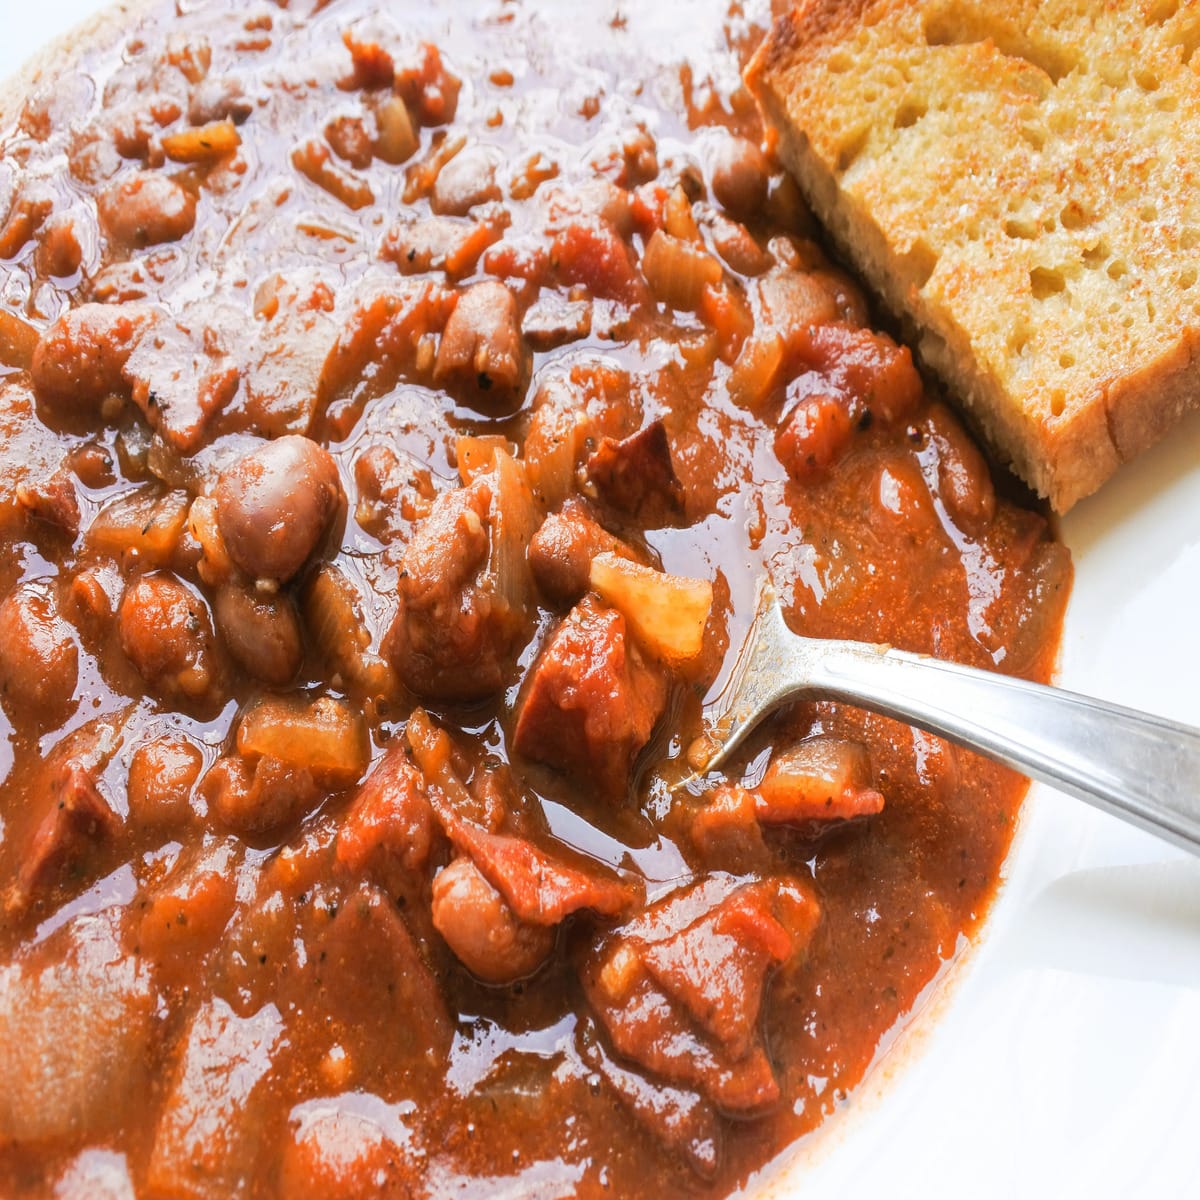
Dive into a hearty bowl of chorizo and bean stew, where smoky paprika-spiked chorizo sausage mingles with tender, creamy beans in a rich, tomato-based broth. Each spoonful bursts with savory goodness, accented by pops of sweetness from bell peppers and a hint of earthy warmth from aromatics like garlic and onion. It’s a rustic, comforting dish that’s perfect for chilly nights, served with crusty bread for dipping into the flavorful broth.
Chorizo and Bean Stew

No ratings yet
This hearty stew is a symphony of smoky chorizo, tender beans, and vibrant vegetables simmered in a rich tomato broth. Each spoonful bursts with flavor - savory chorizo, earthy beans, and a touch of sweetness from the tomatoes. It's a comfort food classic with a Spanish twist, perfect for a cozy night in or a flavorful potluck dish.
Prep Time 5 minutes
Cook Time 25 minutes
Servings: 6
Course: Dinner, Lunch, Main Course, Side Dish
Cuisine: Spanish
Calories: 254

Ingredients
  

  • 1 tbsp Canola oil
  • 1 Yellow Onion chopped
  • ½ med Red Bell Pepper chopped
  •  
    ½ med Green bell pepper chopped
  • 5 Garlic minced
  •  
    1 Carrot cubed
  •  
    ½ lb Cured Spanish chorizo
  •  
    1 lb Red kidney beans canned
  •  
    ½ cup Tomato sauce
  •  
    1 Chicken bouillon
  • 2 tsp Oregano dried
  • ½ tsp Black pepper ground
  • ½ tsp Salt
  •  
    ½ tsp Saffron
  •  
    1 tsp Apple cider vinegar
  • 2 ½ cups Water
  • ½ cup Parsley roughly chopped

Method
 

  1. In a large Dutch oven, heat olive oil. Add onions, peppers, garlic, and carrots to the pot and saute until tender, about 4-5 minutes.
  2. Add chorizo and beans until heated through. Stir in tomato sauce, chicken bouillon, oregano, salt, black pepper, saffron, vinegar, and water.
  3. Bring to a simmer and cook for about 15 minutes. About 1 minute before it's ready, stir in parsley.
  4. Serve with crusty French bread and a garnish of parsley, if desired.

Nutrition

Serving: 12OzCalories: 254kcalCarbohydrates: 24gProtein: 14gFat: 12gSaturated Fat: 4gPolyunsaturated Fat: 1gMonounsaturated Fat: 2gTrans Fat: 0.01gCholesterol: 24mgSodium: 544mgPotassium: 512mgFiber: 7gSugar: 3gVitamin A: 2710IUVitamin C: 33mgCalcium: 59mgIron: 4mg

Notes

  • Use Spanish, rather than Mexican, chorizo for this recipe.
  • This chorizo and bean stew is easy to adapt to your tastes. You can add in whatever veggies you have in your fridge, and shredded chicken is a welcome addition. You can also make it more spicy if you like, by adding cayenne, chili flakes, or a diced red chili pepper.
  • If making ahead of time, let the stew cool completely before storing.

Tried this recipe?

Let us know how it was!

Related Recipes

With this list of ingredients, you’re well on your way to a delicious and flavorful chorizo and bean stew! Here’s a breakdown of what you can expect:

Base:

  • Canola oil: Used for sauteing the vegetables and chorizo, adding a touch of fat for flavor and browning.

Vegetables:

  • Spanish onion, red and green bell peppers, garlic, carrot: These classic aromatics provide a foundation of savory flavors and pops of sweetness from the peppers.

Protein:

  • Cured Spanish chorizo: The star of the show! It adds smokiness, paprika spice, and a rich meaty depth to the stew.

Beans:

  • Canned red kidney beans: A convenient and protein-packed base for the stew. They’ll add creaminess and texture.

Flavor Boosters:

  • Tomato sauce: Creates a rich, slightly sweet tomato base for the stew.
  • Chicken bouillon, dried oregano, black pepper, salt: Seasoning essentials that build layers of savory flavor.
  • Saffron: A luxurious spice that adds a subtle floral and earthy note.
  • Apple cider vinegar: A touch of acidity to balance the richness and bring out the other flavors.

Image Gallery

While there’s no single documented origin story for chorizo and bean stew, its history likely reflects a combination of factors:

  • Preservation techniques: Chorizo, a sausage made for preserving meat, has roots in various cultures throughout history. Spain’s tradition of “matanza,” the winter slaughter and processing of pigs, would’ve naturally led to using sausages like chorizo in stews to stretch ingredients.
  • Humble ingredients: Beans, a cheap and plentiful source of protein and fiber, have been a staple food for centuries across Europe. Combining them with preserved meats would create a hearty and satisfying meal.
  • Spanish influence: The smoky paprika used in chorizo arrived in Spain from the Americas in the 16th century. This key ingredient, along with the widespread availability of beans and pork, makes Spain a prime candidate for the development of this type of stew.

It’s likely similar stews with regional variations existed throughout Spain for centuries. Today, variations of chorizo and bean stew are found in Spain and Latin America, reflecting the influence of Spanish cuisine in those regions.

If you tried this recipe please share with us. Be as detailed as possible in your descriptions.

Your Details

Recipe Essentials

One ingredient per line
One instruction per line

Recipe Details

Recipe Tags

Separate multiple tags with a comma.
For example: Italian, American

[DISPLAY_ULTIMATE_SOCIAL_ICONS]

Our Advertisers.

We utilize advertisements on our website as a means to generate income.  By doing so, we can secure the necessary funding to develop the recipes that you have the opportunity to experience.  If you would like to support us, please visit our advertiser page and consider clicking on the provided link when making online purchases.  Your support is greatly appreciated.


Advertisers

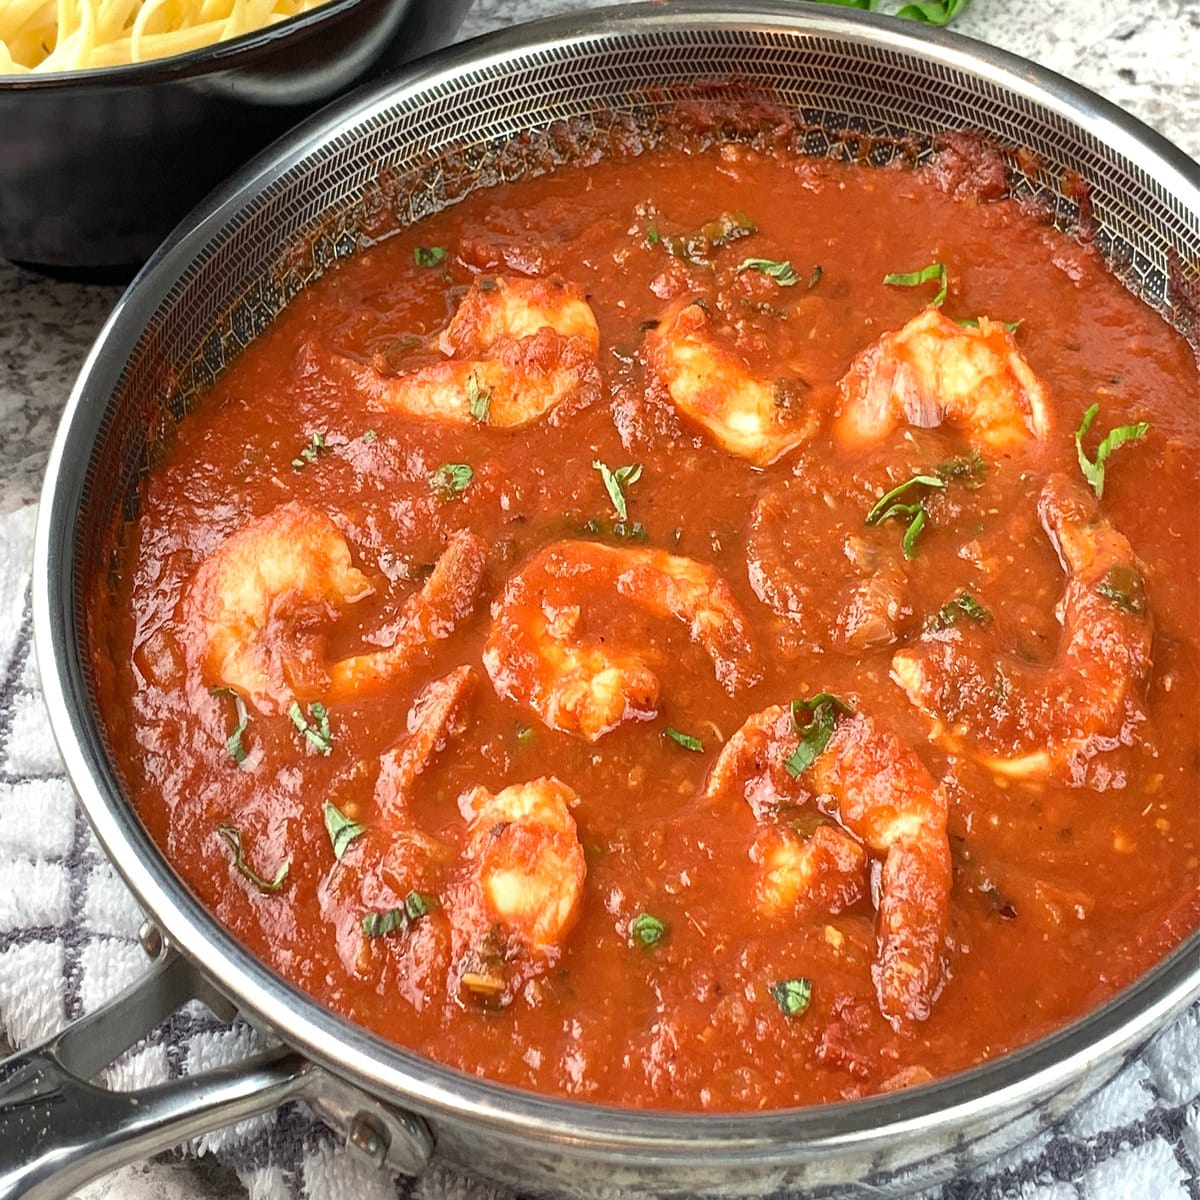
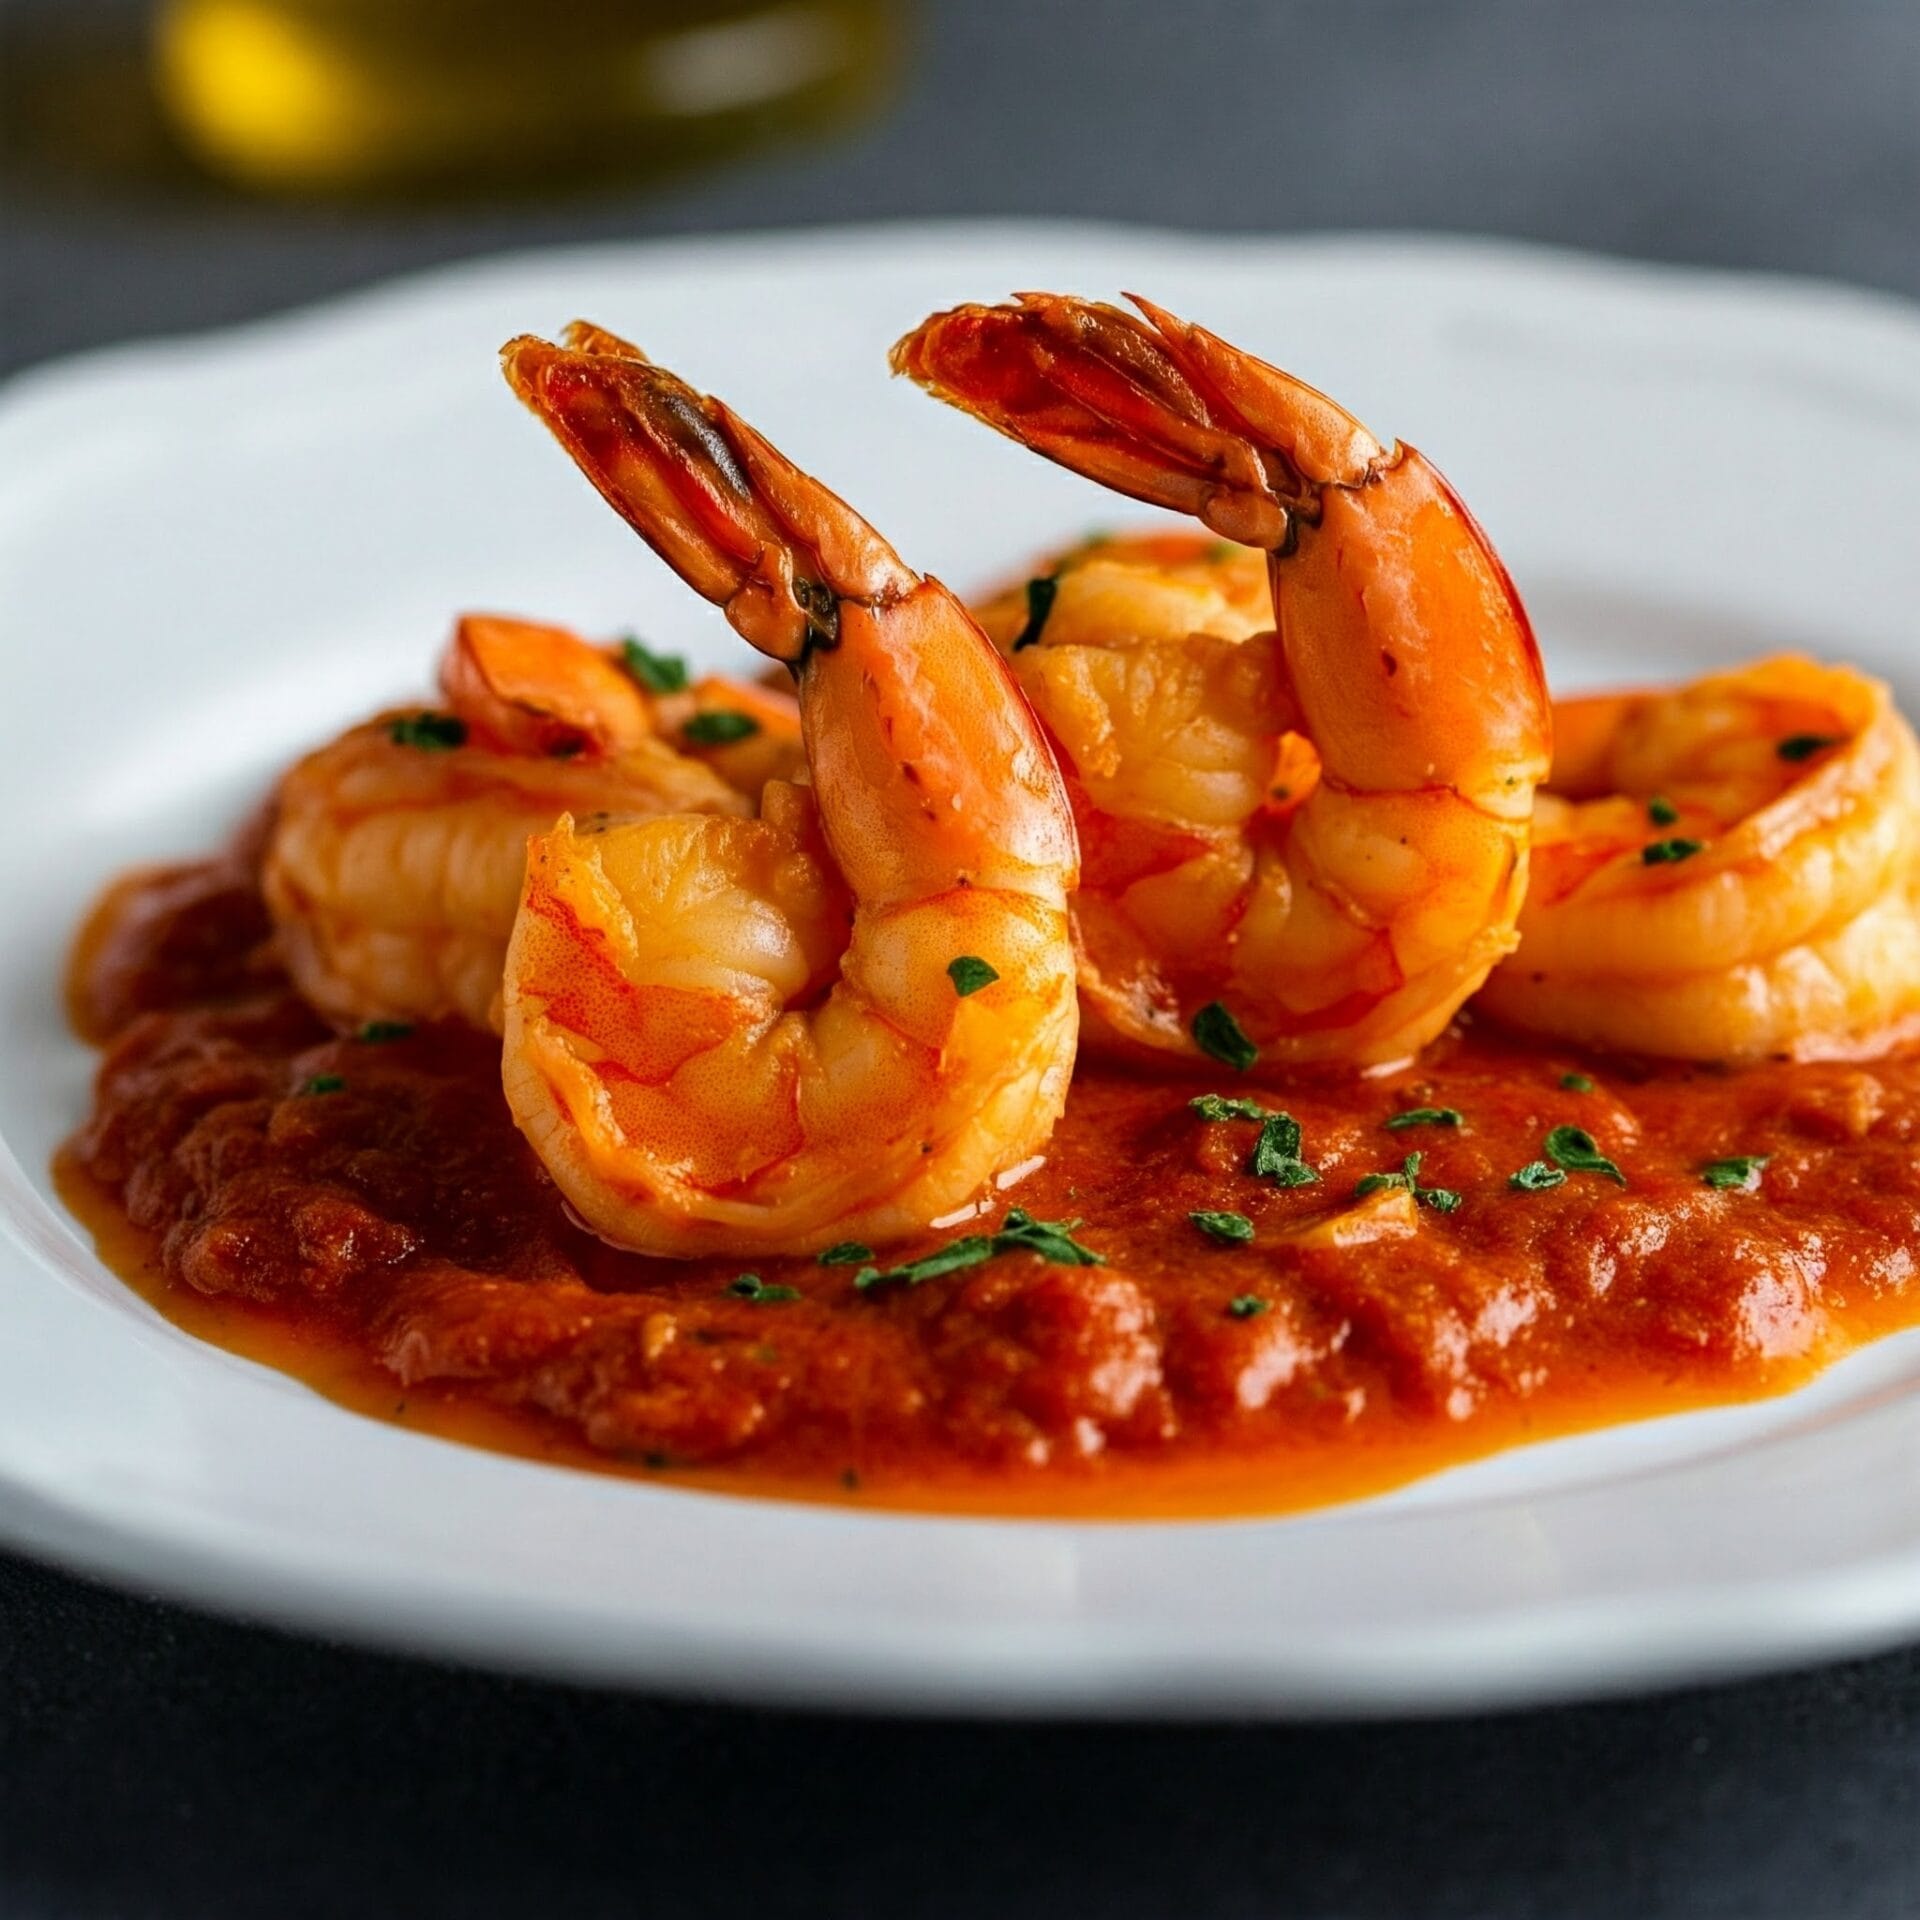
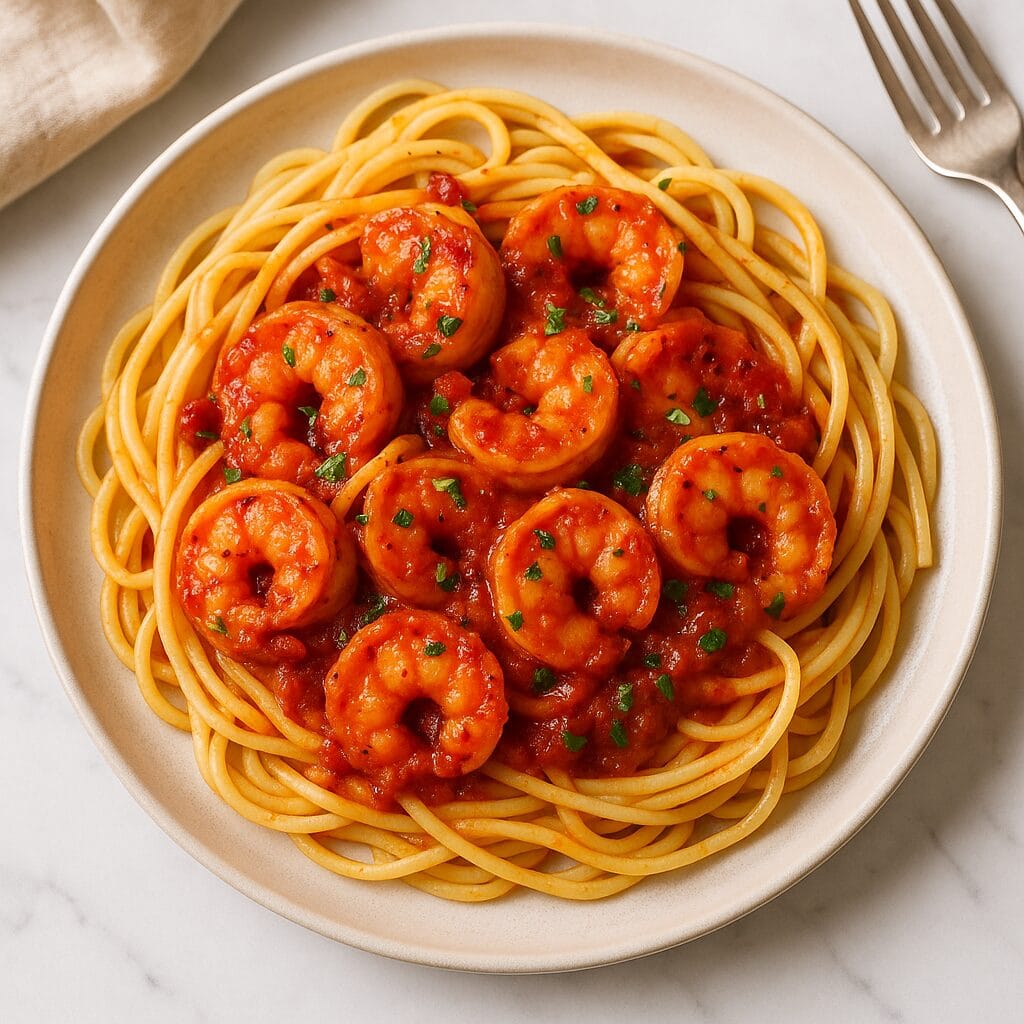
Shrimp Fra Diavolo

Shrimp Fra Diavolo

Turn up the heat with this bold and fiery Shrimp Fra Diavolo, a classic Italian-American seafood dish that’s fast, flavorful, and full of attitude. Juicy shrimp are sautéed until tender, then simmered in a spicy tomato sauce infused with garlic, chili flakes, and white wine — creating a rich, complex flavor with just the right kick.

Tossed over perfectly cooked linguine, this dish is as elegant as it is easy, making it a go-to for date nights, weeknight dinners, or any night you’re craving something with serious flavor. With no shrimp tails to slow you down, every bite is pure, saucy satisfaction.

Whether you’re a spice lover or just looking to elevate your pasta game, Shrimp Fra Diavolo delivers a restaurant-quality experience right at home.

Shrimp Fra Diavolo

No ratings yet
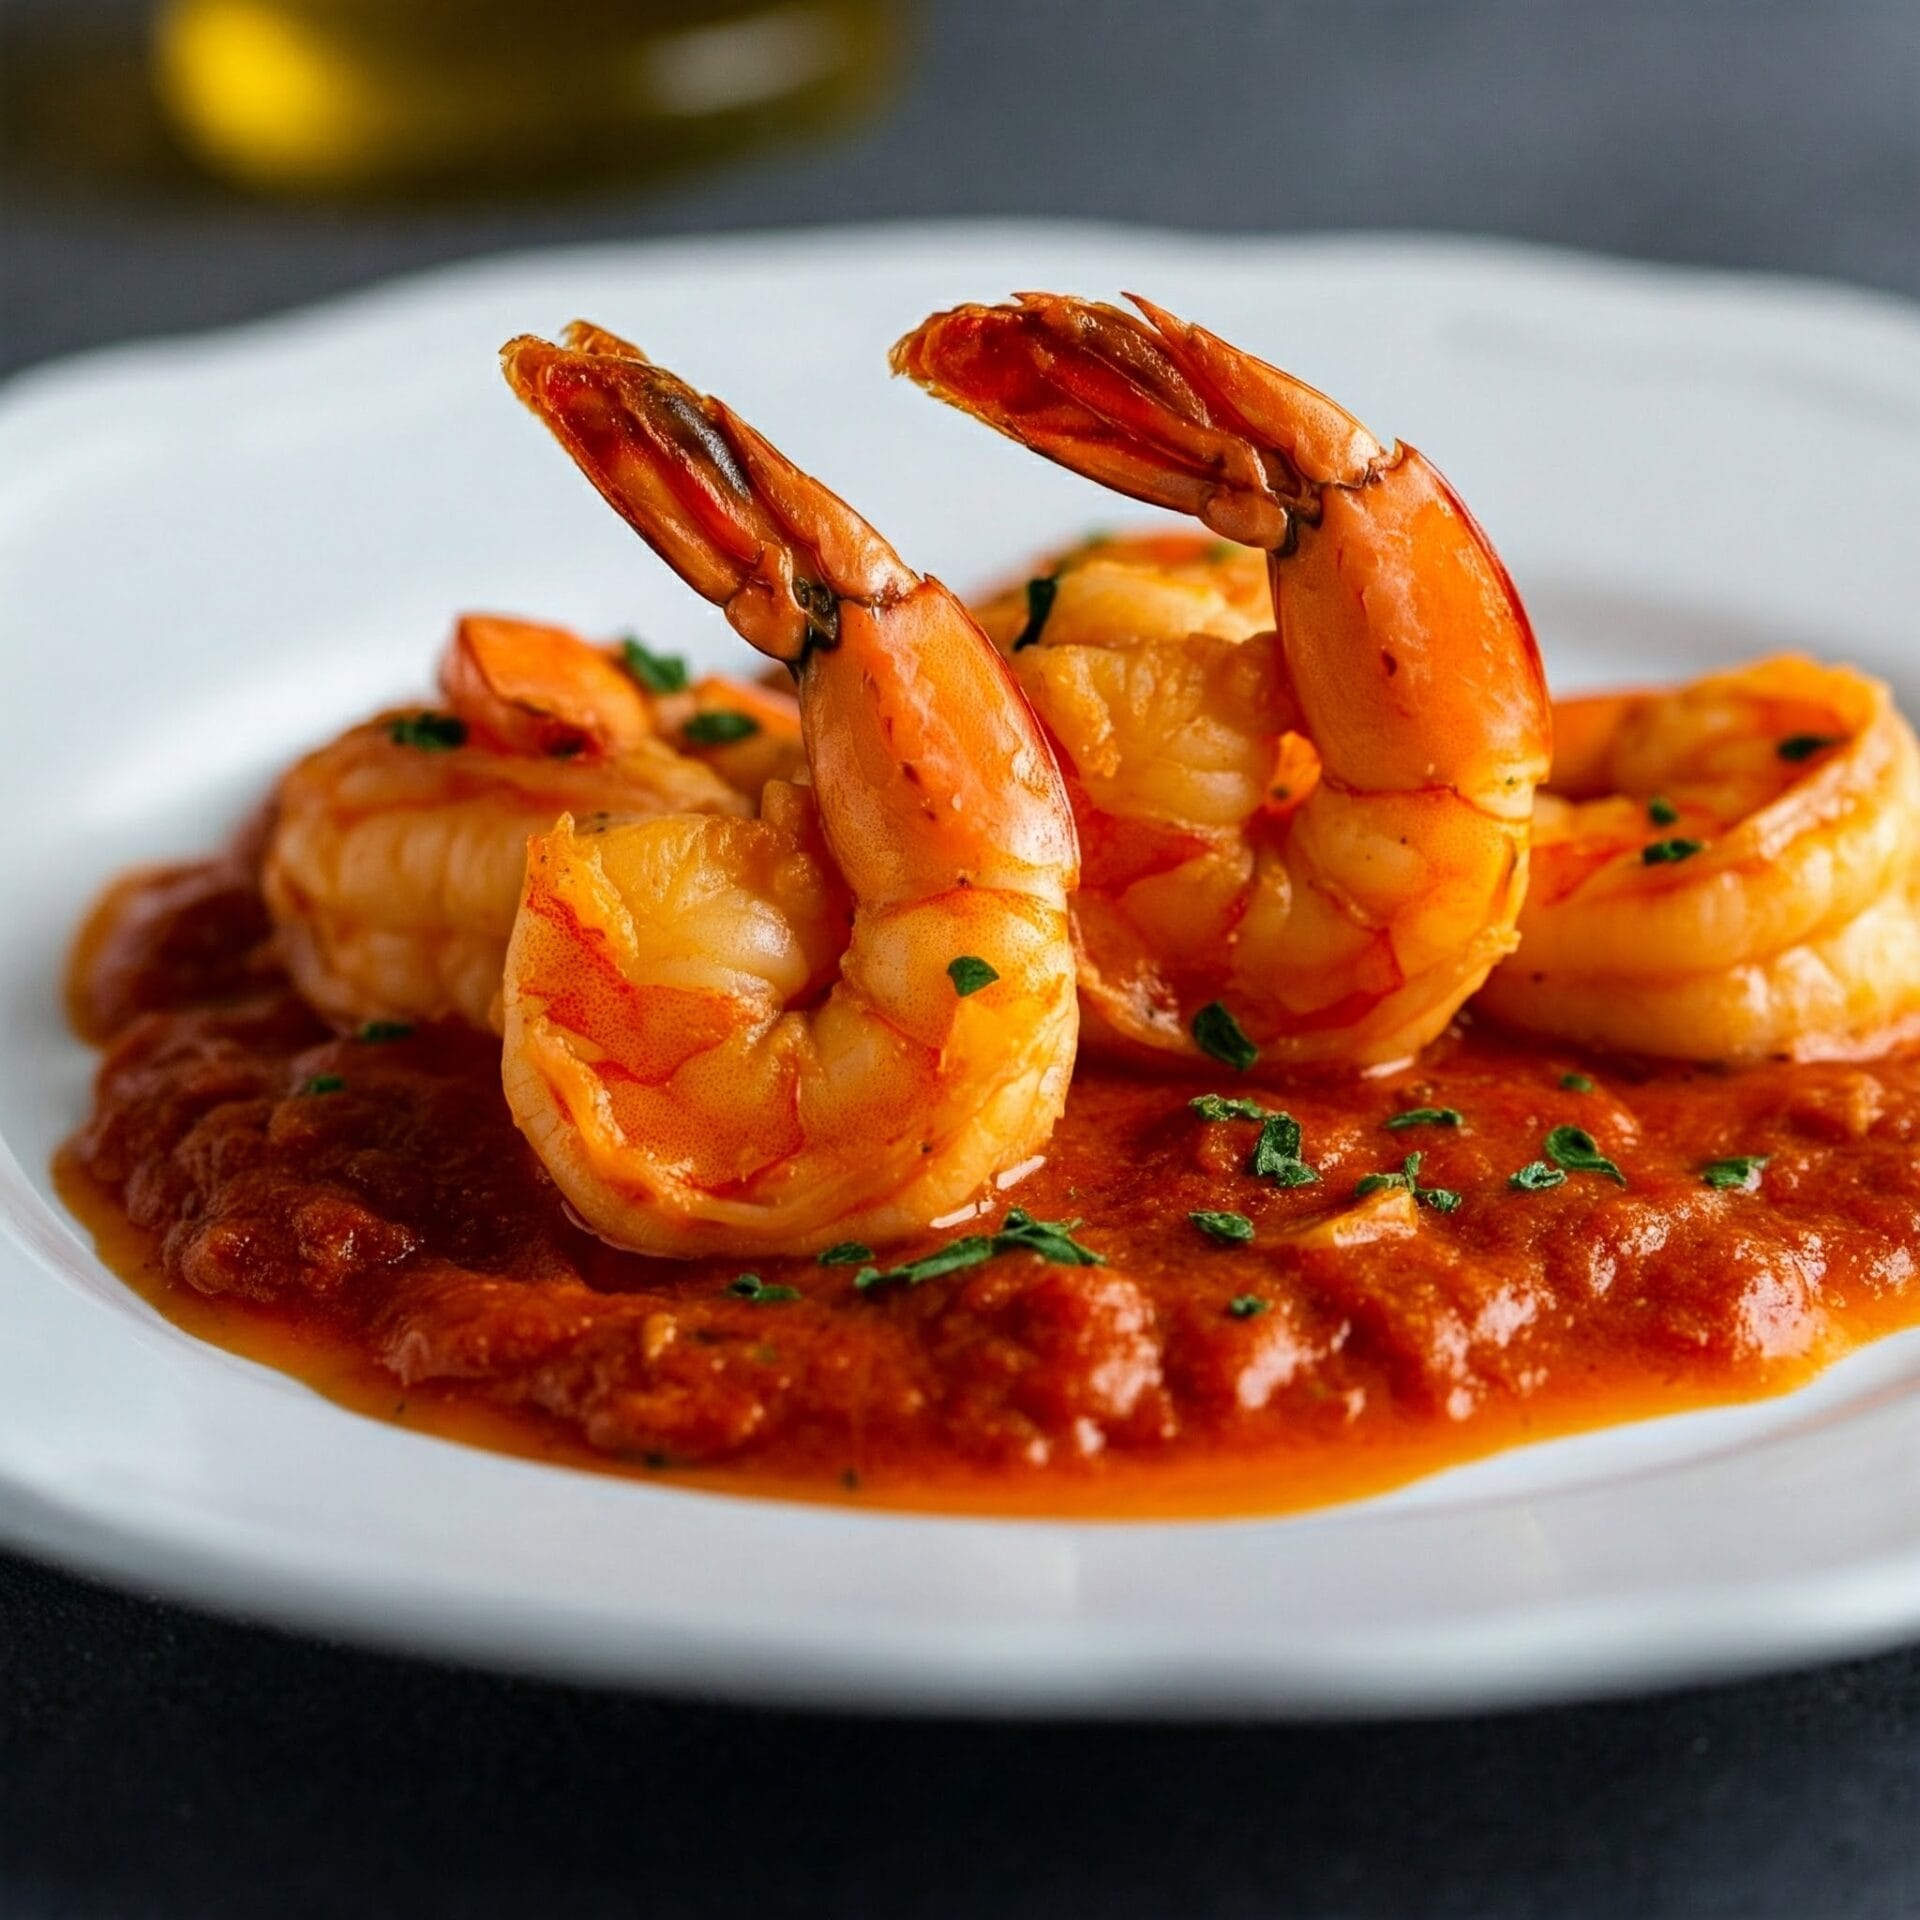
Shrimp fra diavolo is like a party in your mouth! Plump, juicy shrimp get all dressed up in a vibrant tomato sauce that's got a kick. A hint of spice from red pepper flakes and Aleppo pepper adds a little devilish heat, while fresh herbs like parsley and basil bring a cool balance. It's a flavor explosion that's perfect for a quick and satisfying weeknight meal!
Prep Time 15 minutes
Cook Time 25 minutes
Servings: 10
Course: Dinner, Main Course
Cuisine: Italian, Italian American
Calories: 115

Ingredients
  

  • 1 Lb. Extra Large Shrimp (16-20 is the size). Peeled & Deveined, tail on.
  • 2 tbsp Olive Oil
  • 1 tsp Crushed Red Pepper Flakes
  • 1 tsp Salt
  •  
    1 Pinch Aleppo Pepper Flakes
  • ½ Large Yellow Onion Sliced
  • 3 Cloves Garlic Minced
  • ½ tsp Dried Oregano
  • 1 Cup White Wine
  •  
    Cups Crushed Tomatoes
  • 2 tbsp Parsley Flat Leaf
  • 2 tbsp Dried Basil Fresh and slice thin

Method
 

  1. Gather all ingredients and have ready.
  2. In a bowl, combine red pepper flakes, salt, and Aleppo pepper flakes. Drizzle with olive oil and toss to create a spiced oil mixture. Add the shrimp and toss thoroughly to coat them. Let the shrimp marinate for 10-15 minutes for deeper flavor, or skip this step and cook them right away.
  3. Heat a large skillet over high heat until very hot. Add the shrimp in a single layer and cook undisturbed for about 2 minutes until the bottoms are nicely browned. Flip the shrimp and cook for another minute or so on the other side. Transfer the cooked shrimp to a bowl.
  4. Reduce the heat to medium and add a pinch of salt to the same skillet. Add the onions and cook, stirring occasionally, for 2-4 minutes until softened and slightly golden.
  5. Stir in the garlic and oregano, cooking for 15-30 seconds to release their fragrance. Pour in the white wine and bring it to a boil, scraping up any browned bits from the bottom of the pan with a wooden spoon.
  6. Add the crushed tomatoes and reduce the heat to medium-low. Simmer the sauce for 10-15 minutes, stirring occasionally, until it thickens slightly and the flavors come together.
  7. Return the cooked shrimp and any juices from the bowl back to the skillet with the tomato sauce. Gently heat everything through for 2-4 minutes until the shrimp are warmed through.
  8. Turn off the heat. Stir in the chopped parsley and basil for freshness. Season the sauce with additional salt, red pepper flakes, and Aleppo pepper flakes to your taste preference.

Nutrition

Serving: 12OzCalories: 115kcalCarbohydrates: 10gProtein: 8gFat: 4gSaturated Fat: 0.5gPolyunsaturated Fat: 0.4gMonounsaturated Fat: 2gTrans Fat: 0.004gCholesterol: 57mgSodium: 810mgPotassium: 498mgFiber: 2gSugar: 5gVitamin A: 842IUVitamin C: 11mgCalcium: 49mgIron: 2mg

Tried this recipe?

Let us know how it was!

Related Recipes

Ingredients

  • 1 lb extra-large shrimp (16–20 count), peeled & deveined

  • 2 tbsp olive oil

  • 1 tsp red pepper flakes

  • Pinch Aleppo pepper flakes (optional for smoky heat)

  • ½ large yellow onion, sliced

  • 3 cloves garlic, minced

  • ½ tsp dried oregano

  • 1 cup white wine

  • 1½ cups crushed tomatoes

  • 2 tbsp flat-leaf parsley

  • 2 tbsp fresh basil, thinly sliced

Image Gallery Shrimp Fra Diavolo

Storage & Leftovers

Refrigerator:
Let the dish cool completely, then store in an airtight container in the refrigerator for up to 2–3 days. For best quality, store the shrimp and sauce separately from the pasta if possible.

Freezer:
Freezing is not recommended for this dish. Shrimp can become rubbery when thawed and reheated, and cream or wine-based sauces may separate. If you must freeze, do so without the pasta and use within 1 month.

Reheating:

  • Stovetop (preferred): Gently reheat shrimp and sauce in a skillet over medium-low heat until just warmed through. Avoid boiling or overcooking the shrimp.

  • Microwave: Reheat in short bursts (30–45 seconds) on medium power to prevent overcooking. Stir gently between bursts.

Best Enjoyed:
Shrimp Fra Diavolo is best served fresh, but leftovers can still be delicious if reheated carefully to maintain the shrimp’s texture and flavor.

Please follow and like us:
onpost_follow
fb-share-icon197
Tweet120
Pinterest20
Share 20
submit to reddit

Subscribe for New Recipes

* indicates required

Intuit Mailchimp

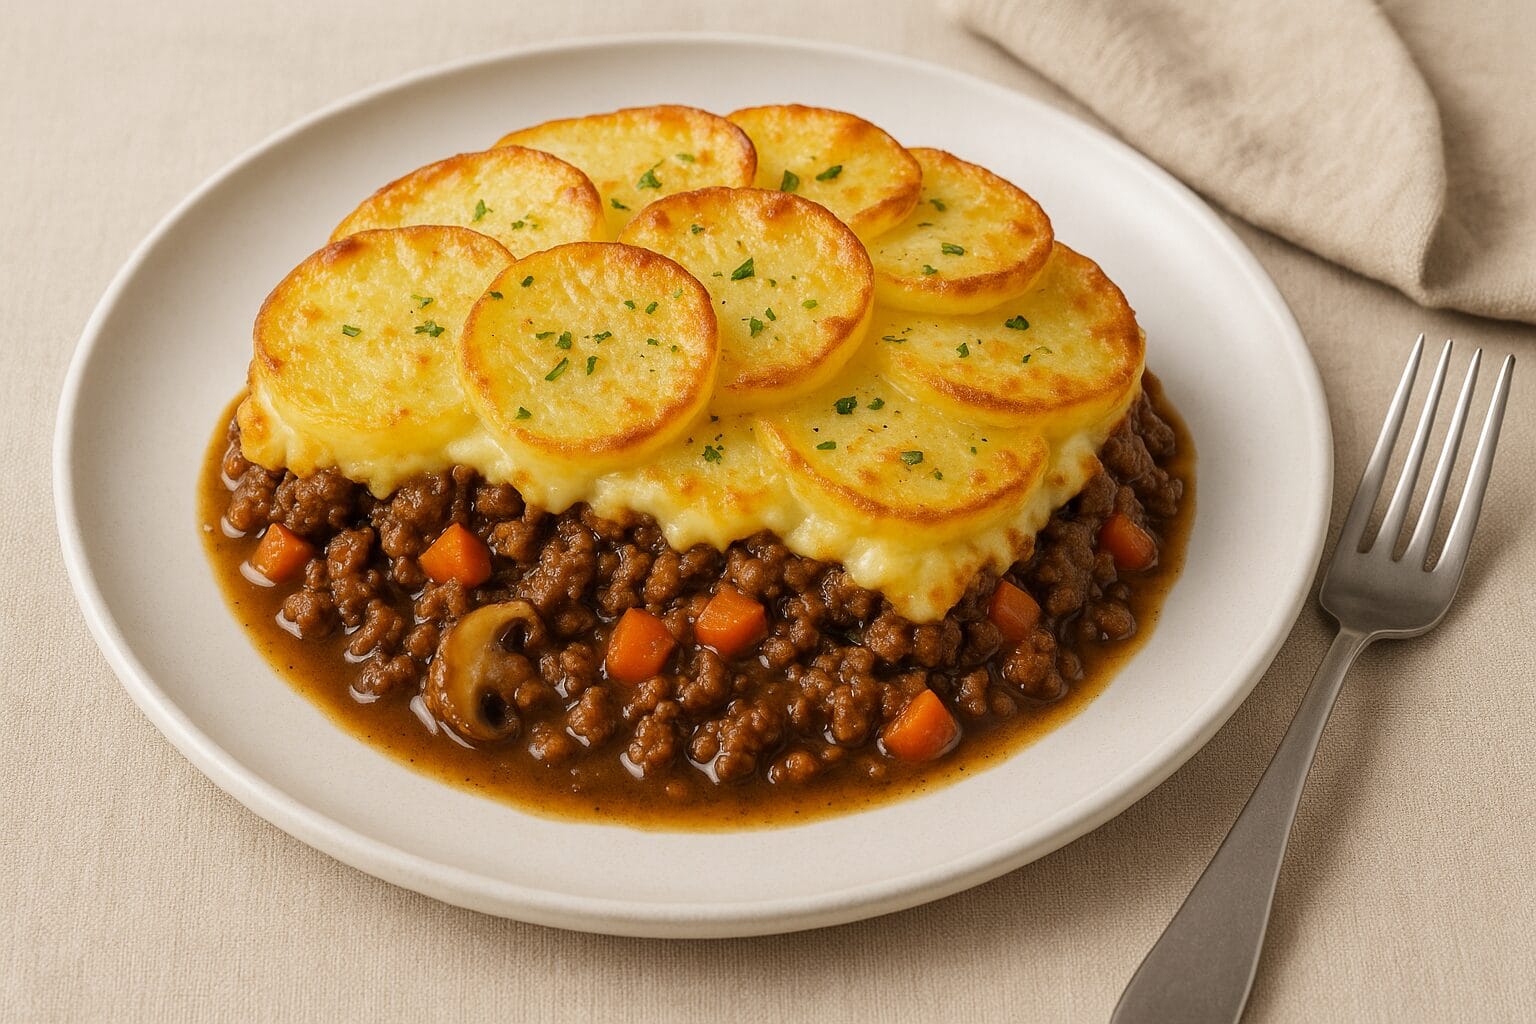
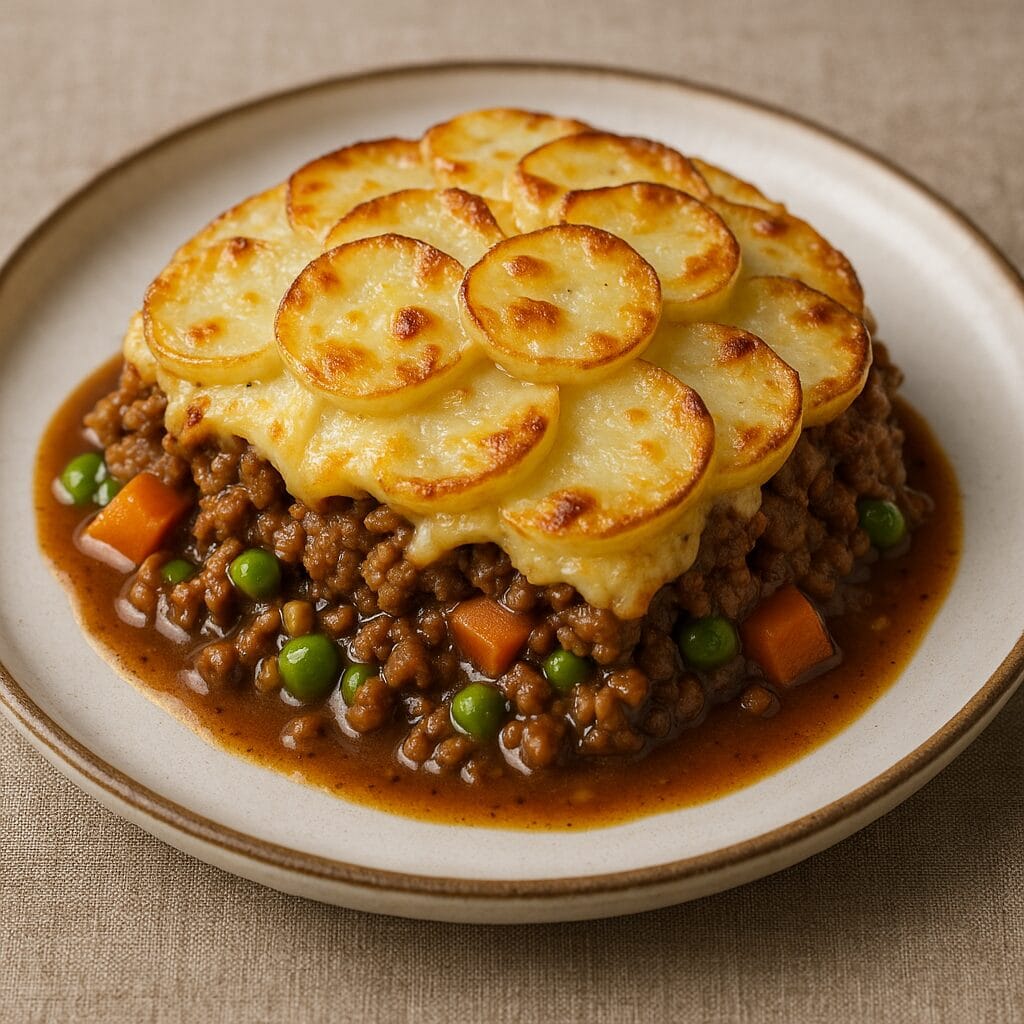
Cottage Pie With Scalloped Potato Topping

Cottage Pie With Scalloped Potato Topping

This Cottage Pie with Scalloped Potato Topping is a delicious twist on the traditional favorite. A rich and savory base of seasoned ground beef, tender carrots, peas, and mushrooms simmers in a hearty gravy, forming the foundation of this comforting dish. But what truly sets it apart is the golden scalloped potato topping — thinly sliced, layered with creamy cheese, and baked until bubbling and beautifully crisp on top.

Each bite delivers a perfect balance of meaty warmth and cheesy, creamy potatoes, making it ideal for cozy dinners, family gatherings, or a satisfying weeknight meal. It’s comfort food with a little extra elegance, served hot and straight from the oven.

Cottage Pie with Scalloped Potato Topping

No ratings yet
Shepherd's Pie gets a luxurious upgrade with a scalloped potato au gratin topping. This hearty dish combines savory ground meat and vegetables with a creamy, cheesy potato gratin for a comforting and flavorful meal.
Prep Time 20 minutes
Cook Time 35 minutes
Servings: 6 People
Course: Dinner, Main Course
Cuisine: British
Calories: 709

Ingredients
  

  • 1 tbsp Olive Oil
  • 1 lbs. Ground Beef
  • 2 Large Yellow Onion Diced
  • 4 Large Carrots Diced
  • 1 tsp Salt
  •  
    1 Cup Red Wine A little over a cup is better.
  • Cup All-Purpose Flour
  • 1 Cup Beef Stock
  • 1 tbsp Worcestershire Sauce Optional
  •  
    1 tbsp Brown Sugar Optional
  • 1 tbsp Thyme
  • ½ lb. Button Mushrooms Sliced 1/4 inch thick
  •  
    3 lbs. Yukon Gold Peeled and sliced 1/8 inch thick
  •  
    ½ Cup Cream
  • 2 Cup Cheddar Cheese

Method
 

Make The Filling
  1. Get your cooking started by placing a large skillet or Dutch oven over medium heat. Add a drizzle of oil and let it get hot. Once shimmering, toss in the ground meat and crumble it with a spoon as it cooks. Sauté for 5 minutes, stirring occasionally, until nicely browned all over. Remove the browned meat from the pan and set it aside on a plate.
  2. Add the chopped onions and carrots to the same pan along with 1 teaspoon of salt. Sauté for about 7 minutes, stirring occasionally, until they begin to soften and turn translucent.
  3. In the meantime, grab a small mixing bowl and whisk together the flour and wine until you have a smooth paste. Next, whisk in the beef stock to combine everything well.
  4. Now, return the browned ground meat to the pan with the softened onions and carrots. Pour in the prepared wine mixture along with Worcestershire sauce, sugar, and thyme. Bring the entire mixture to a boil, stirring frequently until it thickens slightly.
  5. Add the mushrooms to the pan and season everything with salt and pepper to taste. Cover the pan with a lid and simmer for 45 minutes, allowing the flavors to meld and the mushrooms to cook through.
Scalloped Potato Topping
  1. Grab a large pot and fill it with water. Add a good pinch of salt and bring it to a boil over medium-high heat.
  2. Once the water is boiling, add your sliced potatoes. Gently stir them a bit and let them cook for 4-5 minutes. You want them to be fork-tender, but not mushy.
  3. To prevent the potatoes from overcooking, drain them immediately in a colander. You can even rinse them with cold water to stop the cooking process completely.
  4. Let the potatoes sit in the colander for a few minutes to drain any excess water. Then, spread them out on a plate or baking sheet to cool down completely before using them in your potato salad. This will help prevent them from getting mushy in the final dish.
Building Your Creamy Potato Layers
  1. Get things started by preheating your oven to 425°F (220°C).
  2. Pour your delicious meat filling into a 2-quart baking dish. This will be the base for your creamy potato masterpiece.
  3. Now, it's time for the star of the show - the potatoes! Arrange the sliced potatoes in a single layer over the meat filling. Think of overlapping shingles on a roof - each potato slice should slightly overlap the one before it, creating a neat and even layer.
  4. Once your first potato layer is complete, drizzle half of the heavy cream over it. Season generously with salt and pepper to taste. This creamy layer will add richness and help the potatoes cook through evenly.
  5. Repeat steps 3 and 4 to create another layer of overlapping potatoes and then top it off with the remaining heavy cream. Season again with salt and pepper.
  6. Finally, for that irresistible cheesy goodness, arrange your shredded cheese evenly over the top cream layer.
  7. Now that your potato gratin is beautifully assembled, place the baking dish on top of a rimmed baking sheet (just in case of any bubbling over) and pop it into the middle rack of your preheated oven. Bake for about 30 minutes, or until the top is golden brown and the gratin is bubbling merrily.

Nutrition

Serving: 12ozCalories: 709kcalCarbohydrates: 60gProtein: 31gFat: 38gSaturated Fat: 18gPolyunsaturated Fat: 2gMonounsaturated Fat: 13gTrans Fat: 1gCholesterol: 115mgSodium: 865mgPotassium: 1685mgFiber: 8gSugar: 10gVitamin A: 8761IUVitamin C: 55mgCalcium: 369mgIron: 5mg

Notes

Gentle Handling of Cooked Potatoes:
Once cooked, potatoes can become delicate. To preserve their texture and prevent them from breaking apart, avoid pulling them when separating. Instead, employ a gentle sliding motion. This technique will maintain the integrity of the potato pieces, resulting in a more aesthetically pleasing and texturally superior final dish.
Utilizing a Rimmed Baking Sheet:
When baking any dish, particularly those with a tendency to bubble or overflow, using a rimmed baking sheet is a prudent choice. This simple step can significantly reduce cleanup time. The raised edges of the rim effectively capture any spills or drips that may occur during the baking process, preventing them from burning onto the bottom of your oven. This not only makes cleaning easier but also helps maintain a cleaner and more professional kitchen environment.

Tried this recipe?

Let us know how it was!

Related Recipes

Ingredients

  • For the Hearty Filling:

    • 1 Tbsp oil
    • 2 lbs. ground beef or lamb (your preference!)
    • 2 onions, diced (about 2 cups)
    • 4 carrots, diced (about 2 cups)
    • 1 tsp salt
    • 1 generous cup of red wine (add a splash more if you like!)
    • 1/3 cup flour
    • 1 cup beef stock
    • 1 Tbsp Worcestershire sauce (optional, for a deeper savory flavor)
    • 1 Tbsp brown sugar (optional, for a touch of sweetness)
    • 1 Tbsp fresh thyme (chopped)
    • 1/2 lb. mushrooms, sliced 1/4 inch thick
  • For the Creamy Scalloped Potato Topping:

    • 3 lbs. Yukon Gold potatoes (peeled and thinly sliced, about 1/8 inch thick)
    • 1/2 cup cream
    • 2 cups shredded cheddar cheese

Image Gallery Cottage Pie with Scalloped Potato Topping

Storage & Leftovers

Please follow and like us:
onpost_follow
fb-share-icon197
Tweet120
Pinterest20
Share 20
submit to reddit

Subscribe for New Recipes

* indicates required

Intuit Mailchimp

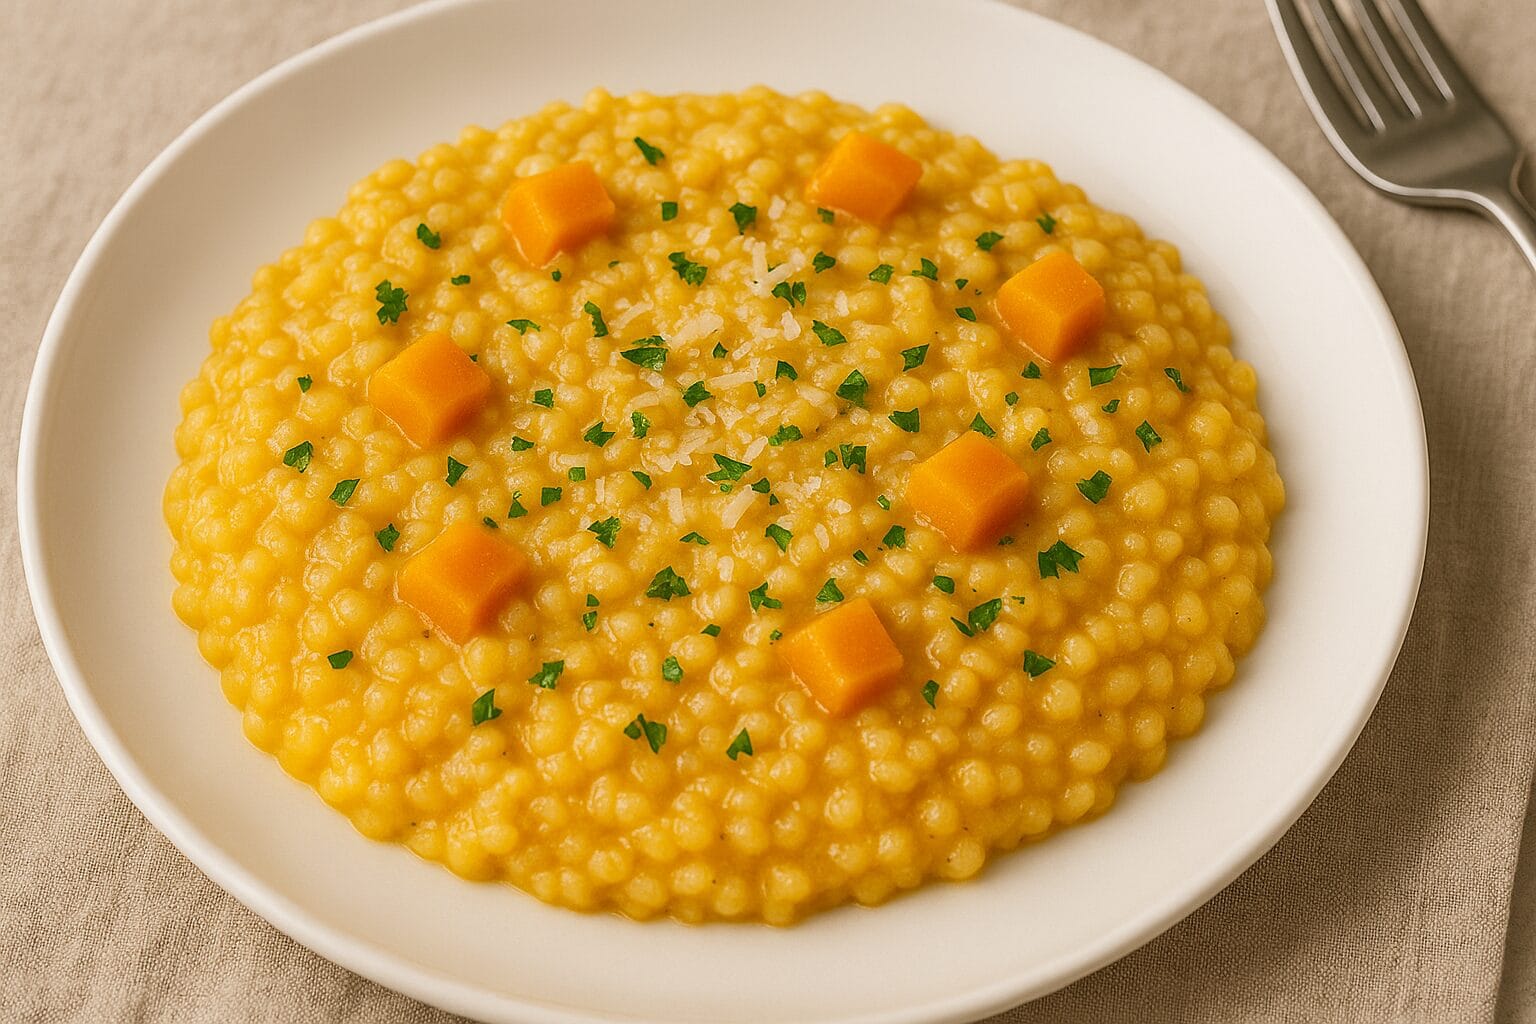
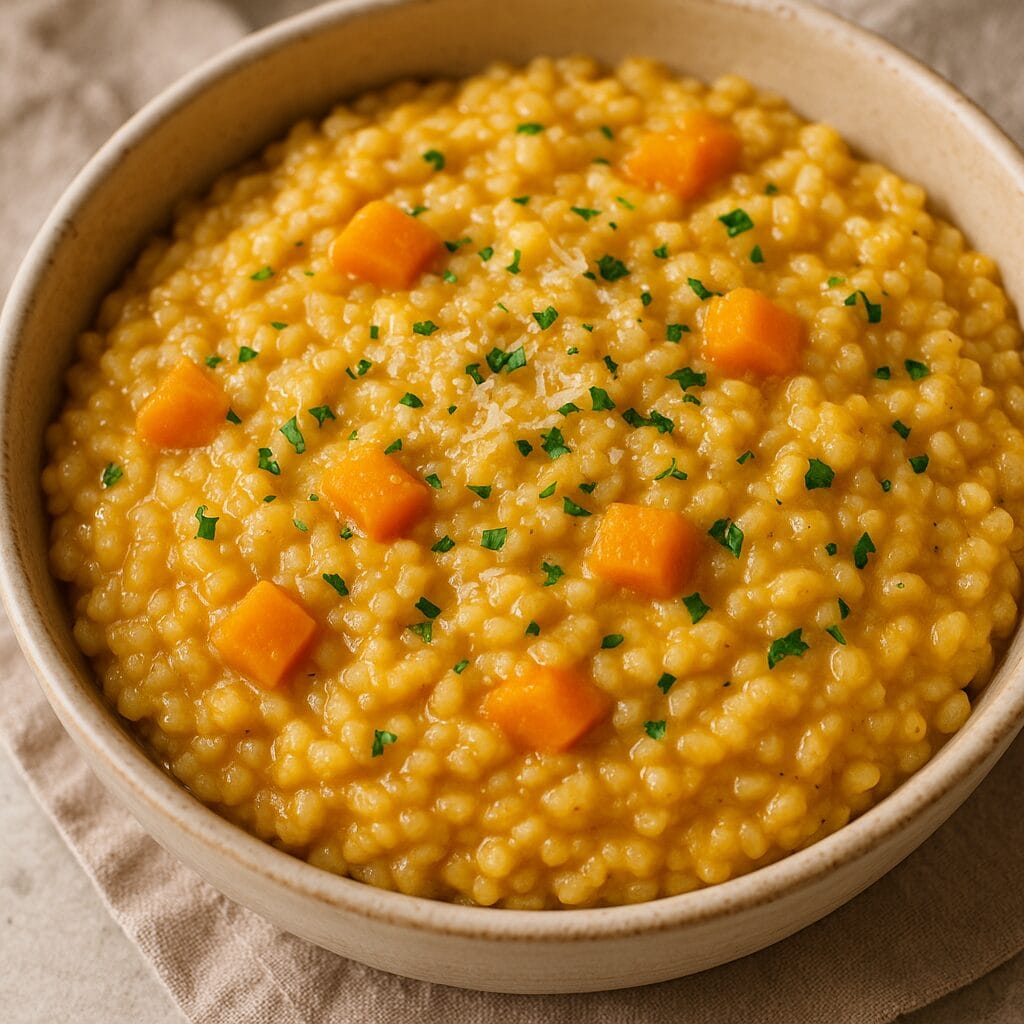
Creamy Pumpkin Risotto

Creamy Pumpkin Risotto

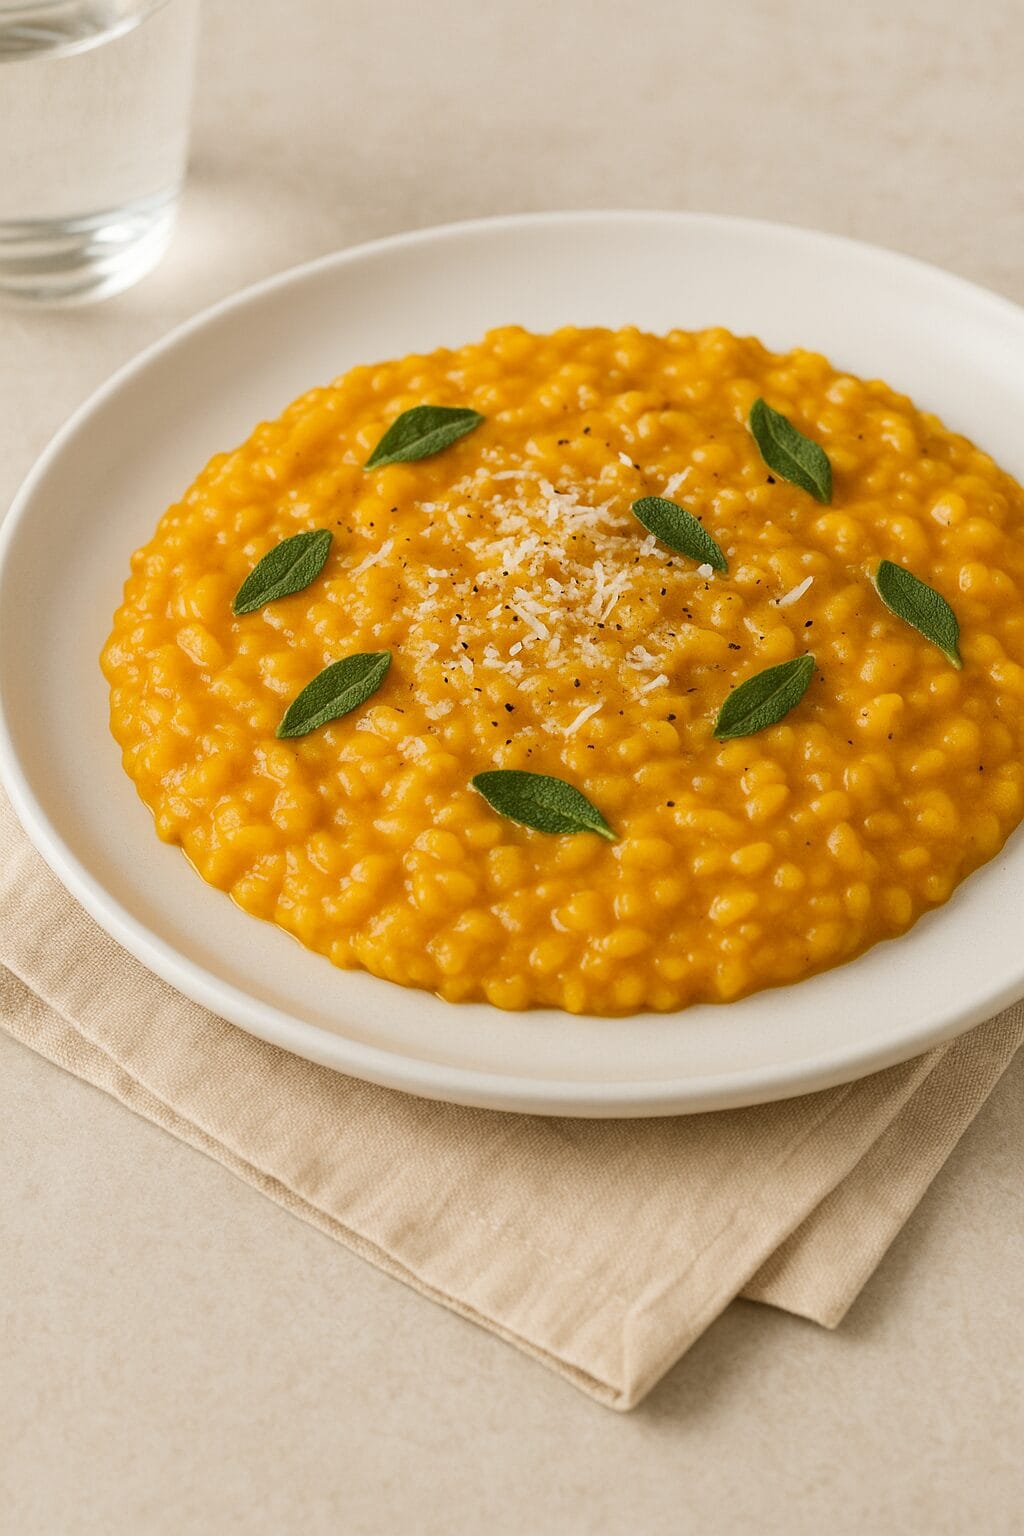
This Creamy Baked Pumpkin Risotto is the ultimate comfort dish—rich, velvety, and full of cozy autumn flavor. Earthy pumpkin purée and savory Parmesan cheese melt into arborio rice for a luxurious, hands-off version of classic risotto. Baked instead of stirred constantly, it’s an effortlessly elegant one-pot meal that feels like a hug in a bowl.

Perfect for weeknight dinners, fall gatherings, or holiday sides, this dish balances warmth and flavor with minimal fuss. Finished with fresh herbs, a sprinkle of cheese, or crispy sage leaves, it’s as beautiful as it is delicious.

Creamy Baked Pumpkin Risotto

No ratings yet
Creamy Baked Pumpkin Risotto is a fall-inspired dish made with arborio rice, pumpkin, and parmesan cheese. The rice is cooked in a broth until tender and creamy, and the pumpkin adds sweetness and flavor.
Prep Time 15 minutes
Cook Time 30 minutes
Servings: 6 People
Course: Dinner, Lunch, Main Course, Side Dish
Cuisine: Italian
Calories: 907

Ingredients
  

  • 3 tbsp Unsalted Butter
  • 1 ½ Cup Arborio Rice
  • 1 Large Yellow Onion Diced
  •  
    20 Oz Pumpkin Diced into 1/2 inch cubes
  • 3 Cloves Garlic Minced
  • ¼ Cup White Wine
  •  
    3 ½ Cup Chicken Stock Optional is vegetable stock
  •  
    2 tbsp Sage Leaves Roughly Chopped
  • ½ Cup Parmesan Cheese
  • 1 Pinch Salt For Taste
  • 1 Pinch Black Pepper For Taste
Crispy Sage & Brown Butter
  • 3 tbsp Butter
  •  
    12-20 Leaves Sage leaves
Garnish
  • ¼ Cup Parmesan Cheese

Equipment

1 Small Saucepan
1 Large Ovenproof Pot w/Lid

Method
 

  1. Prepare all ingredients and have ready.
  2. Preheat Oven to 350 °F. Over medium heat melt 1 tbsp of butter in an oven proof pot.
  3. Add the garlic and onion. Cook until onion is translucent.
  4. Add the chopped sage and cook for one minute or until sage has wilted.
  5. Add the rice grains and stir. Make sure all the rice grains are coated in butter and semi translucent. Then add the white wine and cook until the liquid evaporates.
  6. Add the pumpkin & broth. Allow to heat up but do not bring to a simmer.
  7. Place lid (or cover with foil) and place in oven for 25 minutes. Until the rice is cooked firm but not raw. If the rice is undercooked return to oven for another 5 minutes.
    Do not worry if there is some excess liquid.
  8. Add the remaining butter and the parmesan cheese.
  9. Stir vigorously until the pumpkin turns into a puree and blends into the risotto. If it becomes to thick add a splash of hot water. Should have a consistency of porridge. Risotto should sag a tad rather then standing in a tall firm pile.
  10. Spoon into serving bowls. Seve with either crispy sage or sage brown butter.
Crispy Sage
  1. Melt butter in small saucepan.
  2. Cook for 1½ or until crispy. Remove sage and place on a dry paper towel. Pour the butter which should be brown now into a heat proof jug.

Nutrition

Serving: 12ozCalories: 907kcalCarbohydrates: 56gProtein: 40gFat: 62gSaturated Fat: 18gPolyunsaturated Fat: 21gMonounsaturated Fat: 20gTrans Fat: 1gCholesterol: 40mgSodium: 275mgPotassium: 1001mgFiber: 8gSugar: 3gVitamin A: 468IUVitamin C: 4mgCalcium: 214mgIron: 11mg

Notes

Creamy Baked Pumpkin Risotto: Recipe Notes

The Rice:
  • Arborio is key: Risotto needs the extra starch from Arborio rice to achieve its signature creamy texture without adding cream.
The Pumpkin:
  • Fresh is best: Fresh pumpkin or butternut squash offers the best flavor. Any type of pumpkin works, except Jack-O-Lantern varieties.
  • Canned pumpkin as a substitute: Use 1.5 cans (or even 1 can) of pumpkin puree and stir it in after baking.
The Herbs:
  • Sage adds a touch: While subtle, sage complements the pumpkin nicely. Don't worry if you don't have it; parsley, thyme, or oregano work well too.
  • Crispy sage for presentation (optional): This adds a delightful textural contrast, but save it for special occasions.
Seasoning:
  • Salt to taste at the end: The salt content of your broth can vary, so wait until the end to season the risotto.
Leftover Brown Butter:
  • Extravagant drizzle: You'll likely have leftover brown butter. While the recipe requires enough for crisping the sage, a drizzle adds a touch of luxury to any dish - proteins, pasta, omelets, or even soups.
Servings and Baking Time:
  • More than it seems: This recipe yields a surprisingly large portion (enough for 4 hearty eaters or 6 moderate servings) due to the pumpkin content.
  • Adjust baking time for your pan: A heavy cast iron casserole with a lid retains heat well and cooks the risotto in 25 minutes. Lighter pots covered with foil may take 35-40 minutes.
Protein Powerhouse:
  • Chicken and spinach transformation: Make it a complete meal by adding chicken and spinach. Saute chopped, seasoned chicken with the onion until white. Follow the recipe, then stir in spinach with the butter, parmesan, and desired amount of water to achieve the perfect consistency.
Vegan Option:
  • Simple substitutions: Omit the parmesan cheese and use vegetable broth instead of chicken broth for a vegan version. Adjust salt to taste after omitting the cheese.
Leftover Magic:
  • Arancini resurrection: Risotto doesn't reheat well as it thickens. But fear not! Leftovers transform into delicious Arancini Rice Balls, baked or fried.

Tried this recipe?

Let us know how it was!

Related Recipes

Ingredients

  • Here’s a list of ingredients for Creamy Pumpkin Risotto:

    • Rice:

      • 1 ½ Cup Arborio Rice
    • Vegetables:

      • 1 Large yellow onion, Diced
      • 20 Oz Pumpkin, Diced into 1/2 inch cubes
      • 3 Cloves Garlic, Minced
    • Liquids:

      • ¼ Cup Dry White Wine
      • 3 ½ Cup Chicken Stock (or vegetable stock)
    • Seasonings:

      • 2 tbsp Sage Leaves, Roughly Chopped
      • ½ Cup Parmesan Cheese
      • 1 Pinch salt
      • 1 Pinch Black Pepper
    • For Garnish (Optional):

      • Crispy Sage & Brown Butter
        • 3 tbsp Salted Butter
        • 12-20 Sage leaves
        • ¼ Cup Grated Parmesan Cheese

Image Gallery Creamy Pumpkin Risotto

Storage & Leftovers

🧊 Storage:

  • Let the risotto cool completely before storing.

  • Transfer to an airtight container and refrigerate for up to 4 days.

  • Keep herbs or garnishes separate if possible for best freshness.

🔥 Reheating:

  • Reheat gently on the stovetop over medium-low heat.

  • Add a splash of broth, milk, or water to loosen the texture as it reheats—risotto thickens as it sits.

  • Microwave in short intervals, stirring in between, and add a touch of liquid to bring back its creamy consistency.

❄️ Freezing:

  • Risotto is best fresh, but it can be frozen for up to 2 months.

  • Thaw overnight in the fridge and reheat with extra liquid, as the rice will absorb more moisture.

💡 Pro Tip:
Turn leftovers into crispy risotto cakes—form into patties, pan-fry until golden, and serve with a dollop of sour cream or crème fraîche.

Please follow and like us:
onpost_follow
fb-share-icon197
Tweet120
Pinterest20
Share 20
submit to reddit

Subscribe for New Recipes

* indicates required

Intuit Mailchimp

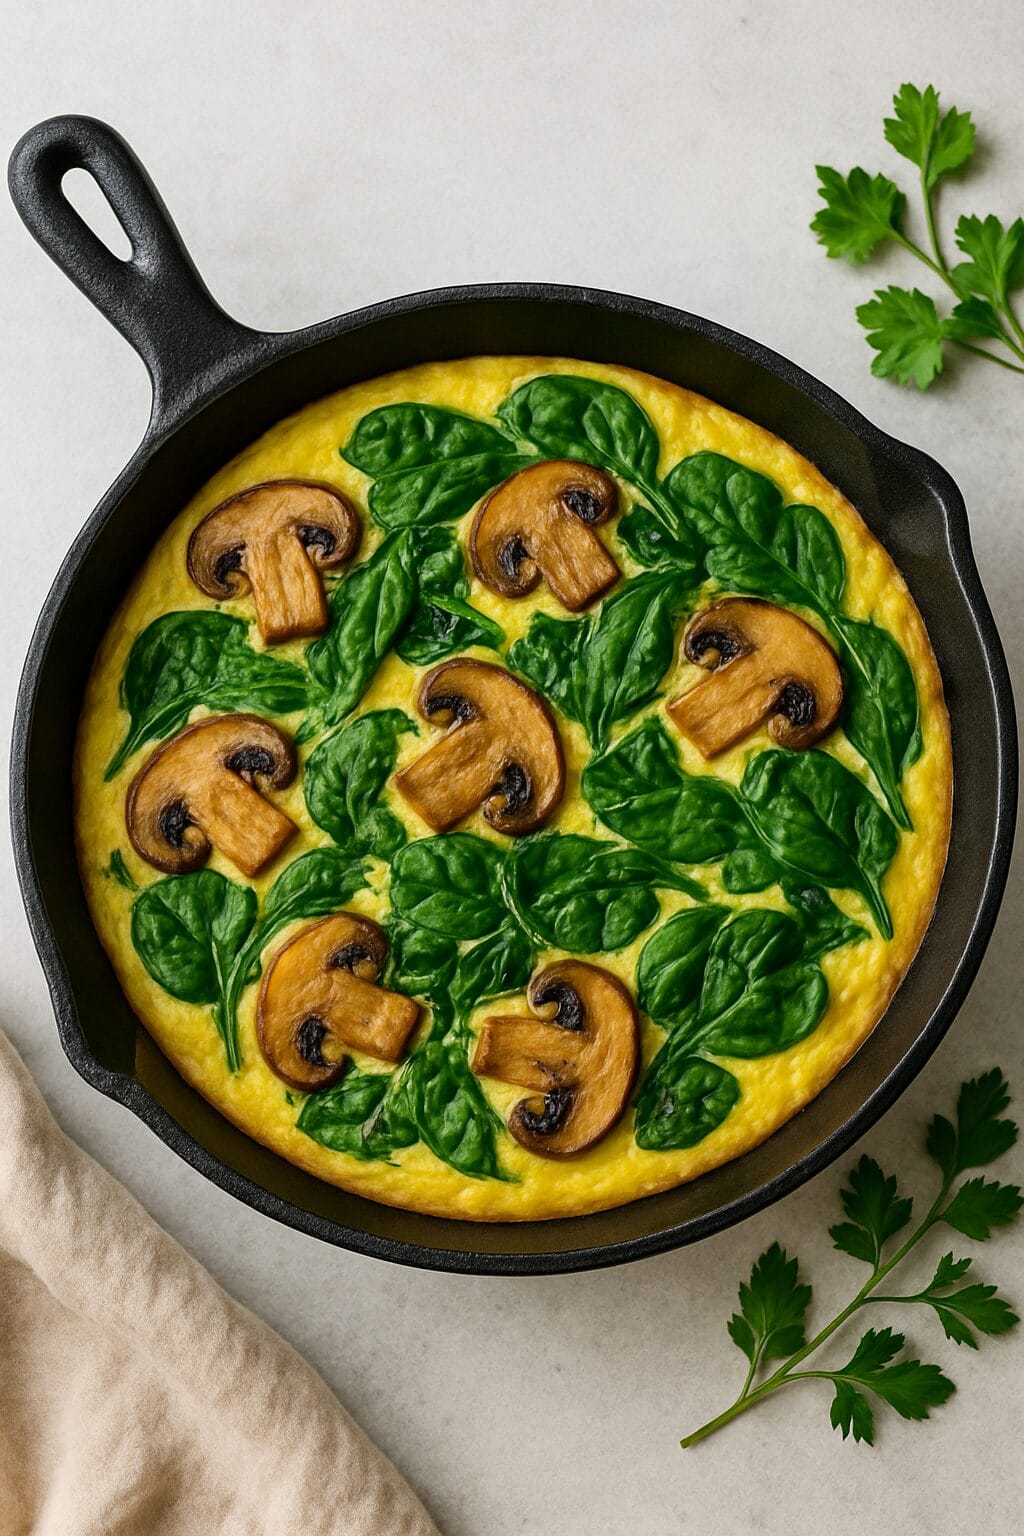
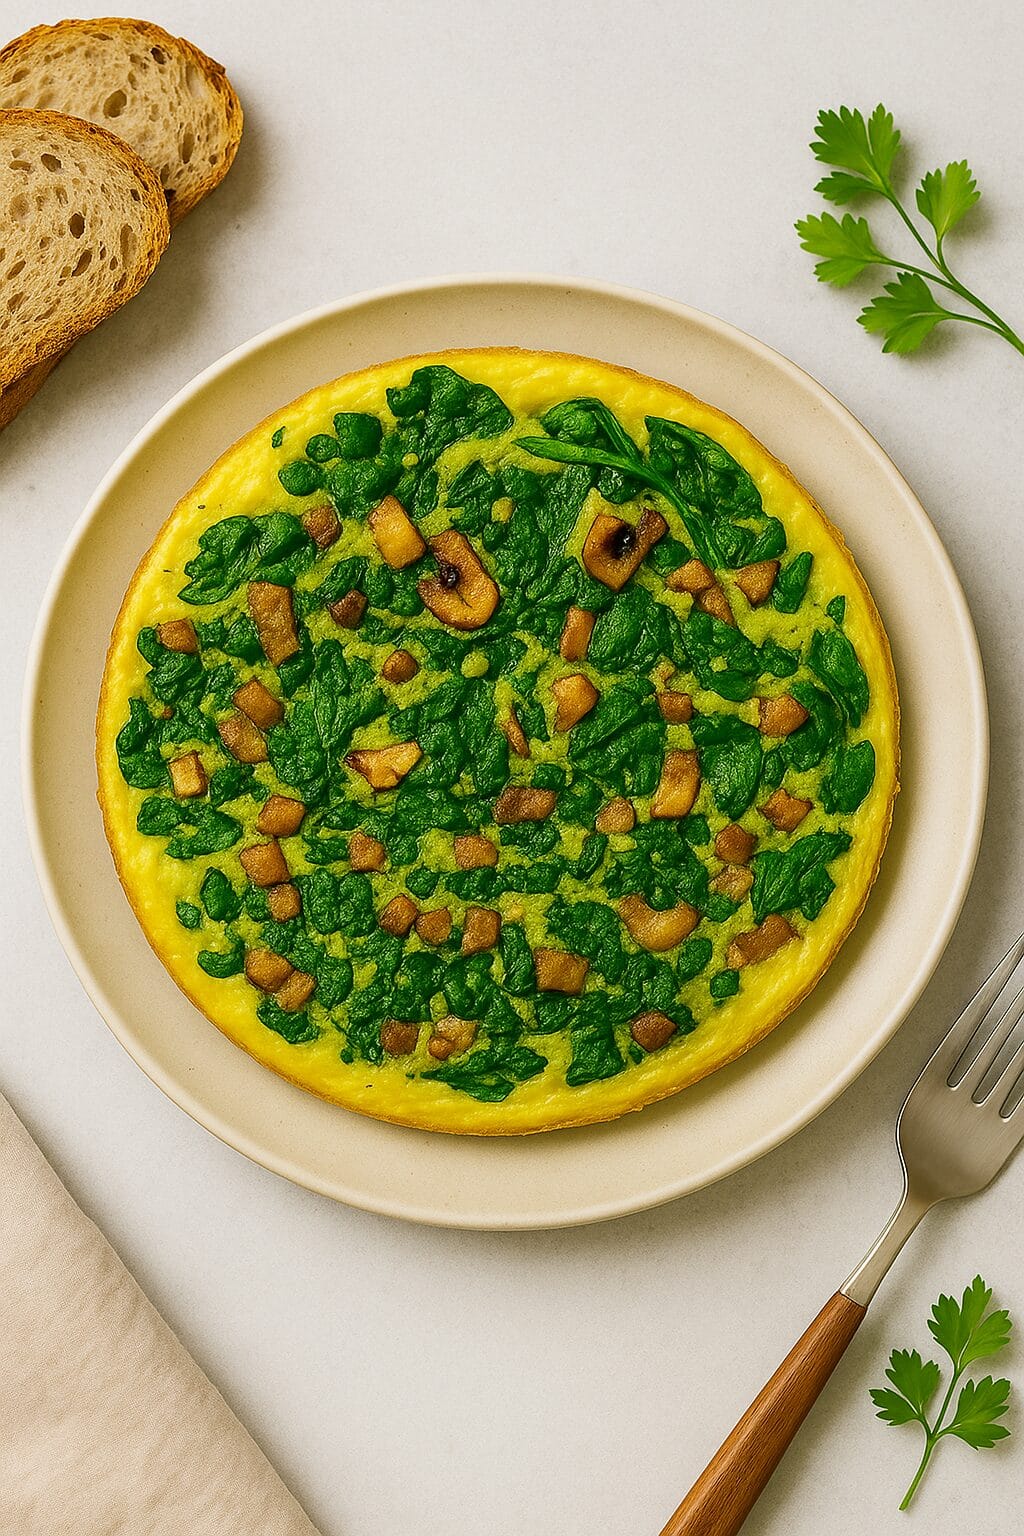
Mushroom & Spinach Frittata

Mushroom & Spinach Frittata

This Mushroom & Spinach Frittata is a savory, protein-packed dish that’s as versatile as it is delicious. Made with tender sautéed mushrooms, fresh baby spinach, and fluffy eggs, it’s the ultimate one-pan meal that transitions seamlessly from breakfast to brunch — or even dinner. Lightly seasoned and cooked to golden perfection, this frittata is bursting with earthy flavor and wholesome goodness.

Whether you’re meal-prepping for the week or hosting a laid-back weekend gathering, this frittata delivers hearty comfort with minimal effort. Serve it warm with toast or a simple side salad, or enjoy it cold straight from the fridge — it’s just as tasty either way!

Mushroom & Spinach Frittata

No ratings yet
A spinach and mushroom frittata is a savory Italian egg bake packed with sauteed mushrooms and wilted spinach. It's typically seasoned with cheese and herbs, and can be enjoyed warm or at room temperature.
Prep Time 15 minutes
Cook Time 20 minutes
Servings: 6 Servings
Course: Breakfast, Dinner, Lunch
Cuisine: Italian
Calories: 233

Ingredients
  

  • 8 Large Egg
  •  
    ¾ Cup Mozzarella Shredded
  • 1 Pinch Kosher Salt
  • 1 Pinch Black Pepper Ground
  • 1 Pinch Crushed Red Pepper Flakes
  • 2 tbsp Extra Virgin Olive Oil
  • 1 Large Shallot
  • 3 Cloves Garlic Minced
  • 8 Oz Baby Bella Mushrooms Sliced
  • 3 Cup Baby spinach
  •  
    ½ Cup Ricotta
  • Cup Heavy Cream

Equipment

1 Oven Proof Large Skillet
1 Medium Bowl

Method
 

  1. Gather all of your ingredients and have everything prepped and ready.
  2. Preheat your oven to 375 °F.
    Using a medium bowl, whisk the eggs, mozzarella, and the cream.
    Season with salt, black pepper, and red pepper flakes.
  3. Place a large ovenproof skillet over medium heat and add oil, shallot and garlic. Stirring occasionally, cook until the shallot is translucent.
  4. Add the mushrooms and cook until softened. Continue to stirring occassionally.
  5. After the mushrooms have cooked and softened, add the spinach and cook until all spinach has wilted. Season with salt and pepper for taste.
  6. Turn heat off on skillet. Pour egg mixture into the mushroom and spinach mix.
  7. Dollop the mixture with ricotta.
  8. Place in your preheated oven and bake for 12-20 minutes. Check after 12 minutes and add time as needed.
    The eggs should have set and the top should have a slight brown to them.

Nutrition

Serving: 10ozCalories: 233kcalCarbohydrates: 5gProtein: 16gFat: 17gSaturated Fat: 6gPolyunsaturated Fat: 2gMonounsaturated Fat: 7gTrans Fat: 0.02gCholesterol: 268mgSodium: 241mgPotassium: 405mgFiber: 1gSugar: 2gVitamin A: 1972IUVitamin C: 5mgCalcium: 206mgIron: 2mg

Tried this recipe?

Let us know how it was!

Related Recipes

Ingredients

  • 8 large eggs

  • ¾ cup shredded mozzarella

  • ½ cup ricotta

  • ⅓ cup heavy cream

  • 2 tbsp extra virgin olive oil

  • 1 large shallot, diced

  • 3 cloves garlic, minced

  • 8 oz baby bella mushrooms, sliced

  • 3 cups baby spinach

  • Pinch of kosher salt, black pepper, and red pepper flakes

Quick to prep, easy to love, and endlessly versatile — this dish is proof that simple ingredients can create something extraordinary.

Image Gallery Mushroom & Spinach Frittata

Storage & Leftovers

Refrigerator:
Let the frittata cool completely before storing. Slice into portions and place in an airtight container. Store in the fridge for up to 4 days.

Freezer:
Wrap individual slices in plastic wrap or foil, then place in a freezer-safe bag or container. Freeze for up to 2 months. For best texture, avoid freezing if the frittata is extra creamy (ricotta-heavy versions may weep slightly when thawed).

Reheating:

  • Microwave: Reheat individual slices on a microwave-safe plate for 30–60 seconds until warm.

  • Oven or Toaster Oven: Bake at 350°F (175°C) for 10–15 minutes for a crispier finish.

  • Skillet (optional): Warm slices on a nonstick skillet over low heat with a lid to keep moisture in.

Best Enjoyed:
Frittata is just as delicious cold or room temp, making it perfect for meal prep, quick breakfasts, or lunch on the go.

Please follow and like us:
onpost_follow
fb-share-icon197
Tweet120
Pinterest20
Share 20
submit to reddit

Subscribe for New Recipes

* indicates required

Intuit Mailchimp