Milk-Batter Zucchini Fritters

Appetizer · Snack

Milk-Batter Zucchini Fritters

Cut the zucchini evenly, dry it well and cook one test piece before frying the rest. The oil temperature and a thin, even coating help the batter cook without leaving a wet center.

Yield
4 snack portions
Cuisine
Contemporary

Bring it to the table

Keep water away from hot oil

Dry the zucchini and utensils thoroughly. Use a heavy pot with plenty of headroom, and lower pieces into the oil carefully without dropping them.

At the table

Serve promptly while the coating is crisp, with a separately prepared dipping sauce if desired.

Before you start

Gather your ingredients.

Full quantities and serving adjustments are in the recipe card below.

See the ingredient checklist
  • 250 g zucchini
  • 50 g all-purpose flour — plus a little extra for dusting
  • 50 g cornstarch
  • 4 g baking powder — not baking soda
  • 102 g cold milk — plus a little only if needed to thin the batter
  • 1 g salt
  • 1 pinch ground black pepper
  • neutral frying oil — enough for about 1 1/2 inches in a deep heavy pot; do not fill the pot above one-third

A few useful notes.

This home version uses baking powder, not the separate baking-soda dry mix.

These instructions cover thin zucchini slices, not soft-shell crab, raw seafood or cheese.

Four snack portions are a serving suggestion.

Never leave hot frying oil unattended.

The cooking plan

How to make Milk-Batter Zucchini Fritters.

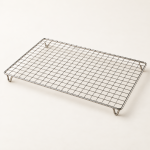
  1. Wash and dry the zucchini thoroughly, then cut into even slices about 1/4 inch thick. Pat dry again. Set a draining rack over a tray.

  2. Whisk the measured flour, cornstarch, baking powder, salt and pepper together. Stir in the cold milk just until combined. If necessary, add a little extra milk until the batter coats a slice without sitting on it in a thick lump.

  3. Heat the oil in a deep heavy pot to 350°F, using a frying thermometer. Leave ample headroom and keep the pot no more than one-third full. Keep water away from the hot oil.

  4. Lightly dust a dry zucchini slice with flour, shake off excess and dip in batter. Let excess drip away, then lower carefully into the oil. Fry, turning as needed, until golden and the coating is fully cooked. Let the test piece cool briefly, then cut it to confirm a tender vegetable and no wet batter inside.

  5. Adjust the heat or coating thickness after the test. Coat and fry the remaining slices in small batches without crowding, allowing the oil to return to temperature between batches. Lift onto the rack to drain and serve promptly.

  6. Discard leftover batter after cooking. Cool leftover fritters and refrigerate within 2 hours at 40°F or below; use within 3–4 days and reheat to 165°F, noting that the coating softens during storage.

Let’s cook

The full recipe.

Check off ingredients as you get them ready.

Changing servings? The ingredient list scales automatically. Adjust quantities named in the steps to match, and choose pans and cooking times for your batch.

Milk-Batter Zucchini Fritters

No ratings yet
Zucchini slices dipped in a flour-and-cornstarch milk batter and fried until the coating is golden and cooked through.
Servings: 4 snack portions
Course: Appetizer, Snack
Cuisine: Contemporary

Some ingredient links are affiliate links. We may earn a commission at no extra cost to you. As an Amazon Associate I earn from qualifying purchases.

Ingredients
  

  •  
    250 g zucchini
  • 50 g all-purpose flour plus a little extra for dusting
  • 50 g cornstarch
  •  
    4 g baking powder not baking soda
  •  
    102 g cold milk plus a little only if needed to thin the batter
  • 1 g salt
  • 1 pinch ground black pepper
  •  
    neutral frying oil enough for about 1 1/2 inches in a deep heavy pot; do not fill the pot above one-third


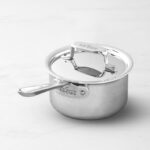
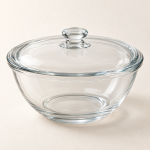
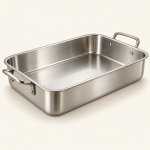
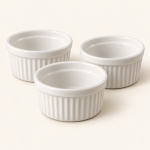
Equipment images are illustrative. Exact products may vary.
Instructions
 

  1. Wash and dry the zucchini thoroughly, then cut into even slices about 1/4 inch thick. Pat dry again. Set a draining rack over a tray.
  2. Whisk the measured flour, cornstarch, baking powder, salt and pepper together. Stir in the cold milk just until combined. If necessary, add a little extra milk until the batter coats a slice without sitting on it in a thick lump.
  3. Heat the oil in a deep heavy pot to 350°F, using a frying thermometer. Leave ample headroom and keep the pot no more than one-third full. Keep water away from the hot oil.
  4. Lightly dust a dry zucchini slice with flour, shake off excess and dip in batter. Let excess drip away, then lower carefully into the oil. Fry, turning as needed, until golden and the coating is fully cooked. Let the test piece cool briefly, then cut it to confirm a tender vegetable and no wet batter inside.
  5. Adjust the heat or coating thickness after the test. Coat and fry the remaining slices in small batches without crowding, allowing the oil to return to temperature between batches. Lift onto the rack to drain and serve promptly.
  6. Discard leftover batter after cooking. Cool leftover fritters and refrigerate within 2 hours at 40°F or below; use within 3–4 days and reheat to 165°F, noting that the coating softens during storage.

Notes

This home version uses baking powder, not the separate baking-soda dry mix.
These instructions cover thin zucchini slices, not soft-shell crab, raw seafood or cheese.
Four snack portions are a serving suggestion.
Never leave hot frying oil unattended.

Tried this recipe?

Let us know how it was!

A couple of useful answers.

Can I use the same cooking directions for soft-shell crab?

No. This page covers thin zucchini slices; seafood requires its own preparation and doneness instructions.

Is baking soda the same as baking powder?

No. Use the baking powder listed for this version.

Keep the good food going

Similar Recipes

Find another recipe to bring to the table.

Citrus, Ginger and Curry Dressing

Condiment

Citrus, Ginger and Curry Dressing

Measure the juices rather than counting whole fruit, then whisk them into commercial mayonnaise. The finished dressing is meant to be spoonable but loose enough to drizzle.

Yield
1 small batch
Cuisine
Contemporary

Bring it to the table

Use measured juice

Fruit sizes vary. Start with the measured amounts below and add any extra juice only a teaspoon at a time if you want a thinner dressing.

At the table

Drizzle sparingly over cooked fish, vegetables or a salad, with extra dressing served separately.

Before you start

Gather your ingredients.

Full quantities and serving adjustments are in the recipe card below.

See the ingredient checklist
  • 180 g commercial mayonnaise
  • 30 ml fresh orange juice
  • 15 ml fresh grapefruit juice
  • 10 ml fresh lemon juice
  • 1/4 tsp curry powder
  • 3/4 tsp fresh ginger — finely grated
  • 3/4 tsp extra-virgin olive oil
  • 1 pinch Espelette pepper
  • salt — to taste

A few useful notes.

Commercial mayonnaise avoids making a separate uncooked egg emulsion.

The base batch uses measured juice quantities rather than a fixed number of fruits.

The recipe control represents one small batch, without a measured finished-volume claim.

The cooking plan

How to make Citrus, Ginger and Curry Dressing.

  1. Wash the fruit before cutting and squeeze the juices. Measure the listed amounts, straining out seeds.

  2. Whisk the mayonnaise, measured juices, curry powder, ginger and olive oil together until smooth.

  3. Add Espelette and salt to taste. For a thinner dressing, add extra juice only a teaspoon at a time, stirring and tasting between additions.

  4. Cover and refrigerate promptly at 40°F or below. Stir before serving and use within 2 days. Discard dressing left at room temperature for more than 2 hours.

Let’s cook

The full recipe.

Check off ingredients as you get them ready.

Changing servings? The ingredient list scales automatically. Adjust quantities named in the steps to match, and choose pans and cooking times for your batch.

Citrus, Ginger and Curry Dressing

No ratings yet
A creamy dressing with orange, grapefruit, lemon, fresh ginger and a little curry powder.
Servings: 1 small batch
Course: Condiment
Cuisine: Contemporary

Some ingredient links are affiliate links. We may earn a commission at no extra cost to you. As an Amazon Associate I earn from qualifying purchases.

Ingredients
  

  •  
    180 g commercial mayonnaise
  •  
    30 ml fresh orange juice
  •  
    15 ml fresh grapefruit juice
  •  
    10 ml fresh lemon juice
  •  
    ¼ tsp curry powder
  •  
    ¾ tsp fresh ginger finely grated
  • ¾ tsp extra-virgin olive oil
  •  
    1 pinch Espelette pepper
  • salt to taste

Equipment images are illustrative. Exact products may vary.

Instructions
 

  1. Wash the fruit before cutting and squeeze the juices. Measure the listed amounts, straining out seeds.
  2. Whisk the mayonnaise, measured juices, curry powder, ginger and olive oil together until smooth.
  3. Add Espelette and salt to taste. For a thinner dressing, add extra juice only a teaspoon at a time, stirring and tasting between additions.
  4. Cover and refrigerate promptly at 40°F or below. Stir before serving and use within 2 days. Discard dressing left at room temperature for more than 2 hours.

Notes

Commercial mayonnaise avoids making a separate uncooked egg emulsion.
The base batch uses measured juice quantities rather than a fixed number of fruits.
The recipe control represents one small batch, without a measured finished-volume claim.

Tried this recipe?

Let us know how it was!

A couple of useful answers.

Can I add all the juice from a whole orange?

Measure first; fruit sizes vary and extra juice can make the dressing too thin.

Does this require homemade mayonnaise?

No. Use commercial mayonnaise for this version.

Keep the good food going

Similar Recipes

Find another recipe to bring to the table.
White Wine-Braised Baby Artichokes

Side Dish

White Wine-Braised Baby Artichokes

Trim away the tough leaves before cooking and use a snug pan. The artichokes are ready when a knife slips easily into their bases, with no tough outer leaves remaining.

Yield
4 side servings
Cuisine
French-inspired

Bring it to the table

Trim down to tender leaves

Baby artichokes still need trimming. Remove tough outer leaves, shorten the tops and peel the stems before halving and checking for any fuzzy choke.

At the table

Serve warm or chilled with a little of the cooking liquid as a vegetable side.

Before you start

Gather your ingredients.

Full quantities and serving adjustments are in the recipe card below.

See the ingredient checklist
  • 8 baby artichokes
  • 1 lemon — juice, for the holding water
  • 4 tbsp extra-virgin olive oil — divided
  • 1/2 small onion — finely diced
  • 2 cloves garlic — thinly sliced
  • 1/2 tsp fennel seeds
  • 1/2 tsp coriander seeds
  • 1/8 tsp whole black peppercorns
  • 180 ml dry white wine
  • 1 thyme sprig
  • 1 bay leaf
  • 2 parsley stems
  • water — as needed for braising
  • salt — to taste

A few useful notes.

Four side portions are a home serving suggestion.

Cooking time varies with artichoke size and trimming.

This version contains white wine; cooking is not a promise of complete alcohol removal.

The cooking plan

How to make White Wine-Braised Baby Artichokes.

  1. Prepare a bowl of cold water with the lemon juice. Remove tough outer artichoke leaves, cut away the firm upper leaf tips, trim and peel the stems, and halve the artichokes. Remove any fuzzy choke. Place trimmed pieces in the lemon water as you work, then drain before cooking.

  2. Warm half the oil in a snug, heavy saucepan. Add the fennel seeds, coriander and peppercorns and stir briefly until fragrant without burning.

  3. Add the onion and garlic and cook gently until softened without browning. Add the remaining oil and drained artichokes, then the wine, thyme, bay and parsley stems.

  4. Add only enough water to barely cover the artichokes. Cover with a close-fitting lid or parchment circle and simmer gently, stirring or turning occasionally and adding a splash of water if the pan is drying.

  5. Start checking after about 15 minutes and continue until a small knife slips easily into the bases and the leaves are tender. Remove the herb stems and bay, season to taste and serve with a little cooking liquid.

  6. If serving later, cool in a shallow container and refrigerate within 2 hours at 40°F or below. Use within 3–4 days. This is a cooked vegetable dish for prompt use, not a preserving or canning method.

Let’s cook

The full recipe.

Check off ingredients as you get them ready.

Changing servings? The ingredient list scales automatically. Adjust quantities named in the steps to match, and choose pans and cooking times for your batch.

White Wine-Braised Baby Artichokes

No ratings yet
Baby artichokes braised with white wine, garlic, onion, fennel seed and coriander.
Servings: 4 side servings
Course: Side Dish
Cuisine: French-inspired

Some ingredient links are affiliate links. We may earn a commission at no extra cost to you. As an Amazon Associate I earn from qualifying purchases.

Ingredients
  

  •  
    8 baby artichokes
  • 1 lemon juice, for the holding water
  • 4 tbsp extra-virgin olive oil divided
  •  
    ½ small Onions finely diced
  • 2 cloves garlic thinly sliced
  • ½ tsp fennel seeds
  •  
    ½ tsp coriander seeds
  •  
    ⅛ tsp whole black peppercorns
  •  
    180 ml dry white wine
  • 1 thyme sprig
  • 1 bay leaf
  •  
    2 parsley stems
  • water as needed for braising
  • salt to taste

Equipment images are illustrative. Exact products may vary.

Instructions
 

  1. Prepare a bowl of cold water with the lemon juice. Remove tough outer artichoke leaves, cut away the firm upper leaf tips, trim and peel the stems, and halve the artichokes. Remove any fuzzy choke. Place trimmed pieces in the lemon water as you work, then drain before cooking.
  2. Warm half the oil in a snug, heavy saucepan. Add the fennel seeds, coriander and peppercorns and stir briefly until fragrant without burning.
  3. Add the onion and garlic and cook gently until softened without browning. Add the remaining oil and drained artichokes, then the wine, thyme, bay and parsley stems.
  4. Add only enough water to barely cover the artichokes. Cover with a close-fitting lid or parchment circle and simmer gently, stirring or turning occasionally and adding a splash of water if the pan is drying.
  5. Start checking after about 15 minutes and continue until a small knife slips easily into the bases and the leaves are tender. Remove the herb stems and bay, season to taste and serve with a little cooking liquid.
  6. If serving later, cool in a shallow container and refrigerate within 2 hours at 40°F or below. Use within 3–4 days. This is a cooked vegetable dish for prompt use, not a preserving or canning method.

Notes

Four side portions are a home serving suggestion.
Cooking time varies with artichoke size and trimming.
This version contains white wine; cooking is not a promise of complete alcohol removal.

Tried this recipe?

Let us know how it was!

A couple of useful answers.

Why do the artichokes need so much trimming?

The tough outer leaves and stem skin do not become pleasant to eat simply by braising. Trim until the remaining parts are tender.

Is this a jarred preserve?

No. Refrigerate promptly and use within 3–4 days.

Keep the good food going

Similar Recipes

Find another recipe to bring to the table.
Savory Foie Gras Custards

Appetizer

Savory Foie Gras Custards

Blend and strain the mixture for a smooth base, then bake in small ramekins. Check the center temperature of each custard rather than stopping when the surface looks set.

Yield
4 small servings
Cuisine
French-inspired

Bring it to the table

Cook the liver fully

These custards contain poultry liver. Each center must reach 165°F, even if the custard appears set sooner.

At the table

Serve in small portions with toast or another accompaniment prepared separately.

Before you start

Gather your ingredients.

Full quantities and serving adjustments are in the recipe card below.

See the ingredient checklist
  • 180 g heavy cream
  • 170 g raw foie gras — chilled; veins removed
  • 30 g ready-to-eat cooked foie gras — commercially prepared; check the label
  • 2 large eggs
  • 1 tsp granulated sugar
  • 2 g salt
  • 1/4 tsp ground black pepper
  • 1 pinch ground coriander

A few useful notes.

This is a fully cooked poultry-liver custard, not a cured or partially cooked parfait.

Use commercially prepared cooked foie gras labeled ready to eat for the small cooked portion.

The 165°F center temperature is required for the poultry liver.

No alcohol or curing salt is included in this version.

The cooking plan

How to make Savory Foie Gras Custards.

  1. Heat the oven to 225°F. Arrange four 6-ounce ovenproof ramekins in a deep roasting pan. Keep the foie gras chilled until ready to blend and use clean equipment after handling raw liver.

  2. Warm the cream gently until steaming without boiling. Put the raw and ready-to-eat cooked foie gras in a blender and pour in the warm cream. Blend until smooth, allowing steam to escape according to the blender manufacturer’s instructions.

  3. Add the eggs, sugar, salt, pepper and coriander and blend briefly to combine. Do not taste the raw mixture. Strain through a fine sieve into a pouring jug.

  4. Divide among the ramekins, leaving headroom. Pour hot water into the roasting pan to reach about halfway up the ramekins, keeping water out of the custards. Move the pan carefully into the oven.

  5. Bake gently until the custards are set and the center of every ramekin reaches 165°F on a food thermometer. Start checking around 35 minutes and continue as needed; appearance or time alone does not establish doneness.

  6. Remove the ramekins carefully from the water bath. Serve promptly, or cool in shallow portions and refrigerate within 2 hours at 40°F or below. Use chilled leftovers within 3–4 days and reheat to 165°F.

Let’s cook

The full recipe.

Check off ingredients as you get them ready.

Changing servings? The ingredient list scales automatically. Adjust quantities named in the steps to match, and choose pans and cooking times for your batch.

Savory Foie Gras Custards

No ratings yet
Small savory custards made with foie gras, cream, eggs and a pinch of coriander, baked gently in a water bath.
Servings: 4 small servings
Course: Appetizer
Cuisine: French-inspired

Some ingredient links are affiliate links. We may earn a commission at no extra cost to you. As an Amazon Associate I earn from qualifying purchases.

Ingredients
  

  • 180 g heavy cream
  •  
    170 g raw foie gras chilled; veins removed
  •  
    30 g ready-to-eat cooked foie gras commercially prepared; check the label
  • 2 large eggs
  • 1 tsp granulated sugar
  • 2 g salt
  • ¼ tsp ground black pepper
  • 1 pinch ground coriander

Equipment images are illustrative. Exact products may vary.

Instructions
 

  1. Heat the oven to 225°F. Arrange four 6-ounce ovenproof ramekins in a deep roasting pan. Keep the foie gras chilled until ready to blend and use clean equipment after handling raw liver.
  2. Warm the cream gently until steaming without boiling. Put the raw and ready-to-eat cooked foie gras in a blender and pour in the warm cream. Blend until smooth, allowing steam to escape according to the blender manufacturer’s instructions.
  3. Add the eggs, sugar, salt, pepper and coriander and blend briefly to combine. Do not taste the raw mixture. Strain through a fine sieve into a pouring jug.
  4. Divide among the ramekins, leaving headroom. Pour hot water into the roasting pan to reach about halfway up the ramekins, keeping water out of the custards. Move the pan carefully into the oven.
  5. Bake gently until the custards are set and the center of every ramekin reaches 165°F on a food thermometer. Start checking around 35 minutes and continue as needed; appearance or time alone does not establish doneness.
  6. Remove the ramekins carefully from the water bath. Serve promptly, or cool in shallow portions and refrigerate within 2 hours at 40°F or below. Use chilled leftovers within 3–4 days and reheat to 165°F.

Notes

This is a fully cooked poultry-liver custard, not a cured or partially cooked parfait.
Use commercially prepared cooked foie gras labeled ready to eat for the small cooked portion.
The 165°F center temperature is required for the poultry liver.
No alcohol or curing salt is included in this version.

Tried this recipe?

Let us know how it was!

A couple of useful answers.

Can I stop cooking when the custard looks set?

No. Check each center with a thermometer and continue until it reaches 165°F.

Does this use pink salt?

No. There is no curing salt in this custard recipe.

Keep the good food going

Similar Recipes

Find another recipe to bring to the table.
Lemon Butter Sponge Loaf

Dessert

Lemon Butter Sponge Loaf

Whip the yolks and whites separately, then fold the flour and melted butter into the foam carefully. Lemon zest gives this version its citrus flavor.

Yield
1 small loaf
Cuisine
French-inspired

Bring it to the table

Keep the air in the batter

Use a wide spatula and gentle folding strokes. Mix a little batter with the melted butter first so it blends into the main bowl more easily.

At the table

Cool before slicing and serve plain or with fruit prepared separately.

Before you start

Gather your ingredients.

Full quantities and serving adjustments are in the recipe card below.

See the ingredient checklist
  • 150 g unsalted butter — plus a little to grease the pan
  • 150 g granulated sugar — divided equally
  • 3 large egg yolks
  • 150 g egg whites — weighed separately
  • 150 g all-purpose flour — sifted
  • 1 lemon — finely grated zest only

A few useful notes.

This version uses lemon zest throughout.

The whipped whites provide the lift; no baking powder is included.

The recipe control represents one small loaf rather than a fixed slice count.

Do not taste raw batter.

The cooking plan

How to make Lemon Butter Sponge Loaf.

  1. Heat the oven to 340°F. Grease an 8-by-4-inch loaf pan and line it with parchment, leaving a little overhang for lifting. Melt the measured butter and let it cool until just warm.

  2. Whip the yolks with half the sugar until pale and thick. Mix in the lemon zest. In a separate clean bowl, whisk the weighed whites until foamy, then gradually add the remaining sugar and whip to glossy peaks that still bend at the tips.

  3. Fold about one-third of the whites into the yolk mixture to lighten it. Fold in the sifted flour and remaining whites in alternating additions, gently lifting the mixture until no flour pockets remain.

  4. Mix a few spoonfuls of batter with the just-warm melted butter in a separate bowl. Fold that mixture back into the main batter gently until evenly incorporated.

  5. Transfer to the prepared pan without filling above two-thirds full; bake any excess separately rather than overfilling. Bake until golden, the top springs back gently and a skewer inserted into the center comes out without wet batter, starting to check around 40 minutes and continuing as needed.

  6. Cool in the pan for about 10 minutes, then lift onto a rack and cool completely before slicing. Wrap the cooled loaf well. Add any perishable topping only when serving and store that topping according to its own instructions.

Let’s cook

The full recipe.

Check off ingredients as you get them ready.

Changing servings? The ingredient list scales automatically. Adjust quantities named in the steps to match, and choose pans and cooking times for your batch.

Lemon Butter Sponge Loaf

No ratings yet
A buttery lemon loaf lifted with whipped egg whites, with no added baking powder.
Servings: 1 small loaf
Course: Dessert
Cuisine: French-inspired

Some ingredient links are affiliate links. We may earn a commission at no extra cost to you. As an Amazon Associate I earn from qualifying purchases.

Ingredients
  

  • 150 g unsalted butter plus a little to grease the pan
  • 150 g granulated sugar divided equally
  •  
    3 large egg yolks
  • 150 g egg whites weighed separately
  • 150 g all-purpose flour sifted
  • 1 lemon finely grated zest only

Equipment images are illustrative. Exact products may vary.

Instructions
 

  1. Heat the oven to 340°F. Grease an 8-by-4-inch loaf pan and line it with parchment, leaving a little overhang for lifting. Melt the measured butter and let it cool until just warm.
  2. Whip the yolks with half the sugar until pale and thick. Mix in the lemon zest. In a separate clean bowl, whisk the weighed whites until foamy, then gradually add the remaining sugar and whip to glossy peaks that still bend at the tips.
  3. Fold about one-third of the whites into the yolk mixture to lighten it. Fold in the sifted flour and remaining whites in alternating additions, gently lifting the mixture until no flour pockets remain.
  4. Mix a few spoonfuls of batter with the just-warm melted butter in a separate bowl. Fold that mixture back into the main batter gently until evenly incorporated.
  5. Transfer to the prepared pan without filling above two-thirds full; bake any excess separately rather than overfilling. Bake until golden, the top springs back gently and a skewer inserted into the center comes out without wet batter, starting to check around 40 minutes and continuing as needed.
  6. Cool in the pan for about 10 minutes, then lift onto a rack and cool completely before slicing. Wrap the cooled loaf well. Add any perishable topping only when serving and store that topping according to its own instructions.

Notes

This version uses lemon zest throughout.
The whipped whites provide the lift; no baking powder is included.
The recipe control represents one small loaf rather than a fixed slice count.
Do not taste raw batter.

Tried this recipe?

Let us know how it was!

A couple of useful answers.

Is there baking powder?

No. This version relies on carefully whipped eggs and gentle folding.

Can I slice it hot?

Let it cool completely so the delicate crumb can settle before slicing.

Keep the good food going

Similar Recipes

Find another recipe to bring to the table.

Almond Joconde Sponge Sheet

Dessert · Pastry

Almond Joconde Sponge Sheet

Whip the two egg mixtures separately, then fold them together with the sifted dry ingredients. Spread the batter evenly so the sheet bakes through without dry edges and a wet center.

Yield
1 small batch
Cuisine
French-inspired

Bring it to the table

Keep the layer thin

Spread the batter about 1/4 inch thick on parchment-lined rimmed baking sheets. Use another sheet if needed rather than making a deep cake.

At the table

Cool and cut for a dessert assembled separately, or serve small pieces with fruit. Any cream or filling needs its own preparation and storage instructions.

Before you start

Gather your ingredients.

Full quantities and serving adjustments are in the recipe card below.

See the ingredient checklist
  • 150 g whole eggs — lightly beaten and weighed without shell
  • 60 g egg yolks
  • 50 g granulated sugar — for the whole-egg mixture
  • 100 g all-purpose flour — sifted
  • 100 g egg whites
  • 20 g granulated sugar — for the meringue
  • 100 g confectioners’ sugar — sifted
  • 100 g almond flour — finely ground, sifted

A few useful notes.

This is a sponge component, without a filling, syrup or assembled cake.

The two granulated sugar amounts belong to different egg mixtures.

The recipe control represents one batch, without a fixed sheet or portion count.

Do not taste raw batter.

The cooking plan

How to make Almond Joconde Sponge Sheet.

  1. Heat the oven to 375°F. Line a large rimmed baking sheet with parchment, preparing a second if needed to keep the batter layer thin.

  2. Whip the whole eggs, yolks and their 50 g granulated sugar until thick, pale and foamy, with a ribbon that remains briefly on the surface. Sift the flour, confectioners’ sugar and almond flour together separately.

  3. In a clean, grease-free bowl, whisk the whites until foamy. Gradually add their 20 g granulated sugar and continue to soft peaks.

  4. Fold a portion of the whites into the whole-egg mixture to lighten it. Fold in the sifted dry ingredients and remaining whites in alternating additions, using gentle strokes and stopping as soon as no dry pockets or white streaks remain.

  5. Spread about 1/4 inch thick on the prepared sheet or sheets. Bake until lightly colored and set, starting to check at 8 minutes and continuing as needed. The center should spring back gently, with no wet batter.

  6. Transfer the parchment and sponge to a rack to cool. Peel away the paper carefully once cool and cut as needed. Wrap well if keeping for later, and refrigerate if combined with a perishable filling.

Let’s cook

The full recipe.

Check off ingredients as you get them ready.

Changing servings? The ingredient list scales automatically. Adjust quantities named in the steps to match, and choose pans and cooking times for your batch.

Almond Joconde Sponge Sheet

No ratings yet
A thin almond sponge sheet made with whole eggs, extra yolks and a separately whipped meringue.
Servings: 1 small batch
Course: Dessert, Pastry
Cuisine: French-inspired

Some ingredient links are affiliate links. We may earn a commission at no extra cost to you. As an Amazon Associate I earn from qualifying purchases.

Ingredients
  

  •  
    150 g whole eggs lightly beaten and weighed without shell
  •  
    60 g egg yolks
  • 50 g granulated sugar for the whole-egg mixture
  • 100 g all-purpose flour sifted
  • 100 g egg whites
  • 20 g granulated sugar for the meringue
  •  
    100 g confectioners’ sugar sifted
  •  
    100 g almond flour finely ground, sifted

Equipment images are illustrative. Exact products may vary.

Instructions
 

  1. Heat the oven to 375°F. Line a large rimmed baking sheet with parchment, preparing a second if needed to keep the batter layer thin.
  2. Whip the whole eggs, yolks and their 50 g granulated sugar until thick, pale and foamy, with a ribbon that remains briefly on the surface. Sift the flour, confectioners’ sugar and almond flour together separately.
  3. In a clean, grease-free bowl, whisk the whites until foamy. Gradually add their 20 g granulated sugar and continue to soft peaks.
  4. Fold a portion of the whites into the whole-egg mixture to lighten it. Fold in the sifted dry ingredients and remaining whites in alternating additions, using gentle strokes and stopping as soon as no dry pockets or white streaks remain.
  5. Spread about 1/4 inch thick on the prepared sheet or sheets. Bake until lightly colored and set, starting to check at 8 minutes and continuing as needed. The center should spring back gently, with no wet batter.
  6. Transfer the parchment and sponge to a rack to cool. Peel away the paper carefully once cool and cut as needed. Wrap well if keeping for later, and refrigerate if combined with a perishable filling.

Notes

This is a sponge component, without a filling, syrup or assembled cake.
The two granulated sugar amounts belong to different egg mixtures.
The recipe control represents one batch, without a fixed sheet or portion count.
Do not taste raw batter.

Tried this recipe?

Let us know how it was!

A couple of useful answers.

Can I bake it as a deep cake?

These instructions are for a thin sponge sheet about 1/4 inch thick; a deep cake needs a different baking assessment.

Why whip the whites separately?

The meringue adds air that needs to be preserved with gentle folding.

Keep the good food going

Similar Recipes

Find another recipe to bring to the table.