Creamy Chimichurri Roast Chicken

Flavor Explosion: Creamy Chimichurri Roast Chicken 🌿🔥

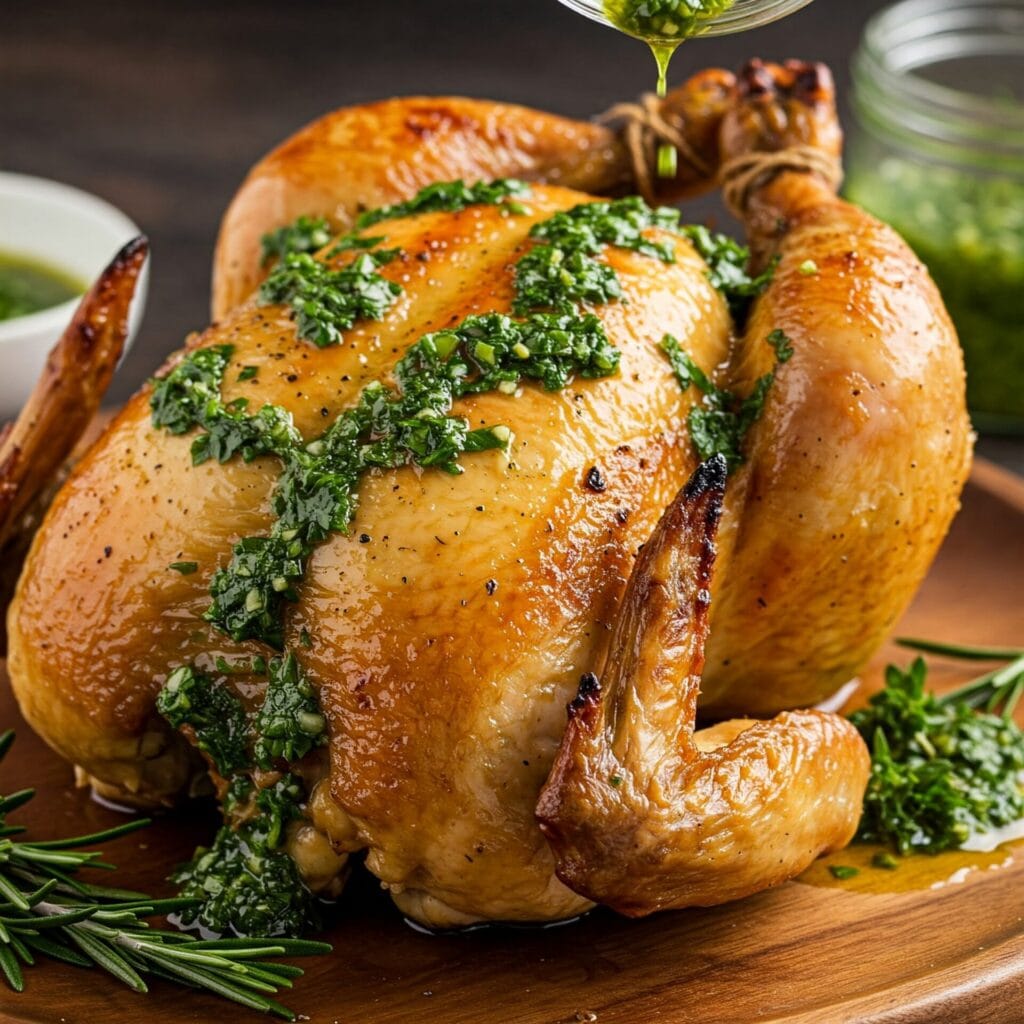
Juicy roasted chicken topped with a bold, herb-packed creamy chimichurri sauce—every bite is pure flavor! 🌿🔥

If you’re searching for a roast chicken recipe that goes beyond basic, this Creamy Chimichurri Roast Chicken is guaranteed to impress. With crispy, golden-brown skin, juicy meat, and a bold, herbaceous chimichurri cream sauce drizzled over the top, every bite bursts with flavor.

Not only is this dish beautiful to serve, but it also delivers a perfect balance of richness and freshness. Thanks to a creamy twist on traditional chimichurri, the sauce combines garlic, parsley, olive oil, vinegar, and a touch of cream.

As a result, it’s bright, savory, and just tangy enough to cut through the richness of the roast. Meanwhile, the roasted chicken brings satisfying comfort and hearty texture to the table.

Even better, the recipe is surprisingly simple to prepare. From seasoning the bird to roasting it to golden perfection, the steps are easy to follow. While the chicken cooks, you can blend the sauce—no complicated prep required.

Because this dish is so versatile, it’s perfect for a cozy family dinner or an impressive weekend meal with guests. Furthermore, it pairs beautifully with roasted potatoes, crusty bread, or a fresh green salad. And if you’re lucky enough to have leftovers, they’re just as delicious the next day.

In conclusion, if you’re ready to elevate your roast chicken game with bold herbs and creamy goodness, this recipe is calling your name. It’s easy, elegant, and guaranteed to wow.

For example, you can use boneless thighs for a faster cook time. In addition, the chimichurri sauce can be made in advance and refrigerated. Furthermore, any leftovers are excellent in wraps or sandwiches. As a result, this recipe is both practical and elevated. Therefore, it’s great for busy nights or special dinners alike.

Why You’ll Love It

🍗 Juicy, Golden Roast Chicken – Crispy on the outside, tender and flavorful on the inside.
🌿 Bold Chimichurri Flavor – A vibrant blend of parsley, garlic, vinegar, and herbs brings the dish to life.
🧄 Creamy Twist – This version adds smooth cream to classic chimichurri for a sauce that’s both fresh and indulgent.
Simple Yet Impressive – It requires minimal ingredients and steps, yet the presentation looks stunning.
🕒 Perfect for Any Occasion – Whether it’s a weeknight dinner or an elegant meal for guests, it works beautifully.
🥔 Pairs Beautifully – For example, try it with roasted veggies, potatoes, or crusty bread.
🔥 Elevates the Everyday – It’s a comforting dish with restaurant-quality flavor.
♻️ Tasty Leftovers – As a bonus, leftovers are great in wraps, salads, or grain bowls the next day.

🔪 How to Make Creamy Chimichurri Roast Chicken

Step 1: Preheat & Prep
Preheat your oven to 425°F (220°C). Pat your whole chicken (or chicken parts) dry with paper towels for extra crispy skin.

Step 2: Season the Chicken
Rub the chicken all over with olive oil, salt, pepper, garlic powder, and paprika. Make sure to season under the skin and inside the cavity if using a whole bird.

Step 3: Roast Until Golden
Place the chicken in a roasting pan or oven-safe skillet. Roast for about 45–60 minutes, or until the internal temperature reaches 165°F and the skin is golden and crispy.

Step 4: Make the Creamy Chimichurri
While the chicken roasts, blend fresh parsley, garlic, olive oil, red wine vinegar, a pinch of chili flakes, and a spoonful of sour cream or Greek yogurt until smooth and creamy. Adjust salt and spice to taste.

Step 5: Let the Chicken Rest
Remove chicken from the oven and let it rest for 10–15 minutes. This helps keep the juices locked in.

Step 6: Slice, Drizzle & Serve
Carve the chicken and drizzle generously with the creamy chimichurri sauce. Serve with extra sauce on the side and your favorite sides!

Jump to Section

📱 Follow Us 

📬 Subscribe for Updates

* indicates required

Intuit Mailchimp

Creamy Chimichurri Roast Chicken

No ratings yet
This Creamy Chimichurri Roast Chicken combines crispy, golden-roasted chicken with a bold, herb-loaded chimichurri sauce—elevated with a rich and creamy twist. It’s easy to make, bursting with flavor, and perfect for weeknight dinners or impressing guests. Serve it with your favorite sides and get ready for a dish that’s anything but ordinary! 🌿🍗✨
Prep Time 20 minutes
Cook Time 1 hour
Marinate & Chill 12 hours
Total Time 13 hours 20 minutes
Servings: 6 people
Course: Dinner, Main Course
Cuisine: Argentinian, Argentinian Fusion, South America
Calories: 579

Ingredients
  

Sauce:
  • 5 Cloves Garlic
  • Cups Fresh Cilantro packed
  • 2 Cups Parsley packed
  • ¼ Cup Red Wine Vinegar
  • tsp Kosher Salt
  • 4 tsp Dried Oregano
  • 2 tsp Crushed Red Pepper Flakes
  • ¾ Cup Extra Virgin Olive Oil divided
  • 1 Cup Greek Yogurt Plain Whole-Milk
Chicken And Assembly:
  • 4 Lb Whole Chicken whole, backbone removed, patted dry
  • tsp Kosher Salt

Equipment

1 Chef's knife (For chopping parsley, cilantro, garlic, and shallots with precision.)
1 Cutting board (A large, sturdy board to handle raw chicken and herbs. Preferably non-slip.)
1 Mixing Bowls (Set) (For marinating chicken and mixing the chimichurri and creamy sauce separately. Stainless steel or glass preferred.)
1 Garlic Press (Speeds up garlic prep and keeps your hands clean.)
1 Citrus Juicer (Handy for juicing fresh lemons or limes for the chimichurri.)
1 Whisk (For emulsifying the chimichurri and blending in the creamy base.)
1 Cast Iron Skillet (Ideal for getting a golden sear on the chicken and finishing it in the oven.)
1 Tongs (For turning chicken safely without losing juices.)
1 Meat Thermometer (Ensures chicken reaches 165°F for safe cooking.)
1 Food processor (Optional, but helps make a smooth chimichurri quickly.)
1 Measuring Cups & Spoons (Essential for consistent flavor in your marinade and sauce.)
1 Serving Platter (For presenting the finished creamy chimichurri chicken beautifully.)

Method
 

Sauce:
  1. Alright, let's make that chimichurri magic happen! In your food processor, combine the garlic, cilantro, parsley, vinegar, salt, oregano, and red pepper flakes. Drizzle in ¼ cup of olive oil, then pulse everything together until the herbs are finely chopped but not completely pulverized. We want a bit of texture in that vibrant green sauce!
    5 Cloves Garlic, 2½ Cups Fresh Cilantro, 2 Cups Parsley, ¼ Cup Red Wine Vinegar, 2¼ tsp Kosher Salt, 4 tsp Dried Oregano, 2 tsp Crushed Red Pepper Flakes, ¾ Cup Extra Virgin Olive Oil
  2. Now, let's bring that chimichurri to life! Transfer the vibrant herb mixture to a medium bowl. Add the yogurt and the remaining ½ cup of olive oil. Grab a whisk and vigorously whisk everything together until the mixture is emulsified. This means the oil and yogurt will combine into a creamy, cohesive sauce. You should have about 2½ cups of this luscious chimichurri—plenty to coat that chicken and have some leftover for dipping!
    1 Cup Greek Yogurt, ¾ Cup Extra Virgin Olive Oil
Chicken and Assembly:
  1. Time to prep that chicken! Place the chicken breast-side up on a cutting board. Open it up like a book, spreading it out as much as you can. Now, using your palms, press firmly down on the breastbone to flatten the chicken. You might hear a satisfying crack—that's the breastbone giving way to create a more even surface for cooking. Transfer the flattened chicken to a large bowl and generously rub it all over with salt and ¾ cup of that glorious chimichurri sauce. Make sure to get the sauce into every nook and cranny! Cover the bowl and let the chicken chill in the refrigerator for at least 2 hours, or preferably up to 12 hours. This allows the flavors to meld and the chicken to marinate beautifully. No need to bring it to room temperature before roasting—it's ready to go straight from the fridge to the oven!
    4 Lb Whole Chicken, 1¼ tsp Kosher Salt
  2. Okay, time to roast this bird to perfection! Place a rack in the middle of your oven and preheat it to 375°F (190°C). Now, carefully transfer the marinated chicken to a wire rack set inside a large rimmed baking sheet. Don't let that precious marinade go to waste! Spread any leftover chimichurri from the bowl over the skin of the chicken. This will help create a beautifully browned and flavorful crust. Slide the baking sheet into the oven and roast the chicken, rotating the baking sheet halfway through, until the skin is a deep golden brown and an instant-read thermometer inserted into the thickest part of a thigh registers 165°F (74°C). This should take about 50-60 minutes. Once it's cooked through, take the chicken out of the oven and let it rest for 10 minutes before carving. This allows the juices to redistribute, ensuring a tender and flavorful result.
  3. And now for the grand finale! Carefully transfer the roasted chicken to a serving platter. Take a look at that remaining chimichurri sauce. If it has separated a bit while the chicken was roasting, just give it a quick whisk in the bowl to bring it back together. Now, generously spoon that vibrant chimichurri over the chicken, or serve it alongside for dipping. Get ready to savor every bite of this flavor-packed masterpiece!

Nutrition

Serving: 12ozCalories: 579kcalCarbohydrates: 14gProtein: 57gFat: 34gSaturated Fat: 6gPolyunsaturated Fat: 4gMonounsaturated Fat: 22gTrans Fat: 0.04gCholesterol: 156mgSodium: 4511mgPotassium: 1328mgFiber: 2gSugar: 4gVitamin A: 2415IUVitamin C: 30mgCalcium: 133mgIron: 3mg

Notes

🐔 Chicken Champion: Tips for Roast Chicken Perfection

  • Butterfly the Bird: Flattening (spatchcocking) your chicken helps it cook more evenly and keeps the breasts from drying out. Don’t be shy—give that breastbone a good crack!
  • Marinate for Maximum Flavor: The longer the chicken marinates, the more intense and delicious the flavor. Aim for at least 2 hours, but overnight is ideal.
  • Give It Space: Don’t overcrowd the pan! Allowing room on your baking sheet promotes better air circulation and golden-brown skin.
  • Use a Meat Thermometer: An instant-read thermometer ensures your chicken is cooked perfectly—look for an internal temp of 165°F (74°C).
  • Let It Rest: Rest the chicken for at least 10 minutes after roasting to lock in juices and boost tenderness.

🌿 Chimichurri Cheer: Sauce Secrets for Maximum Flavor

  • Fresh Herbs Are Key: Always use the freshest herbs for vibrant color and unbeatable flavor.
  • Pulse, Don’t Puree: Use a food processor and pulse until finely chopped—you want texture, not a smoothie.
  • Whisk to Emulsify: To achieve that creamy chimichurri magic, whisk the oil and yogurt well until the sauce is smooth and cohesive.
  • Taste & Adjust: Chimichurri is all about balance. Add extra vinegar for tang, red pepper flakes for heat, or salt to brighten the flavors.

🍽️ Serving Sensations: How to Make It a Meal

  • Serve It Hot or Cold: This dish shines straight from the oven or served at room temperature—your call!
  • Choose the Right Sides: Roasted veggies, fresh salad, or crusty bread are perfect companions for soaking up all that creamy chimichurri.
  • Love Your Leftovers: Leftover sauce is gold—drizzle it over grilled meats, fish, veggies, or even use it as a zippy salad dressing or marinade.

🎉 Bonus Tip: Make It a Party

Feeding a crowd? No problem! This recipe easily scales up. Just double or triple the ingredients and you’ve got yourself a crowd-pleasing main dish worthy of any celebration.

With these tips and tricks, you’ll master the art of Creamy Chimichurri Roast Chicken—and trust us, your taste buds will thank you! 🌿🐔😋

Tried this recipe?

Let us know how it was!

🧂 What to Serve with Creamy Chimichurri Roast Chicken

This roast chicken is juicy, herb-packed, and drizzled with creamy chimichurri sauce—so it’s begging for sides that can soak up all that flavor. Whether you’re hosting a dinner party or just making a cozy family meal, here are some delicious pairings to round out your plate:

🥔 Comforting & Hearty

Garlic Mashed Potatoes: Creamy, buttery potatoes that pair perfectly with the tangy chimichurri drizzle.
Roasted Fingerling Potatoes: Crispy edges + tender centers = the perfect match for juicy chicken.
Herbed Rice Pilaf: Light, fluffy, and subtly seasoned so the chimichurri shines.

🥗 Fresh & Vibrant

Simple Arugula Salad: Peppery greens with a lemon vinaigrette bring brightness to the dish.
Grilled Veggie Medley: Zucchini, peppers, and red onion roasted or grilled for extra char and color.
Tomato & Avocado Salad: Creamy, juicy, and perfectly balanced against the bold chimichurri.

🍞 Breads & Bonus Bites

Warm Crusty Bread or Garlic Bread: Ideal for soaking up every last drop of sauce.
Polenta Cakes or Grits: A southern-style twist that adds richness and texture.
Crispy Chickpeas or Roasted Cauliflower: Great as a crunchy, spiced side.

🍷 Drinks to Pair

Chilled White Wine (Sauvignon Blanc or Albariño): Refreshing and herb-friendly.
Sparkling Water with Lime: Clean and citrusy to balance the creaminess.
Iced Green Tea or Light Beer: Earthy or crisp, depending on your vibe.

FAQ – Creamy Chimichurri Roast Chicken


Can I use chicken breasts or thighs instead of a whole chicken?

Yes! This recipe works beautifully with bone-in, skin-on chicken thighs, breasts, or even drumsticks. Just adjust the cooking time accordingly—smaller cuts usually roast in 25–35 minutes.


Can I make the chimichurri sauce ahead of time?

Absolutely. In fact, it tastes even better after a few hours in the fridge. You can make the chimichurri up to 3 days in advance, then stir in the yogurt or sour cream just before serving for the freshest texture.


How do I store leftovers?

Store leftover chicken and sauce separately in airtight containers. The chicken will keep for 3–4 days in the fridge, and the chimichurri sauce lasts up to 5 days. Reheat chicken gently in the oven or enjoy cold!


Is this recipe gluten-free?

Yes! The ingredients used in both the roasted chicken and chimichurri sauce are naturally gluten-free. Just double-check any packaged seasonings or yogurt brands to be sure.


What herbs can I substitute if I don’t have fresh parsley?

While parsley is traditional, you can use cilantro, basil, or even a mix of herbs like oregano and mint. The fresher, the better!


Can I grill the chicken instead of roasting it?

Definitely! Grilled chicken adds smoky depth and works especially well in warm weather. Just marinate, then grill over medium heat until the internal temp hits 165°F.


What can I serve with creamy chimichurri roast chicken?

It pairs well with roasted vegetables, mashed potatoes, herbed rice, simple salads, or crusty bread to soak up all that sauce. See the full “What to Serve” section above for more ideas!

Please follow and like us:
onpost_follow
fb-share-icon197
Tweet120
Pinterest20
Share 20
submit to reddit

Buffalo Cauliflower Wings

Cauliflower Wings with a Kick – Buffalo Style!

Spicy, crispy, and totally addictive—these Buffalo cauliflower wings are the ultimate crowd-pleasing snack! 

Craving the ultimate plant-based snack that’s bold, crispy, and full of flavor? These Buffalo Cauliflower Wings are the spicy, satisfying treat you’ve been searching for. Whether you’re throwing a game day bash, prepping party appetizers, or simply want to elevate your weekday meals, this easy recipe delivers big on flavor—without the meat.

Instead of traditional chicken wings, this version features tender cauliflower florets that are oven-baked or air-fried until perfectly crisp. As a result, you get a bite that’s crunchy on the outside, tender on the inside, and absolutely packed with bold Buffalo spice.

In addition, the ingredients are simple and likely already in your kitchen. Moreover, the method is easy enough for beginners, yet tasty enough to win over even the most devoted wing lovers. For example, you can adjust the heat level by using mild or extra-hot sauce, depending on your preference.

Because these wings are so versatile, they work for nearly any occasion. Serve them with ranch or blue cheese dip, plus a side of celery and carrots for that classic presentation. Therefore, whether you’re hosting friends, meal prepping for the week, or just feeding your own spicy cravings, this recipe is sure to impress.

In conclusion, Buffalo Cauliflower Wings are everything a great appetizer should be—crispy, flavorful, and absolutely addictive. Once you try them, you may never go back to chicken again.

💥 Why You’ll Love These Buffalo Cauliflower Wings

🔥 Bold Buffalo FlavorAs a result, every bite is spicy, tangy, and totally addictive.
🥦 Plant-Based & Vegan-FriendlyMoreover, it’s a satisfying meatless option for everyone.
Crispy Without FryingInstead of deep-frying, it’s oven-baked or air-fried for crunch without grease.
🧄 Simple Pantry IngredientsIn fact, you likely already have everything in your kitchen.
⏱️ Quick & Easy PrepBecause of that, it’s perfect for weeknights or spontaneous gatherings.
🍽️ Crowd-Pleasing Snack or AppetizerFor example, serve it at parties, game day, or brunch.
🧡 Customizable Heat LevelTherefore, you can make it mild, medium, or hot—just how you like

🔪 How to Make Buffalo Cauliflower Wings

Step 1: Prep the Cauliflower
Cut a medium head of cauliflower into bite-sized florets. Rinse and pat them dry for maximum crispiness.

Step 2: Make the Batter
In a bowl, whisk together flour, plant-based milk (or regular milk), garlic powder, onion powder, salt, and pepper until smooth. The batter should be thick enough to coat the cauliflower.

Step 3: Coat the Cauliflower
Dip each floret into the batter, letting the excess drip off. Place them on a lined baking sheet or into your air fryer basket in a single layer.

Step 4: Bake or Air Fry
Bake at 425°F for 20–25 minutes (flip halfway), or air fry at 400°F for about 15 minutes until golden and crispy.

Step 5: Toss in Buffalo Sauce
Remove from oven and gently toss the crispy cauliflower in your favorite Buffalo sauce. Want it extra spicy? Add a pinch of cayenne or hot sauce.

Step 6: Return to Crisp Up
Place the coated cauliflower back in the oven or air fryer for another 10 minutes to let the sauce bake in and edges crisp up.

Step 7: Serve & Enjoy
Serve hot with ranch or blue cheese dip, celery sticks, and maybe a sprinkle of fresh parsley or green onions. Dig in while they’re warm and crispy!

Jump to Section

📱 Follow Us 

📬 Subscribe for Updates

* indicates required

Intuit Mailchimp

Buffalo Cauliflower Wings

No ratings yet
These Buffalo Cauliflower Wings are crispy, spicy, and totally addictive! 🥦🔥 In addition, they’re baked or air-fried to golden perfection, then tossed in bold Buffalo sauce and served with creamy ranch or blue cheese dip. As a result, they make the perfect crowd-pleasing snack. Whether you're hosting game day or craving plant-based heat, this recipe delivers bold flavor without the meat. Therefore, it’s always a hit! 🌶️💥
Prep Time 10 minutes
Cook Time 35 minutes
Servings: 4 people
Course: Appetizer, Snacks
Cuisine: American, American Fusion
Calories: 170

Ingredients
  

  • Cup All-Purpose Flour Leveled
  • ¼ Cup Cornstarch
  • 1 tsp Garlic Powder
  • 1 tsp Onion Powder
  • 1 tsp Paprika
  • ½ tsp Sea Salt
  • ¾ Cup water
  • 2 Lbs Cauliflower Head

Equipment

1 Large mixing bowl (for coating the cauliflower in batter and tossing with sauce.)
1 Small bowl (for preparing the batter or buffalo sauce separately.)
1 Whisk or fork (to mix batter ingredients until smooth.)
1 Measuring cups & spoons ( for accuracy in flour, spices, and liquids.)
1 Cutting board (for chopping cauliflower into florets.)
1 Sharp chef’s knife (to cut through the cauliflower cleanly and safely)
1 Tongs ( for flipping the wings or tossing them in sauce without breaking them.)

Method
 

  1. Start by preheating your oven to 450 degrees Fahrenheit. While the oven is heating up, prepare two large baking sheets by lining them with parchment paper. This will help prevent the cauliflower from sticking to the baking sheets and make cleanup easier.
  2. In a large bowl, combine the flour, cornstarch, garlic powder, onion powder, paprika, and salt. Whisk the dry ingredients together until they are well combined. Gradually add the water to the bowl, whisking constantly, until a smooth batter forms. Make sure there are no lumps in the batter. Add the cauliflower florets to the bowl and use your hands or a spoon to gently stir until all the florets are evenly coated in the batter.
    ⅔ Cup All-Purpose Flour, ¼ Cup Cornstarch, 1 tsp Garlic Powder, 1 tsp Onion Powder, 1 tsp Paprika, ½ tsp Sea Salt, ¾ Cup water
  3. Using tongs or a fork, carefully lift the cauliflower florets out of the batter, allowing any excess batter to drip back into the bowl. Arrange the florets in a single layer on the prepared baking sheets, making sure they are not touching each other. Bake the cauliflower for 10 minutes, then remove the baking sheets from the oven. Use a spatula to carefully flip the florets. Return the baking sheets to the oven, swapping their positions on the oven racks. This will help ensure even cooking. Bake for another 10 minutes, or until the cauliflower is golden brown and crispy.
    2 Lbs Cauliflower Head
  4. Remove the baking sheets from the oven. Using a pastry brush or a spoon, brush the cauliflower florets with some of the buffalo wing sauce, making sure to coat them evenly. Return the baking sheets to the oven and bake for another 12 to 15 minutes, or until the cauliflower is dark golden brown and crisp around the edges. The exact cooking time will depend on your oven and the size of the cauliflower florets.
  5. Remove the baking sheets from the oven and let the cauliflower cool slightly. Brush the cauliflower florets with additional buffalo wing sauce, making sure to coat them evenly. This will add extra flavor and spice. Transfer the cauliflower wings to a serving platter or individual plates. Serve immediately while they are still hot and crispy. For dipping, ranch dressing is a classic pairing that helps to cool the heat of the buffalo sauce.

Nutrition

Serving: 12ozCalories: 170kcalCarbohydrates: 36gProtein: 7gFat: 1gSaturated Fat: 0.3gPolyunsaturated Fat: 0.2gMonounsaturated Fat: 0.1gSodium: 363mgPotassium: 726mgFiber: 5gSugar: 4gVitamin A: 247IUVitamin C: 109mgCalcium: 58mgIron: 2mg

Notes

📝 Recipe Notes – Buffalo Cauliflower Wings

  • Flour Options: You can use all-purpose flour, chickpea flour, or a gluten-free blend. Each offers a slightly different texture, so pick your favorite based on dietary needs.
  • Make It Extra Crispy: For extra crunch, add a tablespoon of cornstarch to the batter and bake on a wire rack instead of directly on parchment paper.
  • Buffalo Sauce Tip: Want more heat? Add cayenne or a splash of hot sauce. Prefer mild? Mix the Buffalo sauce with melted butter or Greek yogurt to tone it down.
  • Air Fryer Instructions: Cook at 400°F for 15–18 minutes, shaking the basket halfway through. They’ll come out extra crispy with minimal oil!
  • Vegan-Friendly: Use plant-based milk and vegan Buffalo sauce (most are!). Pair with dairy-free ranch or blue cheese for a fully vegan snack.
  • Reheating: Re-crisp leftovers in the oven or air fryer at 375°F for 5–8 minutes. Microwaving will soften the coating.
  • Serving Tip: These wings are best served immediately with cold celery sticks, carrot slices, and your favorite dip. Great as an appetizer, snack, or even a light main dish!

Tried this recipe?

Let us know how it was!

🧂 What to Serve with Buffalo Cauliflower Wings

These spicy, saucy bites are a total flavor bomb — but they’re even better when paired with the perfect sides and sips. Whether you’re planning a game day spread, party platter, or just spicing up your snack routine, here are some delicious ideas to serve alongside your Buffalo Cauliflower Wings:

🥕 Cool & Crunchy

Celery & Carrot Sticks: The classic combo — crisp, refreshing, and the perfect cooling contrast to all that heat.
Cucumber Ranch Salad: Sliced cucumbers, red onion, and dill tossed in creamy ranch dressing. Light, cooling, and super easy.
Apple Slaw: A sweet and tangy slaw made with cabbage, apples, and a light vinaigrette for a little crunch and contrast.

🍚 Hearty & Comforting

Mac & Cheese: Creamy, cheesy, and oh-so-satisfying — the ultimate comfort food to balance the spice.
Loaded Potato Wedges: Crispy wedges topped with cheese, scallions, and a drizzle of ranch or hot sauce.
Cauliflower Fried Rice: Keep the cauliflower theme going with a lighter twist that still satisfies.

🥑 Dips & Extras

Ranch or Blue Cheese Dip: A must-have for dunking — cool, creamy, and made to pair with Buffalo heat.
Avocado Crema: Smooth, tangy, and a little unexpected — like guac, but silkier.
Garlic Hummus: A savory side that tones down the spice and boosts the flavor variety.

🍹 Drinks to Cool the Heat

Iced Lemonade or Limeade: Sweet, citrusy, and perfectly refreshing.
Cucumber Mint Sparkler: Fizzy, crisp, and cooling — ideal for those fiery bites.
Non-Alcoholic Beer or a Cold Lager: Classic pairings for wings that just work.

❓ FAQ – Buffalo Cauliflower Wings


Can I make Buffalo Cauliflower Wings in an air fryer?

Yes! The air fryer is a great option for extra crispiness. Cook at 400°F for 15–18 minutes, flipping halfway. They’ll turn out perfectly golden and crunchy with less oil.


Are Buffalo Cauliflower Wings vegan?

They can be! Just use plant-based milk for the batter and a vegan Buffalo sauce (many are naturally vegan). Serve with dairy-free ranch or blue cheese dip to keep it fully plant-based. 🌱


Can I make them gluten-free?

Absolutely. Swap the all-purpose flour with a gluten-free flour blend or chickpea flour for a delicious GF version. Just make sure your hot sauce is also gluten-free.


How spicy are these wings?

They’re moderately spicy, depending on the Buffalo sauce you use. You can reduce the heat by using a mild sauce or mixing it with a bit of melted butter or Greek yogurt to mellow it out.


How do I keep them crispy after tossing in sauce?

For the best texture, return them to the oven or air fryer for 5–10 minutes after tossing in sauce. This helps the coating re-crisp and bakes in the flavor.


What should I serve with Buffalo Cauliflower Wings?

Classic sides include celery sticks, carrots, and ranch or blue cheese dip. You can also pair them with mac and cheese, slaw, or seasoned fries. Check out our full “What to Serve” section for tasty ideas!


Can I prep these ahead of time?

You can prep the batter and cut the cauliflower in advance, but for the best texture, bake or air-fry them right before serving. Reheating can work, but they’re crispiest when fresh.

Please follow and like us:
onpost_follow
fb-share-icon197
Tweet120
Pinterest20
Share 20
submit to reddit

Coconut Curry Salmon

Coconut Curry Salmon

Dive into bold, vibrant flavor with this Coconut Curry Salmon—a dish that brings together tender, flaky salmon and a luxuriously creamy coconut curry sauce. Infused with warming spices, fresh ginger, garlic, and a touch of lime, each bite is layered with savory depth and gentle heat. The richness of the coconut milk balances perfectly with the natural richness of the salmon, creating a dish that’s both comforting and exotic. Served over rice or with warm naan, it’s a restaurant-worthy meal that comes together effortlessly in your own kitchen.

Coconut Curry Salmon

No ratings yet
Coconut curry salmon is a vibrant dish where tender salmon fillets are immersed in a rich and fragrant curry sauce. This sauce, typically made with creamy coconut milk, is infused with a medley of aromatic spices. Common additions include ginger, garlic, and chili, providing warmth and depth. The salmon is often pan-seared to achieve a slightly crispy exterior while maintaining a moist and flaky interior. It then simmers in the curry sauce, absorbing the complex flavors. This dish is typically served with fluffy rice, which acts as the perfect vehicle for soaking up the luscious sauce. Garnishes like fresh cilantro, lime wedges, and chopped peanuts add brightness and texture, completing this flavorful and satisfying meal.
Prep Time 10 minutes
Cook Time 30 minutes
Servings: 6 people
Course: Dinner, Lunch, Main Course
Cuisine: Southeast Asian, Thai
Calories: 267

Ingredients
  

  •  
    16 oz Salmon filets
  • 1 Kosher Salt
  • 1 Ground Black Pepper (freshly ground)
  • 1 Tbsp Vegetable oil
  • 1 Shallot thinly sliced
  •  
    1 Tbsp Red curry paste
  • 2 Cloves Garlic minced
  •  
    1 tsp Ginger, Fresh minced
  •  
    14 oz Coconut milk canned
  • 1 Tbsp Sriracha
  •  
    1 Tbsp Fish sauce
  •  
    1 Rice pre cooked
  • 1 Lime Cut into wedges
  • 1 Fresh Cilantro chopped

Method
 

  1. Grab your salmon fillets and season them generously with salt and pepper. Next, heat up your skillet over medium heat and add the oil. Once the oil is nice and hot, it's time for the salmon! Place the fillets in the skillet, skin-side down. Let them sizzle away for about 5 minutes, until that skin gets beautifully golden and crispy. Flip them over and cook for another 5 minutes, or until the salmon is cooked through. Transfer the salmon to a plate, and you're ready for the next step!
    16 oz Salmon filets, 1 Kosher Salt, 1 Ground Black Pepper, 1 Tbsp Vegetable oil
  2. Place the skillet back on the stovetop over medium heat. Add the shallots and cook, stirring occasionally, until they become soft and golden brown, about 3 minutes. Next, add the curry paste, minced garlic, and ginger to the skillet. Cook for another minute, stirring constantly, until the paste is fragrant and has deepened in color. Reduce the heat slightly and slowly whisk in the coconut milk, ensuring it is fully incorporated into the sauce. Then, add the sriracha and fish sauce. Bring the sauce to a gentle simmer. Carefully return the salmon fillets to the skillet, nestling them into the sauce. Allow the salmon to simmer until it flakes easily with a fork and reaches an internal temperature of 145°F. This should take about 15 minutes, depending on the thickness of the salmon. As the salmon simmers, spoon the sauce over the fillets occasionally to ensure they are well coated and infused with flavor. Taste the sauce and adjust the seasoning by adding more sriracha or fish sauce as needed.
    1 Shallot, 1 Tbsp Red curry paste, 2 Cloves Garlic, 1 tsp Ginger, Fresh, 14 oz Coconut milk, 1 Tbsp Sriracha, 1 Tbsp Fish sauce
  3. And there you have it! Spoon that amazing sauce over the salmon – don't be shy! Serve it up with a generous portion of fluffy rice. A squeeze of lime and a sprinkle of cilantro add the perfect finishing touch. Dig in and enjoy!
    1 Rice, 1 Lime , 1 Fresh Cilantro

Nutrition

Serving: 6ozCalories: 267kcalCarbohydrates: 3gProtein: 17gFat: 21gSaturated Fat: 14gPolyunsaturated Fat: 3gMonounsaturated Fat: 3gTrans Fat: 0.01gCholesterol: 42mgSodium: 335mgPotassium: 547mgFiber: 0.3gSugar: 1gVitamin A: 428IUVitamin C: 3mgCalcium: 29mgIron: 3mg

Notes

Choosing the Salmon:
  • Freshness: Look for salmon fillets that are firm, brightly colored, and have a fresh, mild scent. Avoid any with a strong fishy odor or discoloration.
  • Skin on or off: While skin-on fillets provide extra flavor and texture, skinless fillets work well too.
  • Sustainability: Consider purchasing sustainably sourced salmon to support responsible fishing practices.
Cooking the Salmon:
  • Don't overcrowd the pan: Give the fillets enough space in the skillet to ensure even cooking and browning.
  • Adjust cooking time: Cooking time will vary depending on the thickness of the fillets and your stovetop. Aim for an internal temperature of 145°F (63°C) for food safety.
  • Avoid overcooking: Overcooked salmon can become dry and tough. Aim for a moist and flaky texture.
Making the Curry Sauce:
  • Curry paste: Use your favorite red or yellow curry paste. Adjust the amount to your desired level of spiciness.
  • Aromatics: Fresh ginger and garlic are key to building flavor in the sauce.
  • Coconut milk: Use full-fat coconut milk for a rich and creamy sauce.
  • Balancing flavors: Taste the sauce and adjust the sriracha and fish sauce to achieve the desired balance of sweet, salty, spicy, and sour.
  • Simmering: Simmering the salmon in the sauce allows it to absorb the flavors fully.
Serving:
  • Rice: Serve with fluffy white or brown rice to soak up the delicious sauce.
  • Garnishes: Fresh cilantro, lime wedges, and chopped peanuts add brightness, acidity, and texture.
  • Sides: Consider serving with additional sides like steamed vegetables or a simple salad.
Other Tips:
  • Make it ahead: The curry sauce can be made ahead of time and reheated.
  • Storage: Leftovers can be stored in the refrigerator for up to 3 days.
  • Adapt to your taste: Feel free to adjust the ingredients and spices to your liking. You can add vegetables like bell peppers, onions, or spinach to the sauce.
By keeping these notes in mind, you'll be well on your way to preparing a flavorful and satisfying coconut curry salmon dish. Enjoy!

Tried this recipe?

Let us know how it was!

Related Recipes

Ingredients

  • 16 oz Salmon fillets
  • 1 tsp Kosher salt
  • 1 tsp Ground black pepper (freshly ground)
  • 1 Tbsp Vegetable oil
  • 1 Shallot, thinly sliced
  • 1 Tbsp Red curry paste
  • 2 Cloves Garlic, minced
  • 1 tsp Fresh ginger, minced
  • 14 oz Canned coconut milk
  • 1 Tbsp Sriracha
  • 1 Tbsp Fish sauce
  • Cooked rice (for serving)
  • 1 Lime, cut into wedges (for serving)
  • Chopped cilantro (for serving)

Image Gallery Coconut Curry Salmon

Storage & Leftovers

Storage:

  • Refrigerator: Store cooled leftovers in an airtight container in the fridge for up to 3 days. Keep the salmon and curry sauce together for maximum flavor, or separate them if you prefer to reheat individually.

  • Freezer: While the curry sauce freezes well, the texture of salmon can change slightly after freezing. If freezing, do so in portions and use within 1 month for best results.

Reheating:

  • Stovetop (Recommended): Reheat gently over medium-low heat in a skillet, adding a splash of water or coconut milk to loosen the sauce. Heat until warmed through, about 5–7 minutes.

  • Microwave: Place in a microwave-safe dish, cover loosely, and heat in 30-second intervals, stirring between rounds to avoid overcooking the fish.

Tips:

  • Avoid high heat to keep the salmon from drying out.

  • Leftovers are perfect for grain bowls, stuffed pitas, or as a topping for coconut rice.

  • For added freshness, squeeze a little lime juice or sprinkle chopped cilantro before serving again.

Please follow and like us:
onpost_follow
fb-share-icon197
Tweet120
Pinterest20
Share 20
submit to reddit

Subscribe for New Recipes

* indicates required

Intuit Mailchimp

Beef Stroganoff Soup

Beef Stroganoff Soup

This hearty and comforting Beef Stroganoff Soup transforms the classic dish into a rich, soul-warming bowl of goodness. Tender ground beef is simmered with savory mushrooms and aromatic onions in a creamy beef broth infused with garlic, Worcestershire sauce, and tangy sour cream. Swirls of egg noodles soak up all the flavor, making every spoonful creamy, beefy, and deeply satisfying. Finished with a sprinkle of fresh parsley, this soup is the perfect fusion of cozy comfort and bold flavor—ideal for chilly nights or an easy weeknight dinner.

Beef Stroganoff Soup

No ratings yet
This Beef Stroganoff Soup is a flavor adventure! Tender beef and earthy mushrooms swim in a rich, savory broth, all brought together with a touch of red wine and a swirl of creamy sour cream. It's comfort food with a sophisticated twist, perfect for a cozy night in.
With simple ingredients and easy-to-follow instructions, this recipe is a winner for seasoned cooks and beginners alike. Each bite is an explosion of texture and taste, from the tender beef to the chewy egg noodles. You'll be amazed at how quickly this soup disappears from your bowls!
Prep Time 15 minutes
Cook Time 1 hour
Servings: 6 people
Course: Dinner, Lunch, Main Course
Cuisine: Eastern European, Ukraine
Calories: 361

Ingredients
  

  • 1 Tbsp Unsalted Butter
  • 3 Tbsp Olive Oil divided
  • 1 lb Stew Beef
  • 8 oz Cremini mushrooms sliced
  • 1 Cup Yellow Onion diced
  • 3 Cloves Garlic minced
  • 2 Tbsp Tomato Paste
  • 1 Tbsp Worcestershire Sauce
  • ½ Cup Dry Red Wine
  • 6 Cups Beef Stock low sodium
  • 2 Cups Egg noodles
  • ½ Cup Sour Cream
  • 2 Tbsp All-Purpose Flour
  • 1 Bunch Parsley fresh, for garnish
  • 1 pinch Kosher Salt to taste
  • 1 pinch Ground Black Pepper to taste

Method
 

  1. In a Dutch oven, melt the butter with 2 tablespoons of olive oil over medium-high heat. Add the beef, season with salt and pepper, and cook until browned on all sides. Remove the beef from the pot and set it aside.
  2. Add the onion to the pot with the remaining oil and cook until softened. Then, add the mushrooms and cook until they are tender.
  3. Stir in the tomato paste and Worcestershire sauce, making sure they are evenly distributed throughout the mushroom and onion mixture.
  4. Carefully pour the red wine into the pot, ensuring it covers the bottom, to deglaze. Bring the mixture to a boil over medium-high heat, then let the wine simmer and reduce for approximately 1-2 minutes, or until slightly thickened.
  5. Gently return the browned beef to the pot and pour in 5 cups of rich beef stock. Over medium-high heat, bring the liquid to a rolling boil. Once boiling, reduce the heat to low, cover the pot snugly, and let it simmer for 35-40 minutes. The beef will be perfectly tender and infused with flavor.
  6. Stir in the noodles, cover the pot, and simmer for 5-7 minutes, or until the noodles reach your desired level of tenderness.
  7. While the noodles cook, combine the sour cream and flour in a small bowl. Ladle 2 cups of the hot soup into the bowl and whisk until well combined. Return the mixture back into the pot and simmer for 1-2 minutes, stirring frequently, until thickened. If the noodles absorbed too much liquid, add more broth.
  8. Finish the soup with a sprinkle of salt and freshly ground black pepper according to your preference. Just before serving, stir in a handful of chopped fresh parsley for a bright, herbaceous lift.

Nutrition

Serving: 12ozCalories: 361kcalCarbohydrates: 22gProtein: 26gFat: 17gSaturated Fat: 6gPolyunsaturated Fat: 1gMonounsaturated Fat: 8gTrans Fat: 0.1gCholesterol: 74mgSodium: 628mgPotassium: 1112mgFiber: 2gSugar: 5gVitamin A: 1072IUVitamin C: 17mgCalcium: 93mgIron: 4mg

Notes

Beef Choice & Prep:
  • Cut: Use a tender cut of beef like sirloin, tenderloin, or New York strip.
  • Slicing: Slice the beef against the grain for maximum tenderness. Aim for thin, bite-sized pieces.
  • Don't overcrowd the pan: When searing the beef, work in batches to ensure proper browning. Overcrowding will cause the beef to steam instead of sear.
Flavor Boosters:
  • Umami: Don't be afraid to add a splash of Worcestershire sauce or a dollop of tomato paste to deepen the savory flavors.
  • Mushrooms: While not traditional in every stroganoff, mushrooms add a wonderful earthy note. Use cremini, button, or even wild mushrooms.
  • Aromatics: Sautéing onions and garlic with the mushrooms builds a flavorful foundation for the soup.
  • Herbs: Fresh thyme or a bay leaf simmered with the broth adds subtle complexity.
Texture & Consistency:
  • Noodles: Egg noodles are classic, but you can experiment with pappardelle, wide egg noodles, or even small pasta shapes.
  • Sour cream: For the creamiest texture, use full-fat sour cream.
  • Tempering: To prevent the sour cream from curdling, temper it by gradually whisking in a small amount of the hot soup before adding it to the pot.
  • Thickness: If your soup is too thin, you can thicken it with a cornstarch slurry (cornstarch mixed with a little cold water or broth).
Serving Suggestions:
  • Garnishes: Fresh parsley is a must, but you can also try chives, dill, or a dollop of crème fraîche.
  • Sides: Serve with crusty bread, a simple salad, or roasted vegetables.
Other Tips:
  • Broth: Use a good quality beef broth for the best flavor. Homemade is ideal, but a store-bought low-sodium broth works well too.
  • Simmering: Don't rush the simmering process. This allows the beef to become tender and the flavors to meld.
  • Salt & Pepper: Season gradually throughout the cooking process, tasting and adjusting as needed.
Enjoy your delicious homemade beef stroganoff soup!

Tried this recipe?

Let us know how it was!

Related Recipes

Ingredients

Ingredients:

  • 1 tablespoon unsalted butter
  • 3 tablespoons olive oil, divided
  • 1 pound stew beef, cut into 1-inch cubes
  • 8 ounces cremini mushrooms, sliced
  • 1 cup yellow onion, diced
  • 3 cloves garlic, minced
  • 2 tablespoons tomato paste
  • 1 tablespoon Worcestershire sauce
  • ½ cup dry red wine
  • 6 cups beef stock, low sodium
  • 2 cups egg noodles
  • ½ cup sour cream
  • 2 tablespoons all-purpose flour
  • 1 bunch fresh parsley, for garnish
  • Kosher salt, to taste
  • Ground black pepper, to taste

Image Gallery Beef Stroganoff Soup

Storage & Leftovers

Refrigerator:
Let the soup cool to room temperature, then transfer to an airtight container. Store in the refrigerator for up to 4 days. The noodles may absorb more liquid over time, so you can add a splash of broth or water when reheating to restore the consistency.

Freezer:
For best results, freeze the soup without the noodles (they can become mushy). Store the base in freezer-safe containers for up to 2 months. When ready to eat, thaw overnight in the fridge, reheat gently, and stir in freshly cooked noodles.

Reheating:
Warm leftovers on the stovetop over medium heat or microwave in short bursts, stirring in between. Add broth or milk as needed to loosen the soup. Stir in a spoonful of sour cream after reheating if you’d like to refresh the creaminess.

Please follow and like us:
onpost_follow
fb-share-icon197
Tweet120
Pinterest20
Share 20
submit to reddit

Subscribe for New Recipes

* indicates required

Intuit Mailchimp

Shrimp Chowder

Shrimp Chowder

This Shrimp Chowder is a creamy coastal dream in a bowl! Tender, juicy shrimp swim in a rich, flavorful broth alongside hearty chunks of potato and sweet bursts of corn—each spoonful delivering a comforting medley of textures and seaside flavor.

It’s a celebration of simple ingredients done right: plump shrimp, velvety potatoes, and a whisper of smoky bacon to deepen the flavor. Whether you’re a seafood lover or just craving something soul-warming, this chowder is sure to hit the spot.

Why You’ll Love It:
🦐 Flavorful – A perfect balance of creamy, savory, and subtly sweet.
🥔 Hearty – Loaded with shrimp, potatoes, and corn for a filling, satisfying meal.
Weeknight-friendly – Quick and easy to make, yet elegant enough for guests.

Grab a spoon and dive in—this homemade Shrimp Chowder brings the cozy charm of a seaside kitchen straight to your table.

Shrimp Chowder

No ratings yet
Shrimp chowder is a creamy, comforting soup packed with tender shrimp, potatoes, and often other vegetables like corn and celery. It's a flavorful and satisfying dish, perfect for a cozy meal.
Prep Time 15 minutes
Cook Time 25 minutes
Servings: 4 people
Course: Dinner, Main Course
Cuisine: New England, Northeast
Calories: 397

Ingredients
  

  • 2 Slices Bacon chopped
  • 1 Tbsp Extra Virgin Olive Oil a little extra for drizzling
  • 1 small Yellow Onion chopped
  • 1 tsp Tomato Paste
  • 3 Tbsp All-Purpose Flour
  • 3 Cups Chicken Broth low Sodium
  • 2 Cups Half and Half
  • 1 lb Red Skinned Potatoes halved or quartered if large
  • 12 oz Medium Shrimp
  • ½ Cup Fresh Basil Loosely packed and torn into pieces
  • 1 pinch Kosher Salt to taste
  • 1 pinch Ground Black Pepper to taste

Method
 

  1. Cook the bacon in a Dutch oven over medium heat, stirring occasionally, until it becomes crispy. Add the oil and onion to the pot and cook until the onion softens. Stir in the tomato paste and cook briefly until it darkens slightly. Sprinkle in the flour and cook, stirring constantly, to create a roux.
    2 Slices Bacon, 1 Tbsp Extra Virgin Olive Oil, 1 small Yellow Onion, 1 tsp Tomato Paste, 3 Tbsp All-Purpose Flour
  2. Gradually whisk in the broth and half-and-half, stirring constantly until the mixture is smooth and there are no lumps of flour remaining. Add the potatoes, 1 teaspoon of salt, and 1/2 teaspoon of pepper. Bring the chowder to a boil over medium-high heat, then reduce the heat to medium-low, cover the pot, and simmer until the potatoes are tender, about 15 minutes.
    3 Cups Chicken Broth, 2 Cups Half and Half, 1 lb Red Skinned Potatoes, 1 pinch Kosher Salt, 1 pinch Ground Black Pepper
  3. Gently stir in the shrimp and cook until they turn pink and opaque, about 4 minutes. Taste the chowder and adjust the seasoning with more salt and pepper if needed. If the chowder is too thick, thin it out with a little bit of water. Ladle the chowder into bowls, drizzle with a touch of olive oil, and garnish with fresh basil leaves and a sprinkle of black pepper.
    1 Tbsp Extra Virgin Olive Oil, 12 oz Medium Shrimp, ½ Cup Fresh Basil, 1 pinch Ground Black Pepper

Nutrition

Serving: 12ozCalories: 397kcalCarbohydrates: 31gProtein: 26gFat: 20gSaturated Fat: 9gPolyunsaturated Fat: 2gMonounsaturated Fat: 7gTrans Fat: 0.003gCholesterol: 184mgSodium: 941mgPotassium: 995mgFiber: 3gSugar: 8gVitamin A: 630IUVitamin C: 13mgCalcium: 217mgIron: 2mg

Notes

Ingredients:
  • Shrimp: Use fresh or frozen shrimp, peeled and deveined. If using frozen, thaw them completely before adding to the chowder.
  • Bacon: Bacon adds a smoky depth of flavor. You can use pancetta or salt pork as substitutes. 
  • Vegetables: The classic base includes onions, celery, and potatoes. You can add other vegetables like corn, carrots, or bell peppers for variety.  
  • Tomato Paste: Tomato paste adds richness and depth of flavor. Make sure to cook it briefly to remove any raw taste.  
  • Flour: Flour is used to thicken the chowder. All-purpose flour is common, but you can use a gluten-free blend if needed.
  • Broth: Use a good-quality chicken or seafood broth. Homemade broth will add the most flavor.
  • Half-and-Half: This adds creaminess. You can use whole milk or a combination of milk and cream as alternatives.
  • Potatoes: Russet or Yukon Gold potatoes work well in chowder.
  • Seasonings: Salt and pepper are essential. Some recipes also add herbs like thyme or bay leaves.  
  • Garnishes: Fresh basil is a classic garnish. You can also use parsley, chives, or a squeeze of lemon juice.
Cooking Tips:
  • Crisp the Bacon: Cook the bacon until it's nice and crispy to render out the fat and add maximum flavor.  
  • Don't Overcrowd the Pot: When sautéing the vegetables, make sure the pot isn't overcrowded. This will ensure they cook evenly.
  • Cook the Tomato Paste: Cook the tomato paste briefly until it darkens slightly to remove any raw taste.
  • Make a Roux: Cooking the flour with the bacon fat and vegetables creates a roux, which helps to thicken the chowder.
  • Simmer Gently: Simmer the chowder gently to allow the potatoes to cook through and the flavors to meld.
  • Don't Overcook the Shrimp: Add the shrimp towards the end of cooking and cook just until they turn pink and opaque. Overcooked shrimp will be tough.
  • Adjust Consistency: If the chowder is too thick, thin it out with a little water or broth.
  • Taste and Adjust: Always taste the chowder before serving and adjust the seasonings to your liking.
Serving Suggestions:
  • Bread: Serve with crusty bread or oyster crackers for dipping.
  • Salad: A simple green salad is a refreshing accompaniment.
  • Sides: Coleslaw or cornbread also pair well with shrimp chowder.  
Variations:
  • Spicy: Add some diced jalapeños or a pinch of cayenne pepper for heat.
  • Smoked: Use smoked paprika or chipotle powder for a smoky flavor.
  • Corn Chowder: Add corn kernels for a sweeter, summery twist.
With these tips, you'll be well on your way to making a delicious and satisfying shrimp chowder!

Tried this recipe?

Let us know how it was!

Related Recipes

Ingredients

Ingredients:

  • 2 Slices Bacon, chopped: The bacon adds a smoky, savory flavor to the soup.
  • 1 Tbsp Extra Virgin Olive Oil: Olive oil is used to sauté the onion and create a flavorful base.
  • 1 small Yellow Onion, chopped: The onion adds sweetness and depth of flavor.
  • 1 tsp Tomato Paste: Tomato paste adds a rich, concentrated tomato flavor.
  • 3 Tbsp All-Purpose Flour: The flour is used to thicken the soup.
  • 3 Cups Chicken Broth (low sodium): Chicken broth forms the base of the soup.
  • 2 Cups Half and Half: Half and half adds creaminess and richness to the soup.
  • 1 lb Red Skinned Potatoes, halved or quartered if large: Potatoes add substance and a comforting texture to the soup.
  • 12 oz Medium Shrimp: The shrimp is the star of the show, adding a delicate seafood flavor.
  • ½ Cup Fresh Basil, loosely packed and torn into pieces: Fresh basil adds a bright, herbaceous flavor.
  • 1 pinch Kosher Salt: Salt enhances the flavors of the soup.
  • 1 pinch Ground Black Pepper: Black pepper adds a subtle warmth and depth of flavor.

Tips for the Best Shrimp Chowder:

  • Don’t overcook the shrimp: Cook the shrimp just until they turn pink and are cooked through. Overcooking can make them tough and rubbery.
  • Use fresh ingredients: Fresh ingredients make a big difference in the flavor of the soup.
  • Don’t overcook the potatoes: Cook the potatoes until they are tender but not mushy.
  • Season to taste: Taste the soup as you go and adjust the seasonings as needed.
  • Garnish with fresh herbs: A sprinkle of fresh herbs like parsley or chives adds a beautiful finishing touch.
  • Serve hot: Serve the soup hot with a side of crusty bread or crackers.

Enjoy your homemade Shrimp Chowder! Let me know if you have any questions or want help with the instructions. 🥣😊

Image Gallery Shrimp Chowder

Storage & Leftovers

Storage

  • Cool it down: Before storing, allow the chowder to cool completely. This prevents condensation, which can lead to bacterial growth and affect the texture.
  • Refrigerator: Transfer the cooled chowder to an airtight container and store it in the refrigerator for up to 2-3 days.
  • Freezer: Freezing Shrimp Chowder isn’t generally recommended as dairy-based soups can separate and become grainy upon thawing. However, if you do freeze it, do so before adding the half and half. Store it in a freezer-safe container or bag for up to 1 month.

Reheating

  • Stovetop: The best way to reheat this chowder is gently on the stovetop over low heat. Stir occasionally to prevent sticking. If the chowder has thickened in the refrigerator, add a splash of milk or broth to thin it out.
  • Microwave: You can reheat it in the microwave, but do so in short bursts, stirring frequently, to prevent overheating and separation.

Tips and Tricks

  • Portioning: If you plan to freeze the chowder, consider freezing it in individual portions for easy grab-and-go meals.
  • Separation: If the chowder separates slightly after refrigeration, don’t worry! A quick whisk or a blend with an immersion blender can often restore its creamy texture.
  • Flavor Boost: When reheating, consider adding a squeeze of fresh lemon juice or a pinch of your favorite herbs to brighten the flavors.
  • Garnish Fresh: If you’re using any fresh herbs as a garnish, add them just before serving to maintain their freshness and flavor.
  • Freshness: Always check for any signs of spoilage before consuming leftovers. Look for any off-putting smells, discoloration, or mold.

By following these tips, you can enjoy your homemade Shrimp Chowder even a couple of days after making it!

Please follow and like us:
onpost_follow
fb-share-icon197
Tweet120
Pinterest20
Share 20
submit to reddit

Subscribe for New Recipes

* indicates required

Intuit Mailchimp