Bagel And Cheese Bake

Bagel & Cheese Breakfast Bake

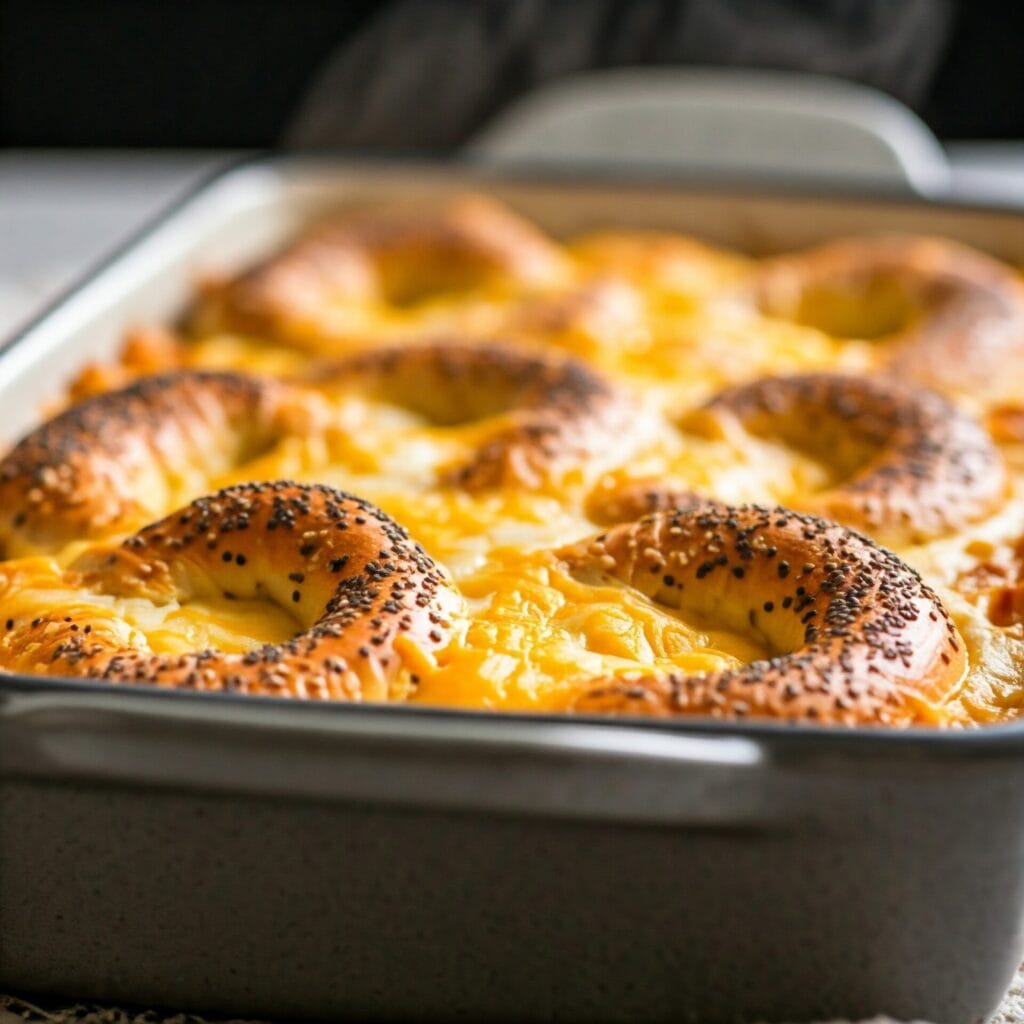
This easy bagel & cheese breakfast bake turns leftover bagels into a warm, golden, cheesy casserole. 🧀🥯 Perfect for weekend brunch, holidays, or make-ahead mornings!

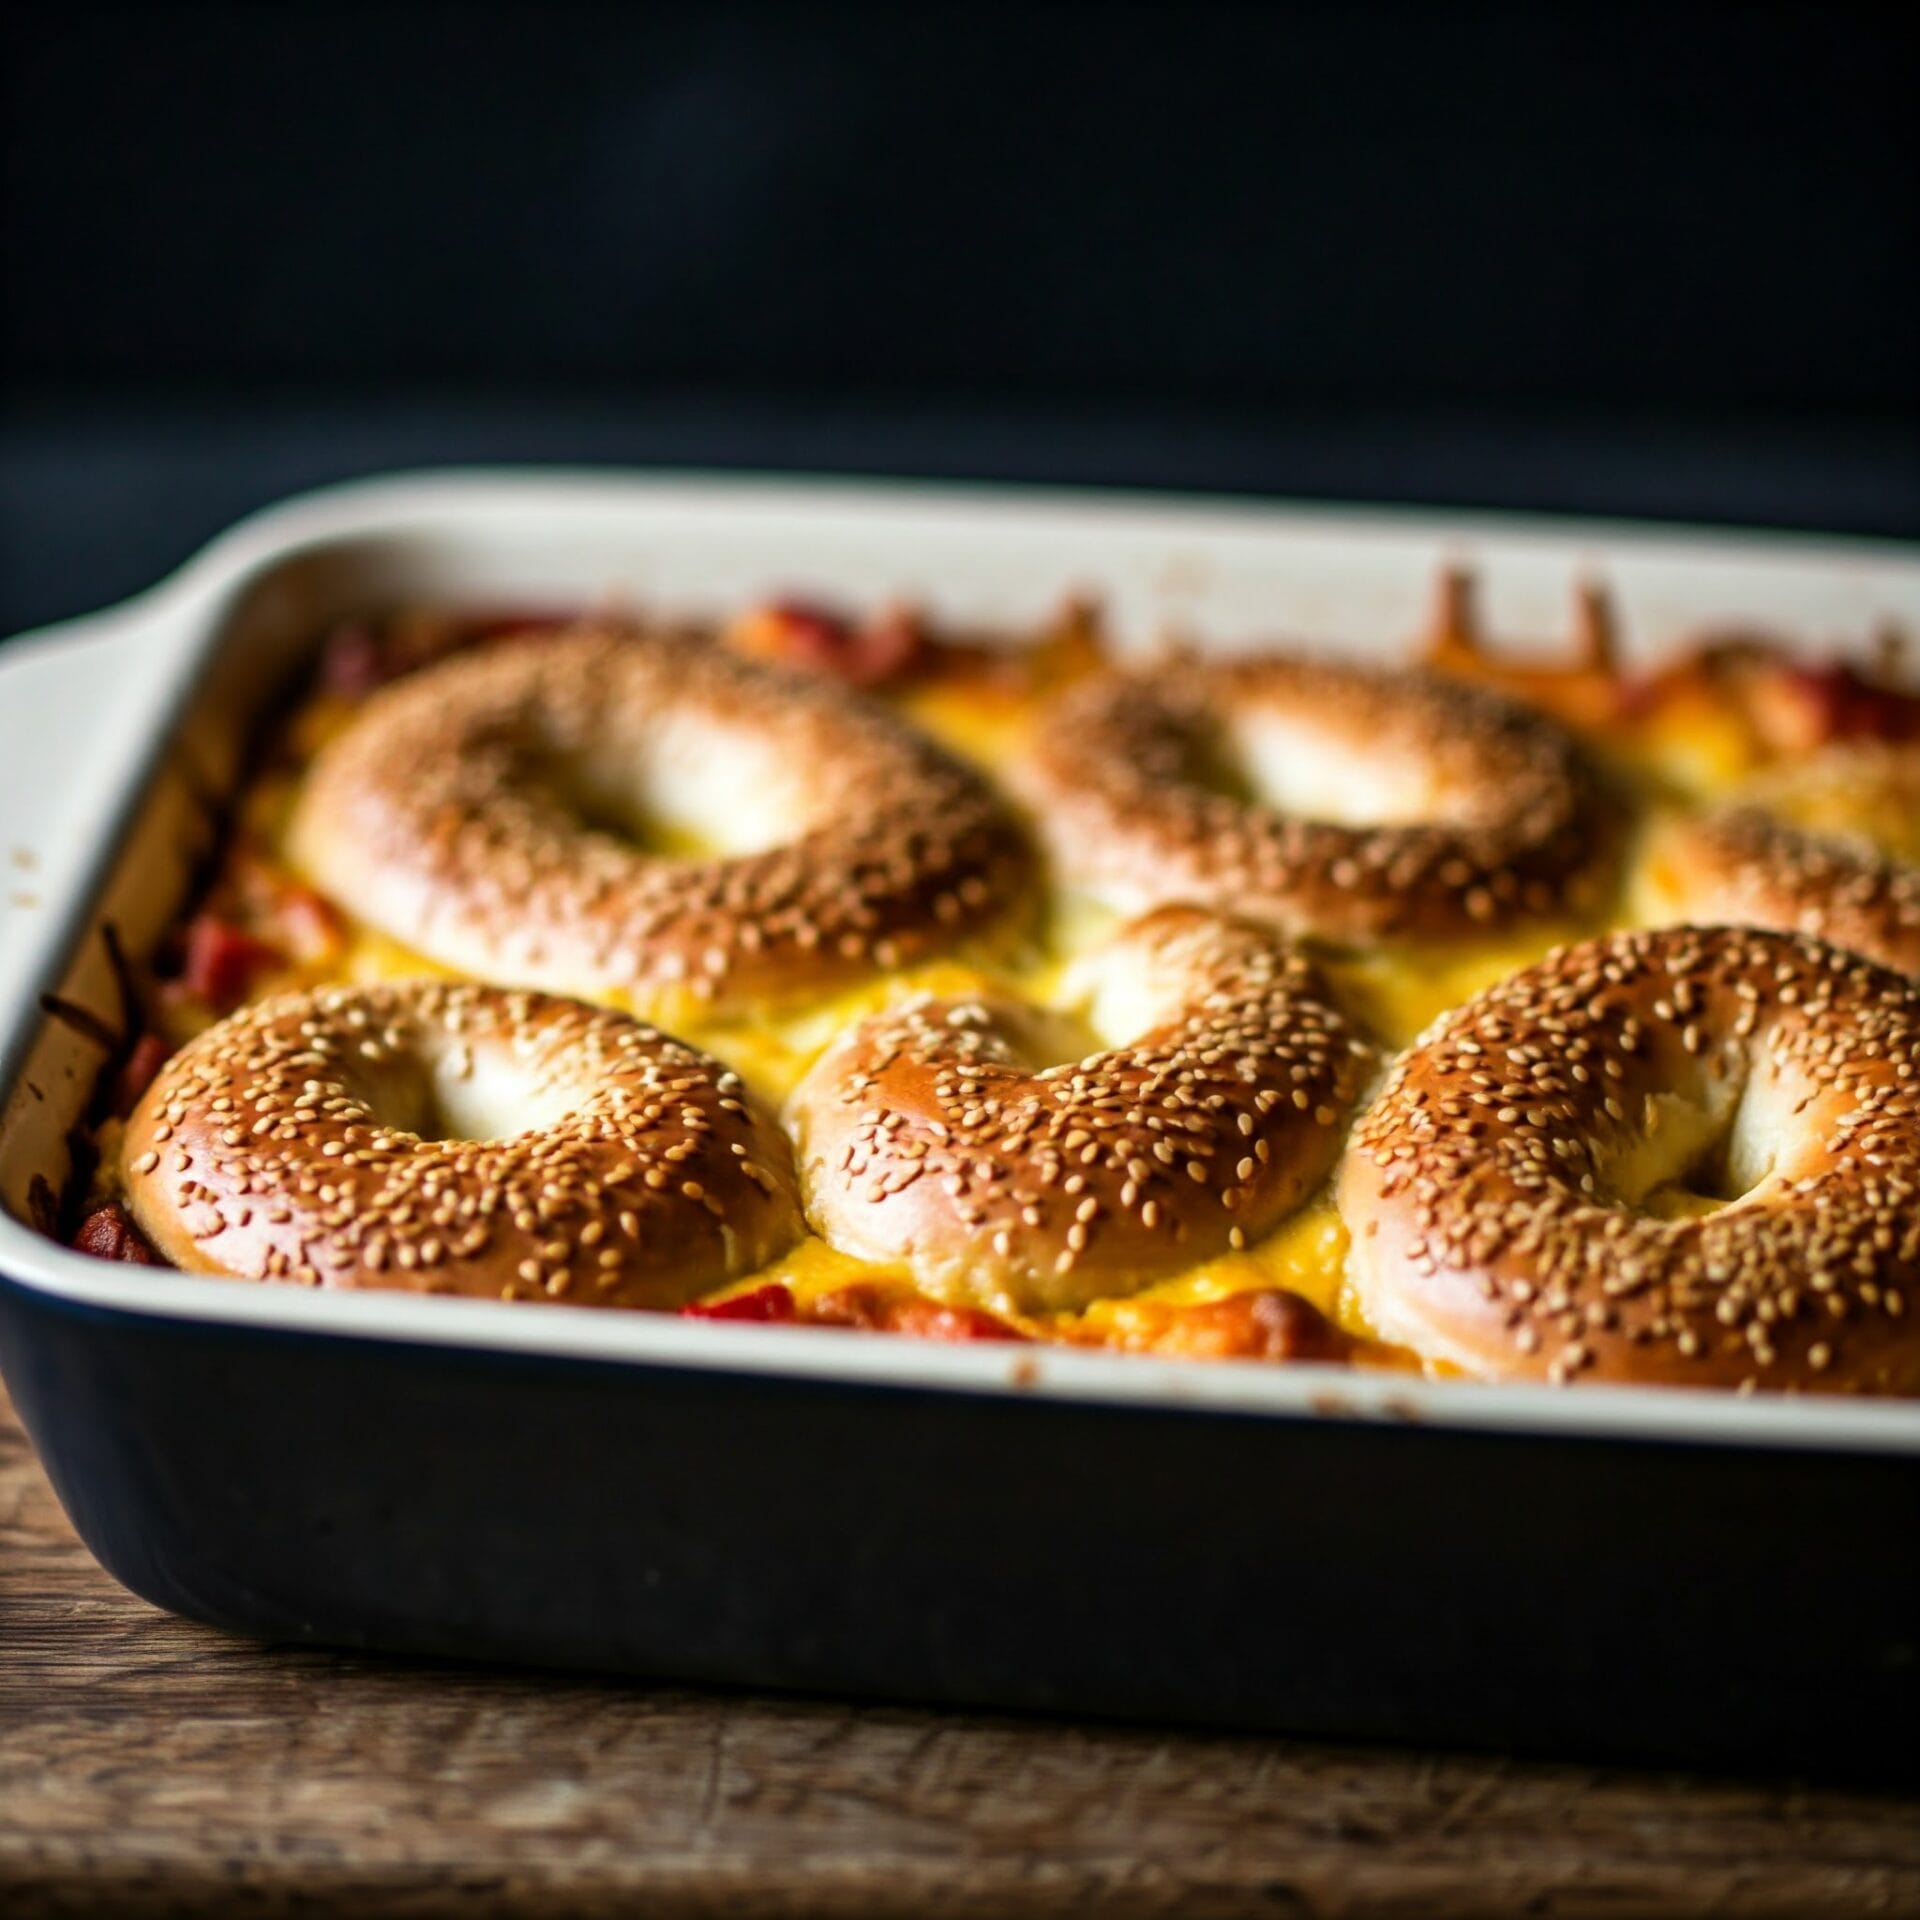
If you’ve got a few leftover bagels sitting on the counter, don’t toss them—transform them into this Bagel & Cheese Breakfast Bake. This cozy, crowd-pleasing casserole layers crispy bagel pieces, fluffy eggs, and loads of melted cheese for a comforting dish that’s perfect for brunch or breakfast-for-dinner.

Not only is this recipe a smart way to reduce food waste, but it’s also incredibly easy to throw together. You can prep it in advance, let it chill overnight, and bake it fresh in the morning. As a result, it’s ideal for hosting, meal prepping, or lazy weekends when you want something warm and satisfying—without the stress.

In addition, the ingredients are flexible. Choose your favorite bagel flavor, mix up the cheeses, or even toss in cooked bacon, veggies, or sausage for extra protein and texture. No matter how you customize it, this casserole always bakes up golden and bubbly, with just the right mix of crunch and creaminess in every bite.

🔥 Why You’ll Love This Bagel & Cheese Breakfast Bake

  • 🥯 Smart use of leftover bagels – No more stale bagels going to waste!

  • 🧀 Loaded with melty cheese – Every bite is rich, gooey, and comforting.

  • 🍳 Hearty and filling – Perfect for feeding a hungry family or brunch crowd.

  • ⏱️ Make-ahead friendly – Assemble it the night before and just bake in the morning.

  • 🔁 Totally customizable – Use your favorite bagel flavors, cheeses, and mix-ins like bacon, sausage, or veggies.

  • 🧊 Freezer-safe – Prep in advance and freeze portions for easy weekday breakfasts.

  • 👩‍🍳 No special skills required – If you can chop a bagel and whisk some eggs, you’ve got this.

  • Kid-friendly, brunch-worthy, and meal-prep approved – It checks all the boxes.

🔪 How to Make Bagel & Cheese Breakfast Bake

Preheat and Prep
Start by preheating your oven to 350°F (175°C). Grease a 9×13-inch baking dish with butter or non-stick spray.

Chop and Toast the Bagels
Slice your bagels into bite-sized cubes. Toast them in the oven for 5–8 minutes until lightly crisp. This helps them hold up better in the egg mixture.

Whisk the Egg Mixture
In a large mixing bowl, whisk together eggs, milk, salt, pepper, and any optional seasonings like garlic powder or dried herbs.

Layer the Bake
Spread half the toasted bagel pieces in the bottom of your dish. Sprinkle with shredded cheese, then pour over half the egg mixture. Repeat with remaining bagels, cheese, and eggs.

Let It Soak (Optional)
For best texture, let the bake sit for 20–30 minutes—or cover and refrigerate overnight for a make-ahead breakfast.

Bake Until Golden
Bake uncovered for 35–40 minutes, or until the center is set and the top is golden brown. Let cool slightly before slicing and serving.

Serve and Customize
Serve warm, topped with fresh herbs, hot sauce, or a dollop of sour cream. It pairs perfectly with fruit, coffee, or crispy bacon on the side!

Jump to Section

📱 Follow Us 

📬 Subscribe for Updates
* indicates required

Intuit Mailchimp

Bagel and Cheese Bake

No ratings yet
A Bagel & Cheese Bake is a hearty and comforting casserole made with layers of bagels, cheese, and eggs. It's a simple yet satisfying dish that's perfect for a quick and easy breakfast or brunch.
Prep Time 25 minutes
Cook Time 30 minutes
Additional Time 8 hours
Total Time 8 hours 55 minutes
Servings: 6 people
Course: Appetizer, Breakfast
Cuisine: American, American Fusion
Calories: 310

Ingredients
  

  • ½ Lb Bacon diced
  • ½ Cup Yellow Onion chopped
  • 6 Each Bagels Plain
  • 1 Cup Cheddar Cheese shredded
  • 12 Large Eggs beaten
  • 2 Cups Milk
  • 2 tsp Parsley chopped
  • ¼ tsp Ground Black Pepper
  • ½ Cup Parmesan Cheese

Equipment

1 9x13 Baking Dish (The ideal size for layering and baking your casserole evenly.)
1 Large mixing bowl (For combining the egg mixture, bagels, and cheese.)
1 Whisk (Helps blend eggs, milk, and seasonings smoothly)
1 Chef's knife (To slice bagels and chop any mix-ins like bacon or vegetables.)
1 Cutting board (A clean, sturdy surface for prepping your ingredients.)
1 Measuring cups & spoons (Ensures consistent flavor in the egg mixture and topping)
1 Serving Spatula (For portioning and serving the baked casserole neatly.)
1 Aluminum Foil (For covering the dish if the top is browning too quickly.)

Method
 

  1. Fry the bacon and onion in a large skillet over medium-high heat until they are crisp and golden brown. Drain the excess grease on paper towels and set aside. Slice each bagel in half.
    ½ Lb Bacon, ½ Cup Yellow Onion, 6 Each Bagels
  2. Arrange 6 bagel slices in the bottom of a lightly greased 9x13 inch baking dish. Top with the cooked bacon and onion mixture, then sprinkle with Cheddar cheese. Cover with the remaining bagel slices.
    1 Cup Cheddar Cheese
  3. In a medium bowl, whisk eggs, milk, parsley, and pepper. Pour the egg mixture evenly over the bagel layers. Cover and refrigerate for at least 8 hours, or preferably overnight.
    12 Large Eggs, 2 Cups Milk, 2 tsp Parsley, ¼ tsp Ground Black Pepper
  4. Preheat the oven to 400°F. Uncover the chilled casserole dish. Bake for 25-30 minutes, or until the eggs are set and the top is lightly golden brown. Sprinkle with Parmesan cheese and serve immediately.
    ½ Cup Parmesan Cheese

Nutrition

Serving: 12ozCalories: 310kcalCarbohydrates: 13gProtein: 15gFat: 22gSaturated Fat: 9gPolyunsaturated Fat: 6gMonounsaturated Fat: 5gCholesterol: 36mgSodium: 949mgPotassium: 204mgFiber: 2gSugar: 6gVitamin A: 399IUVitamin C: 1mgCalcium: 360mgIron: 2mg

Notes

Here are some tips and tricks for making a delicious Bagel & Cheese Bake:
Ingredient Choices:
  • Bagel Variety: Experiment with different types of bagels! Everything bagels add extra flavor and texture.
  • Cheese: Use a combination of cheeses for a richer flavor profile. Try cheddar, Monterey Jack, Gruyere, or even some crumbled feta.
  • Add-ins: Get creative with add-ins! Consider chopped spinach, diced bell peppers, sautéed mushrooms, or even cooked sausage.
Preparation Tips:
  • Even Layers: Ensure even layers of bagels, cheese, and bacon for consistent baking.
  • Soaking: Letting the bagels soak in the egg mixture for a bit longer (up to 30 minutes) can help them absorb more flavor.
  • Refrigeration: Refrigerating overnight allows the flavors to meld together and makes for easier slicing.
Baking Tips:
  • Baking Time: Monitor closely towards the end of baking to prevent overcooking.
  • Golden Brown: Bake until the top is golden brown and the eggs are set.
  • Resting: Let the casserole rest for a few minutes after baking before serving to allow the flavors to settle.
Serving Suggestions:
  • Garnish: Sprinkle with fresh herbs like chives or parsley before serving.
  • Sides: Serve with fresh fruit, a side salad, or breakfast potatoes.
  • Dipping Sauce: Offer a side of salsa, hot sauce, or your favorite dipping sauce.
Leftovers:
  • Storage: Store leftovers in an airtight container in the refrigerator for up to 3-4 days.
  • Reheating: Reheat individual portions in the microwave or gently in the oven.
By following these tips and tricks, you can create a delicious and satisfying Bagel & Cheese Bake that will be a hit with your family and friends.

Tried this recipe?

Let us know how it was!

🍽️ What to Serve with Bagel & Cheese Breakfast Bake

This savory breakfast casserole is rich, cheesy, and filling—so pairing it with lighter, fresh, or tangy sides is the perfect way to balance your plate. Whether you’re hosting brunch or meal-prepping for the week, these ideas will round out your breakfast beautifully.


🥗 Fresh & Bright Sides

  • Fresh fruit salad – A mix of berries, citrus, or melons adds natural sweetness and color to the plate.

  • Sliced avocado or guacamole – Creamy and satisfying, with a dose of healthy fats.

  • Simple green salad – A light arugula or spinach salad with lemon vinaigrette adds a crisp contrast.


🥓 Savory & Hearty Add-Ons

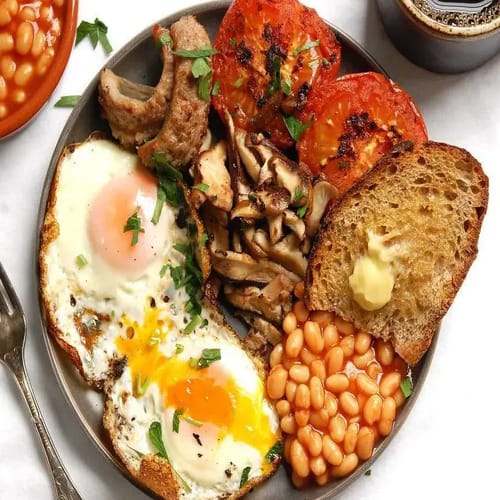
  • Crispy bacon or sausage links – Add a salty, smoky side to the cheesy casserole.

  • Roasted breakfast potatoes – Seasoned with herbs and baked until crispy for a comforting touch.

  • Grilled tomatoes or sautéed mushrooms – A warm, savory vegetable side to round out the meal.


Drinks That Pair Well

  • Hot coffee or cold brew – Bold coffee pairs perfectly with eggs and cheese.

  • Fresh orange juice or grapefruit juice – Bright and citrusy to cut through the richness.

  • Bloody Mary or mimosa – If you’re serving brunch, these classics are always a hit!

❓ Bagel & Cheese Bake FAQ


Q: Can I make this casserole the night before?
A: Yes! In fact, letting the casserole sit overnight allows the bagels to soak up the egg mixture even better. Simply assemble, cover, and refrigerate. In the morning, bring it to room temperature for 20–30 minutes, then bake as directed.


Q: Do I need to toast the bagels first?
A: Toasting the bagels helps them stay firm and slightly crispy after baking. It’s optional, but recommended—especially if you’re using soft or fresh bagels.


Q: What kind of bagels work best?
A: Plain, everything, onion, and even whole wheat bagels work great. Avoid overly sweet ones (like cinnamon raisin) unless you’re going for a sweet-savory combo.


Q: Can I freeze leftovers?
A: Absolutely. Let the casserole cool completely, then slice into portions. Wrap tightly or store in airtight containers and freeze for up to 2 months. Reheat in the oven or microwave until warmed through.


Q: How do I reheat it without drying it out?
A: Reheat covered in a 325°F oven for 10–15 minutes, or microwave slices with a damp paper towel on top to keep moisture in.


Q: Can I add meat or vegetables?
A: Definitely! Try adding cooked bacon, sausage, ham, or sautéed veggies like spinach, onions, or mushrooms for extra flavor and texture.


Q: Is this recipe vegetarian?
A: Yes, if you skip any meat additions, this bake is totally vegetarian as-is.

Please follow and like us:
onpost_follow
fb-share-icon197
Tweet120
Pinterest20
Share 20
submit to reddit

Dinner Recipes

Dinner Recipes

[digr_post_grid posts_number=”24″ post_display=”by_category” include_categories=”1674″ show_pagination=”on” use_number_pagination=”on” use_post_excerpt=”on” excerpt_length=”60″ show_readmore=”on” show_date=”on” show_categories=”off” enable_divider=”on” grid_column=”4″ enable_grid_row=”on” grid_row=”2″ _builder_version=”4.27.4″ _module_preset=”default” hover_enabled=”0″ global_colors_info=”{}” sticky_enabled=”0″][/digr_post_grid]
Please follow and like us:
onpost_follow
fb-share-icon197
Tweet120
Pinterest20
Share 20
submit to reddit

What's for Dinner

Dinner: The Star of the Show!

Dinner is more than just a meal; it’s a celebration of flavors, a time to connect with loved ones, and a chance to unwind after a long day. And here at [Your Page Name], we’re passionate about making dinner the star of your show!

We’ve curated a collection of mouthwatering dinner recipes that will tantalize your taste buds and inspire your inner chef. From comforting classics to exciting global flavors, we’ve got something for everyone. Whether you’re craving a quick and easy weeknight meal or a show-stopping feast for a special occasion, our recipes will help you create culinary magic in your own kitchen.

So, gather around the table, share delicious food, and make memories that will last a lifetime. Dinner is calling, and we’ve got the recipes to answer!

Explore our collection of dinner recipes and discover your new favorite dish!

Explore Our Most Popular Sections with These Quick Links

Holidays & Occasions

Creamy Asparagus & Mushroom Pasta

Creamy Asparagus & Mushroom Pasta

Earthy, elegant, and incredibly satisfying—this Creamy Asparagus & Mushroom Pasta is comfort food with a seasonal twist. Tender pasta is tossed in a silky parmesan cream sauce, loaded with savory sautéed mushrooms and crisp-tender asparagus. Every bite is rich with flavor, yet balanced by the freshness of spring veggies and aromatic herbs. It’s the kind of dish that feels gourmet, but comes together effortlessly—perfect for cozy nights in or when you want to impress without the fuss.

Creamy Asparagus & Mushroom Pasta

5 from 1 vote
Indulge in a symphony of flavors and textures with this Creamy Asparagus and Mushroom Pasta! Imagine tender fettuccine noodles, cooked to perfection, coated in a luscious, velvety Parmesan sauce that clings to every strand. Each bite is a delightful explosion of taste and texture, with the earthy notes of sautéed mushrooms complementing the bright, fresh flavor of tender-crisp asparagus.
This dish is a true culinary masterpiece, a harmonious blend of simple ingredients transformed into an elegant and satisfying meal. The creamy sauce, infused with the subtle sweetness of shallots and the warmth of garlic, elevates the pasta to new heights. And a sprinkle of fresh parsley adds a final touch of vibrancy, both visually and on the palate.
Whether you're seeking a comforting weeknight dinner or an impressive dish to share with friends, this Creamy Asparagus and Mushroom Pasta is sure to delight. It's a culinary adventure that will tantalize your taste buds and leave you wanting more.
Prep Time 10 minutes
Cook Time 15 minutes
Servings: 4 people
Course: Main Course
Cuisine: American, Italian American
Calories: 549

Ingredients
  

  • 8 oz Fettuccine
  • 1 Tbsp Olive Oil
  • 1 Tbsp Unsalted Butter
  •  
    2 Cups Asparagus sliced 1½ inches
  • Cup Shallot thinly slice
  • 2 Cups Button Mushrooms fresh not canned.
  • tsps Garlic minced
  • 1 tsp Italian Seasoning
  • ¾ Cup Heavy Cream
  • ¾ Cup Parmesan Cheese
  • 1 Pinch Salt to taste
  • 1 Pinch Ground Black Pepper to taste

Method
 

  1. Bring a large pot of salted water to a boil. Add the fettuccine and cook for 7 to 10 minutes. You want the pasta to be tender but still have a slight bite to it (al dente). Drain the pasta and reserve some of the pasta cooking water.
    8 oz Fettuccine, 1 Pinch Salt
  2. In a large nonstick skillet, heat the olive oil and butter over medium heat. Swirl the skillet to mix the oil and butter once the butter has melted.
    1 Tbsp Olive Oil, 1 Tbsp Unsalted Butter
  3. Add the asparagus and shallot to the skillet. Cook for about 2 to 3 minutes, stirring occasionally. Season with salt and pepper.
    2 Cups Asparagus, ⅓ Cup Shallot, 1 Pinch Ground Black Pepper, 1 Pinch Salt
  4. Add the mushrooms to the skillet and cook, stirring occasionally, for about 2 minutes, or until they are softened and lightly browned. Then, add the minced garlic and Italian seasoning, and cook for another 30 seconds, or until fragrant.
    2 Cups Button Mushrooms, 1½ tsps Garlic, 1 tsp Italian Seasoning
  5. Gently stir the heavy cream into the skillet, making sure it's fully incorporated with the vegetables. Bring the mixture to a gentle boil, then reduce the heat to low to prevent the cream from curdling. Add the grated Parmesan cheese and stir continuously until the cheese is melted and the sauce is smooth and creamy. If you find the sauce is too thick, stir in ¼ to ½ cup of the reserved pasta water until it reaches your desired consistency.
    ¾ Cup Heavy Cream, ¾ Cup Parmesan Cheese
  6. Now, add the pasta! Pour the cooked and drained fettuccine directly into the skillet with the sauce. Stir gently to combine.
  7. Use tongs or a large fork to divide the pasta among serving plates or bowls. Serve the pasta immediately while it is still hot. Garnish each serving with a sprinkle of fresh parsley for a pop of color and a fresh, herbaceous flavor.

Nutrition

Serving: 16ozCalories: 549kcalCarbohydrates: 52gProtein: 19gFat: 31gSaturated Fat: 16gPolyunsaturated Fat: 2gMonounsaturated Fat: 9gTrans Fat: 0.2gCholesterol: 123mgSodium: 364mgPotassium: 587mgFiber: 5gSugar: 6gVitamin A: 1476IUVitamin C: 7mgCalcium: 254mgIron: 3mg

Notes

Ingredients:
  • Pasta: Fettuccine is classic, but you can use other long pasta shapes like linguine, tagliatelle, or pappardelle.
  • Asparagus: Choose fresh, tender asparagus. Snap off the woody ends before cooking.
  • Mushrooms: Cremini or button mushrooms are common choices. You can also use shiitake, oyster, or portobello mushrooms.
  • Shallot: Shallots have a milder flavor than onions. You can substitute with a small yellow or white onion if needed.
  • Garlic: Freshly minced garlic adds a pungent flavor to the sauce.
  • Heavy Cream: Heavy cream creates a rich and creamy sauce. You can use half-and-half for a lighter option.
  • Parmesan Cheese: Use freshly grated Parmesan cheese for the best flavor.
  • Seasonings: Salt, pepper, and Italian seasoning are essential. You can add other herbs like thyme or oregano.
Cooking Tips:
  • Cook Pasta Al Dente: Cook the pasta until it's tender but still slightly firm to the bite. This prevents it from becoming mushy in the sauce.
  • Reserve Pasta Water: The starchy pasta water is a great way to adjust the consistency of the sauce.
  • Don't Overcrowd the Pan: When sautéing the vegetables, make sure the pan isn't overcrowded. This will ensure they cook evenly.
  • Cook in Stages: Sauté the asparagus and shallot first, then add the mushrooms, and finally the garlic and Italian seasoning. This allows each ingredient to cook properly.
  • Simmer Gently: Simmer the sauce gently to prevent the cream from curdling.
  • Melt the Cheese: Stir in the Parmesan cheese until it's melted and the sauce is smooth.
  • Taste and Adjust: Always taste the sauce before serving and adjust the seasonings to your liking.
Serving Suggestions:
  • Garnish: Garnish with fresh parsley, grated Parmesan cheese, or a drizzle of olive oil.
  • Sides: Serve with a side salad and crusty bread for a complete meal.
Variations:
  • Protein: Add grilled chicken, shrimp, or salmon for extra protein.
  • Vegetables: Incorporate other vegetables like peas, zucchini, or bell peppers.
  • Spicy: Add a pinch of red pepper flakes for heat.
  • Vegan: Use plant-based butter, cream, and Parmesan cheese for a vegan version.
With these tips, you'll be able to make a delicious and satisfying creamy asparagus and mushroom pasta dish!

Tried this recipe?

Let us know how it was!

Related Recipes

Ingredients

  • 8 oz fettuccine pasta
  • 1 tablespoon olive oil
  • 1 tablespoon unsalted butter
  • 2 cups asparagus, sliced 1 ½ inches
  • ⅓ cup shallot, thinly sliced
  • 2 cups fresh button mushrooms (not canned)
  • 1 ½ teaspoons garlic, minced
  • 1 teaspoon Italian seasoning
  • ¾ cup heavy cream
  • ¾ cup grated Parmesan cheese
  • Pinch of salt, to taste
  • Pinch of ground black pepper, to taste

Image Gallery Creamy Asparagus & Mushroom Pasta

Storage & Leftovers

Storage:

  • Refrigerator:
    Let the pasta cool completely, then store in an airtight container in the fridge for up to 3–4 days.

  • Freezer:
    Not recommended—cream-based sauces can separate and veggies may become mushy when thawed.

Reheating:

  • Stovetop (Best method):
    Reheat gently over medium-low heat with a splash of milk, cream, or pasta water to loosen the sauce and restore creaminess. Stir frequently to prevent sticking.

  • Microwave:
    Use a microwave-safe container with a loose lid or paper towel cover. Heat in 30–45 second bursts, stirring in between. Add a splash of liquid if it looks too thick.

Tips:

  • The asparagus may soften slightly after storage, but will still taste great.

  • Add a handful of fresh herbs, a squeeze of lemon juice, or a sprinkle of parmesan when serving to brighten the flavors.

  • Great as a next-day lunch or as a side to grilled chicken or tofu!

Please follow and like us:
onpost_follow
fb-share-icon197
Tweet120
Pinterest20
Share 20
submit to reddit

Subscribe for New Recipes

* indicates required

Intuit Mailchimp

Copycat Recipe: Carl’S Jr. Western Bacon Cheeseburger

Copycat Recipe: Carl’S Jr. Western Bacon Cheeseburger

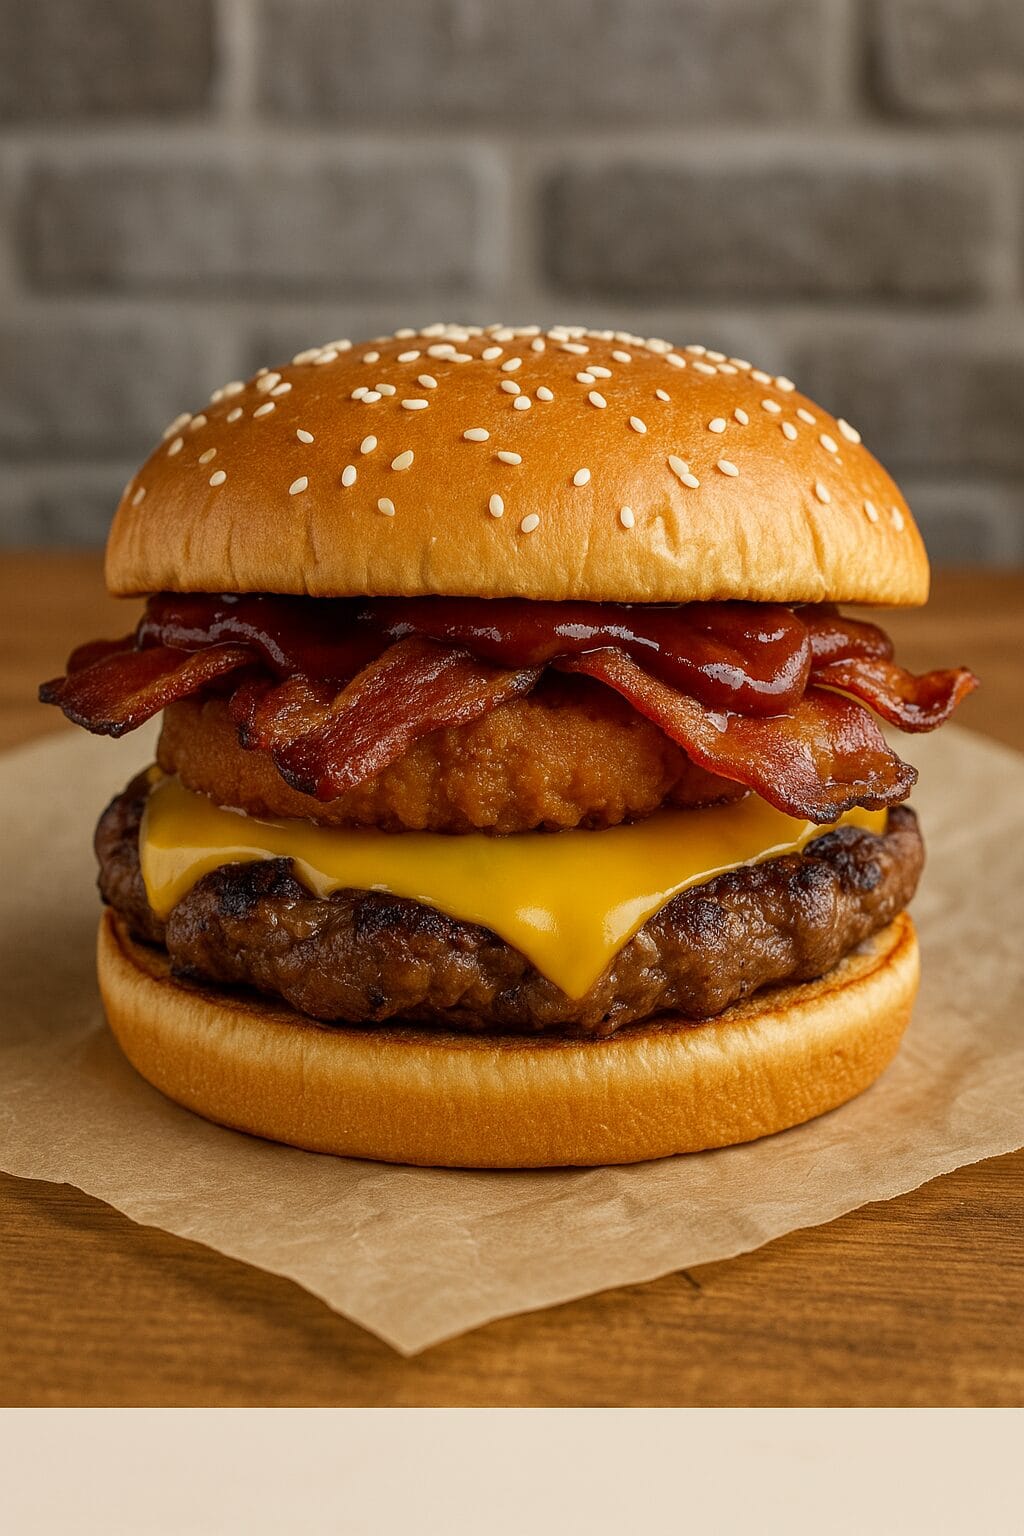
Bring fast food flavor home with this crave-worthy Copycat Western Bacon Cheeseburger—just like the one from Carl’s Jr., but even better. This burger stacks up with a juicy grilled beef patty, crispy bacon, melty American cheese, golden onion rings, and a generous slather of smoky barbecue sauce—all tucked inside a toasted sesame seed bun. Every bite delivers that signature sweet, salty, crispy combo you know and love. Perfect for cookouts, game days, or satisfying those big burger cravings at home.

Copycat Recipe: Carl’s Jr. Western Bacon Cheeseburger

No ratings yet
Carl's Jr. Western Bacon Cheeseburger is a flavorful and satisfying burger featuring a juicy beef patty, crispy bacon, melted American cheese, tangy BBQ sauce, and crunchy onion rings, all served on a toasted sesame seed bun. It's a classic for a reason!
Prep Time 10 minutes
Cook Time 15 minutes
Servings: 4 people
Course: Lunch, Main Course
Cuisine: American, Fast Food
Calories: 744

Ingredients
  

  • ¼ Cup Milk whole
  • 1 Large Egg
  •  
    1 tsp Smoked Paprika
  • ½ tsp Garlic Powder
  • ½ tsp Onion Powder
  • 1 tsp Kosher Salt to taste
  • 1 tsp Ground Black Pepper to taste
  • ½ Cup All-Purpose Flour
  • 2 Tbsp Cornstarch
  •  
    ¾ Cup Breadcrumbs Panko preffered
  • 1 Canola Oil for frying
  • 1 Large Yellow Onion
  • 8 slices Bacon thick cut and hardwood smoked
  • 1 lb Ground Beef divide into 4 patties
  • 4 Slices American Cheese
  •  
    1 BBQ Sauce Bull's-Eye Hickory Smoke barbecue sauce
  •  
    4 Sesame Seed Buns

Method
 

  1. Grab a shallow bowl. Pour in the milk, crack in the egg, and add the paprika, garlic powder, onion powder, salt, and pepper. Whisk all the ingredients together until they are fully incorporated and the mixture is smooth.
    ¼ Cup Milk, 1 Large Egg, 1 tsp Smoked Paprika, ½ tsp Garlic Powder, ½ tsp Onion Powder, 1 tsp Kosher Salt, 1 tsp Ground Black Pepper
  2. In a separate shallow bowl, combine the cornstarch and flour. Whisk until they are fully incorporated and there are no lumps.
    ½ Cup All-Purpose Flour, 2 Tbsp Cornstarch
  3. Pour the breadcrumbs into a shallow bowl.
    ¾ Cup Breadcrumbs
  4. It's important to use a heavy-bottomed pot for frying. Fill the pot with about 3 inches of oil and place it on the stove over medium heat. Heat the oil to 375 degrees F. Make sure to use a thermometer to monitor the temperature carefully. While the oil heats up, preheat your oven to 225 degrees F.
    1 Canola Oil
  5. Slice the onion into ¼-inch rings. Give the onion rings a quick rinse under cold water. Now it's time to coat the onions: First, toss them in the flour mixture until they are completely covered. Next, dip each ring into the egg mixture, making sure it's fully coated. Finally, dredge the onion rings in the breadcrumbs, pressing gently to help the breadcrumbs stick.
    1 Large Yellow Onion
  6. Working in batches, carefully add the breaded onion rings to the hot oil. Fry the onion rings until they are golden brown and crispy, flipping them halfway through the cooking time. This should take about 3-4 minutes per batch. Once cooked, transfer the onion rings to a baking sheet lined with a wire rack. Keep the onion rings warm in the preheated oven while you fry the remaining batches.
  7. In a large, heavy-bottomed skillet, arrange the bacon strips in a single layer. Cook them over medium-high heat until they reach your desired level of crispiness, flipping them halfway through. This should take about 4 minutes total. Be careful not to burn the bacon. Once cooked, remove the bacon strips from the skillet and place them on the baking sheet with the onion rings. Keep both warm in the oven while you prepare the burgers.
    8 slices Bacon
  8. Once the bacon is cooked, carefully wipe out any excess grease from the skillet using a paper towel. Return the skillet to the stovetop and set it over medium-high heat. Add 2 teaspoons of oil to the skillet and heat until the oil is shimmering and hot. While the oil heats up, season your hamburger patties generously with salt and pepper on both sides. Once the oil is hot, carefully place the patties in the skillet, making sure not to overcrowd them.
    1 lb Ground Beef
  9. Cook the burgers for about 2-3 minutes per side, or until they develop a delicious crust on the outside and reach your preferred level of doneness on the inside. After flipping the burgers for the first time, top each patty with a slice of American cheese, allowing it to melt slightly as the burgers finish cooking.
    4 Slices American Cheese
  10. To assemble the Western Bacon Cheeseburgers, start by spreading a generous amount of BBQ sauce on the cut sides of both the top and bottom halves of the sesame seed buns. Next, place two crispy onion rings on the bottom bun. Add the cooked cheeseburger patty, topped with melted American cheese, followed by two strips of crispy bacon. Place the top bun on the burger and serve immediately.
    1 BBQ Sauce, 4 Sesame Seed Buns

Nutrition

Serving: 12ozCalories: 744kcalCarbohydrates: 61gProtein: 37gFat: 39gSaturated Fat: 15gPolyunsaturated Fat: 5gMonounsaturated Fat: 14gTrans Fat: 2gCholesterol: 150mgSodium: 1632mgPotassium: 580mgFiber: 4gSugar: 8gVitamin A: 542IUVitamin C: 3mgCalcium: 388mgIron: 7mg

Notes

Ingredients:
  • Beef: Use 80/20 ground chuck for juicy and flavorful burgers.
  • Bacon: Choose thick-cut bacon for the best texture and flavor.
  • Cheese: American cheese is classic, but you can experiment with cheddar or pepper jack.
  • BBQ Sauce: Bull's-Eye Hickory Smoke is a close match to the Carl's Jr. sauce.
  • Onion Rings: Use thick-cut onion rings for a satisfying crunch. You can use store-bought or make your own.
  • Buns: Sesame seed buns are traditional. Toasting the buns adds flavor and texture.
Cooking Tips:
  • Bacon: Cook the bacon until crispy but not burnt. You can cook it in a skillet, oven, or air fryer.
  • Onion Rings: If using store-bought onion rings, follow the package directions for cooking. If making your own, use a batter with cornstarch for extra crispiness.
  • Burger Patties: Don't overwork the ground beef when forming the patties. Make an indentation in the center of each patty to prevent them from plumping up too much while cooking.
  • Seasoning: Season the patties generously with salt and pepper before cooking.
  • Cooking Temperature: Cook the burgers over medium-high heat to achieve a good sear.
  • Cheese: Add the cheese to the patties in the last minute of cooking to allow it to melt.
  • Doneness: Use a meat thermometer to ensure the burgers are cooked to your desired doneness.
  • Assembly: Spread the BBQ sauce on both halves of the bun. Don't forget the onion rings and bacon!
Serving Suggestions:
  • Sides: Serve with classic sides like fries, onion rings, or a side salad.
  • Drinks: A cold soda or milkshake is the perfect pairing.
Variations:
  • Double Western Bacon Cheeseburger: Use two patties and two slices of cheese for a double.
  • Spicy: Add a slice of jalapeño or some hot sauce for a spicy kick.
  • Deluxe: Add lettuce, tomato, and onion for a deluxe version.
With these tips, you'll be able to create a delicious copycat Carl's Jr. Western Bacon Cheeseburger at home!
 
Psst... want to know a secret? It's rumored that the BBQ sauce used in the original Western Bacon Cheeseburger is Bull's-Eye Hickory Smoke. 😉 Give it a try and see if you can taste the difference!

Tried this recipe?

Let us know how it was!

Related Recipes

Ingredients

Ingredients:

  • For the Onion Rings:

    • ¼ cup whole milk
    • 1 large egg
    • 1 teaspoon smoked paprika
    • ½ teaspoon garlic powder
    • ½ teaspoon onion powder
    • 1 teaspoon kosher salt, to taste
    • 1 teaspoon ground black pepper, to taste
    • ½ cup all-purpose flour
    • 2 tablespoons cornstarch
    • ¾ cup breadcrumbs (Panko preferred)
    • Canola oil for frying
    • 1 large yellow onion
  • For the Burgers:

    • 8 slices bacon, thick-cut and hardwood smoked
    • 1 lb ground beef, divided into 4 patties
    • 4 slices American cheese
    • BBQ sauce (Bull’s-Eye Hickory Smoke barbecue sauce recommended)
    • 4 sesame seed buns

Image Gallery Copycat Recipe: Carl’s Jr. Western Bacon Cheeseburger

Storage & Leftovers

Storage:

  • Refrigerator:
    Store assembled or individual components in airtight containers for up to 3 days. For best results, store buns, patties, bacon, onion rings, and sauce separately to preserve texture.

  • Freezer:
    Freeze cooked burger patties individually wrapped for up to 2 months. Bacon and onion rings can also be frozen separately, but may lose some crispness when reheated.

Reheating:

  • Burger Patty:
    Reheat on a skillet over medium heat for 2–3 minutes per side, or microwave in 30-second intervals until heated through.

  • Bacon & Onion Rings:
    Reheat in an oven or air fryer at 375°F for about 5–7 minutes to bring back crispiness. Avoid microwaving these if possible—they’ll go soggy.

  • Bun:
    Toast lightly in a dry skillet or oven for best texture. Add BBQ sauce after reheating to keep it fresh and saucy.

Pro Tips:

  • For a next-day burger that still hits hard, reassemble freshly heated parts just before serving.

  • Use parchment paper to wrap and warm in foil if reheating a fully assembled burger in the oven—this keeps it moist without going soggy.

Please follow and like us:
onpost_follow
fb-share-icon197
Tweet120
Pinterest20
Share 20
submit to reddit

Subscribe for New Recipes

* indicates required

Intuit Mailchimp

Sopa De Lima

Sopa De Lima

Ditch the ordinary and dive into a bowl of sunshine with Sopa de Lima—Mexico’s bold and beautiful answer to chicken soup! This is no plain bowl of broth. It’s a flavor fiesta, bursting with tangy lime, tender chicken, warm spices, and the satisfying crunch of crispy tortilla strips.

Each spoonful is like a mini vacation for your taste buds, transporting you straight to the colorful streets of the Yucatán.

Why You’ll Love This Recipe:
🌞 Flavor Fusion – Bright lime meets savory chicken with subtle notes of cinnamon and clove—unexpected, unforgettable, and oh-so-delicious.
🌶️ Comfort Food with a Kick – Warm and soothing, yet lively enough to keep you on your toes.
👩‍🍳 Beginner-Friendly – Exotic flavors, simple steps. You’ll be a sopa superstar in no time!
💪 Healthy & Nourishing – Lean protein, fresh veggies, and a vibrant, feel-good broth.
🎉 Crowd-Pleaser – Great for gatherings or a cozy solo night in. Seconds are basically guaranteed.

So grab your limes, crank up the mariachi music, and bring the magic of Sopa de Lima to your kitchen!

Sopa de Lima

No ratings yet
Sopa de lima is a traditional Mexican soup that originates from the Yucatán Peninsula. It's known for its refreshing and zesty flavor, thanks to the prominent use of lime juice. The soup typically features a light chicken or turkey broth, shredded meat (often turkey), and a blend of vegetables and spices.
Prep Time 10 minutes
Cook Time 45 minutes
Servings: 6 people
Course: Soup, Starter
Cuisine: Mexican
Calories: 139

Ingredients
  

  • 2 Tbsp Olive Oil
  • 2 Roma Tomatoes
  • 1 Large Yellow Onion fine dice
  • 1 Anahiem Pepper
  • ¼ tsp Ground Cinnamon
  • tsp Ground Cloves
  • 2 tsp Kosher Salt
  • 3 Cloves Garlic minced
  • l lbs Chicken Breast boneless & skinless
  • 8 Cups Chicken Broth
  • ½ Cup Lime Juice fresh squeezed
For Topping
  • 1 Corn Tortillas cut into strips and fry
  • 1 Avocado diced

Method
 

  1. Heat the olive oil in a large pot or Dutch oven over medium-high heat. Add the chopped tomatoes, onion, and bell peppers. Cook, stirring occasionally, until the vegetables are softened and slightly caramelized.
  2. Add the ground cinnamon, cloves, and kosher salt to the pot. Stir well to incorporate the spices into the vegetables. Continue cooking for another 5 minutes, allowing the flavors to meld.
  3. Stir in the minced garlic and cook until it becomes aromatic and softens slightly, about 1 minute.
  4. Pour the chicken broth into the pot, then add the chicken breasts. Bring the mixture to a boil over high heat. Once boiling, reduce the heat to low, cover the pot, and simmer for 20 minutes. Remove the pot from the heat.
  5. Remove any foam or impurities from the surface of the soup. Shred the cooked chicken with two forks and set it aside.
  6. Add the shredded chicken back to the pot. Stir in the lime juice. Taste the soup and add more salt if needed.
  7. Now, ladle the steaming soup into bowls and finish with a sprinkle of crispy tortilla strips and some creamy diced avocado. Enjoy!

Nutrition

Serving: 12ozCalories: 139kcalCarbohydrates: 10gProtein: 3gFat: 10gSaturated Fat: 1gPolyunsaturated Fat: 1gMonounsaturated Fat: 7gCholesterol: 6mgSodium: 1961mgPotassium: 360mgFiber: 3gSugar: 4gVitamin A: 310IUVitamin C: 25mgCalcium: 33mgIron: 1mg

Notes

Ingredients:
  • Broth: While chicken broth is most common, you can use turkey broth for a more traditional Yucatecan flavor. Homemade broth will add the most depth.
  • Meat: Shredded chicken is widely used, but turkey is more traditional in the Yucatán. You can use leftover cooked poultry or poach chicken breasts specifically for the soup.
  • Vegetables: The classic base includes tomatoes, onions, and bell peppers. Some recipes also add carrots or jalapeños for a bit of heat.
  • Spices: Oregano is essential. Cumin, cloves, and cinnamon are also common additions.
  • Lime Juice: Freshly squeezed lime juice is key for the signature tart flavor. Use plenty!
  • Tortilla Strips: These add a wonderful crunch. You can use store-bought or make your own by frying or baking corn tortillas.
  • Avocado: Diced avocado is a popular garnish, adding creaminess and a contrasting flavor.
Cooking Tips:
  • Sauté the Vegetables: Don't rush the sautéing of the vegetables. Allow them to soften and develop a bit of sweetness.
  • Bloom the Spices: Cooking the spices briefly in the oil helps to intensify their flavor.
  • Simmer Gently: Simmering the soup allows the flavors to meld and the chicken to become tender.
  • Skim the Broth: Skim off any foam or impurities that rise to the surface of the soup for a clearer broth.
  • Lime Juice at the End: Add most of the lime juice towards the end of cooking to preserve its fresh flavor.
  • Taste and Adjust: Taste the soup before serving and adjust the seasonings (especially salt and lime juice) to your liking.
Serving Suggestions:
  • Garnish: Don't forget the tortilla strips and avocado! Cilantro sprigs and lime wedges are also nice additions.
  • Sides: Sopa de lima is often served with warm tortillas or crusty bread for dipping.
  • Pairings: It's a great starter for heavier Mexican dishes like enchiladas, tacos, or mole.
Variations:
  • Spicy: Add some diced jalapeños or serrano peppers to the soup for extra heat.
  • Vegetarian: Omit the chicken or turkey and use vegetable broth. You can add more vegetables like zucchini or corn.
  • Hearty: Add cooked rice or noodles to the soup for a more filling meal.
With these tips, you'll be able to make a delicious and authentic sopa de lima that captures the essence of Yucatecan cuisine!

Tried this recipe?

Let us know how it was!

Related Recipes

Ingredients

Ingredients:

  • 2 tablespoons olive oil
  • 1 large yellow onion, finely diced
  • 2 Roma tomatoes, chopped
  • 1 Anaheim pepper, seeded and chopped
  • ¼ teaspoon ground cinnamon
  • ⅛ teaspoon ground cloves
  • 2 teaspoons kosher salt
  • 3 cloves garlic, minced
  • 1 pound boneless, skinless chicken breasts
  • 8 cups chicken broth
  • ½ cup freshly squeezed lime juice

For Topping:

  • 1 corn tortilla, cut into strips and fried
  • 1 avocado, diced

Image Gallery Sopa de Lima

Storage & Leftovers

Storing Your Leftover Sopa de Lima:

  • Cool it Down: Before storing, let the soup cool to room temperature. This prevents condensation, which can make the soup watery.
  • The Right Container: Use an airtight container to keep the soup fresh and prevent it from absorbing other flavors in your fridge. 
  • Refrigerator Storage: Store leftover sopa de lima in the refrigerator for 3 to 4 days.
  • Freezer-Friendly: You can freeze it for up to 2 months. For best results, freeze the soup without the toppings, as they might not hold up well in the freezer.

Reheating Tips:

  • Thaw if Frozen: Thaw the soup in the refrigerator overnight or in a bowl of cold water.
  • Stovetop Reheating: Reheat gently in a saucepan over medium-low heat, stirring occasionally.
  • Microwave Reheating: Heat in short bursts, stirring between each burst, until warmed through.  
  • Adjust Consistency: If the soup is too thick after reheating, add a little chicken broth or water to thin it out.

Topping Tips:

  • Tortilla Strips: Store leftover tortilla strips separately in an airtight container at room temperature to maintain their crispiness.
  • Avocado: Add fresh avocado when serving the reheated soup, as it tends to brown quickly.

Extra Tips for Sopa Savvy:

  • Separate Storage: If possible, store the toppings (tortilla strips and avocado) separately from the soup to prevent them from getting soggy.
  • Flavor Boost: When reheating, add a squeeze of fresh lime juice and a sprinkle of fresh cilantro to brighten the flavors.

With these tips, you can enjoy your homemade sopa de lima even days after you’ve made it! 🍲

Please follow and like us:
onpost_follow
fb-share-icon197
Tweet120
Pinterest20
Share 20
submit to reddit

Subscribe for New Recipes

* indicates required

Intuit Mailchimp