Christmas Light Cupcakes

Christmas Light Cupcakes

Bring holiday cheer to your dessert table with these whimsical Christmas Light Cupcakes! Fluffy vanilla or chocolate cupcakes are topped with swirls of smooth buttercream frosting and decorated with playful strings of “lights” made from black icing and colorful candy bulbs. They’re fun to make, eye-catching on any holiday spread, and perfect for parties, cookie swaps, or baking with kids. These cupcakes don’t just taste like Christmas—they look like it too!

Christmas Light Cupcakes

No ratings yet
Christmas Light Cupcakes are a delightful holiday treat. These festive cupcakes are decorated with frosting and colorful M&M's candies arranged to look like twinkling Christmas lights, bringing holiday cheer to every bite.
Prep Time 10 minutes
Cook Time 1 hour 20 minutes
Servings: 6 people
Course: Dessert, Snack
Calories: 569

Ingredients
  

  •  
    15 oz Devils Food Cake Mix plus Ingredients called for on box (see notes)
  • Cips Heavy Cream
  •  
    8 oz Cream Cheese
  • 1 Cup Granulated Sugar
  • 1 tsp Vanilla Extract
  • ¼ tsp Kosher Salt
  •  
    1 Black Decorating Gel or green
  • 1 Mini M&M's

Method
 

  1. Begin by preheating your oven to 350 degrees Fahrenheit. Line two muffin tins with 18 cupcake liners. Prepare your favorite cake mix according to the instructions on the package. Use an ice cream scoop or a spoon to fill each cupcake liner about ¾ full with batter. Don't overfill the liners, as the cupcakes will rise as they bake. Bake the cupcakes until a toothpick inserted into the center comes out clean, which should take about 18 minutes. Once baked, remove the cupcakes from the oven and allow them to cool completely in the muffin tins before frosting.
  2. Make the frosting by first whipping the heavy cream. You can use a hand mixer or a stand mixer fitted with the paddle attachment. Beat the cream on medium-high speed until stiff peaks form. Be careful not to over-whip the cream. In a separate large bowl, beat together the cream cheese, powdered sugar, vanilla extract, and salt until the mixture is light and fluffy. Gently fold the whipped cream into the cream cheese mixture until just combined. Avoid overmixing, as this can deflate the whipped cream.
  3. Carefully transfer the frosting to a piping bag fitted with your favorite tip. Frost the cupcakes as desired. You can create swirls, rosettes, or any other design you like. Once the cupcakes are frosted, use a tube of decorating gel in a contrasting color (such as red, green, or blue) to draw a line or "string" around the frosting. This will be the base for your Christmas lights. Finally, add mini M&M's along the line of decorating gel to represent the "lights."

Nutrition

Serving: 12ozCalories: 569kcalCarbohydrates: 88gProtein: 7gFat: 24gSaturated Fat: 10gPolyunsaturated Fat: 4gMonounsaturated Fat: 8gCholesterol: 38mgSodium: 801mgPotassium: 286mgFiber: 2gSugar: 62gVitamin A: 513IUVitamin C: 0.002mgCalcium: 144mgIron: 3mg

Notes

Ingredients:
  • Cake Mix: Use your favorite flavor of cake mix. Chocolate, vanilla, and yellow cake all work well.
  • Frosting: You can use store-bought frosting or make your own. A cream cheese frosting is a delicious and festive option.
  • Decorating Gel: Choose a color of decorating gel that contrasts with your frosting. Red, green, and blue are classic Christmas colors.
  • M&M's Minis: These colorful candies are perfect for creating the "lights" on the cupcakes. 
  • Cupcake Liners: Use festive cupcake liners to add to the holiday theme.
Baking the Cupcakes:
  • Preheat the Oven: Make sure your oven is properly preheated to 350°F.
  • Don't Overfill: Fill the cupcake liners about ¾ full to prevent the batter from overflowing as it bakes.
  • Test for Doneness: Insert a toothpick into the center of a cupcake. If it comes out clean, the cupcakes are done.
  • Cool Completely: Allow the cupcakes to cool completely before frosting to prevent the frosting from melting.  
Frosting and Decorating:
  • Piping Bag: Use a piping bag with your favorite tip to create beautiful frosting swirls.
  • Decorating Gel: Apply the decorating gel in a thin line to create the "string" for the lights.
  • M&M's Placement: Place the M&M's Minis along the line of decorating gel to resemble Christmas lights.
  • Creative Variations: Get creative with the colors and patterns of the M&M's. You can also add other decorations, like sprinkles or edible glitter.
Storage:
  • Room Temperature: Store the decorated cupcakes in an airtight container at room temperature for up to 3 days.
  • Refrigerate: If your frosting contains perishable ingredients like cream cheese, store the cupcakes in the refrigerator for up to 5 days.
Extra Tips:
  • Make it a Family Activity: Decorating the cupcakes is a fun activity for kids and adults alike.
  • Use Different Flavors: Experiment with different cake and frosting flavors to create unique variations.
  • Add a Festive Touch: Use holiday-themed sprinkles or edible glitter to add extra sparkle.
With these tips, you'll be able to create adorable and delicious Christmas Light Cupcakes that are perfect for holiday parties or a festive treat!

Tried this recipe?

Let us know how it was!

Related Recipes

Ingredients

Ingredients:

  • 1 (15 oz) box of Devil’s Food Cake Mix, plus ingredients called for on the box (see notes)
  • 1 ½ cups heavy cream
  • 8 oz cream cheese
  • 1 cup granulated sugar
  • 1 teaspoon vanilla extract
  • ¼ teaspoon kosher salt
  • 1 tube black decorating gel (or green)
  • 1 bag mini M&M’s

Image Gallery Christmas Light Cupcakes

Storage & Leftovers

Storage:

  • Room Temperature:
    If the cupcakes are frosted with buttercream and not made with perishable fillings, they can be stored in an airtight container at room temperature for up to 2 days.

  • Refrigerator:
    Store in an airtight container for up to 5 days. Allow cupcakes to come to room temperature before serving for best texture and flavor.

  • Freezer:
    Unfrosted cupcakes can be frozen for up to 2 months. Wrap each cupcake individually in plastic wrap, then store in a freezer-safe bag or container.
    Frosted cupcakes can also be frozen, but decorations may lose some detail. Freeze uncovered until solid, then wrap carefully.

Reheating (if needed):

  • Cupcakes should not be reheated for serving, but if you want to warm unfrosted cupcakes slightly, microwave for 5–10 seconds max to avoid drying out.

Pro Tips:

  • Store decorative toppings (like candy “lights”) separately if making ahead—they hold up better when added just before serving.

  • If frosting becomes firm in the fridge, let cupcakes sit out for 20–30 minutes to soften.

  • Keep away from direct heat or sunlight to prevent frosting and decorations from melting or sliding.

Please follow and like us:
onpost_follow
fb-share-icon197
Tweet120
Pinterest20
Share 20
submit to reddit

Subscribe for New Recipes

* indicates required

Intuit Mailchimp

Sugar Cookie Dreidels

Sugar Cookie Dreidels

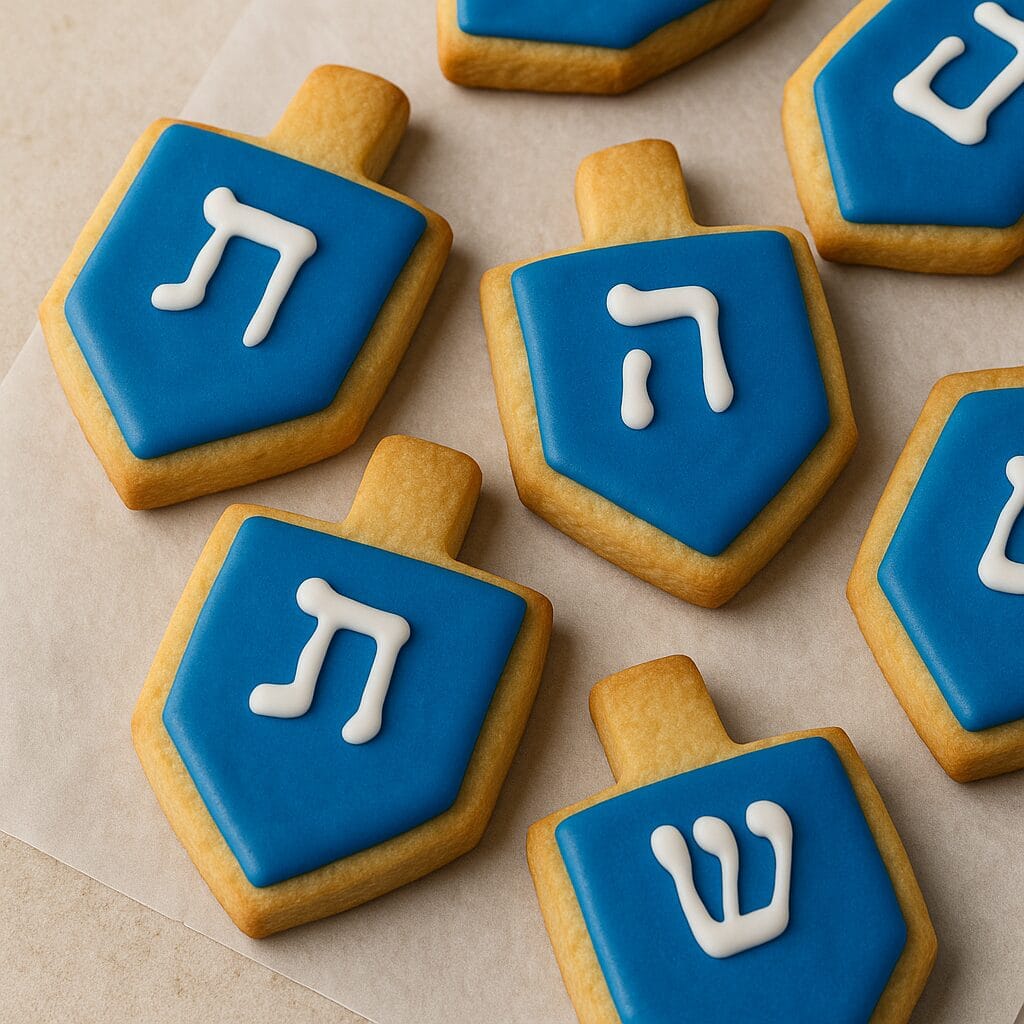
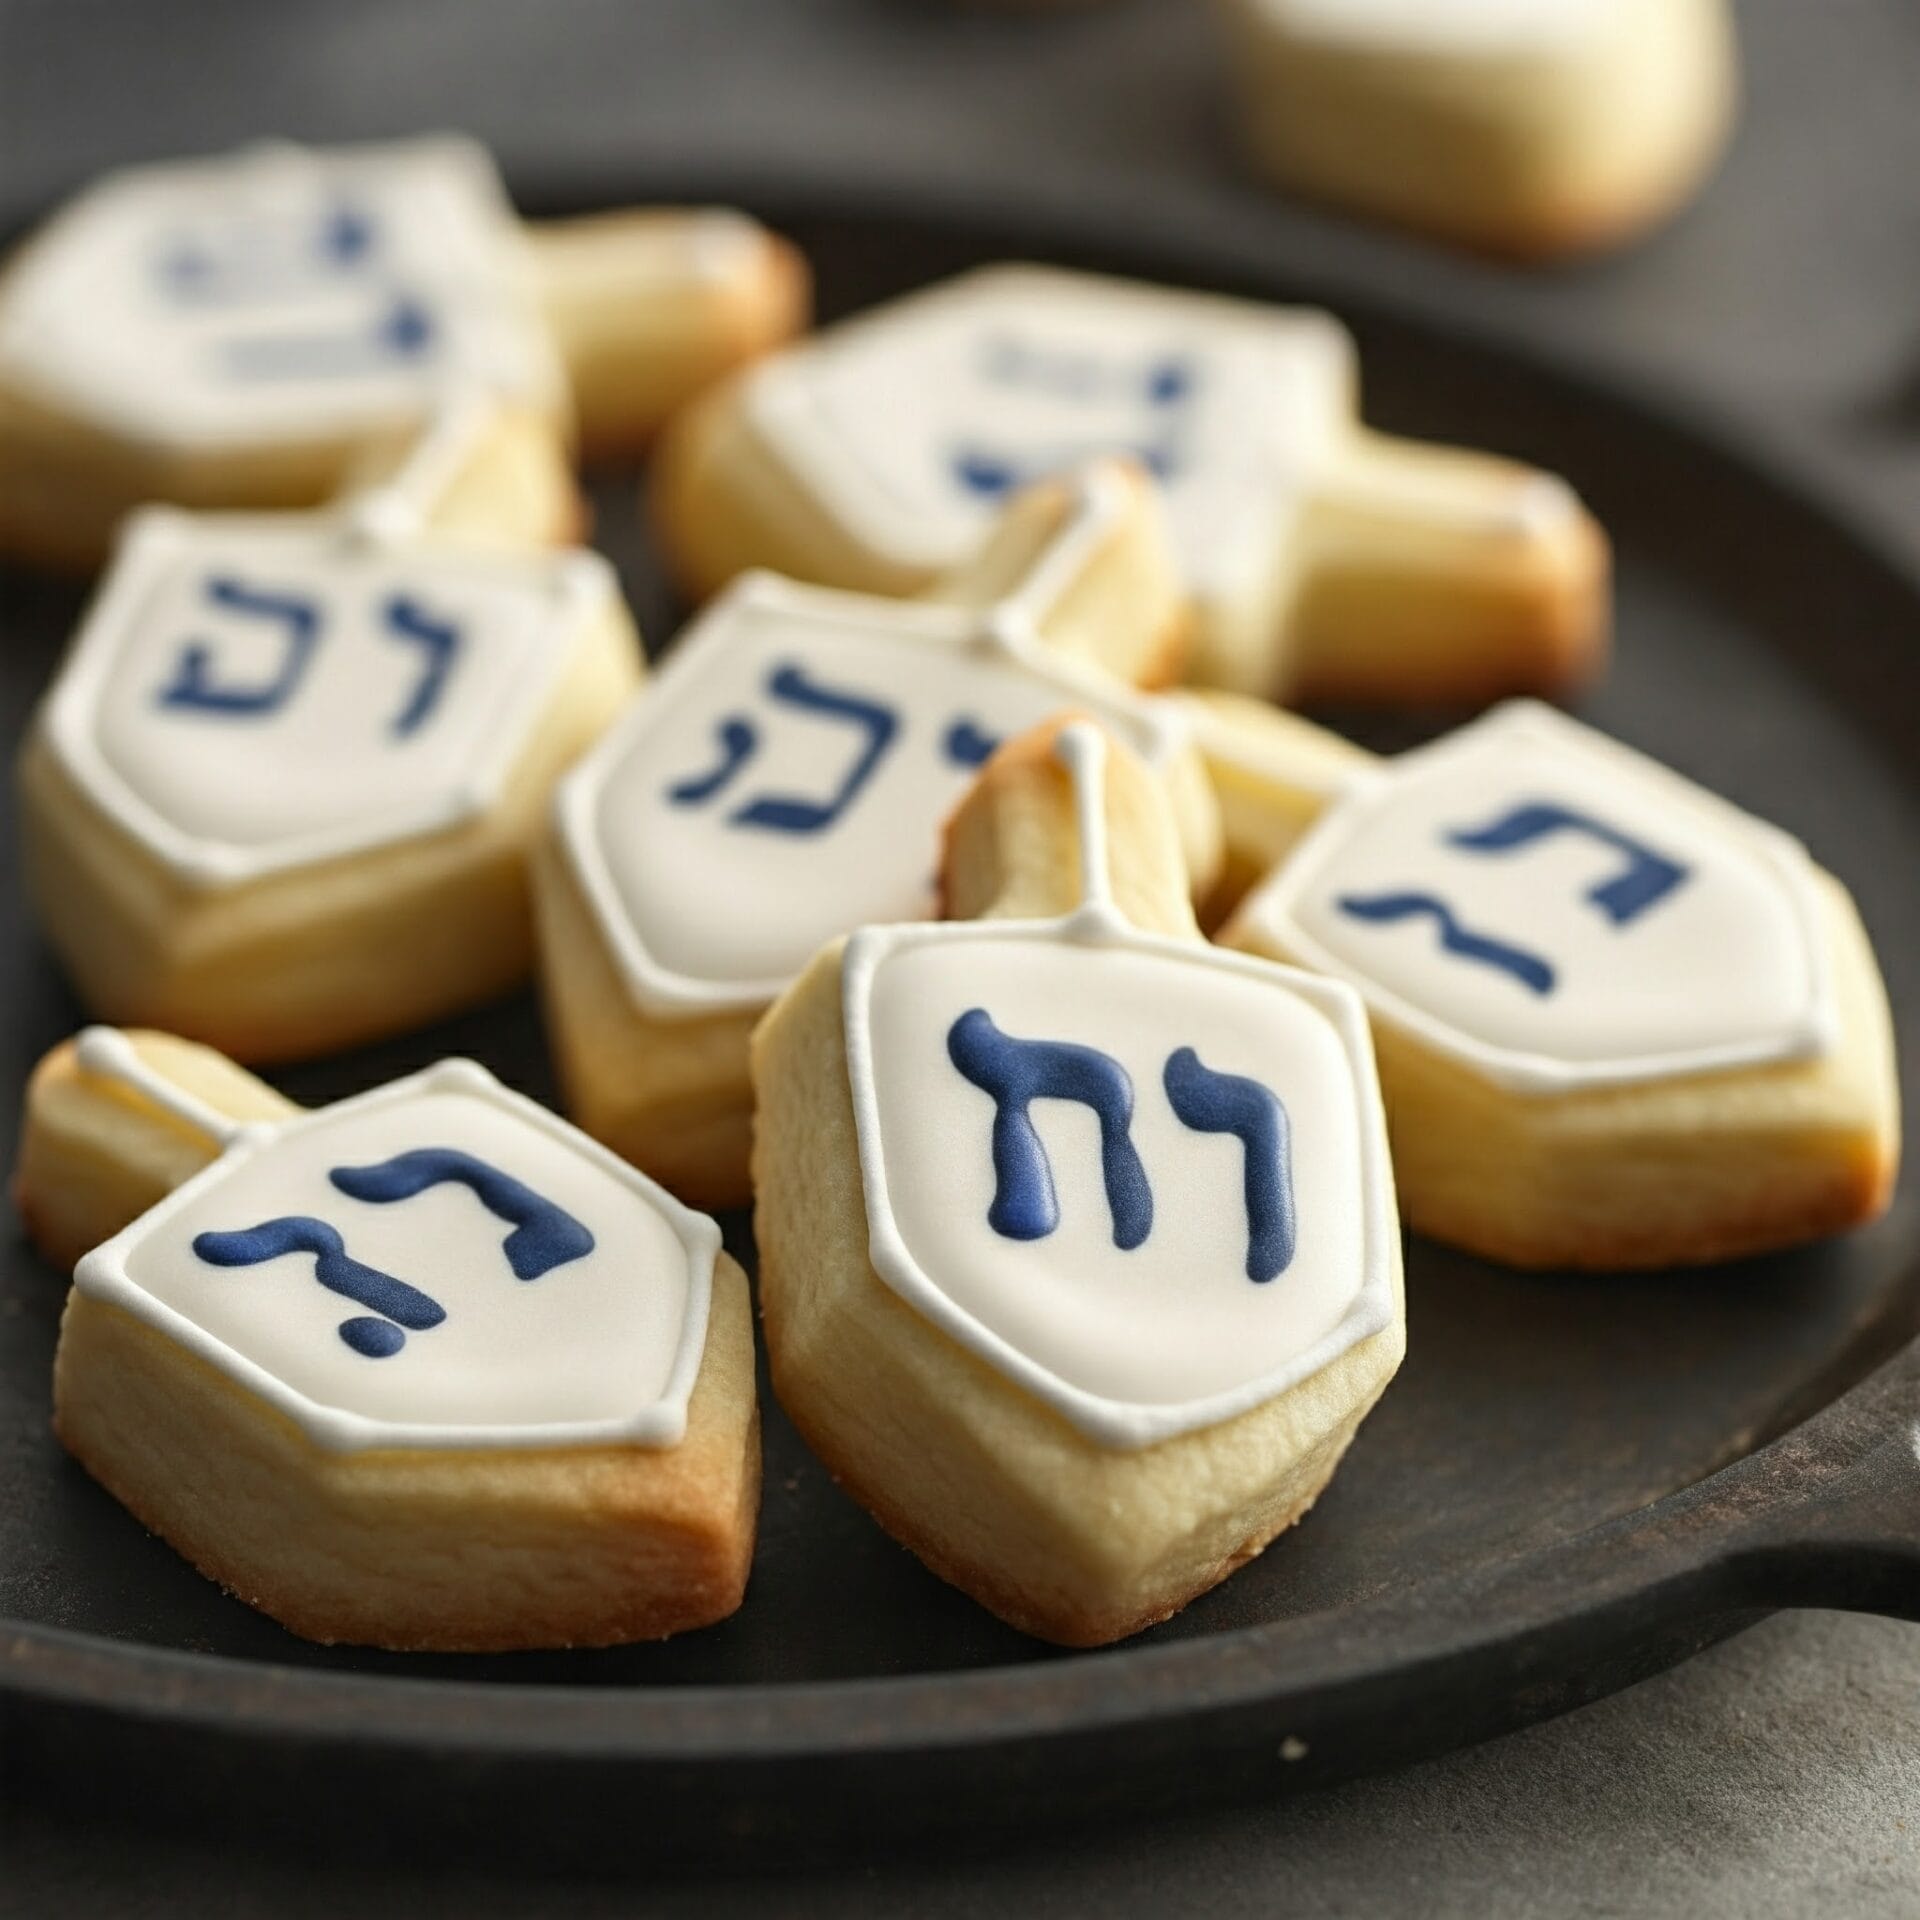
Celebrate Hanukkah with these charming Sugar Cookie Dreidels, perfect for sharing the joy of the season. These buttery sugar cookies are shaped like traditional dreidels and decorated with smooth royal icing in classic blue and white. Topped with Hebrew letters like nun, gimel, hey, and shin, they’re as meaningful as they are delicious. Whether you’re hosting a holiday party, baking with the family, or gifting homemade treats, these cookies are a sweet way to spin tradition into every bite.

Sugar Cookie Dreidels

No ratings yet
Sugar cookie dreidels are a delightful Hanukkah treat. These festive cookies are shaped like dreidels, decorated with colorful frosting and sprinkles, and perfect for celebrating the Festival of Lights.
Prep Time 15 minutes
Cook Time 2 hours 31 minutes
Servings: 6 people
Course: Snacks, Treats
Calories: 356

Ingredients
  

  •  
    2 Logs Sugar Cookie Dough Store bought is fine ( or see the link below for our recipe to make the dough)
  • ½ Cup All-Purpose Flour
  •  
    7 oz White Cookie Icing tube
  •  
    7 oz Blue Cookie Icing tube
  •  
    16 oz Vanilla Frosting
  •  
    10 oz M&M's Minis

Method
 

  1. It's time to assemble your delicious dreidel treats! Start by piping a border of frosting around the edge of each cookie. Use a small round tip on your piping bag for this. Fill the center of the cookies with your favorite treats, such as colorful candies, chopped nuts, or chocolate chips. Be creative and have fun with the fillings! Once you've filled the cookies, you can add additional decorations, like sprinkles or edible glitter, for an extra festive touch.
  2. Preheat your oven to 350 degrees Fahrenheit. Arrange the chilled cookies on a baking sheet lined with parchment paper, leaving some space between them. Place the baking sheet in the preheated oven. Bake for approximately 9 minutes, or until the edges of the cookies become golden brown. The cookies will continue to bake slightly as they cool. Once baked, remove the cookies from the oven and let them cool completely on the baking sheet. This will prevent them from breaking when you decorate them.
  3. It's time to assemble your delicious dreidel treats! Start by piping a border of frosting around the edge of each cookie. Use a small round tip on your piping bag for this. Fill the center of the cookies with your favorite treats, such as colorful candies, chopped nuts, or chocolate chips. Be creative and have fun with the fillings! Once you've filled the cookies, you can add additional decorations, like sprinkles or edible glitter, for an extra festive touch.
  4. Gently place a whole cut-out cookie on top of the frosting border, aligning it with the bottom cookie. Now, fill the hole in the center with your favorite small candies. M&M's Minis work well, but you can also use sprinkles, chocolate chips, or any other small treats that will fit.
  5. To assemble the cookies, use a piping bag or a small knife to carefully outline the edge of each cookie with cookie icing. Gently place a whole cookie on top of the icing, creating a sandwich with the filling in the center. Transfer the assembled cookies to a wire rack placed on a baking sheet. This will allow any excess icing to drip off and prevent the cookies from sticking to the baking sheet. Let the cookie icing set for about 5 minutes before serving or storing. Repeat the process with the remaining cookies.
  6. To create a smooth and glossy finish, transfer the frosting to a liquid measuring cup. Heat the frosting in the microwave in short bursts, about 15 seconds at a time, until it is melted and pourable. Stir the frosting to ensure it's evenly melted. Carefully pour the melted frosting over the assembled dreidels, allowing it to flow over the sides and completely cover the cookies.
  7. Leave the assembled dreidels at room temperature for about an hour to allow the frosting to harden completely. This will prevent the blue icing from smudging or mixing with the white frosting. Once the frosting is set, use a piping bag or a toothpick to decorate the dreidels with blue icing. You can create patterns, write letters, or add other festive designs.

Nutrition

Serving: 5ozCalories: 356kcalCarbohydrates: 60gProtein: 1gFat: 12gSaturated Fat: 2gPolyunsaturated Fat: 6gMonounsaturated Fat: 4gCholesterol: 0.04mgSodium: 140mgPotassium: 38mgFiber: 0.3gSugar: 48gVitamin A: 0.3IUCalcium: 4mgIron: 1mg

Notes

Ingredients:
  • Sugar Cookie Dough: Use your favorite homemade sugar cookie dough recipe or a store-bought refrigerated dough.
  • Flour: A little extra flour helps prevent the dough from sticking while rolling.
  • Cookie Cutters: You'll need a dreidel-shaped cookie cutter.
  • Piping Tip: Use the back of a round piping tip (or a similarly sized object) to cut out the center of the cookies.
  • Cookie Icing: Use store-bought or homemade cookie icing in white and blue.
  • Fillings: Get creative with the fillings! M&M's Minis, sprinkles, chocolate chips, chopped nuts, and small candies all work well.
Preparing the Dough:
  • Chill the Dough: If using store-bought dough, make sure it's properly chilled before rolling it out.
  • Flour the Surface: Lightly flour your work surface and rolling pin to prevent sticking.
  • Roll Evenly: Roll the dough to a consistent ¼-inch thickness for even baking.
  • Refrigerate Cut-Outs: Chilling the cut-out cookies helps them hold their shape during baking. 
Baking:
  • Preheat the Oven: Make sure your oven is properly preheated to 350°F.
  • Baking Time: Keep a close eye on the cookies as they bake. The baking time may vary depending on your oven and the thickness of the cookies.
  • Cool Completely: Allow the cookies to cool completely on the baking sheet before decorating. This prevents them from breaking.
Assembling and Decorating:
  • Piping Icing: Use a piping bag with a small round tip for precise icing application.
  • Fillings: Be creative with the fillings! Use a variety of colors and textures for a festive look.
  • Frosting: Melt the frosting in the microwave in short bursts to avoid overheating.
  • Hardening Time: Allow the frosting to harden completely before adding additional decorations.
  • Storage: Store the assembled dreidels in an airtight container at room temperature for up to 3 days.
Extra Tips:
  • Make it a Family Activity: Decorating the dreidels is a fun activity for kids and adults alike.
  • Get Creative: Experiment with different colors and designs for the frosting and fillings.
  • Add Sprinkles: Sprinkles or edible glitter add a festive touch.
  • Personalize: Use different colored icing to write names or initials on the dreidels.
With these tips, you'll be able to create delicious and festive sugar cookie dreidels that are perfect for celebrating Hanukkah!

Tried this recipe?

Let us know how it was!

Related Recipes

Ingredients

Ingredients:

  • 2 logs of sugar cookie dough (store-bought is fine)
  • ½ cup all-purpose flour
  • 7 oz tube of white cookie icing
  • 7 oz tube of blue cookie icing
  • 16 oz vanilla frosting
  • 10 oz M&M’s Minis

Image Gallery Sugar Cookie Dreidels

Storage & Leftovers

Storage:

  • Room Temperature:
    Store decorated cookies in an airtight container at room temperature for up to 1 week. Place parchment or wax paper between layers to protect the icing.

  • Refrigerator:
    Not recommended, as refrigeration can cause the icing to sweat and lose its crisp design.

  • Freezer (Best for long-term storage):
    Freeze undecorated sugar cookies for up to 2 months, wrapped tightly in plastic wrap and placed in a freezer-safe container or bag.
    Decorated cookies can also be frozen, but allow them to dry completely first. Freeze in a single layer, then stack with parchment between layers once solid.

Thawing Tips:

  • Thaw cookies at room temperature in a single layer. Avoid opening the container during thawing to prevent condensation from forming on the icing.

Pro Tips:

  • For best texture, enjoy within 3–5 days of baking.

  • If prepping ahead for a holiday, bake and freeze the cookies, then decorate closer to serving time for maximum freshness and presentation.

  • Keep away from direct heat or sunlight to avoid fading or melting of icing decorations.

Please follow and like us:
onpost_follow
fb-share-icon197
Tweet120
Pinterest20
Share 20
submit to reddit

Subscribe for New Recipes

* indicates required

Intuit Mailchimp

Copycat Recipe: Carl’S Jr. Western Bacon Cheeseburger

Copycat Recipe: Carl’S Jr. Western Bacon Cheeseburger

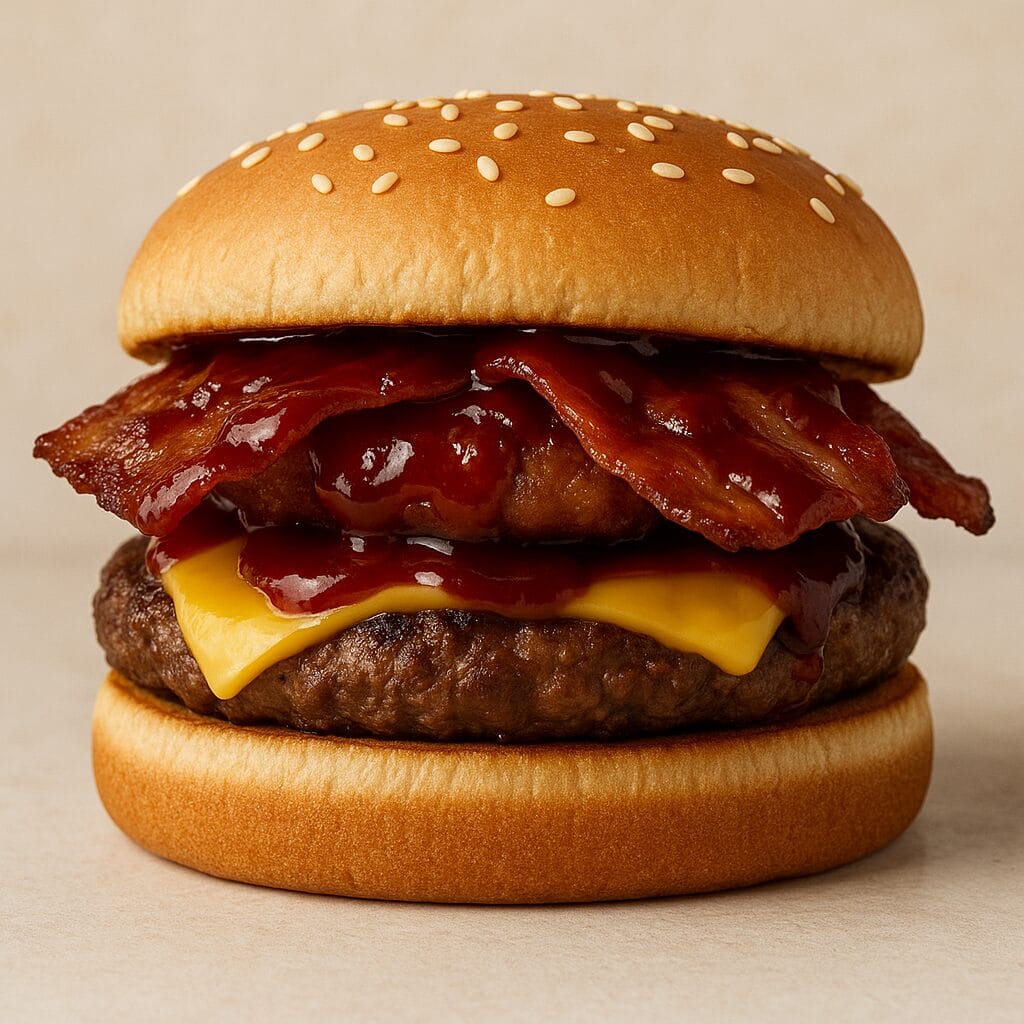
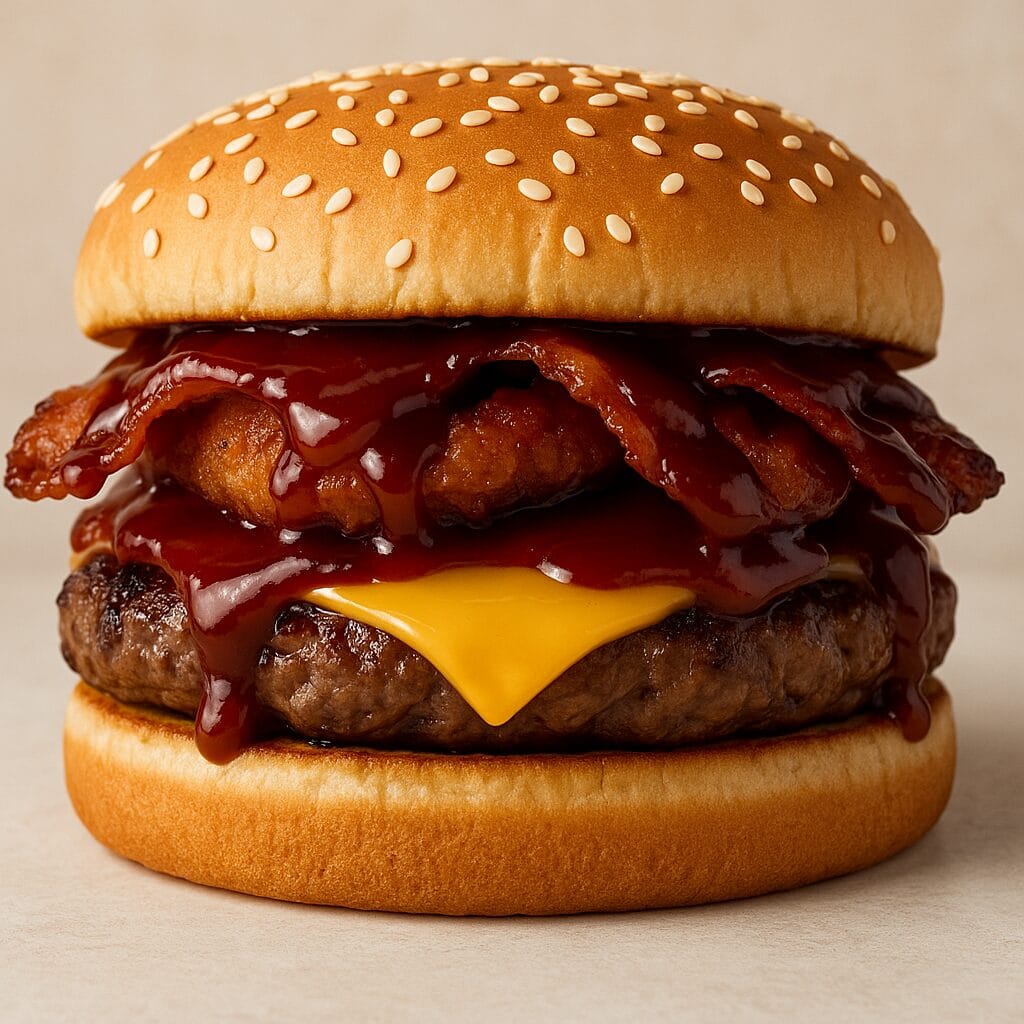
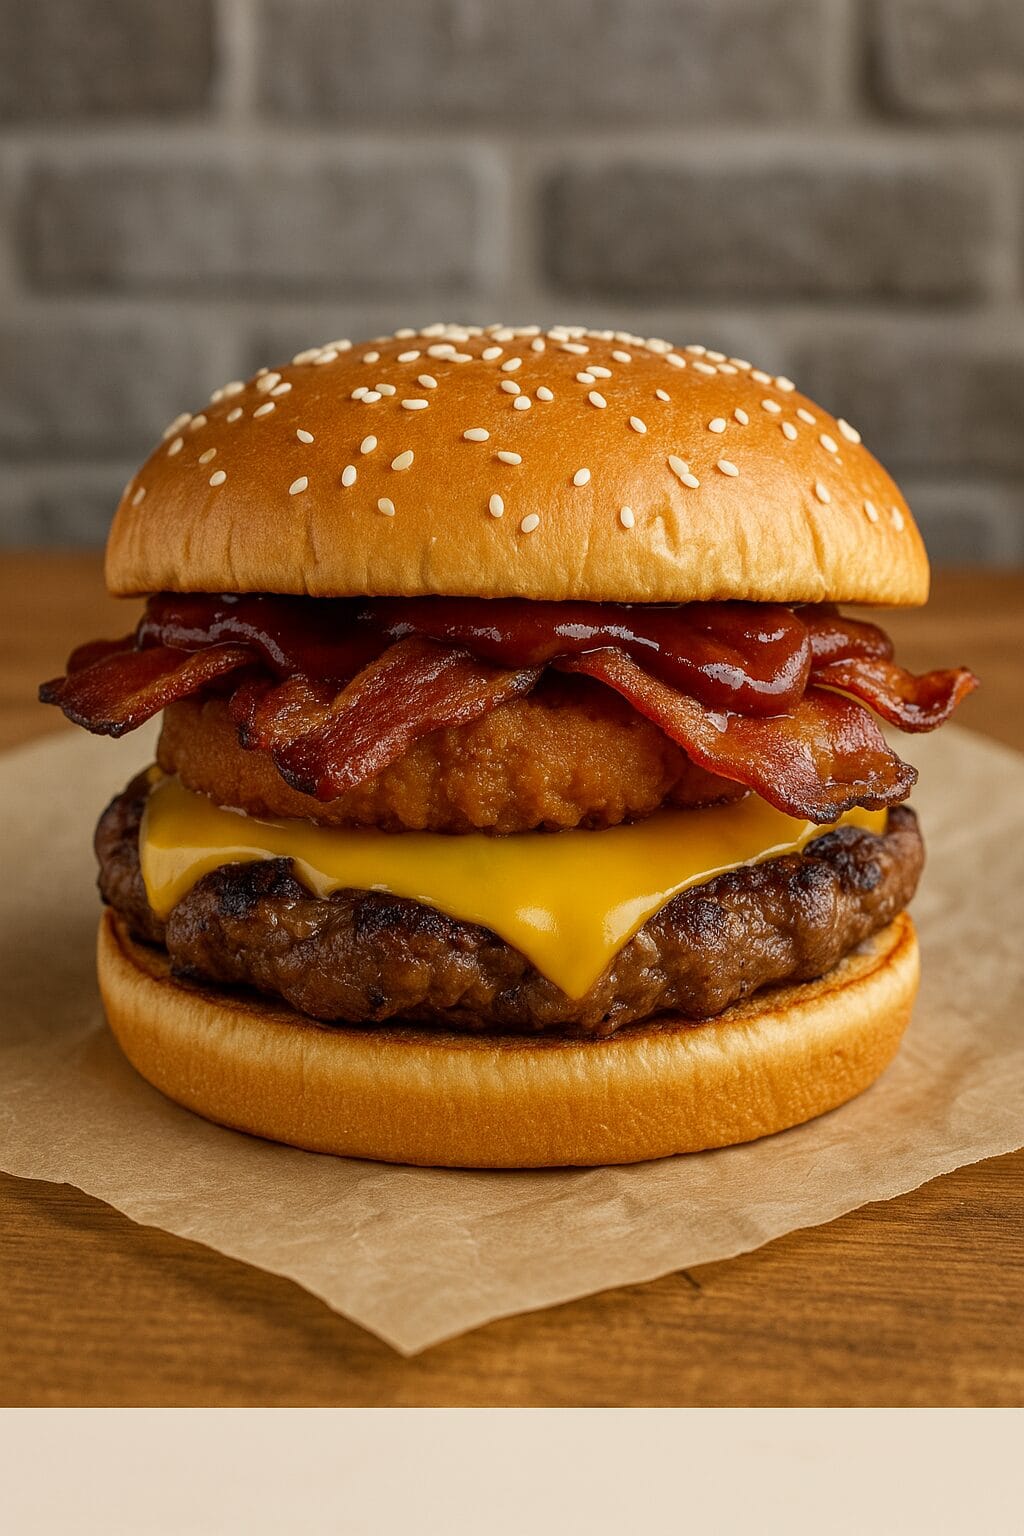
Bring fast food flavor home with this crave-worthy Copycat Western Bacon Cheeseburger—just like the one from Carl’s Jr., but even better. This burger stacks up with a juicy grilled beef patty, crispy bacon, melty American cheese, golden onion rings, and a generous slather of smoky barbecue sauce—all tucked inside a toasted sesame seed bun. Every bite delivers that signature sweet, salty, crispy combo you know and love. Perfect for cookouts, game days, or satisfying those big burger cravings at home.

Copycat Recipe: Carl’s Jr. Western Bacon Cheeseburger

No ratings yet
Carl's Jr. Western Bacon Cheeseburger is a flavorful and satisfying burger featuring a juicy beef patty, crispy bacon, melted American cheese, tangy BBQ sauce, and crunchy onion rings, all served on a toasted sesame seed bun. It's a classic for a reason!
Prep Time 10 minutes
Cook Time 15 minutes
Servings: 4 people
Course: Lunch, Main Course
Cuisine: American, Fast Food
Calories: 744

Ingredients
  

  • ¼ Cup Milk whole
  • 1 Large Egg
  •  
    1 tsp Smoked Paprika
  • ½ tsp Garlic Powder
  • ½ tsp Onion Powder
  • 1 tsp Kosher Salt to taste
  • 1 tsp Ground Black Pepper to taste
  • ½ Cup All-Purpose Flour
  • 2 Tbsp Cornstarch
  •  
    ¾ Cup Breadcrumbs Panko preffered
  • 1 Canola Oil for frying
  • 1 Large Yellow Onion
  • 8 slices Bacon thick cut and hardwood smoked
  • 1 lb Ground Beef divide into 4 patties
  • 4 Slices American Cheese
  •  
    1 BBQ Sauce Bull's-Eye Hickory Smoke barbecue sauce
  •  
    4 Sesame Seed Buns

Method
 

  1. Grab a shallow bowl. Pour in the milk, crack in the egg, and add the paprika, garlic powder, onion powder, salt, and pepper. Whisk all the ingredients together until they are fully incorporated and the mixture is smooth.
    ¼ Cup Milk, 1 Large Egg, 1 tsp Smoked Paprika, ½ tsp Garlic Powder, ½ tsp Onion Powder, 1 tsp Kosher Salt, 1 tsp Ground Black Pepper
  2. In a separate shallow bowl, combine the cornstarch and flour. Whisk until they are fully incorporated and there are no lumps.
    ½ Cup All-Purpose Flour, 2 Tbsp Cornstarch
  3. Pour the breadcrumbs into a shallow bowl.
    ¾ Cup Breadcrumbs
  4. It's important to use a heavy-bottomed pot for frying. Fill the pot with about 3 inches of oil and place it on the stove over medium heat. Heat the oil to 375 degrees F. Make sure to use a thermometer to monitor the temperature carefully. While the oil heats up, preheat your oven to 225 degrees F.
    1 Canola Oil
  5. Slice the onion into ¼-inch rings. Give the onion rings a quick rinse under cold water. Now it's time to coat the onions: First, toss them in the flour mixture until they are completely covered. Next, dip each ring into the egg mixture, making sure it's fully coated. Finally, dredge the onion rings in the breadcrumbs, pressing gently to help the breadcrumbs stick.
    1 Large Yellow Onion
  6. Working in batches, carefully add the breaded onion rings to the hot oil. Fry the onion rings until they are golden brown and crispy, flipping them halfway through the cooking time. This should take about 3-4 minutes per batch. Once cooked, transfer the onion rings to a baking sheet lined with a wire rack. Keep the onion rings warm in the preheated oven while you fry the remaining batches.
  7. In a large, heavy-bottomed skillet, arrange the bacon strips in a single layer. Cook them over medium-high heat until they reach your desired level of crispiness, flipping them halfway through. This should take about 4 minutes total. Be careful not to burn the bacon. Once cooked, remove the bacon strips from the skillet and place them on the baking sheet with the onion rings. Keep both warm in the oven while you prepare the burgers.
    8 slices Bacon
  8. Once the bacon is cooked, carefully wipe out any excess grease from the skillet using a paper towel. Return the skillet to the stovetop and set it over medium-high heat. Add 2 teaspoons of oil to the skillet and heat until the oil is shimmering and hot. While the oil heats up, season your hamburger patties generously with salt and pepper on both sides. Once the oil is hot, carefully place the patties in the skillet, making sure not to overcrowd them.
    1 lb Ground Beef
  9. Cook the burgers for about 2-3 minutes per side, or until they develop a delicious crust on the outside and reach your preferred level of doneness on the inside. After flipping the burgers for the first time, top each patty with a slice of American cheese, allowing it to melt slightly as the burgers finish cooking.
    4 Slices American Cheese
  10. To assemble the Western Bacon Cheeseburgers, start by spreading a generous amount of BBQ sauce on the cut sides of both the top and bottom halves of the sesame seed buns. Next, place two crispy onion rings on the bottom bun. Add the cooked cheeseburger patty, topped with melted American cheese, followed by two strips of crispy bacon. Place the top bun on the burger and serve immediately.
    1 BBQ Sauce, 4 Sesame Seed Buns

Nutrition

Serving: 12ozCalories: 744kcalCarbohydrates: 61gProtein: 37gFat: 39gSaturated Fat: 15gPolyunsaturated Fat: 5gMonounsaturated Fat: 14gTrans Fat: 2gCholesterol: 150mgSodium: 1632mgPotassium: 580mgFiber: 4gSugar: 8gVitamin A: 542IUVitamin C: 3mgCalcium: 388mgIron: 7mg

Notes

Ingredients:
  • Beef: Use 80/20 ground chuck for juicy and flavorful burgers.
  • Bacon: Choose thick-cut bacon for the best texture and flavor.
  • Cheese: American cheese is classic, but you can experiment with cheddar or pepper jack.
  • BBQ Sauce: Bull's-Eye Hickory Smoke is a close match to the Carl's Jr. sauce.
  • Onion Rings: Use thick-cut onion rings for a satisfying crunch. You can use store-bought or make your own.
  • Buns: Sesame seed buns are traditional. Toasting the buns adds flavor and texture.
Cooking Tips:
  • Bacon: Cook the bacon until crispy but not burnt. You can cook it in a skillet, oven, or air fryer.
  • Onion Rings: If using store-bought onion rings, follow the package directions for cooking. If making your own, use a batter with cornstarch for extra crispiness.
  • Burger Patties: Don't overwork the ground beef when forming the patties. Make an indentation in the center of each patty to prevent them from plumping up too much while cooking.
  • Seasoning: Season the patties generously with salt and pepper before cooking.
  • Cooking Temperature: Cook the burgers over medium-high heat to achieve a good sear.
  • Cheese: Add the cheese to the patties in the last minute of cooking to allow it to melt.
  • Doneness: Use a meat thermometer to ensure the burgers are cooked to your desired doneness.
  • Assembly: Spread the BBQ sauce on both halves of the bun. Don't forget the onion rings and bacon!
Serving Suggestions:
  • Sides: Serve with classic sides like fries, onion rings, or a side salad.
  • Drinks: A cold soda or milkshake is the perfect pairing.
Variations:
  • Double Western Bacon Cheeseburger: Use two patties and two slices of cheese for a double.
  • Spicy: Add a slice of jalapeño or some hot sauce for a spicy kick.
  • Deluxe: Add lettuce, tomato, and onion for a deluxe version.
With these tips, you'll be able to create a delicious copycat Carl's Jr. Western Bacon Cheeseburger at home!
 
Psst... want to know a secret? It's rumored that the BBQ sauce used in the original Western Bacon Cheeseburger is Bull's-Eye Hickory Smoke. 😉 Give it a try and see if you can taste the difference!

Tried this recipe?

Let us know how it was!

Related Recipes

Ingredients

Ingredients:

  • For the Onion Rings:

    • ¼ cup whole milk
    • 1 large egg
    • 1 teaspoon smoked paprika
    • ½ teaspoon garlic powder
    • ½ teaspoon onion powder
    • 1 teaspoon kosher salt, to taste
    • 1 teaspoon ground black pepper, to taste
    • ½ cup all-purpose flour
    • 2 tablespoons cornstarch
    • ¾ cup breadcrumbs (Panko preferred)
    • Canola oil for frying
    • 1 large yellow onion
  • For the Burgers:

    • 8 slices bacon, thick-cut and hardwood smoked
    • 1 lb ground beef, divided into 4 patties
    • 4 slices American cheese
    • BBQ sauce (Bull’s-Eye Hickory Smoke barbecue sauce recommended)
    • 4 sesame seed buns

Image Gallery Copycat Recipe: Carl’s Jr. Western Bacon Cheeseburger

Storage & Leftovers

Storage:

  • Refrigerator:
    Store assembled or individual components in airtight containers for up to 3 days. For best results, store buns, patties, bacon, onion rings, and sauce separately to preserve texture.

  • Freezer:
    Freeze cooked burger patties individually wrapped for up to 2 months. Bacon and onion rings can also be frozen separately, but may lose some crispness when reheated.

Reheating:

  • Burger Patty:
    Reheat on a skillet over medium heat for 2–3 minutes per side, or microwave in 30-second intervals until heated through.

  • Bacon & Onion Rings:
    Reheat in an oven or air fryer at 375°F for about 5–7 minutes to bring back crispiness. Avoid microwaving these if possible—they’ll go soggy.

  • Bun:
    Toast lightly in a dry skillet or oven for best texture. Add BBQ sauce after reheating to keep it fresh and saucy.

Pro Tips:

  • For a next-day burger that still hits hard, reassemble freshly heated parts just before serving.

  • Use parchment paper to wrap and warm in foil if reheating a fully assembled burger in the oven—this keeps it moist without going soggy.

Please follow and like us:
onpost_follow
fb-share-icon197
Tweet120
Pinterest20
Share 20
submit to reddit

Subscribe for New Recipes

* indicates required

Intuit Mailchimp

Broccoli Cheddar Soup

Broccoli Cheddar Soup

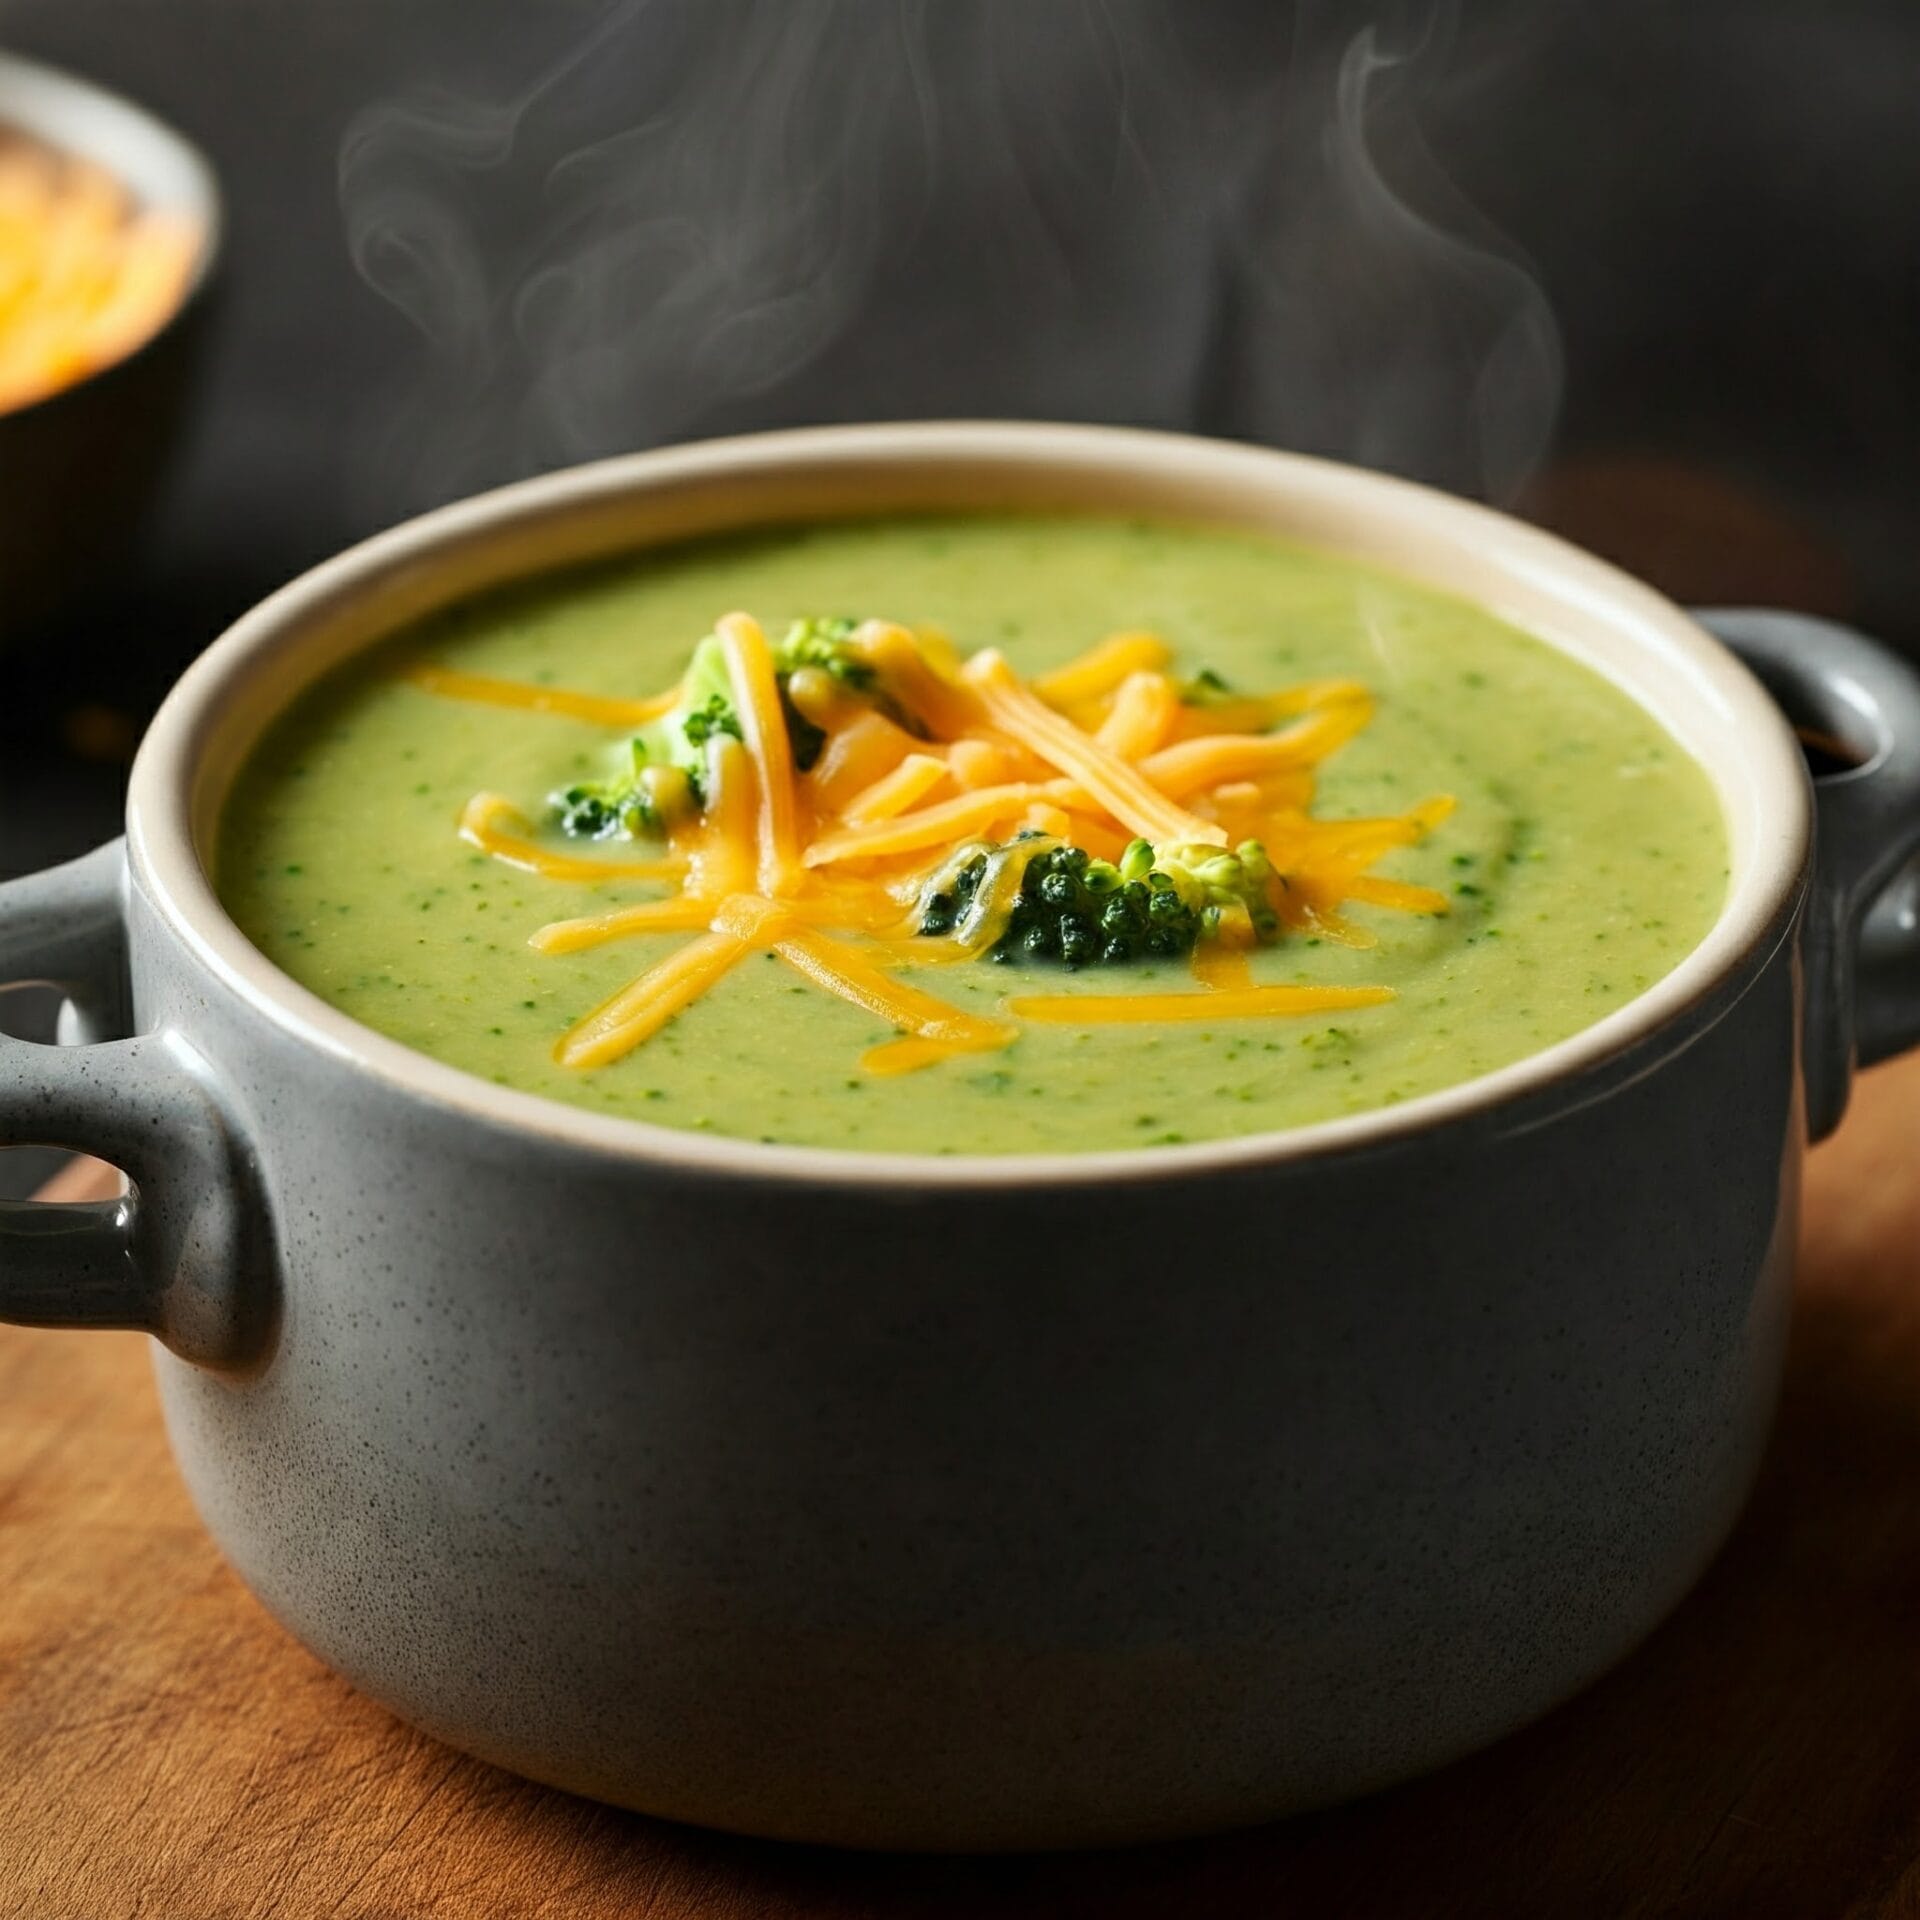
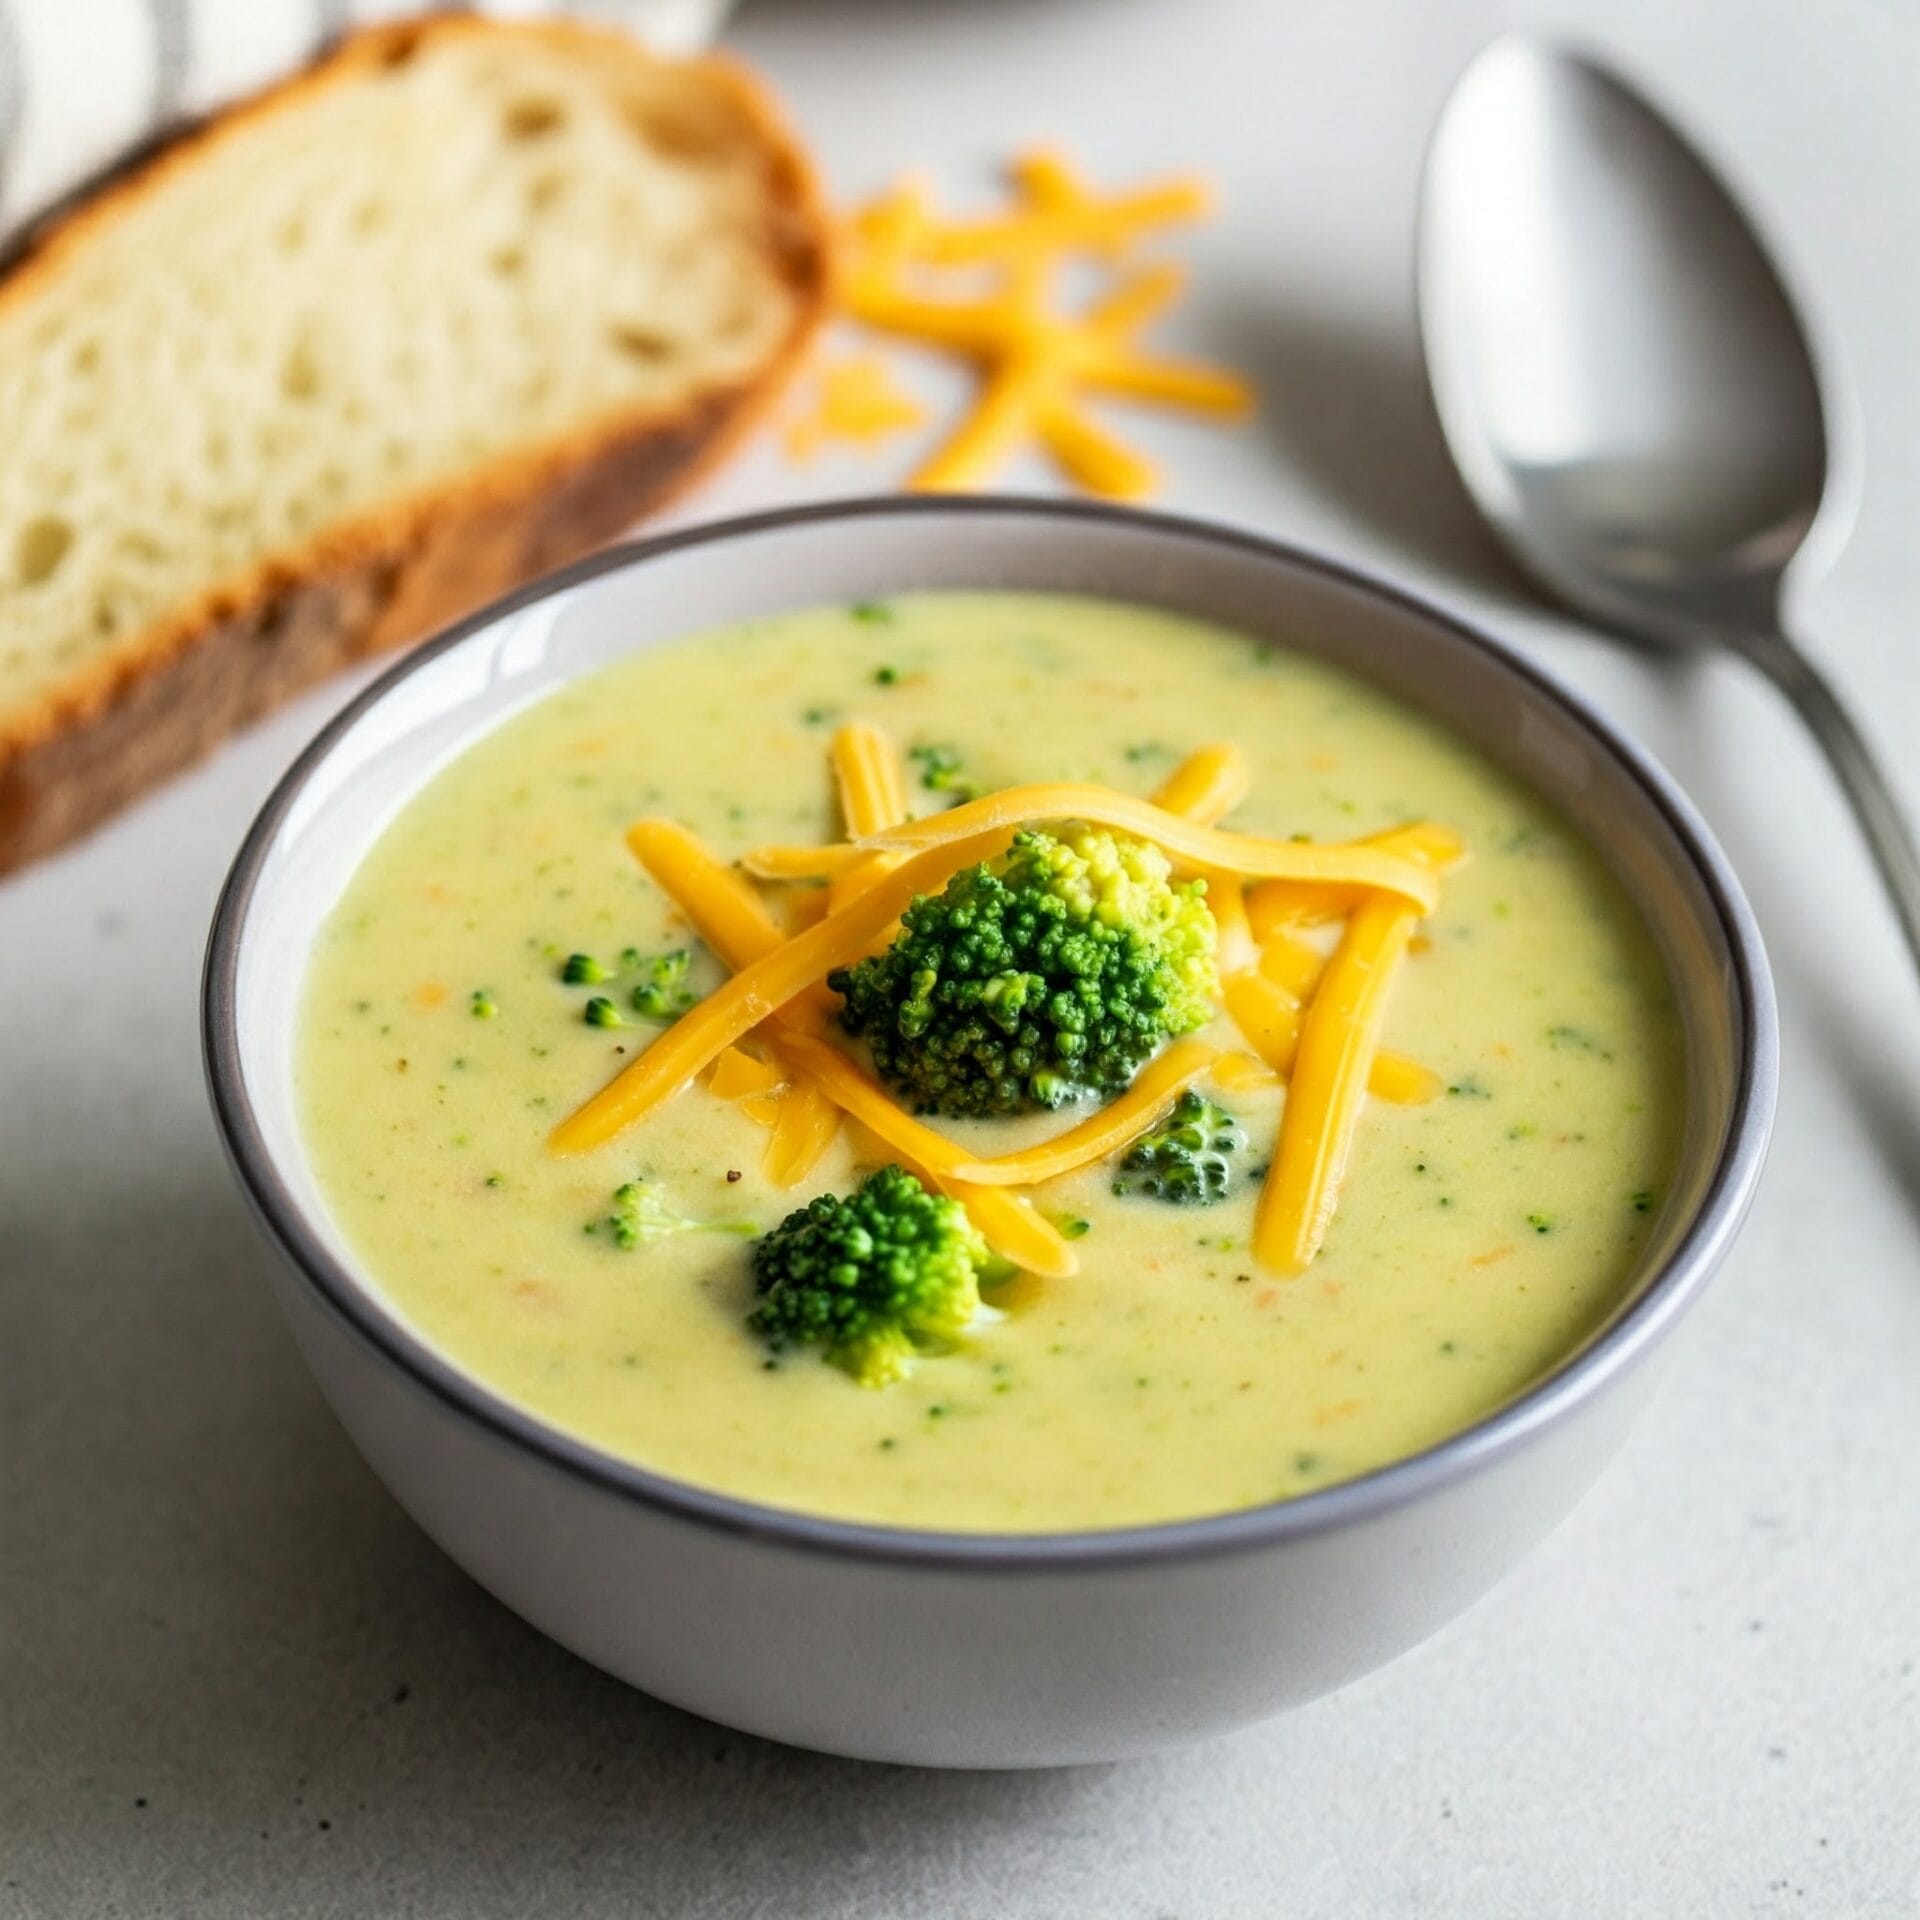
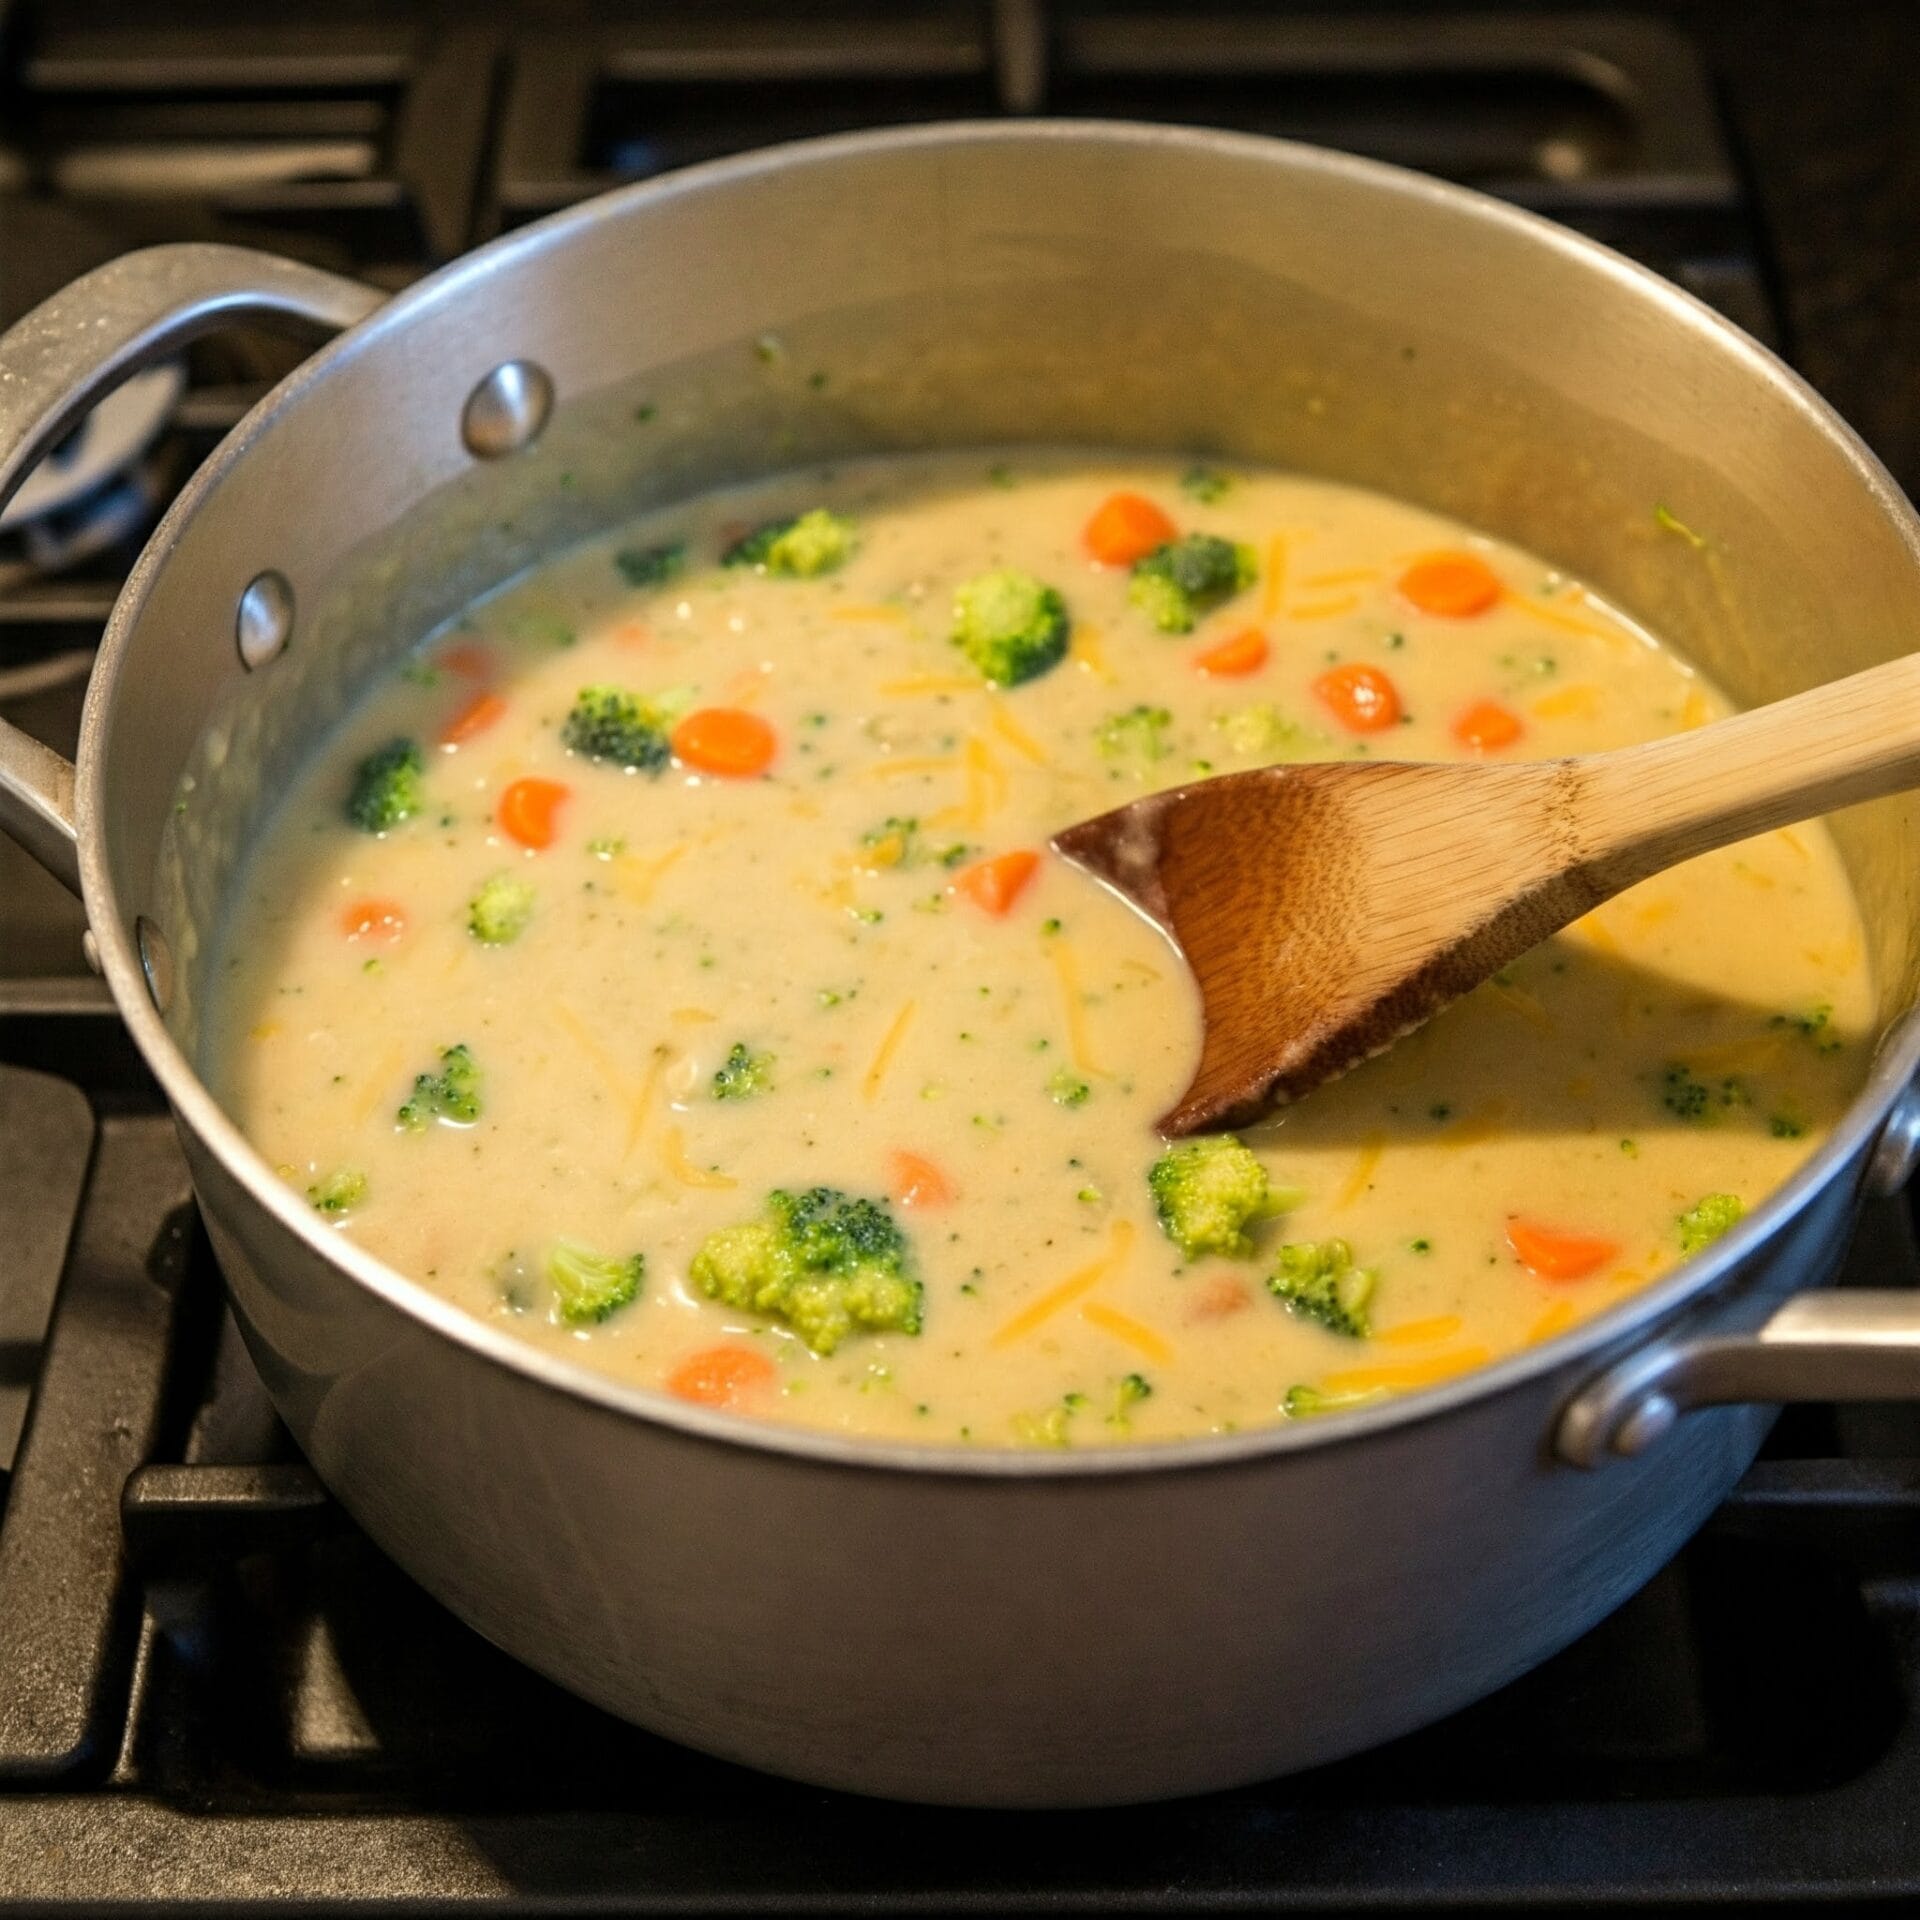
Imagine a bowl of steaming, velvety soup, brimming with tender broccoli florets and a rich, cheesy flavor that will warm you from the inside out. That’s broccoli cheddar soup—a comforting classic that’s perfect for chilly days and cozy nights.

This creamy delight starts with a base of sautéed onions and garlic, creating a fragrant foundation for the soup. Then comes the star of the show: broccoli, simmered to tender perfection in a rich and flavorful broth. But the real magic happens when a generous amount of sharp cheddar cheese is melted into the soup, creating a velvety smooth texture and an irresistible cheesy flavor.

Each spoonful is a symphony of textures and tastes—tender broccoli, creamy broth, and that sharp cheddar bite. It’s a simple yet satisfying dish that’s perfect for a quick weeknight meal or a cozy weekend lunch.

Whether you’re a cheese lover, a soup enthusiast, or simply seeking a comforting and flavorful meal, broccoli cheddar soup is sure to hit the spot. It’s a classic for a reason—a delicious and satisfying dish that’s perfect for any occasion.

Broccoli & Cheddar Cheese Soup

No ratings yet
Broccoli cheddar soup is a classic comfort food loved for its creamy texture and rich flavor. It typically consists of broccoli florets, onions, carrots, and sometimes potatoes, simmered in a broth and then blended or partially blended with sharp cheddar cheese for a velvety smooth finish. Often seasoned with garlic, mustard, and pepper, it's a satisfying and flavorful meal. This soup can be enjoyed as is, or topped with croutons, shredded cheese, or a dollop of sour cream for extra richness.
Prep Time 15 minutes
Cook Time 30 minutes
Servings: 6
Course: Appetizer, Dinner, Lunch, Main Course, Snacks
Cuisine: American
Calories: 345

Ingredients
  

  • 4 Tbsp Unsalted Butter
  • 1 Med Yellow Onion diced
  • ½ tsp Sea Salt
  • 1 tsp Ground Black Pepper to taste
  • 3 Cloves Garlic minced
  • ¼ Cup All-Purpose Flour
  • 2 Cups Milk whole milk is best
  • 2 Cups Vegetable Broth
  • 3 Cups Broccoli florets, chopped
  • 1 Large Carrots Julienned or finely chopped
  • ½ tsp Dijon Mustard
  • 8 oz Cheddar Cheese shredded
  • 1 Cup Croutons homemade or store bought

Method
 

  1. Melt the butter in a large pot over medium heat. Add the onion, salt, and pepper. Cook and stir until the onion becomes translucent and softens. Stir in the garlic until fragrant. Sprinkle in the flour and whisk until it turns a light golden brown. Slowly pour in the milk while whisking constantly.
    4 Tbsp Unsalted Butter, 1 Med Yellow Onion, ½ tsp Sea Salt, 1 tsp Ground Black Pepper, 3 Cloves Garlic, ¼ Cup All-Purpose Flour, 2 Cups Milk
  2. Now, add the broth, broccoli florets, chopped carrots, and mustard to the pot. Give everything a good stir to combine. Bring the mixture to a simmer, then reduce the heat to low, and cook until the broccoli is tender, about 15 to 20 minutes. You can test the broccoli with a fork to make sure it's cooked to your liking.
    2 Cups Vegetable Broth, 3 Cups Broccoli, 1 Large Carrots, ½ tsp Dijon Mustard
  3. Now, for the best part! Slowly add the shredded cheese to the soup, stirring after each addition, until all of the cheese is melted and the soup has reached a lovely, creamy consistency. Season to taste with salt and pepper. Ladle the soup into bowls and serve hot. Croutons make a nice addition for a bit of crunch.
    1 Cup Croutons, 8 oz Cheddar Cheese

Nutrition

Serving: 12ozCalories: 345kcalCarbohydrates: 20gProtein: 14gFat: 24gSaturated Fat: 14gPolyunsaturated Fat: 1gMonounsaturated Fat: 6gTrans Fat: 0.3gCholesterol: 68mgSodium: 855mgPotassium: 384mgFiber: 2gSugar: 7gVitamin A: 3200IUVitamin C: 42mgCalcium: 409mgIron: 1mg

Notes

Ingredients:
  • Broccoli: Fresh broccoli florets are best. If using frozen, thaw it completely before adding it to the soup.
  • Cheese: Use a good-quality sharp cheddar cheese for the best flavor. You can also add other cheeses like Gruyère or fontina for complexity.
  • Aromatics: Onions and garlic form the flavor base of the soup.
  • Carrot: Adds a touch of sweetness and color.
  • Mustard: A small amount of Dijon mustard adds depth and a subtle tanginess.
  • Broth: Use a good-quality vegetable or chicken broth. Homemade broth will add the most flavor.
  • Milk: Whole milk creates a creamy texture. You can use 2% milk if you prefer a lighter soup.
  • Butter and Flour: These create a roux, which thickens the soup.
  • Seasonings: Salt and pepper are essential. You can also add other spices like nutmeg or paprika.
Cooking Tips:
  • Don't Overcook the Broccoli: Simmer the broccoli just until it's tender-crisp. Overcooked broccoli will be mushy.
  • Make a Roux: Cooking the flour with the butter creates a roux, which helps to thicken the soup and prevent lumps.
  • Stir in the Cheese Gradually: Add the cheese a little at a time, stirring constantly until it's melted and smooth. This helps to prevent the cheese from clumping.
  • Adjust Consistency: If the soup is too thick, add a bit more broth to thin it out.
  • Taste and Adjust: Always taste the soup before serving and adjust the seasonings to your liking.
Serving Suggestions:
  • Garnish: Garnish with croutons, shredded cheese, or a dollop of sour cream.
  • Sides: Serve with crusty bread or a side salad for a complete meal.
Variations:
  • Spicy: Add a pinch of red pepper flakes or a dash of hot sauce for heat.
  • Creamier: Use heavy cream instead of milk for an even richer soup.
  • Veggie-Packed: Add other vegetables like cauliflower, carrots, or potatoes.
  • Hearty: Add cooked bacon or ham for a smoky flavor.
With these tips, you'll be able to make a delicious and satisfying broccoli cheddar soup!

Tried this recipe?

Let us know how it was!

Related Recipes

Ingredients

Ingredients:

  • 4 Tbsp Unsalted Butter: The base of your soup’s rich flavor. Unsalted allows you to control the saltiness.
  • 1 Med Yellow Onion, diced: Adds sweetness and depth.
  • ½ tsp Sea Salt: Enhances the flavors; you can adjust to taste later.
  • 1 tsp Ground Black Pepper, to taste: Provides a bit of warmth and spice.
  • 3 Cloves Garlic, minced: Classic aromatic for savory depth.
  • ¼ Cup All-Purpose Flour: This will thicken the soup.
  • 2 Cups Milk (whole milk is best): Creates creaminess. Whole milk adds richness, but you can use 2% in a pinch.
  • 2 Cups Vegetable Broth: Forms the soup’s base; use a good quality one for the best flavor.
  • 3 Cups Broccoli, florets, chopped: The star ingredient!
  • 1 Large Carrot, Julienned or finely chopped: Adds a touch of sweetness and color.
  • ½ tsp Dijon Mustard: A secret ingredient that adds complexity.
  • 8 oz Cheddar Cheese, shredded: Sharp cheddar is recommended for the best flavor.
  • 1 Cup Croutons, homemade or store-bought: For a crunchy topping.

Tips for the Best Broccoli Cheddar Soup:

  • Don’t overcook the broccoli: Aim for tender-crisp broccoli that retains its vibrant green color.
  • Use quality cheese: The better the cheddar, the better the soup!
  • Adjust seasonings to taste: Start with the recommended amounts of salt and pepper, then add more to your liking.
  • Blend carefully: If using an immersion blender, be careful not to over-blend, which can make the soup gummy.
  • Thicken gradually: Add the flour slowly to avoid lumps.
  • Garnish generously: Croutons are a must, but you can also add extra shredded cheese, a dollop of sour cream, or even some fresh parsley.

Image Gallery Broccoli Cheddar Soup

Storage & Leftovers

Storage

  • Refrigerator: Broccoli Cheddar Soup is best enjoyed fresh, but leftovers can be stored in the refrigerator for 3-4 days. Make sure to transfer the soup to an airtight container once it has cooled completely.

  • Freezer: While freezing is an option, it’s not generally recommended for Broccoli Cheddar Soup. Dairy-based soups can sometimes separate or become grainy when frozen and thawed. However, if you do choose to freeze it, store it in a freezer-safe container or bag for up to 1 month.

Reheating

  • Stovetop: The best way to reheat Broccoli Cheddar Soup is gently on the stovetop over low heat. Stir occasionally to prevent sticking and scorching. If the soup seems thick, you can thin it out with a splash of milk or broth. 

  • Microwave: While you can use a microwave, it’s not ideal as it can heat unevenly and may cause the cheese sauce to separate. If you do use a microwave, heat it in short bursts, stirring frequently, until warmed through.  

Tips and Tricks for Leftovers

  • Separation: If your soup separates slightly after refrigeration, don’t worry! A quick whisk or a blend with an immersion blender can often restore its creamy texture.
  • Thinning: Broccoli Cheddar Soup tends to thicken as it sits in the refrigerator. Add a little extra milk or broth when reheating to achieve your desired consistency.
  • Freshness: Always check for any signs of spoilage before consuming leftovers. Look for any off-putting smells, discoloration, or mold.

By following these storage and reheating tips, you can enjoy your homemade Broccoli Cheddar Soup even after the first day!

Please follow and like us:
onpost_follow
fb-share-icon197
Tweet120
Pinterest20
Share 20
submit to reddit

Lasagna Soup

Lasagna Soup

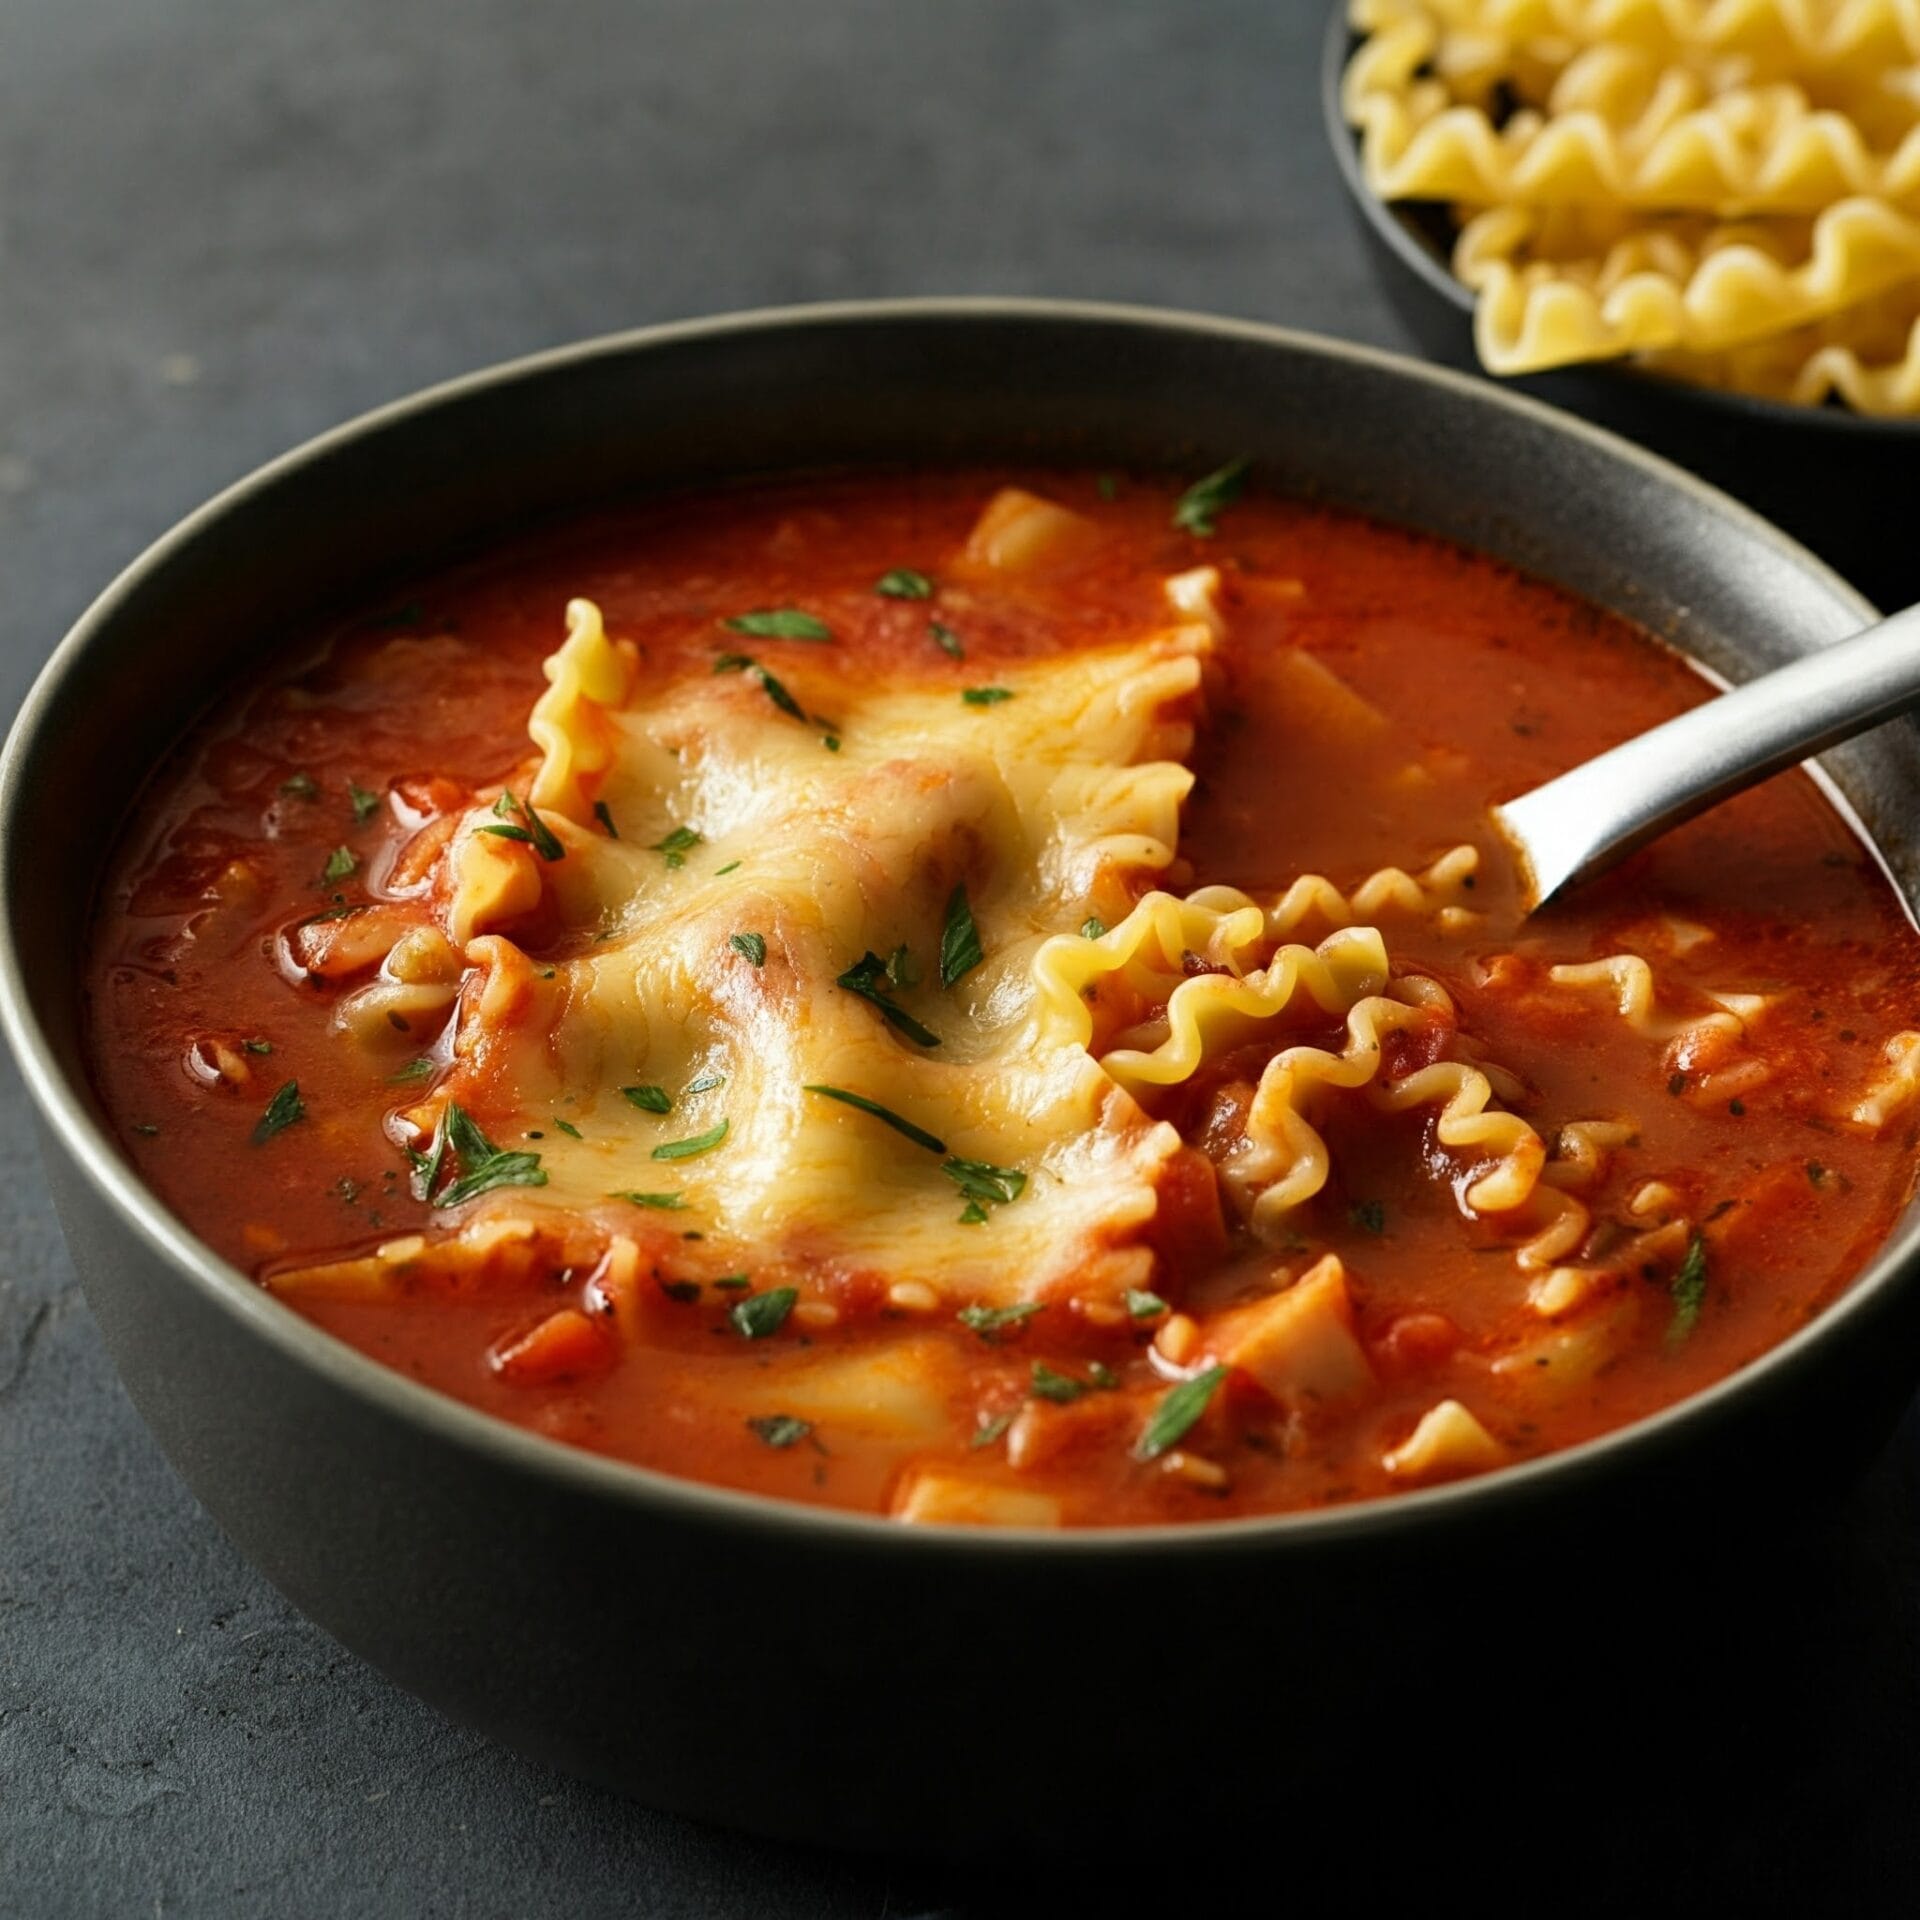
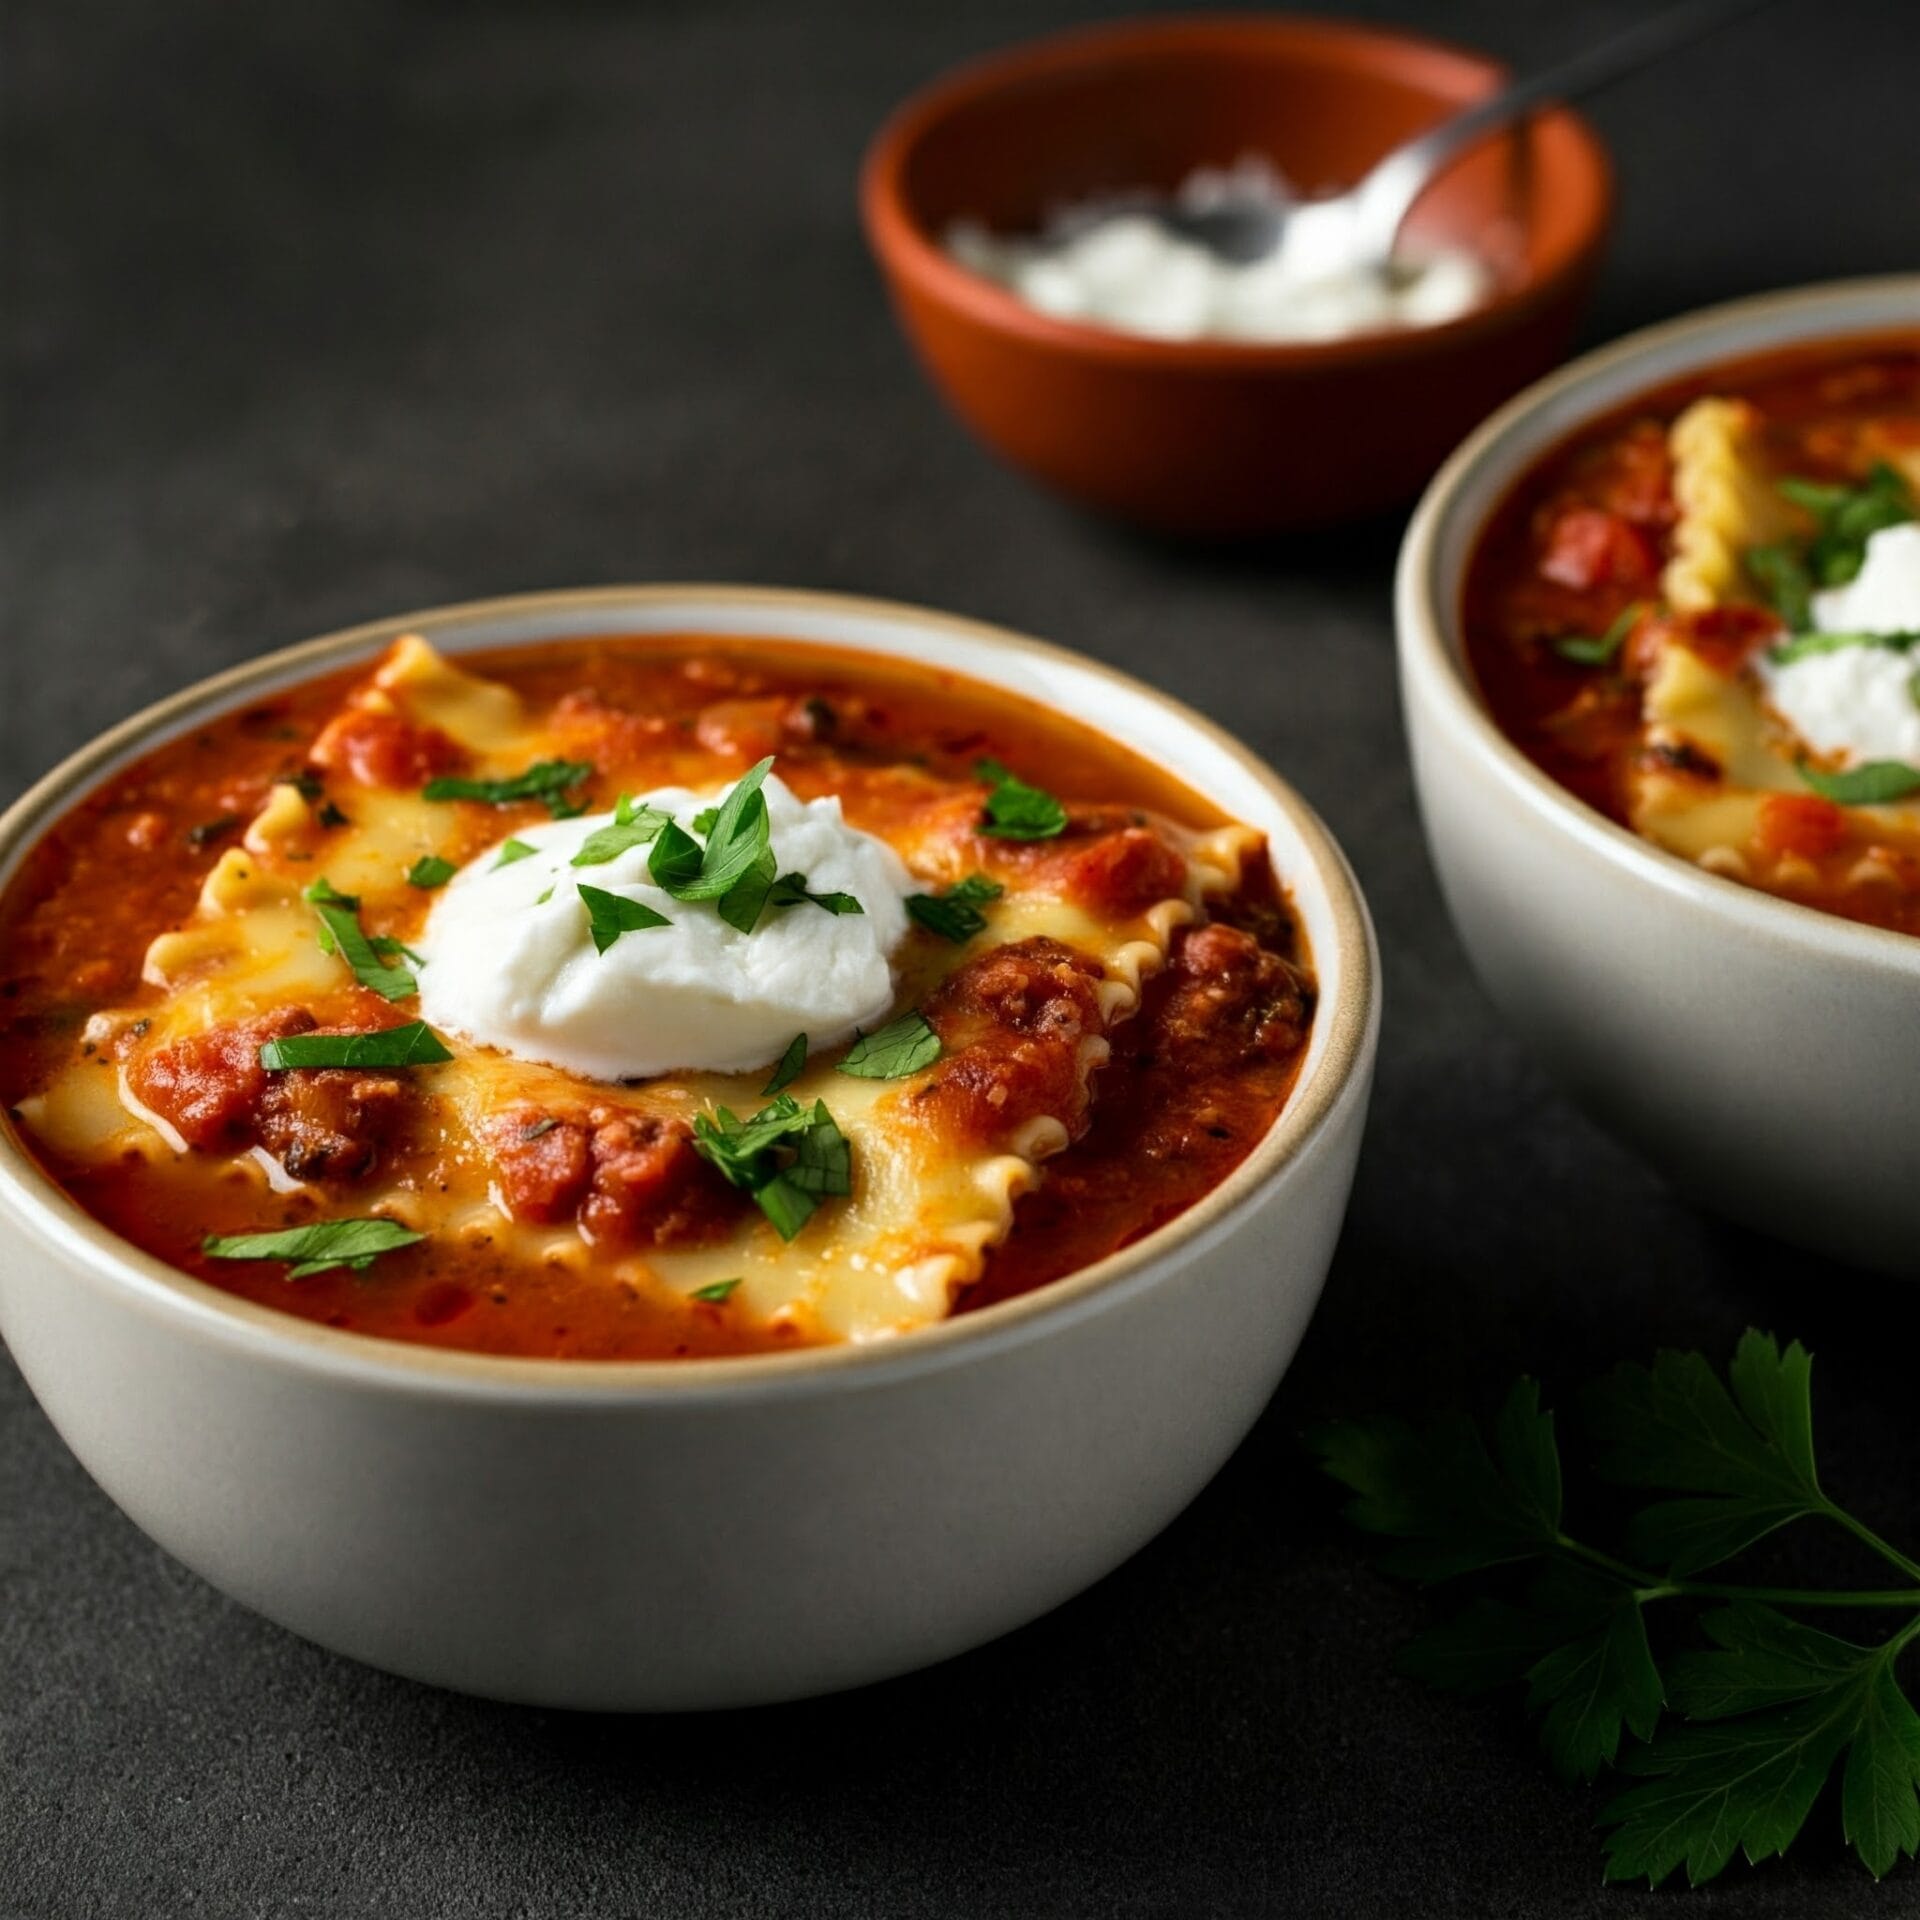
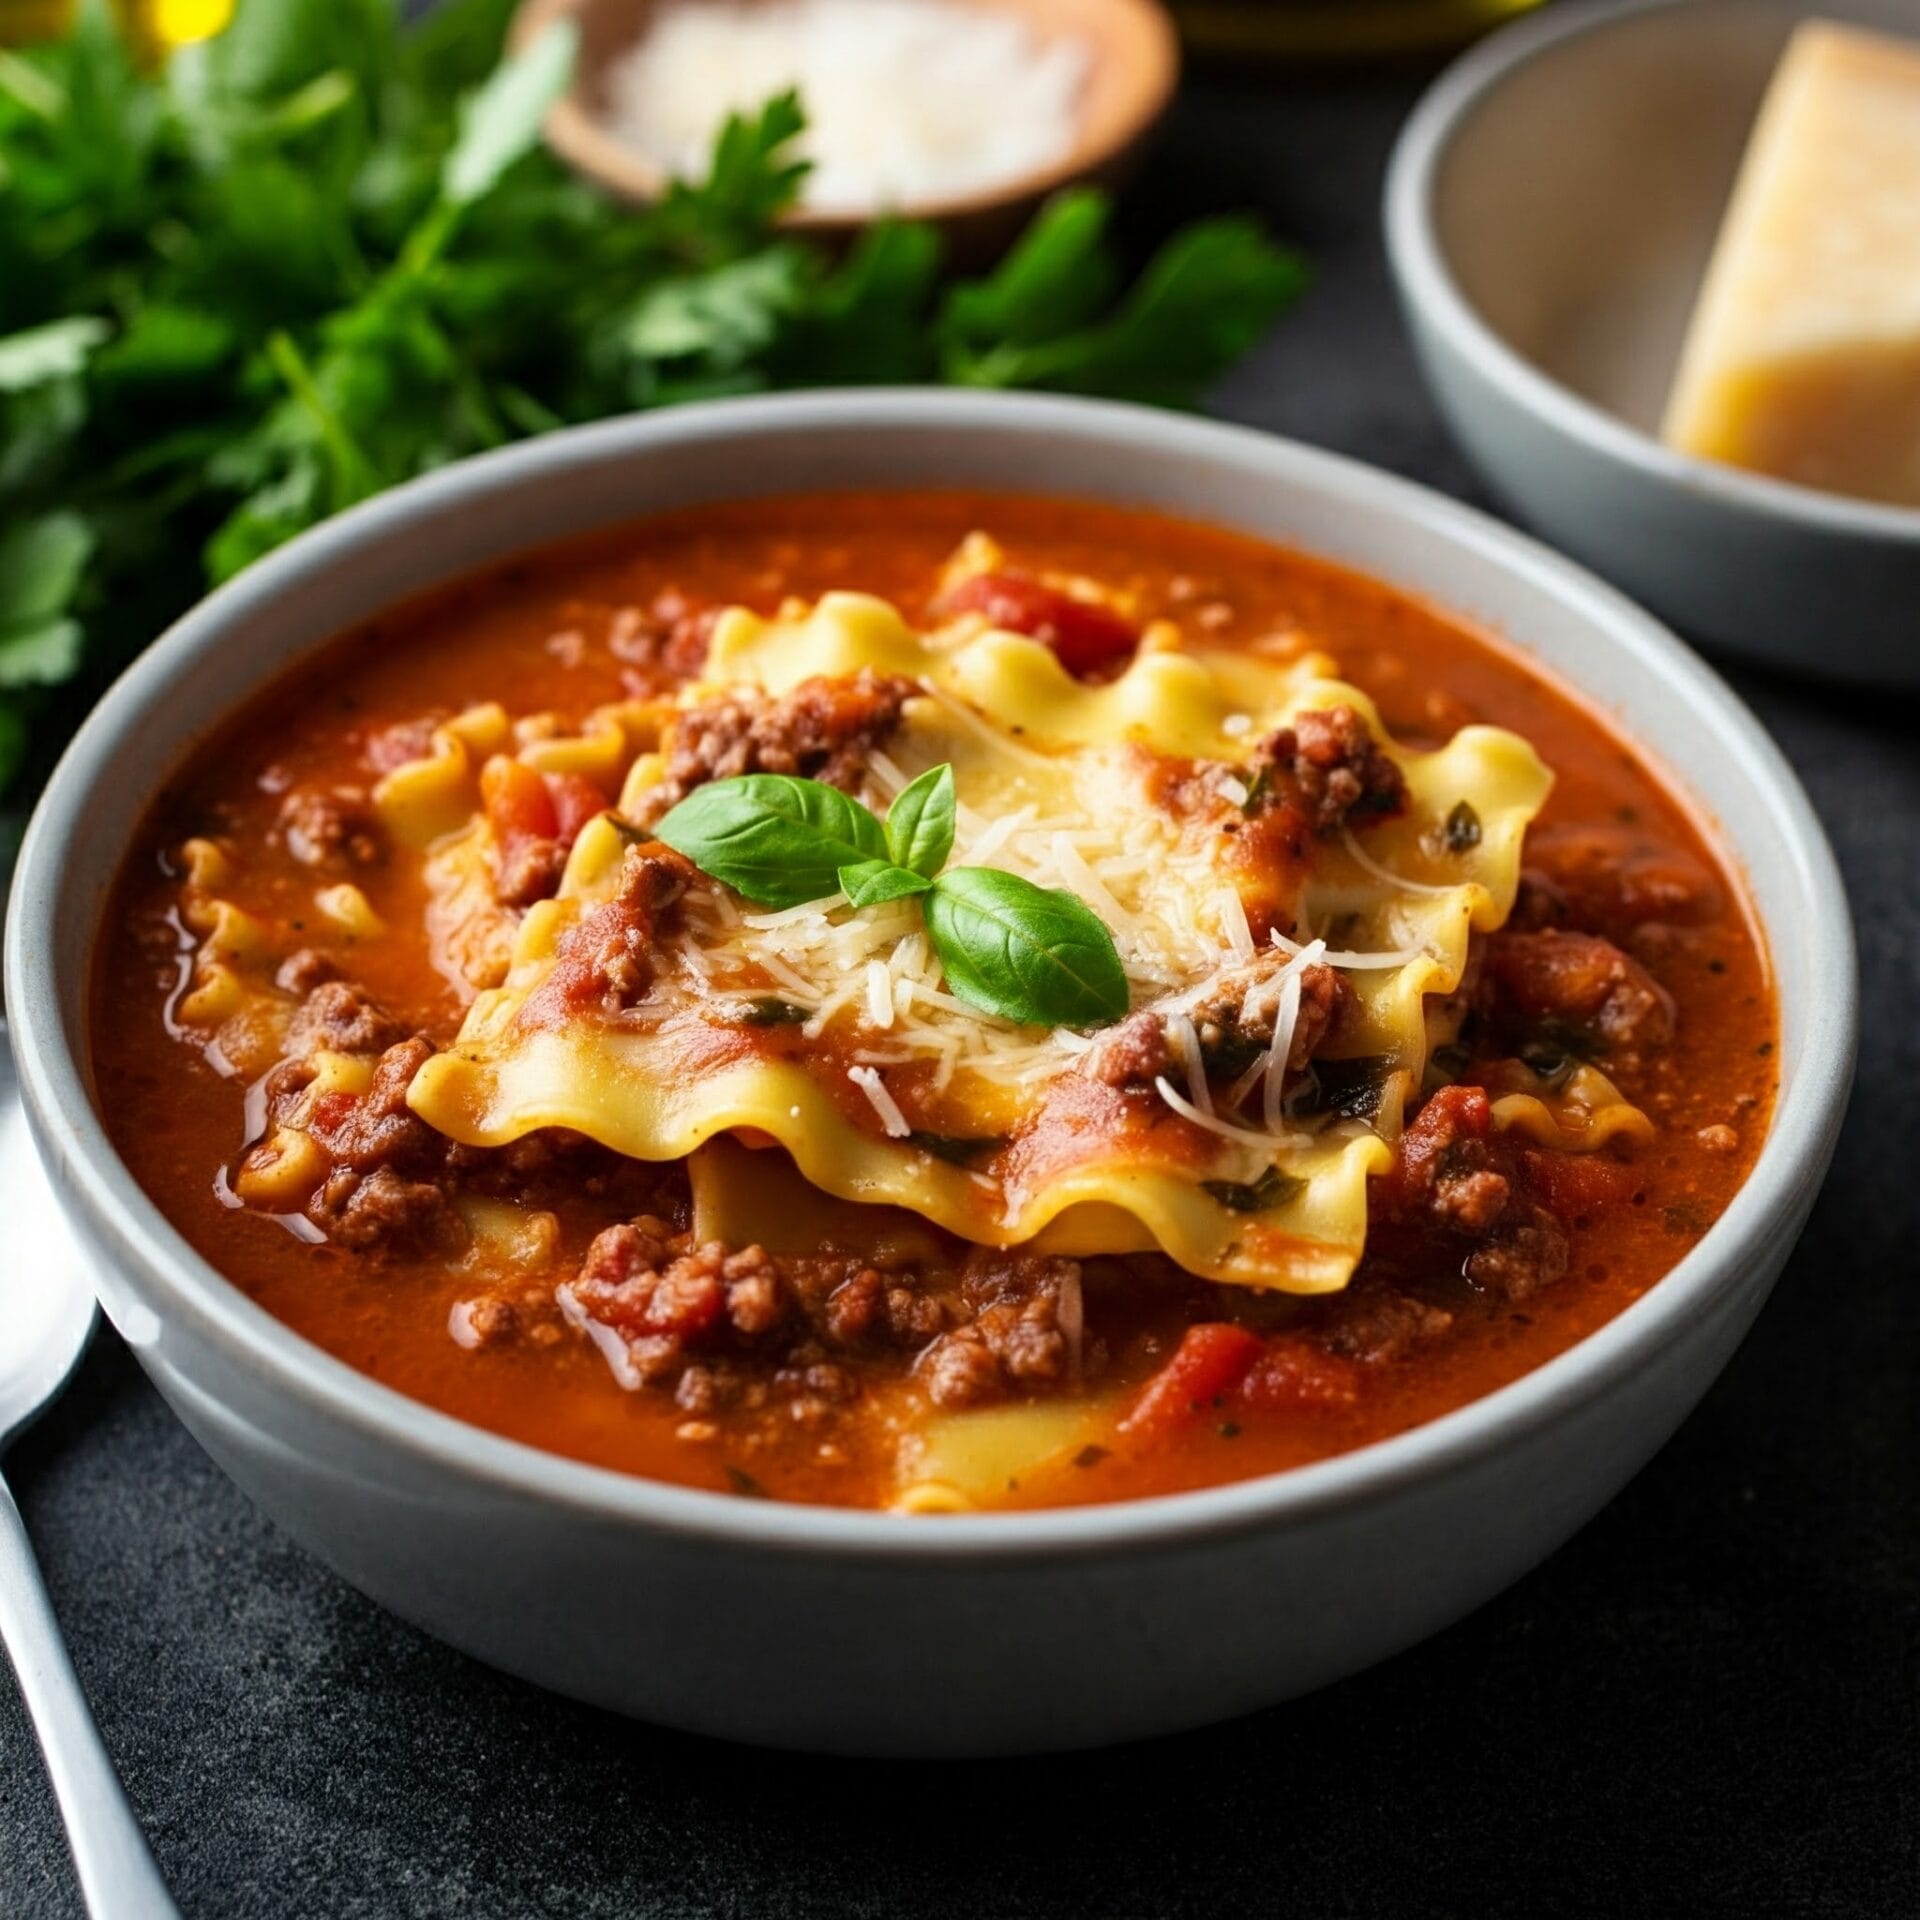
All the comforting flavors of classic lasagna — in a warm, hearty bowl! This Lasagna Soup is the ultimate comfort food mashup: rich tomato broth, savory ground meat, tender pasta, and melty cheese come together for a soul-satisfying meal that’s as easy as it is delicious.

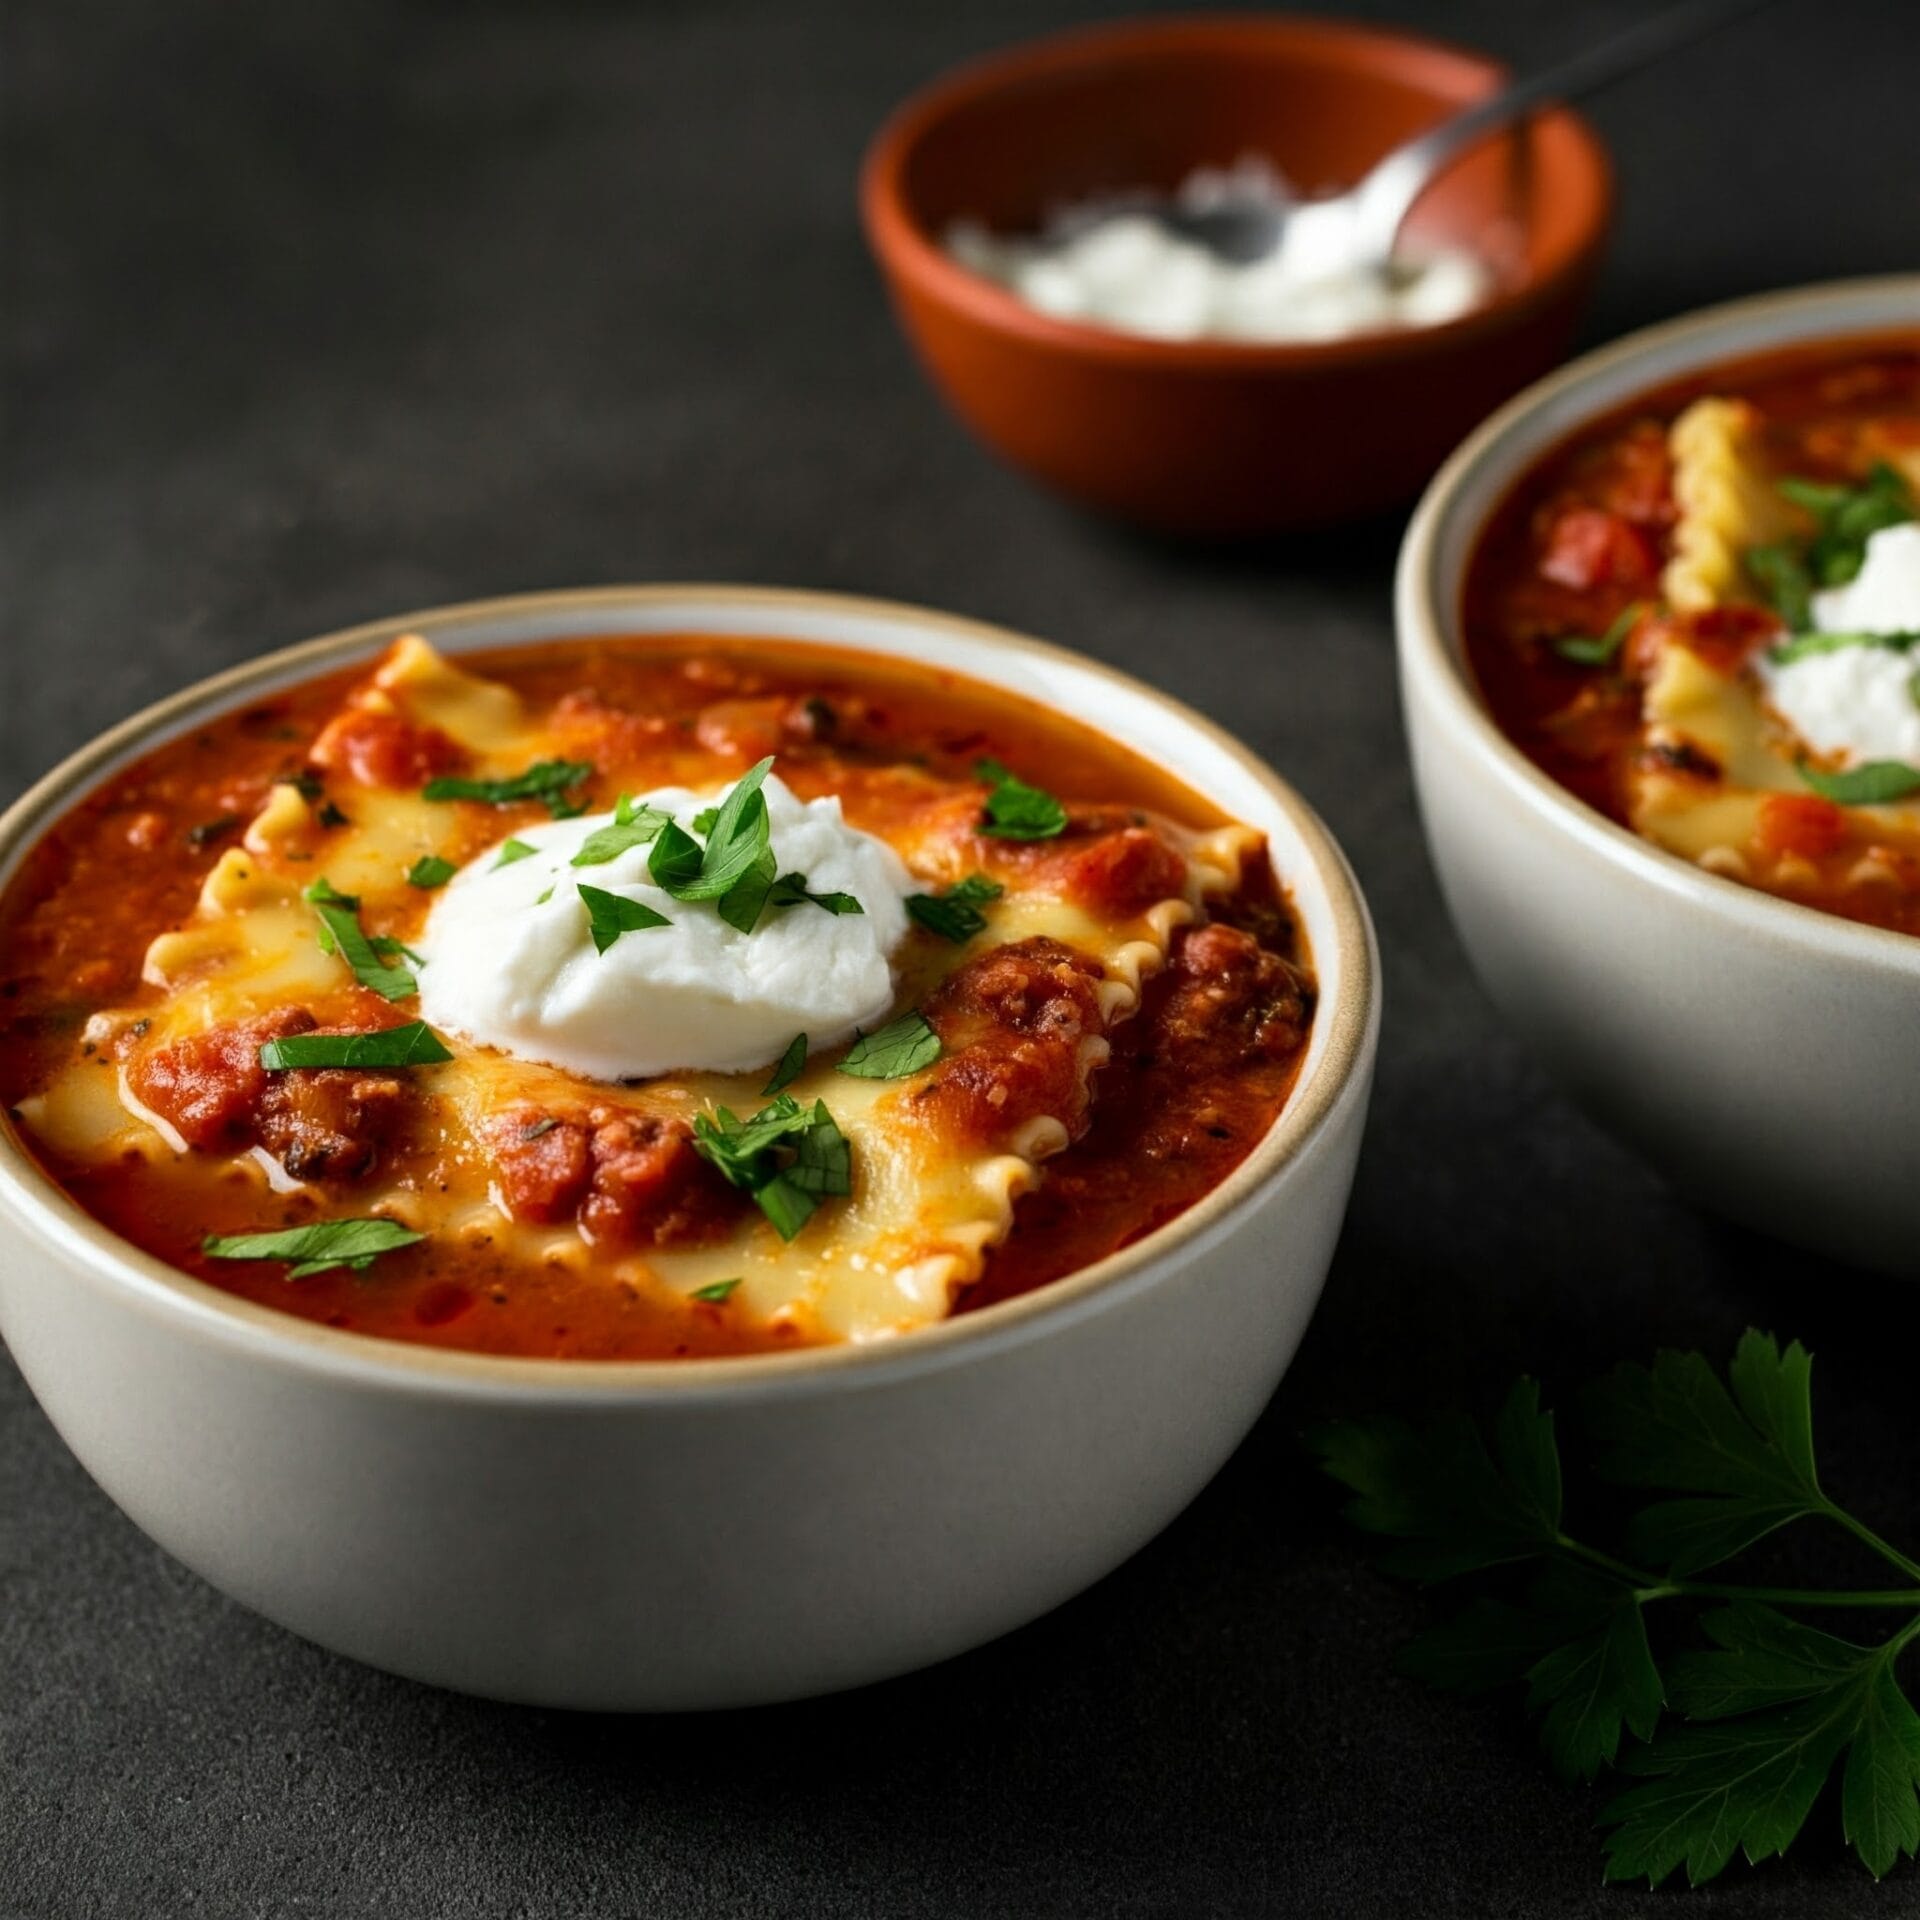
Simmered with garlic, Italian herbs, and a splash of cream, this soup delivers layers of flavor without the layering. Topped with a generous dollop of ricotta, mozzarella, and Parmesan, each spoonful is cheesy, cozy perfection.

Whether you’re feeding a family or craving something warm and filling, this one-pot wonder turns lasagna night into a weeknight win — with half the effort and all the comfort.

Lasagna Soup

No ratings yet
Lasagna soup is a comforting and hearty soup that captures all the flavors of classic lasagna. It features ground beef, a rich tomato-based broth, tender lasagna noodles, and a creamy cheese topping. It's a delicious and satisfying meal, perfect for a cozy winter evening.
Prep Time 15 minutes
Cook Time 30 minutes
Servings: 6 people
Course: Lunch, Main Course, Snack
Cuisine: Italian America Fusion, Italian American
Calories: 577

Ingredients
  

  • 2 tbsp Olive oil divided
  • 1 lb Ground Beef or italian sausage
  • 1 lg Yellow Onion diced (1-3/4 cups)
  • 5 Cloves Garlic minced
  • 4 ½ cups Chicken broth low sodium; add more to thin as desired
  •  
    14.5 oz Diced Tomatoes petite canned
  •  
    14.5 oz Crushed Tomatoes canned
  • 2 ½ tbsp Tomato Paste
  • 1 ¾ tsp Dried Basil dried
  • ¾ tsp Oregano dried
  •  
    ½ tsp Rosemary dried, crushed
  • ½ tsp Thyme dried
  • Salt to taste
  • Black pepper freshly ground; to taste
  •  
    8 Lasagna Noodles broken into bite size pieces (6.5 oz)
  •  
    5 oz Mozzarella cheese shredded (1 1/4 cup)
  • 2 oz Parmesan cheese finely shredded (1/2 cup)
  •  
    2 tbsp Ricotta Cheese
  • 2 tbsp Parsley fresh; chopped; plus more for garnish

Method
 

  1. Place a large pot over medium-high heat and add the olive oil. Once the oil is hot and shimmers, add the ground beef. Season with salt and pepper. Cook the beef, stirring occasionally, until it is evenly browned.
    2 tbsp Olive oil, 1 lb Ground Beef, Salt, Black pepper
  2. Carefully pour off the excess fat from the pot, leaving the browned beef behind. Transfer the beef to a clean bowl and set it aside.
  3. Add the remaining olive oil to the pot and heat over medium heat. Add the chopped yellow onion and cook, stirring occasionally, until it begins to soften, about 3 minutes. Then, add the minced garlic and sauté for another 30 seconds.
    1 lg Yellow Onion, 5 Cloves Garlic
  4. Add in chicken broth, diced tomatoes, crushed tomatoes, tomato paste, basil, oregano, rosemary, thyme, browned ground beef, and season with salt and pepper to taste.
    4 1/2 cups Chicken broth, 14.5 oz Diced Tomatoes, 14.5 oz Crushed Tomatoes, 2 1/2 tbsp Tomato Paste, 1 3/4 tsp Dried Basil, 3/4 tsp Oregano, 1/2 tsp Rosemary, 1/2 tsp Thyme, Salt, Black pepper
  5. Bring the soup to a boil over medium-high heat. Once boiling, reduce the heat to medium-low, cover the pot, and simmer for 20 minutes, allowing the flavors to meld.
  6. During the 20 minutes that the soup simmers, prepare the lasagna noodles. Follow the cooking instructions provided on the noodle packaging.
    8 Lasagna Noodles
  7. Grab a mixing bowl and add the mozzarella, Parmesan, and ricotta cheese to it. Use a fork to thoroughly combine the cheeses until they are evenly distributed.
    5 oz Mozzarella cheese, 2 oz Parmesan cheese, 2 tbsp Ricotta Cheese
  8. Incorporate the cooked lasagna noodles and chopped parsley into the soup. Adjust the consistency with additional broth as needed.
    2 tbsp Parsley
  9. Carefully ladle the soup into bowls. Add a beautiful dollop of the cheese mixture to the center of each bowl, and then sprinkle with fresh parsley for a lovely finishing touch.
    2 tbsp Parsley

Nutrition

Calories: 577kcalCarbohydrates: 48gProtein: 33gFat: 29gSaturated Fat: 11gPolyunsaturated Fat: 2gMonounsaturated Fat: 12gTrans Fat: 1gCholesterol: 82mgSodium: 1730mgPotassium: 1274mgFiber: 5gSugar: 13gVitamin A: 1596IUVitamin C: 26mgCalcium: 374mgIron: 5mg

Notes

Ingredients:
  • Meat: Ground beef is classic, but you can use Italian sausage, ground turkey, or even a meat substitute for a vegetarian version.
  • Vegetables: The foundation is onions and garlic, but you can add carrots, celery, bell peppers, or spinach for extra flavor and nutrition.
  • Tomatoes: Use a combination of diced and crushed tomatoes for the best texture. If you want a smoother soup, you can use a can of crushed tomatoes and purée half of it before adding it to the pot.
  • Tomato Paste: Tomato paste adds a concentrated tomato flavor and richness. Make sure to cook it briefly with the onions and garlic to enhance its flavor.
  • Herbs: Dried basil, oregano, and thyme are essential for the classic Italian flavor. You can add other herbs like rosemary or marjoram, or use fresh herbs if you have them on hand.
  • Broth: Use a good-quality beef or chicken broth. Homemade broth will add the most depth of flavor.
  • Lasagna Noodles: Use oven-ready lasagna noodles, not the no-boil kind. Break them into smaller pieces before adding them to the soup.
  • Cheese: The classic combination is ricotta, mozzarella, and Parmesan. You can experiment with other Italian cheeses like provolone or fontina.
  • Seasonings: Salt and pepper are essential. You can also add a pinch of red pepper flakes for a touch of heat.
Cooking Tips:
  • Brown the Meat: Make sure to brown the ground beef well to develop flavor. Drain off any excess grease before adding the other ingredients.
  • Sauté the Vegetables: Sauté the onions and garlic until softened to bring out their sweetness. This creates a flavorful base for the soup.
  • Simmer the Soup: Simmering the soup allows the flavors to meld and the vegetables to become tender.
  • Cook the Noodles Separately: Cook the lasagna noodles according to the package directions in a separate pot. This prevents them from becoming mushy in the soup.
  • Don't Overcook the Noodles: Be careful not to overcook the noodles, as they will continue to soften in the hot soup. Aim for al dente.
  • Cheese Mixture: Combine the ricotta, mozzarella, and Parmesan cheese in a bowl and mix well. This creates a creamy and flavorful topping that will melt into the soup.
  • Thin the Soup: If the soup is too thick, add a bit more broth to reach your desired consistency.
  • Taste and Adjust: Always taste the soup before serving and adjust the seasonings to your liking. You may want to add more salt, pepper, or herbs.
Serving Suggestions:
  • Garnish: Garnish with fresh parsley, grated Parmesan cheese, or a drizzle of olive oil.
  • Sides: Serve with a side salad and crusty bread for a complete meal.
Variations:
  • Spicy: Add some red pepper flakes or a pinch of cayenne pepper for heat.
  • Veggie-Packed: Add more vegetables like zucchini, spinach, or mushrooms.
  • Meatless: Omit the ground beef and use vegetable broth for a vegetarian version. You can add lentils or beans for extra protein.
With these tips, you'll be able to make a delicious and satisfying lasagna soup that's perfect for a cozy night in!

Tried this recipe?

Let us know how it was!

Related Recipes

Ingredients

  • 2 tablespoons olive oil, divided
  • 1 pound ground beef or Italian sausage
  • 1 large yellow onion, diced (1 3/4 cups)
  • 5 cloves garlic, minced
  • 4 ½ cups low-sodium chicken broth (add more to thin as desired)
  • 1 (14.5 oz) can petite diced tomatoes
  • 1 (14.5 oz) can crushed tomatoes
  • 2 ½ tablespoons tomato paste
  • 1 ¾ teaspoons dried basil
  • ¾ teaspoon dried oregano
  • ½ teaspoon dried rosemary, crushed
  • ½ teaspoon dried thyme
  • Salt, to taste
  • Freshly ground black pepper, to taste
  • 8 lasagna noodles, broken into bite-sized pieces (6.5 oz)
  • 5 ounces shredded mozzarella cheese (1 ¼ cups)
  • 2 ounces finely shredded Parmesan cheese (½ cup)
  • 2 tablespoons ricotta cheese
  • 2 tablespoons chopped fresh parsley, plus more for garnish

Image Gallery Lasagna Soup

Storage & Leftovers

Refrigerator:
Allow the soup to cool completely, then store it in an airtight container in the fridge for up to 4 days. For best texture, you can store the pasta separately and add it to the soup when reheating.

Freezer:
Lasagna soup freezes well — but it’s best to freeze without the pasta to avoid it becoming mushy. Freeze the broth and meat mixture in airtight containers or freezer bags for up to 3 months. Add freshly cooked pasta when reheating.

Reheating:

  • Stovetop (best): Warm the soup over medium heat, stirring occasionally. Add a splash of broth or water if it’s too thick.

  • Microwave: Reheat individual portions in a microwave-safe bowl in 60-second intervals, stirring between rounds.

Tip: Add fresh cheese (ricotta, mozzarella, Parmesan) right before serving for the best flavor and texture.

Please follow and like us:
onpost_follow
fb-share-icon197
Tweet120
Pinterest20
Share 20
submit to reddit

Subscribe for New Recipes

* indicates required

Intuit Mailchimp

Sauteed Mushrooms With Garlic

Sauteed Mushrooms With Garlic

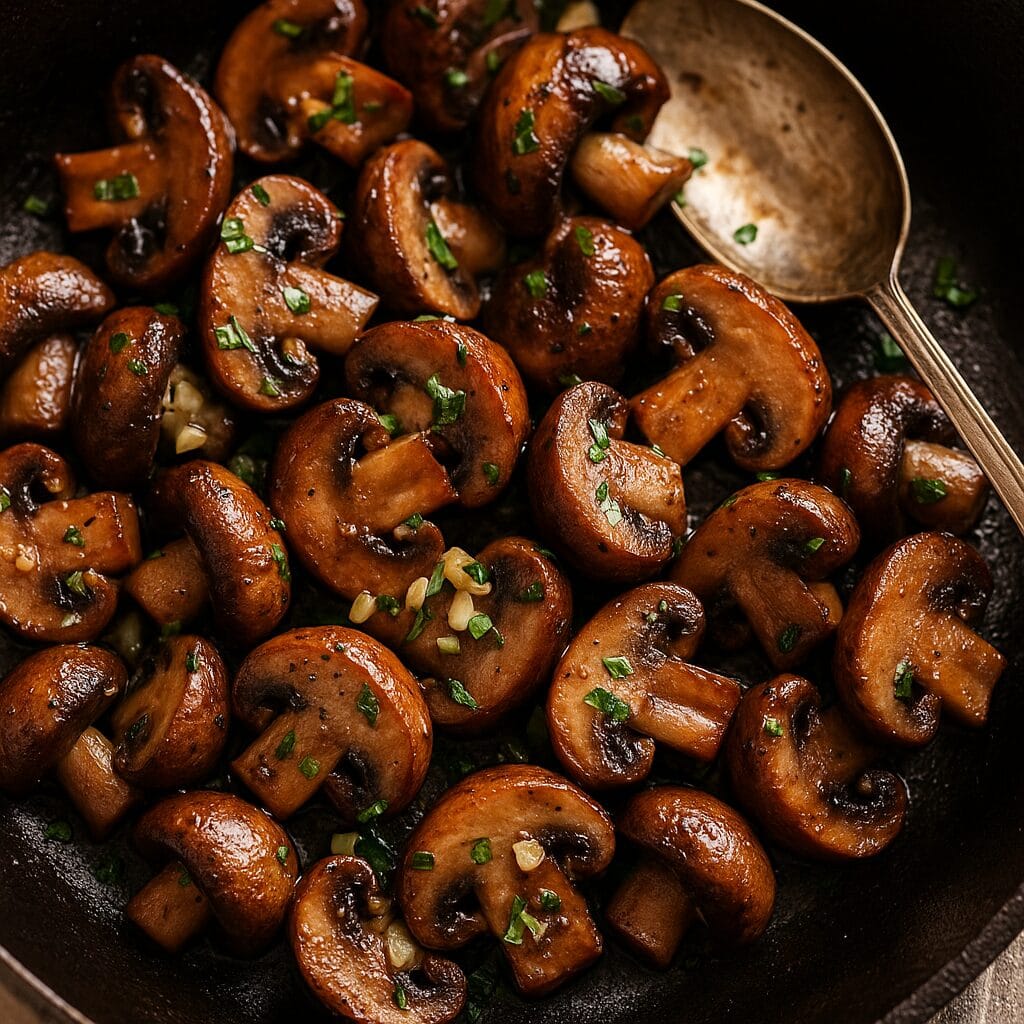
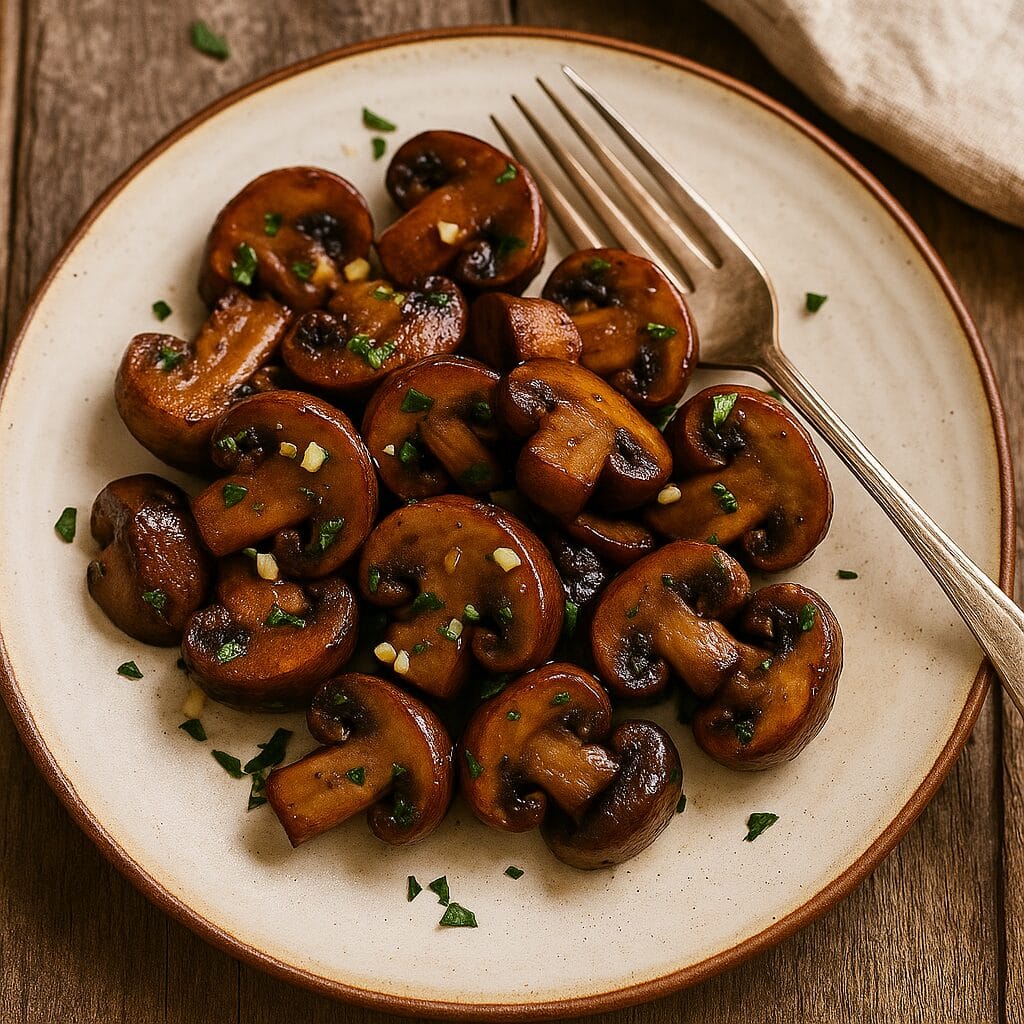
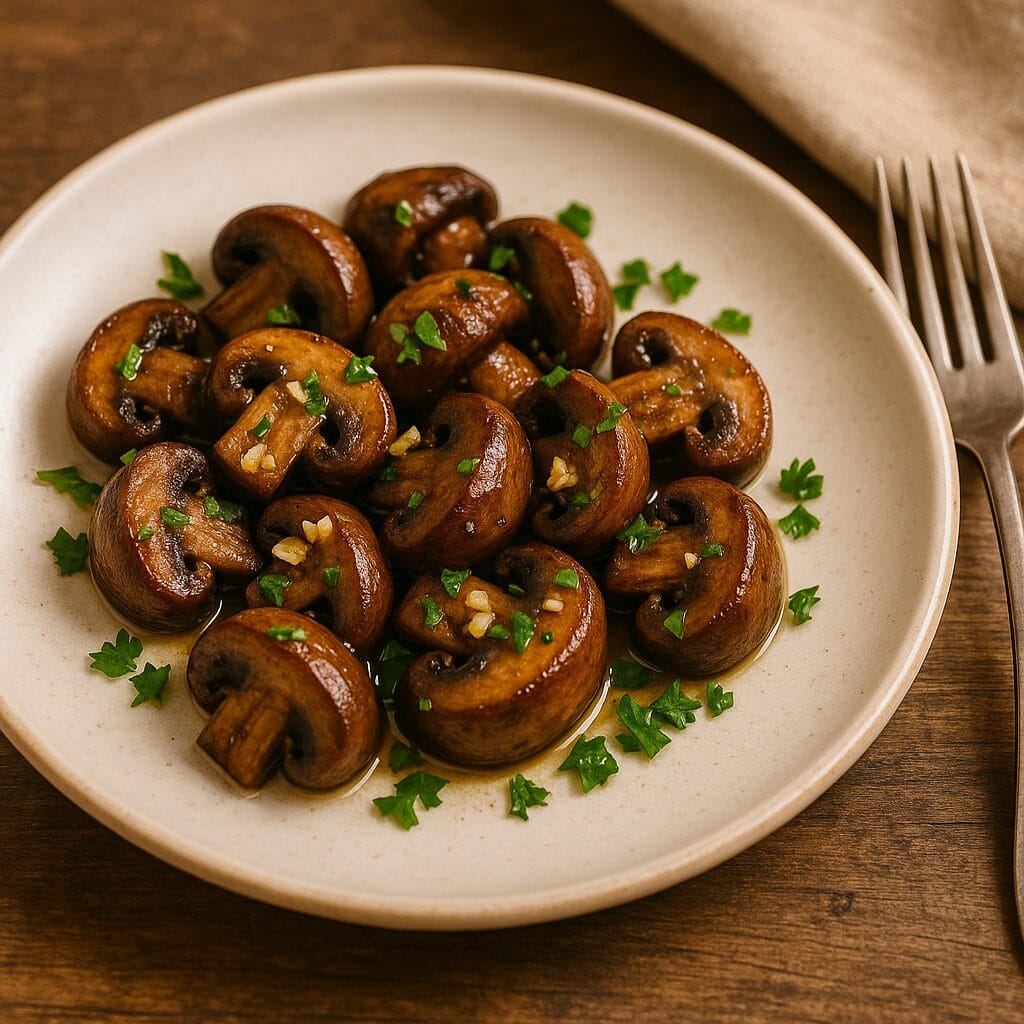
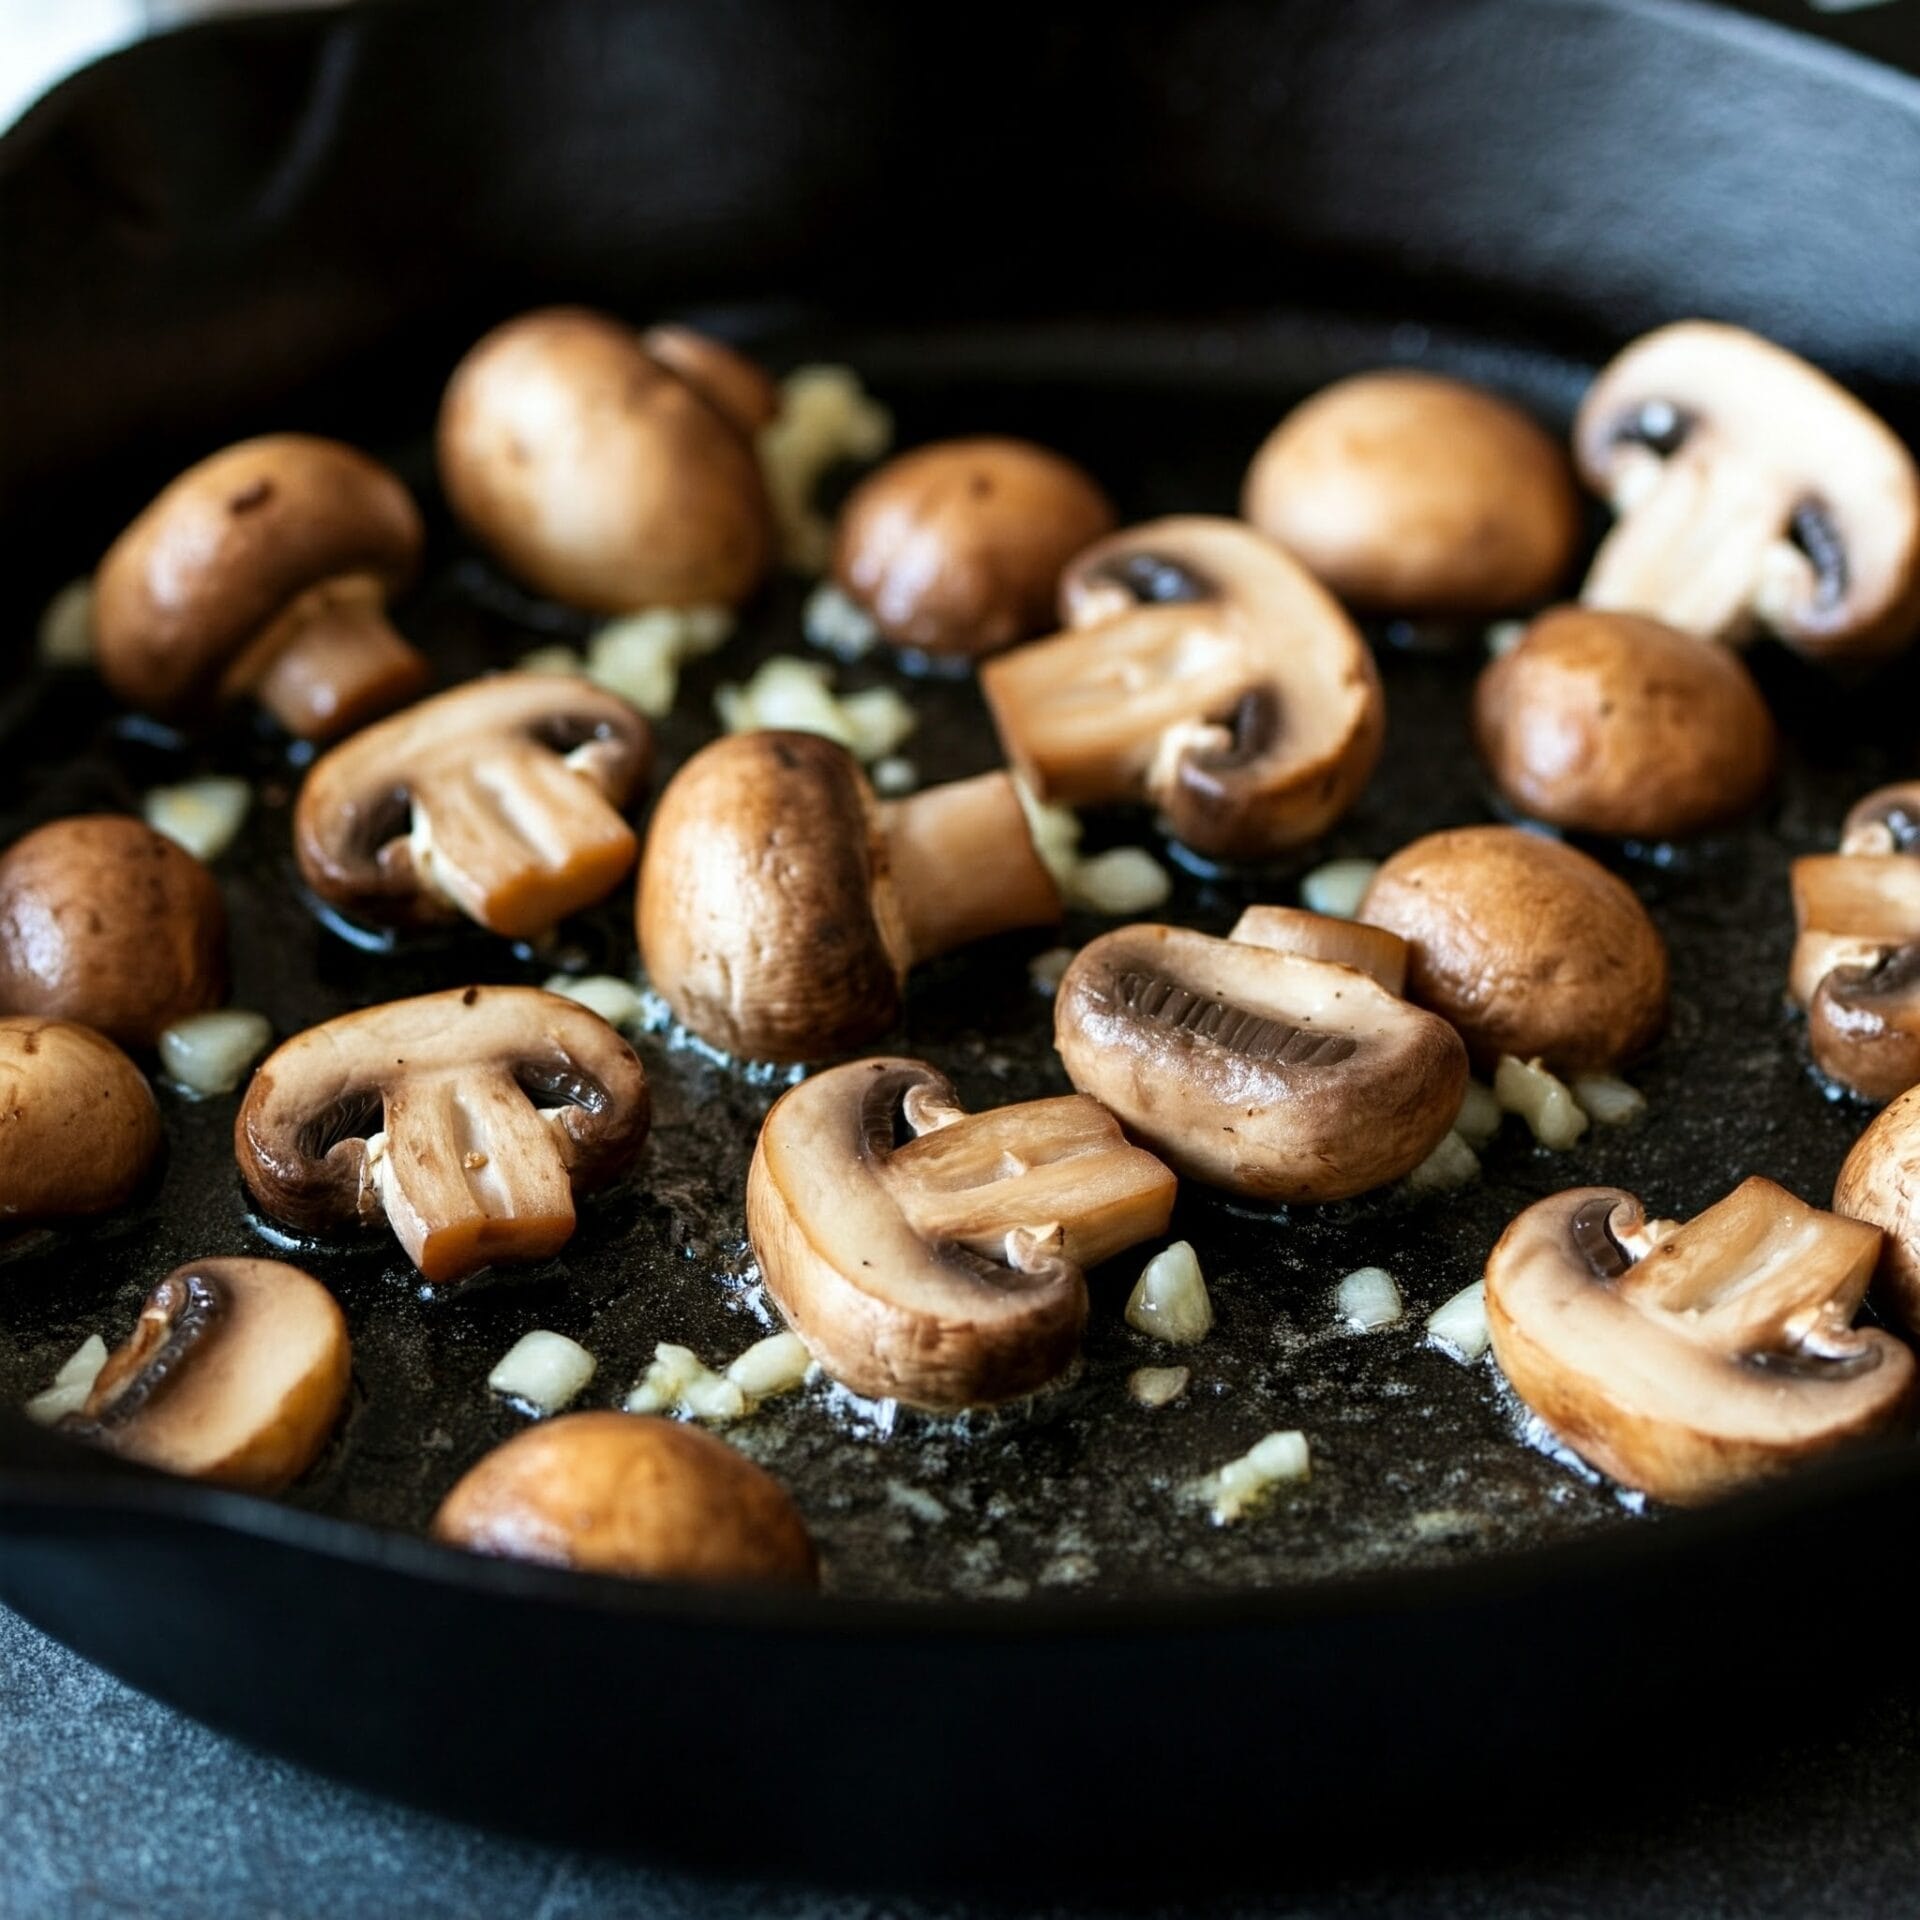
These Sautéed Mushrooms with Garlic are a simple, elegant side dish bursting with earthy flavor and rich, golden garlic. Cremini mushrooms are sliced and seared until deeply browned and tender, then tossed with freshly minced garlic and a touch of butter or olive oil for a perfectly savory finish. A sprinkle of fresh parsley adds brightness and color, making them as beautiful as they are delicious.

Whether served alongside steak, chicken, pasta, or tucked into a sandwich or omelet, these mushrooms are quick to prepare but full of restaurant-quality flavor. They’re the kind of side dish you’ll make once and crave again and again.

Fast, flavorful, and endlessly versatile — the perfect way to elevate any meal.

Sauteed Mushrooms with Garlic

No ratings yet
Sauteed mushrooms with garlic are a simple yet flavorful side dish where earthy mushrooms are cooked with aromatic garlic in butter or oil until tender and golden brown. They're incredibly versatile and can be enjoyed with a variety of meals.
Prep Time 5 minutes
Cook Time 8 minutes
Total Time 13 minutes
Servings: 6
Course: Sides
Cuisine: East Asian, French, Italian, Mediterranean, Spanish
Calories: 103

Ingredients
  

  • 1 lb Button Mushrooms white, brown, cremini or portobello will work well
  • 1 tbsp Soy sauce
  • 2 tbsp Olive oil
  • 2 tbsp Butter
  • ¼ cup White Wine white; optional
  • 1 Thyme sprig fresh (or a pinch of dried thyme)
  • 2 Garlic minced
  • 1 tbsp Chives for garnish (optional)

Method
 

  1. Gently clean the mushrooms by wiping them with a damp paper towel or using a mushroom brush. Slice into ½-inch thick slices.
    1 lb Button Mushrooms
  2. Place a pan over medium-high heat. Once hot, add the butter and oil, swirling to coat the bottom evenly.
    2 tbsp Olive oil, 2 tbsp Butter
  3. Just before cooking, toss the sliced mushrooms with soy sauce in a bowl.
    1 tbsp Soy sauce
  4. Add the mushrooms to the pan. Do not stir; allow to cook about 4-5 minutes without disturbing to brown on one side.
  5. Pour in the white wine, if using, and let it evaporate. Then, add the garlic and thyme (if using), and cook for 3-4 minutes more, stirring occasionally, until the mushrooms are tender. Season with salt and pepper to taste.
    1/4 cup White Wine, 1 Thyme sprig, 2 Garlic, 1 tbsp Chives

Nutrition

Serving: 6ozCalories: 103kcalCarbohydrates: 3gProtein: 3gFat: 9gSaturated Fat: 3gPolyunsaturated Fat: 1gMonounsaturated Fat: 4gTrans Fat: 0.2gCholesterol: 10mgSodium: 173mgPotassium: 264mgFiber: 1gSugar: 2gVitamin A: 146IUVitamin C: 2mgCalcium: 8mgIron: 1mg

Notes

Tips for the Best Sautéed Mushrooms with Garlic:
  • Mushroom Choice: While any variety works, cremini, shiitake, or oyster mushrooms add more depth of flavor than basic white button mushrooms. Using a mix is also great!
  • Don't Overcrowd: Cook the mushrooms in batches if needed to ensure proper browning. Overcrowding the pan will cause them to steam instead of sear.
  • Salt at the End: Some people prefer to salt the mushrooms at the end of cooking to prevent them from releasing too much moisture. Experiment to see what you prefer!
  • Adjust Cooking Time: Cooking time will depend on the type and size of mushrooms. Cook until they're tender and golden brown to your liking.
  • Fresh Herbs: If using fresh herbs, add them towards the end of cooking to preserve their flavor.
  • Serving Suggestions: These mushrooms are delicious on their own, but they also make a great topping for steak, chicken, pasta, polenta, or toast.
Variations to Try:
  • Add a splash of acidity: A squeeze of lemon juice or a splash of balsamic vinegar at the end brightens the flavors.
  • Incorporate other vegetables: Add shallots, onions, or bell peppers for extra flavor and texture.
  • Spice it up: A pinch of red pepper flakes adds a kick.
  • Make it creamy: Stir in a dollop of cream or crème fraîche for a richer sauce.
  • Add some greens: Toss in some spinach or arugula at the end for a boost of nutrients.
Enjoy experimenting and making this simple dish your own!

Tried this recipe?

Let us know how it was!

Related Recipes

Ingredients

  • 1 lb mushrooms (white or brown, cremini or portobello)
  • 1 tbsp soy sauce
  • 2 tbsp olive oil
  • 2 tbsp butter
  • ¼ cup white wine (optional)
  • 1 sprig fresh thyme (or a pinch of dried thyme)
  • 2 cloves garlic, minced
  • 1 tbsp chives, for garnish (optional)

Image Gallery Sauteed Mushrooms With Garlic

Storage & Leftovers

Refrigerator:
Let the mushrooms cool to room temperature, then transfer them to an airtight container. Store in the fridge for up to 4 days.

Freezer:
While technically freezable, sautéed mushrooms can lose their texture and become rubbery after thawing. If you do freeze them, use within 1 month and reheat gently from frozen in a skillet.

Reheating:

  • Skillet (best method): Warm mushrooms in a nonstick skillet over medium heat with a small splash of oil or butter to revive the texture and flavor.

  • Microwave: Heat in short bursts (20–30 seconds) and stir between rounds. May become softer but still tasty.

Best Use for Leftovers:
Toss into pasta, spoon over toast, fold into omelets or quesadillas, or serve over steak, chicken, or rice bowls.

Please follow and like us:
onpost_follow
fb-share-icon197
Tweet120
Pinterest20
Share 20
submit to reddit

Subscribe for New Recipes

* indicates required

Intuit Mailchimp