Spring Panzanella with Peas and Kombucha Dressing

Lunch · Side Dish

Spring Panzanella with Peas and Kombucha Dressing

This bread salad brings toasted sourdough together with peas, shaved fennel and peppery greens. Kombucha and vinegar-softened shallot give the mustard dressing its tangy edge.

Servings
4
Cuisine
Italian-inspired

Bring it to the table

Give the bread room to drink in the dressing

Toast the torn sourdough until golden, then combine it with the vegetables just before dressing. The croutons catch the vinaigrette while still bringing texture to the salad.

At the table

Toss the salad with the dressing, taste for salt and pepper, and scatter the reserved fennel fronds over the top. Serve soon after mixing.

Before you start

Gather your ingredients.

Full quantities and serving adjustments are in the recipe card below.

See the ingredient checklist
  • 2 tbsp olive oil — for toasting, plus more if the pan is dry
  • 8 oz sourdough bread — torn into bite-size pieces
  • kosher salt — to taste and for the pea cooking water
  • black pepper — freshly ground, to taste
  • 1 1/2 cups shelled green peas — fresh, or frozen and thawed
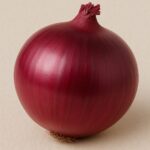
  • 1 medium shallot — finely chopped
  • 2 sprigs thyme — leaves picked
  • 2 tbsp sherry vinegar or red wine vinegar
  • 1 tsp crushed red pepper flakes
  • 1/4 cup kombucha
  • 1 tbsp whole-grain mustard
  • 4 tbsp olive oil — for the dressing
  • 1 fennel bulb — thinly sliced; reserve fronds
  • 1 1/2 oz Pecorino Romano — finely grated
  • 3 cups watercress — trimmed, or other tender salad greens
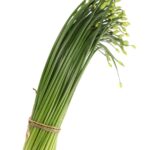
  • 2 tbsp green garlic or garlic chives — thinly sliced

A few useful notes.

Keep the bread and dressing separate until you are ready to assemble the salad.

Pecorino Romano is commonly made with animal rennet; choose a suitable alternative if serving someone who avoids it.

The cooking plan

How to make Spring Panzanella with Peas and Kombucha Dressing.

  1. Heat the bread oil in a large skillet over medium-high heat. Add the torn sourdough and toss for about 4 minutes, until golden on all sides, adding a little more oil only if the pan is dry. Season with salt and pepper and set aside.

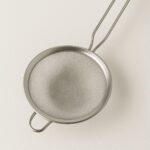
  2. Boil the peas in salted water for about 3 minutes, until bright green and tender. Drain through a fine sieve and rinse under cold water to stop the cooking. Keep the saucepan for the dressing.

  3. Put the shallot, thyme leaves, vinegar and red pepper flakes into the saucepan. Cook over medium heat for about 4 minutes, stirring occasionally, until the shallot softens and takes up the vinegar. Scrape into a bowl.

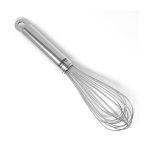
  4. Whisk the kombucha, mustard and dressing oil into the shallot mixture. Taste and add salt as needed.

  5. Combine the fennel, Pecorino, watercress, green garlic, toasted bread and peas in a large bowl. Add the dressing and toss gently. Taste for salt and pepper, finish with fennel fronds and serve.

Let’s cook

The full recipe.

Check off ingredients as you get them ready.

Changing servings? The ingredient list scales automatically. Adjust quantities named in the steps to match, and choose pans and cooking times for your batch.

Spring Panzanella with Peas and Kombucha Dressing

No ratings yet
Toasted sourdough with peas, fennel, watercress and Pecorino in a kombucha-mustard dressing.
Servings: 4 servings
Course: Lunch, Side Dish
Cuisine: Italian-Inspired

Some ingredient links are affiliate links. We may earn a commission at no extra cost to you. As an Amazon Associate I earn from qualifying purchases.

Ingredients
  

Bread
  • 2 tbsp olive oil for toasting, plus more if the pan is dry
  •  
    8 oz sourdough bread torn into bite-size pieces
  • kosher salt to taste and for the pea cooking water
  • black pepper freshly ground, to taste
Salad
  •  
    1 ½ cups shelled green peas fresh, or frozen and thawed
Dressing
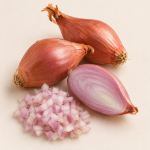
  • Whole, halved and chopped pink shallots1 medium shallot finely chopped
  • 2 sprigs thyme leaves picked
  •  
    2 tbsp sherry vinegar or red wine vinegar
  • 1 tsp crushed red pepper flakes
  •  
    ¼ cup kombucha
  •  
    1 tbsp whole-grain mustard
  • 4 tbsp olive oil for the dressing
Salad
  •  
    1 fennel bulb thinly sliced; reserve fronds
  •  
    1 ½ oz Pecorino Romano finely grated
  •  
    3 cups watercress trimmed, or other tender salad greens
  •  
    2 tbsp green garlic or garlic chives thinly sliced

Equipment images are illustrative. Exact products may vary.

Instructions
 

  1. Heat the bread oil in a large skillet over medium-high heat. Add the torn sourdough and toss for about 4 minutes, until golden on all sides, adding a little more oil only if the pan is dry. Season with salt and pepper and set aside.
  2. Boil the peas in salted water for about 3 minutes, until bright green and tender. Drain through a fine sieve and rinse under cold water to stop the cooking. Keep the saucepan for the dressing.
  3. Put the shallot, thyme leaves, vinegar and red pepper flakes into the saucepan. Cook over medium heat for about 4 minutes, stirring occasionally, until the shallot softens and takes up the vinegar. Scrape into a bowl.
  4. Whisk the kombucha, mustard and dressing oil into the shallot mixture. Taste and add salt as needed.
  5. Combine the fennel, Pecorino, watercress, green garlic, toasted bread and peas in a large bowl. Add the dressing and toss gently. Taste for salt and pepper, finish with fennel fronds and serve.

Notes

Keep the bread and dressing separate until you are ready to assemble the salad.
Pecorino Romano is commonly made with animal rennet; choose a suitable alternative if serving someone who avoids it.

Tried this recipe?

Let us know how it was!

A couple of useful answers.

What is the kombucha doing in the dressing?

It adds a tangy, lightly sweet liquid to the mustard, oil and vinegar-softened shallot. Taste the dressing before adding salt.

Can I prepare the parts separately?

Yes. Toast the bread, cook and cool the peas, and mix the dressing separately. Combine them with the greens and fennel close to serving.

Keep the good food going

Similar Recipes

Find another recipe to bring to the table.

Roast Rack of Lamb with Strawberry-Balsamic Sauce

Dinner

Roast Rack of Lamb with Strawberry-Balsamic Sauce

Strawberries roast beside the lamb, then break down into a savory pan sauce with broth, rosemary and balsamic vinegar. Keep a few berry halves aside for the plate and whisk in butter to finish.

Servings
4
Cuisine
Contemporary

Bring it to the table

Build the sauce in the roasting skillet

The browned bits in the pan are the start of the sauce. Add broth and scrape them loose, then mash the roasted berries as the liquid reduces. Remove the pan from the heat before whisking in the butter.

At the table

Carve the rested rack between the bones. Spoon sauce over the chops and finish with mint and the reserved strawberries.

Before you start

Gather your ingredients.

Full quantities and serving adjustments are in the recipe card below.

See the ingredient checklist
  • 1 rack lamb — about 1 1/2 lb for the base batch
  • kosher salt — to taste
  • 1 tbsp vegetable oil
  • 8 oz strawberries — hulled and halved
  • 1 cup low-sodium chicken broth
  • 1 tbsp rosemary — finely chopped
  • 2 tsp balsamic vinegar
  • 1 1/2 tsp black pepper — freshly cracked, plus more to season lamb
  • 2 tbsp salted butter — cut into pieces
  • mint leaves — to serve

A few useful notes.

Use a thermometer rather than color alone. The lamb should reach at least 145°F and rest for at least 3 minutes before carving.

The roasting time depends on the size and shape of the rack. The temperature is the finishing guide.

The skillet handle stays hot after roasting; use oven mitts while making the sauce.

The cooking plan

How to make Roast Rack of Lamb with Strawberry-Balsamic Sauce.

  1. Heat the oven to 375°F with a rack in the middle. Season the lamb all over with salt and some of the extra black pepper.

  2. Warm the oil in a large ovenproof skillet over medium-high heat. Brown the lamb on all sides, turning as needed, for about 6–8 minutes. Add the halved strawberries around it and transfer the skillet to the oven.

  3. Roast until a thermometer inserted into the thickest part of the meat, away from bone, reaches at least 145°F. Begin checking after 15 minutes; continue as needed rather than relying on the clock. Move the lamb to a board and rest at least 3 minutes before carving, or while you finish the sauce.

  4. Set aside a few roasted strawberry halves for serving. Carefully pour excess fat from the skillet into a heatproof container. Return the skillet to medium-high heat and add the broth, rosemary, balsamic vinegar and measured cracked pepper.

  5. Bring to a boil, scraping up the browned bits and pressing the remaining strawberries into the liquid. Cook for about 5 minutes, stirring often, until reduced by roughly half and mostly smooth.

  6. Take the pan off the heat. Whisk in the butter a few pieces at a time until the sauce comes together. Taste and adjust the salt. Carve the rested lamb into chops, add the sauce and finish with mint and the reserved berries.

Let’s cook

The full recipe.

Check off ingredients as you get them ready.

Changing servings? The ingredient list scales automatically. Adjust quantities named in the steps to match, and choose pans and cooking times for your batch.

Roast Rack of Lamb with Strawberry-Balsamic Sauce

No ratings yet
Roasted rack of lamb with strawberries, rosemary and a butter-finished balsamic pan sauce.
Servings: 4 servings
Course: Dinner
Cuisine: Contemporary

Some ingredient links are affiliate links. We may earn a commission at no extra cost to you. As an Amazon Associate I earn from qualifying purchases.

Ingredients
  

Lamb
  •  
    1 rack lamb about 1 1/2 lb for the base batch
  • kosher salt to taste
  • 1 tbsp vegetable oil
Sauce
  •  
    8 oz strawberries hulled and halved
  • 1 cup low-sodium chicken broth
  •  
    1 tbsp rosemary finely chopped
  •  
    2 tsp balsamic vinegar
  • 1 ½ tsp black pepper freshly cracked, plus more to season lamb
  •  
    2 tbsp salted butter cut into pieces
To finish
  •  
    mint leaves to serve

Equipment images are illustrative. Exact products may vary.

Instructions
 

  1. Heat the oven to 375°F with a rack in the middle. Season the lamb all over with salt and some of the extra black pepper.
  2. Warm the oil in a large ovenproof skillet over medium-high heat. Brown the lamb on all sides, turning as needed, for about 6–8 minutes. Add the halved strawberries around it and transfer the skillet to the oven.
  3. Roast until a thermometer inserted into the thickest part of the meat, away from bone, reaches at least 145°F. Begin checking after 15 minutes; continue as needed rather than relying on the clock. Move the lamb to a board and rest at least 3 minutes before carving, or while you finish the sauce.
  4. Set aside a few roasted strawberry halves for serving. Carefully pour excess fat from the skillet into a heatproof container. Return the skillet to medium-high heat and add the broth, rosemary, balsamic vinegar and measured cracked pepper.
  5. Bring to a boil, scraping up the browned bits and pressing the remaining strawberries into the liquid. Cook for about 5 minutes, stirring often, until reduced by roughly half and mostly smooth.
  6. Take the pan off the heat. Whisk in the butter a few pieces at a time until the sauce comes together. Taste and adjust the salt. Carve the rested lamb into chops, add the sauce and finish with mint and the reserved berries.

Notes

Use a thermometer rather than color alone. The lamb should reach at least 145°F and rest for at least 3 minutes before carving.
The roasting time depends on the size and shape of the rack. The temperature is the finishing guide.
The skillet handle stays hot after roasting; use oven mitts while making the sauce.

Tried this recipe?

Let us know how it was!

A couple of useful answers.

Why add the butter off the heat?

Whisking the butter into the reduced sauce off the heat helps it blend into the liquid. Taste after adding it, since the butter is salted.

How long should the lamb rest?

After reaching at least 145°F, rest it for at least 3 minutes before slicing. Making the sauce is a useful pause while it rests.

Keep the good food going

Similar Recipes

Find another recipe to bring to the table.

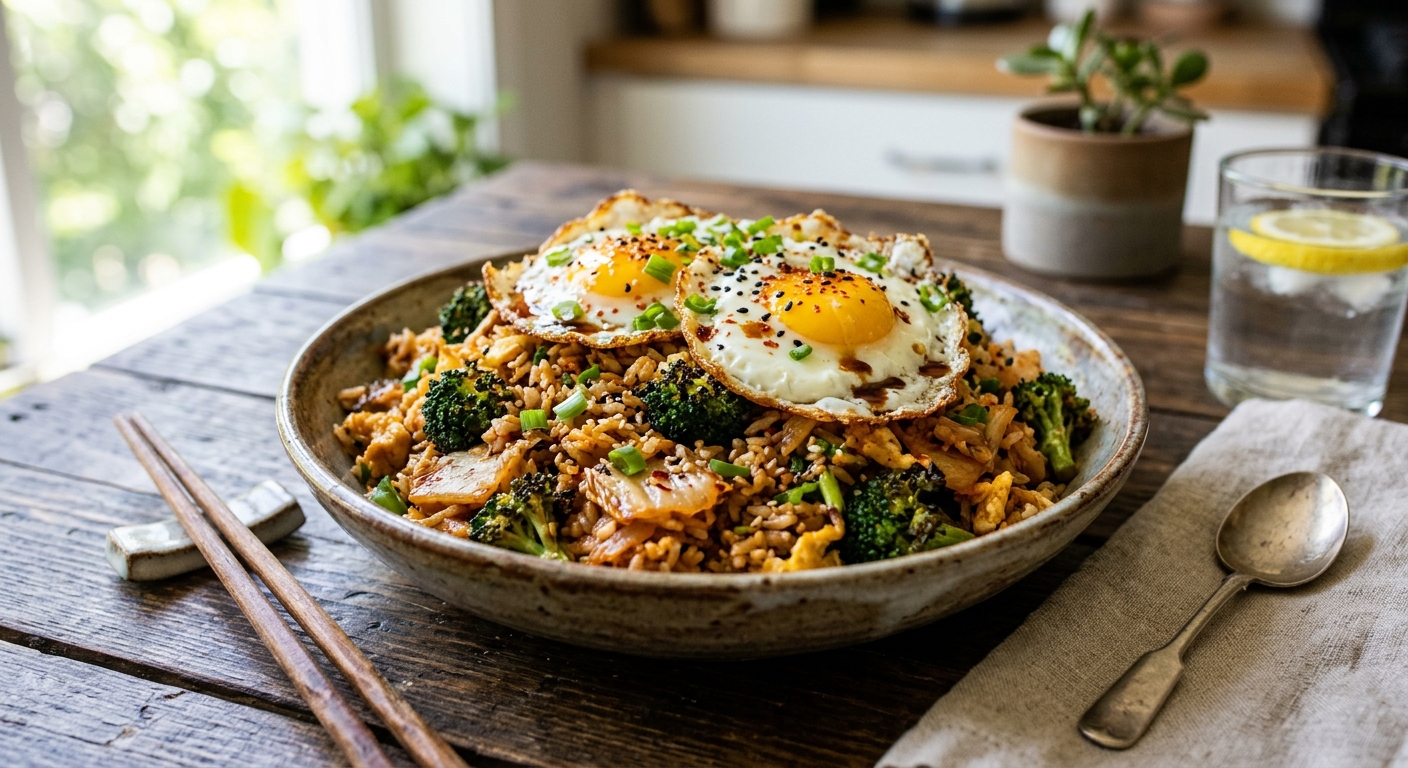
Broccoli and Kimchi Fried Rice with Eggs

Dinner · Lunch

Broccoli and Kimchi Fried Rice with Eggs

Give broccoli and scallion tops a little char, then cook the kimchi with garlic and ginger before the rice joins the pan. An undisturbed spell over the heat builds a crisp layer under the rice.

Servings
4
Cuisine
Korean-inspired

Bring it to the table

Keep the scallion parts separate

The dark green tops cook with the broccoli. The pale slices join the kimchi and aromatics, adding flavor without overcooking the greens.

At the table

Divide the hot rice among bowls and add a cooked egg to each. Finish with sesame seeds, extra kimchi and a little soy sauce as desired.

Before you start

Gather your ingredients.

Full quantities and serving adjustments are in the recipe card below.

See the ingredient checklist
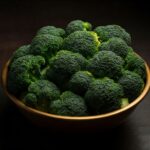
  • 1 large head broccoli — about 1 lb for the base batch
  • 6 scallions
  • 1 cup Napa cabbage kimchi — packed, plus extra to serve
  • 3 tbsp vegetable oil — divided among the cooking stages
  • kosher salt — to taste
  • 4 cloves garlic — finely chopped
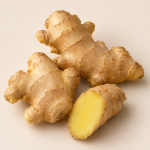
  • 1 2-inch piece fresh ginger — scrubbed and finely chopped
  • 4 cups cooked jasmine rice — chilled promptly after cooking and kept refrigerated
  • 1 tbsp toasted sesame oil
  • 1/4 cup soy sauce or tamari — plus more to serve, if desired
  • 4 large eggs — fried until whites and yolks are firm
  • sesame seeds — to serve
  • black pepper — freshly ground, to taste

A few useful notes.

Start with rice that was refrigerated promptly in a shallow container after cooking. Do not use rice left sitting at room temperature.

Kimchi can contain fish sauce or seafood. Choose vegetarian kimchi if you want a vegetarian meal.

Cook the eggs until the whites and yolks are firm, or use pasteurized eggs if preparing a softer finish.

The cooking plan

How to make Broccoli and Kimchi Fried Rice with Eggs.

  1. Remove any broccoli leaves and slice them thinly. Cut the stem into 1/2-inch coins, trimming away a tough outer layer if needed, and divide the crown into small florets. Cut the scallion tops into 1-inch lengths and thinly slice the white and pale green parts, keeping the two piles separate.

  2. Squeeze the kimchi over a bowl to remove excess liquid, then chop it coarsely. Reserve the liquid for another use rather than adding it to the rice.

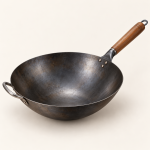
  3. Heat one third of the vegetable oil in a large wok or nonstick skillet over medium-high heat. Add the broccoli and dark scallion tops. Season lightly with salt and leave undisturbed for about 5 minutes to take on color. Stir for another minute, then move to a plate.

  4. Add another third of the vegetable oil to the pan. Stir-fry the kimchi, pale scallion slices, garlic and ginger for about 2 minutes, until fragrant and softened. Push them toward the edges.

  5. Add the remaining vegetable oil in the center, followed by the chilled rice, sesame oil and measured soy sauce. Toss to combine, spread the rice into an even layer and leave for about 5 minutes so the underside begins to crisp.

  6. Return the broccoli and scallion tops and toss until everything is hot throughout; reheated rice should reach 165°F. Taste and adjust the seasoning. Divide among plates and top with the cooked eggs, sesame seeds, extra kimchi and black pepper.

Let’s cook

The full recipe.

Check off ingredients as you get them ready.

Changing servings? The ingredient list scales automatically. Adjust quantities named in the steps to match, and choose pans and cooking times for your batch.

Broccoli and Kimchi Fried Rice with Eggs

No ratings yet
Chilled rice stir-fried with broccoli, scallions, kimchi and sesame oil, finished with fried eggs.
Servings: 4 servings
Course: Dinner, Lunch
Cuisine: Korean-inspired

Some ingredient links are affiliate links. We may earn a commission at no extra cost to you. As an Amazon Associate I earn from qualifying purchases.

Ingredients
  

Fried rice
  • 1 large head broccoli about 1 lb for the base batch
  • 6 scallions
  •  
    1 cup Napa cabbage kimchi packed, plus extra to serve
  • 3 tbsp vegetable oil divided among the cooking stages
  • kosher salt to taste
  • 4 cloves garlic finely chopped
  • Fresh ginger roots with a cut piece showing the yellow interior1 2-inch piece fresh ginger scrubbed and finely chopped
  •  
    4 cups cooked jasmine rice chilled promptly after cooking and kept refrigerated
  •  
    1 tbsp toasted sesame oil
  •  
    ¼ cup soy sauce or tamari plus more to serve, if desired
To finish
  • 4 large eggs fried until whites and yolks are firm
  •  
    sesame seeds to serve
  • black pepper freshly ground, to taste

Equipment images are illustrative. Exact products may vary.

Instructions
 

  1. Remove any broccoli leaves and slice them thinly. Cut the stem into 1/2-inch coins, trimming away a tough outer layer if needed, and divide the crown into small florets. Cut the scallion tops into 1-inch lengths and thinly slice the white and pale green parts, keeping the two piles separate.
  2. Squeeze the kimchi over a bowl to remove excess liquid, then chop it coarsely. Reserve the liquid for another use rather than adding it to the rice.
  3. Heat one third of the vegetable oil in a large wok or nonstick skillet over medium-high heat. Add the broccoli and dark scallion tops. Season lightly with salt and leave undisturbed for about 5 minutes to take on color. Stir for another minute, then move to a plate.
  4. Add another third of the vegetable oil to the pan. Stir-fry the kimchi, pale scallion slices, garlic and ginger for about 2 minutes, until fragrant and softened. Push them toward the edges.
  5. Add the remaining vegetable oil in the center, followed by the chilled rice, sesame oil and measured soy sauce. Toss to combine, spread the rice into an even layer and leave for about 5 minutes so the underside begins to crisp.
  6. Return the broccoli and scallion tops and toss until everything is hot throughout; reheated rice should reach 165°F. Taste and adjust the seasoning. Divide among plates and top with the cooked eggs, sesame seeds, extra kimchi and black pepper.

Notes

Start with rice that was refrigerated promptly in a shallow container after cooking. Do not use rice left sitting at room temperature.
Kimchi can contain fish sauce or seafood. Choose vegetarian kimchi if you want a vegetarian meal.
Cook the eggs until the whites and yolks are firm, or use pasteurized eggs if preparing a softer finish.

Tried this recipe?

Let us know how it was!

A couple of useful answers.

Why use chilled rice?

Chilled cooked rice separates more readily in the pan. Keep it refrigerated until needed and reheat the rice thoroughly.

When does the broccoli go back in?

Return it after the rice has had its undisturbed crisping time. Toss together until both the rice and vegetables are hot throughout.

Keep the good food going

Similar Recipes

Find another recipe to bring to the table.
Asparagus and Arugula Frittata with Gruyère

Breakfast · Brunch · Lunch

Asparagus and Arugula Frittata with Gruyère

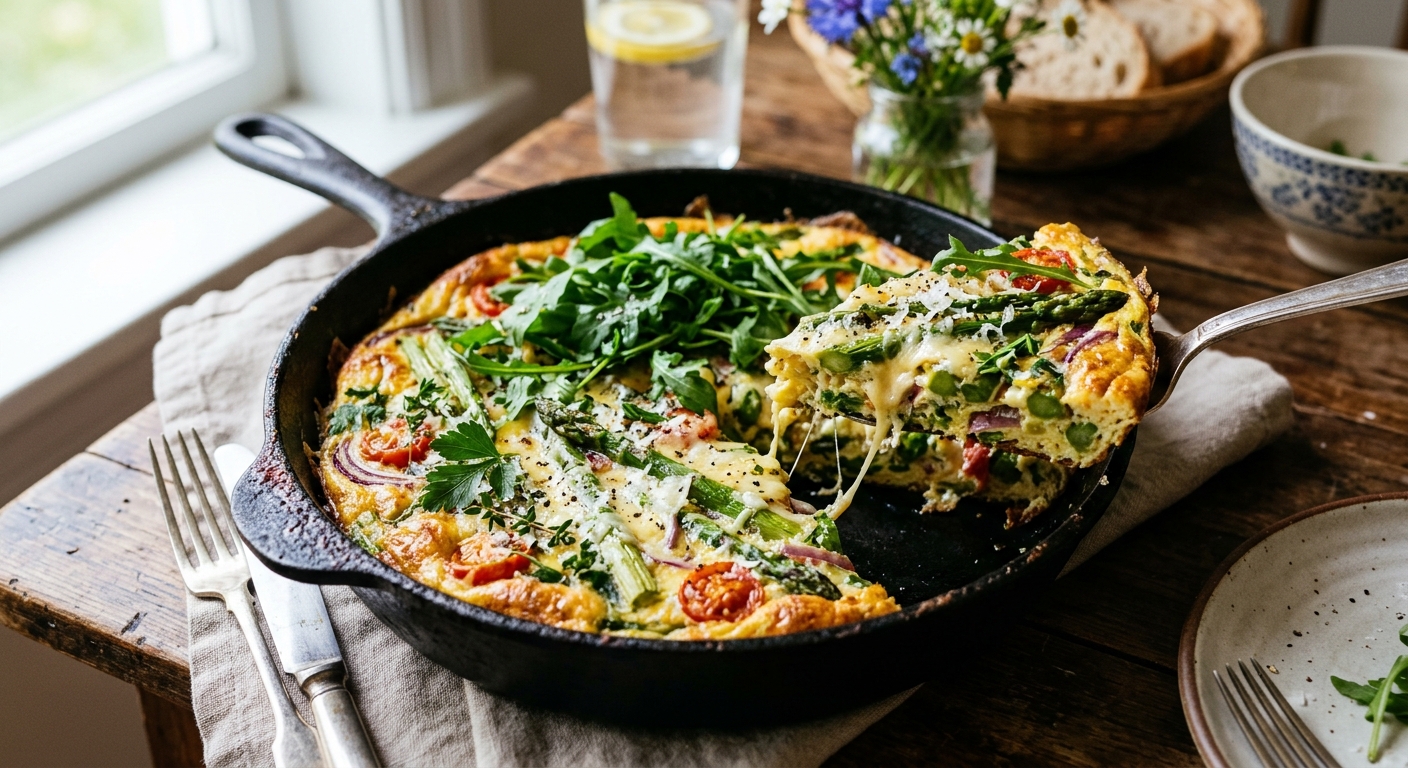
Blister the asparagus in the skillet before the eggs go in, then finish this frittata in the oven. Gruyère melts into the eggs while arugula, oregano and chives keep every slice full of flavor.

Servings
6
Cuisine
Italian-inspired

Bring it to the table

Two stages for the asparagus

Cook the spears first for a little color. Thinly sliced tender stem ends go in with the onion so they have time to soften before the eggs are added. Discard ends that remain tough or fibrous.

At the table

Let the frittata settle in its pan before cutting into wedges. Serve with salad for lunch or as part of a brunch spread.

Before you start

Gather your ingredients.

Full quantities and serving adjustments are in the recipe card below.

See the ingredient checklist
  • 10 large eggs
  • 1/2 cup heavy cream
  • 2 oz Gruyère — coarsely grated; choose vegetarian-rennet cheese if needed
  • 2 cups arugula — packed, or other tender salad greens
  • 1 bunch asparagus — about 1 lb for the base batch
  • 3 tbsp olive oil — divided among the cooking stages
  • kosher salt — to taste
  • 1 medium red onion — thinly sliced
  • 2 cloves garlic — finely chopped
  • 1 tbsp oregano — coarsely chopped
  • black pepper — freshly ground, to taste
  • 1 tbsp chives — coarsely chopped

A few useful notes.

The base batch makes about 6–8 portions, depending on the rest of the meal. The serving control starts at 6.

Use a skillet that is safe at 350°F, including its handle. Keep an oven mitt over the hot handle after removing it.

For a vegetarian meal, choose a Gruyère-style cheese made with vegetarian rennet.

The cooking plan

How to make Asparagus and Arugula Frittata with Gruyère.

  1. Heat the oven to 350°F with a rack in the middle. Whisk the eggs and cream until fully combined, then fold in the grated Gruyère and arugula.

  2. Separate the asparagus spears from their firm lower ends. Thinly slice any usable stem ends, discarding dry or fibrous pieces. Keep these slices separate from the spears.

  3. Heat one third of the oil in a large ovenproof skillet over medium-high heat. Add the asparagus spears and cook for 5–8 minutes, turning occasionally, until blistered in spots and tender-crisp. Season with salt and lift onto a plate.

  4. Add another third of the oil to the skillet. Cook the red onion, garlic, oregano and sliced asparagus ends for about 5 minutes, stirring now and then, until the onion softens and the stem slices are tender. Season with salt and pepper.

  5. Swirl in the remaining oil and wait about 30 seconds. Pour in the egg mixture and arrange the asparagus spears across the top. Cook without stirring for about 3 minutes, until the eggs set around the edges.

  6. Transfer to the oven and bake until the center is set and reaches 160°F, starting to check after 15 minutes. Remove carefully and let stand for 15 minutes. Scatter over the chives and a little more pepper before cutting.

Let’s cook

The full recipe.

Check off ingredients as you get them ready.

Changing servings? The ingredient list scales automatically. Adjust quantities named in the steps to match, and choose pans and cooking times for your batch.

Asparagus and Arugula Frittata with Gruyère

No ratings yet
A baked skillet frittata with blistered asparagus, arugula, red onion and Gruyère.
Servings: 6 servings
Course: Breakfast, Brunch, Lunch
Cuisine: Italian-Inspired

Some ingredient links are affiliate links. We may earn a commission at no extra cost to you. As an Amazon Associate I earn from qualifying purchases.

Ingredients
  

Frittata
  • 10 large eggs
  • ½ cup heavy cream
  •  
    2 oz Gruyère coarsely grated; choose vegetarian-rennet cheese if needed
  •  
    2 cups arugula packed, or other tender salad greens
  • Fresh green asparagus spears1 bunch asparagus about 1 lb for the base batch
  • 3 tbsp olive oil divided among the cooking stages
  • kosher salt to taste
  • 1 medium red onion thinly sliced
  • 2 cloves garlic finely chopped
  • 1 tbsp oregano coarsely chopped
  • black pepper freshly ground, to taste
  • 1 tbsp chives coarsely chopped

Equipment images are illustrative. Exact products may vary.

Instructions
 

  1. Heat the oven to 350°F with a rack in the middle. Whisk the eggs and cream until fully combined, then fold in the grated Gruyère and arugula.
  2. Separate the asparagus spears from their firm lower ends. Thinly slice any usable stem ends, discarding dry or fibrous pieces. Keep these slices separate from the spears.
  3. Heat one third of the oil in a large ovenproof skillet over medium-high heat. Add the asparagus spears and cook for 5–8 minutes, turning occasionally, until blistered in spots and tender-crisp. Season with salt and lift onto a plate.
  4. Add another third of the oil to the skillet. Cook the red onion, garlic, oregano and sliced asparagus ends for about 5 minutes, stirring now and then, until the onion softens and the stem slices are tender. Season with salt and pepper.
  5. Swirl in the remaining oil and wait about 30 seconds. Pour in the egg mixture and arrange the asparagus spears across the top. Cook without stirring for about 3 minutes, until the eggs set around the edges.
  6. Transfer to the oven and bake until the center is set and reaches 160°F, starting to check after 15 minutes. Remove carefully and let stand for 15 minutes. Scatter over the chives and a little more pepper before cutting.

Notes

The base batch makes about 6–8 portions, depending on the rest of the meal. The serving control starts at 6.
Use a skillet that is safe at 350°F, including its handle. Keep an oven mitt over the hot handle after removing it.
For a vegetarian meal, choose a Gruyère-style cheese made with vegetarian rennet.

Tried this recipe?

Let us know how it was!

A couple of useful answers.

Does the frittata need to be flipped?

No. Start it on the stovetop to set the edges, then move the skillet to the oven to cook the center.

Can I use every part of the asparagus?

Thin slices of usable lower stems can cook with the onion. Discard any very dry or fibrous pieces that will not become tender.

Keep the good food going

Similar Recipes

Find another recipe to bring to the table.

Olive-Brine Chicken with Carrots and Date Relish

Dinner

Olive-Brine Chicken with Carrots and Date Relish

Olive brine gives these chicken thighs a salty, tangy start. They roast over carrots and red onion, then meet a fresh relish with sweet dates, green olives and plenty of lemon.

Servings
4
Cuisine
Mediterranean-inspired

Bring it to the table

A skillet dinner with a bright finish

Brown the chicken skin first, then let the carrots cook in the same skillet. Keep the date relish separate until serving so its lemon, herbs and pistachios stay lively.

At the table

Serve the chicken and carrots together, with the relish spooned over the top. Bring any remaining relish to the table.

Before you start

Gather your ingredients.

Full quantities and serving adjustments are in the recipe card below.

See the ingredient checklist
  • 1 lemon — zest and juice
  • 2 cloves garlic — finely grated
  • 1/3 cup olive brine
  • 1/4 tsp crushed red pepper flakes
  • 6 sprigs tarragon — leaves picked and chopped, divided
  • 1 tsp Diamond Crystal kosher salt — or use half as much Morton kosher salt, plus more to taste
  • 4 bone-in, skin-on chicken thighs — about 2 lb for the base batch
  • 1 tbsp olive oil
  • 1 small red onion — sliced
  • 1 1/2 lb medium carrots — scrubbed; cut diagonally into 3-inch pieces
  • 2 tsp sumac
  • black pepper — freshly ground, to taste
  • 1 small red onion — thinly sliced
  • 2 lemons — zest and juice
  • 6 firm Medjool dates — pitted and coarsely chopped
  • 1/3 cup pistachios — coarsely chopped
  • 1/4 cup tender herbs — chopped; tarragon, parsley and/or chives
  • 1/4 cup green olives — pitted and coarsely chopped
  • kosher salt — to taste

A few useful notes.

Marinate the chicken in the refrigerator and discard marinade that has touched raw chicken.

Olive brine varies in saltiness. Taste the cooked vegetables and fresh relish before adding more salt.

The cooking plan

How to make Olive-Brine Chicken with Carrots and Date Relish.

  1. Mix the chicken lemon zest and juice, grated garlic, olive brine, red pepper flakes, half the tarragon and the measured salt in a bowl. Make two or three shallow cuts on the flesh side of each thigh, then coat the chicken in the marinade. Cover and refrigerate for 30 minutes to 3 hours.

  2. Heat the oven to 425°F with a rack in the middle. Warm the oil in a large ovenproof skillet over medium-high heat. Lift the thighs from the marinade, letting excess drip off, and discard the used marinade. Place the chicken skin-side down in the skillet. Cook without moving it for 5–8 minutes, until the skin browns and crisps. Turn briefly to season the other side, then move to a plate.

  3. Add the sliced onion for the chicken, carrots, sumac and remaining tarragon to the skillet. Season with salt and pepper and stir through the rendered fat. Return the thighs skin-side up.

  4. Roast until the carrots are tender-crisp and the thickest part of each thigh reaches at least 165°F without touching bone. Begin checking around 20 minutes; the thighs may need longer depending on size. Transfer to a serving platter and rest for 5–10 minutes.

  5. While the chicken rests, toss the relish onion with the zest and juice of its lemons, dates, pistachios, herbs and olives. Taste before adding salt. Spoon the relish over the chicken and carrots to serve.

Let’s cook

The full recipe.

Check off ingredients as you get them ready.

Changing servings? The ingredient list scales automatically. Adjust quantities named in the steps to match, and choose pans and cooking times for your batch.

Olive-Brine Chicken with Carrots and Date Relish

No ratings yet
Roasted chicken thighs and sumac carrots with a lemony relish of dates, green olives, pistachios and herbs.
Servings: 4 servings
Course: Dinner
Cuisine: Mediterranean-inspired

Some ingredient links are affiliate links. We may earn a commission at no extra cost to you. As an Amazon Associate I earn from qualifying purchases.

Ingredients
  

Chicken and carrots
  • 1 lemon zest and juice
  • 2 cloves garlic finely grated
  •  
    ⅓ cup olive brine
  • ¼ tsp crushed red pepper flakes
  •  
    6 sprigs tarragon leaves picked and chopped, divided
  • Light irregular kosher salt flakes in a small white bowl1 tsp Diamond Crystal kosher salt or use half as much Morton kosher salt, plus more to taste
  •  
    4 bone-in, skin-on chicken thighs about 2 lb for the base batch
  • 1 tbsp olive oil
  • 1 small red onion sliced
  • 1 ½ lb medium carrots scrubbed; cut diagonally into 3-inch pieces
  •  
    2 tsp sumac
  • black pepper freshly ground, to taste
Date relish
  • 1 small red onion thinly sliced
  • 2 Lemon zest and juice
  •  
    6 firm Medjool dates pitted and coarsely chopped
  •  
    ⅓ cup pistachios coarsely chopped
  •  
    ¼ cup tender herbs chopped; tarragon, parsley and/or chives
  •  
    ¼ cup green olives pitted and coarsely chopped
  • kosher salt to taste

Equipment images are illustrative. Exact products may vary.

Instructions
 

  1. Mix the chicken lemon zest and juice, grated garlic, olive brine, red pepper flakes, half the tarragon and the measured salt in a bowl. Make two or three shallow cuts on the flesh side of each thigh, then coat the chicken in the marinade. Cover and refrigerate for 30 minutes to 3 hours.
  2. Heat the oven to 425°F with a rack in the middle. Warm the oil in a large ovenproof skillet over medium-high heat. Lift the thighs from the marinade, letting excess drip off, and discard the used marinade. Place the chicken skin-side down in the skillet. Cook without moving it for 5–8 minutes, until the skin browns and crisps. Turn briefly to season the other side, then move to a plate.
  3. Add the sliced onion for the chicken, carrots, sumac and remaining tarragon to the skillet. Season with salt and pepper and stir through the rendered fat. Return the thighs skin-side up.
  4. Roast until the carrots are tender-crisp and the thickest part of each thigh reaches at least 165°F without touching bone. Begin checking around 20 minutes; the thighs may need longer depending on size. Transfer to a serving platter and rest for 5–10 minutes.
  5. While the chicken rests, toss the relish onion with the zest and juice of its lemons, dates, pistachios, herbs and olives. Taste before adding salt. Spoon the relish over the chicken and carrots to serve.

Notes

Marinate the chicken in the refrigerator and discard marinade that has touched raw chicken.
Olive brine varies in saltiness. Taste the cooked vegetables and fresh relish before adding more salt.

Tried this recipe?

Let us know how it was!

A couple of useful answers.

Is the relish cooked?

No. Toss its onion, lemon, dates, nuts, herbs and olives together while the chicken rests, then spoon it over the hot chicken.

How do I check the thighs are done?

Insert a thermometer into the thickest part of the meat, away from bone. Each thigh should reach at least 165°F.

Keep the good food going

Similar Recipes

Find another recipe to bring to the table.
Seared Scallops with Garlic Butter and Basil

Dinner

Seared Scallops with Garlic Butter and Basil

A hot skillet gives scallops their browned edges; a separate panful of garlic butter brings the finish. A little vinegar cuts through the richness just before serving.

Servings
4
Cuisine
French-inspired

Bring it to the table

Brown the garlic before the scallops

Cook the sliced garlic gently in butter, then move it out of the skillet. Sear the scallops in oil so the garlic stays golden rather than burning while the seafood cooks.

At the table

Spoon the garlic butter over the scallops and add basil at the last moment. Serve with bread or a simple salad alongside.

Before you start

Gather your ingredients.

Full quantities and serving adjustments are in the recipe card below.

See the ingredient checklist
  • 4 tbsp unsalted butter
  • 6 cloves garlic — sliced
  • 2 tsp sherry vinegar or red wine vinegar
  • black pepper — freshly ground, to taste
  • 1 lb dry sea scallops
  • kosher salt — to taste
  • 1 tbsp olive oil or vegetable oil — plus more as needed
  • basil leaves — torn, for serving

A few useful notes.

Dry-packed scallops and a well-dried surface help the scallops sear. Leave space in the pan instead of crowding them.

Let the color and doneness guide you; smaller scallops may finish sooner than the step times suggest.

The cooking plan

How to make Seared Scallops with Garlic Butter and Basil.

  1. Melt the butter in a large nonstick skillet over medium heat. Add the sliced garlic and swirl occasionally for about 5 minutes, lowering the heat if it colors too quickly. When the garlic is golden and the butter is lightly browned, scrape everything into a small bowl. Wipe out the skillet.

  2. Pat the scallops thoroughly dry and season with salt. Warm the oil in the skillet over medium-high heat. Arrange the scallops with space between them; work in batches if necessary.

  3. Leave the scallops in place until a golden crust forms underneath, about 5 minutes, moving the skillet gently if needed and adding a little more oil if it dries out. Flip and cook about 2 minutes more, until the flesh is firm, pearly and opaque throughout. Timing depends on their size; most seafood should reach 145°F.

  4. Stir the vinegar into the reserved garlic butter. Taste and add salt and pepper as needed. Transfer the scallops to a platter, spoon over the garlic butter and finish with torn basil.

Let’s cook

The full recipe.

Check off ingredients as you get them ready.

Changing servings? The ingredient list scales automatically. Adjust quantities named in the steps to match, and choose pans and cooking times for your batch.

Seared Scallops with Garlic Butter and Basil

No ratings yet
Sea scallops with golden garlic butter, a splash of sherry vinegar and torn basil.
Servings: 4 servings
Course: Dinner
Cuisine: French-inspired

Some ingredient links are affiliate links. We may earn a commission at no extra cost to you. As an Amazon Associate I earn from qualifying purchases.

Ingredients
  

Garlic butter
  • 4 tbsp unsalted butter
  • 6 cloves garlic sliced
  •  
    2 tsp sherry vinegar or red wine vinegar
  • black pepper freshly ground, to taste
Scallops
  •  
    1 lb dry sea scallops
  • kosher salt to taste
  •  
    1 tbsp olive oil or vegetable oil plus more as needed
  •  
    basil leaves torn, for serving

Equipment images are illustrative. Exact products may vary.

Instructions
 

  1. Melt the butter in a large nonstick skillet over medium heat. Add the sliced garlic and swirl occasionally for about 5 minutes, lowering the heat if it colors too quickly. When the garlic is golden and the butter is lightly browned, scrape everything into a small bowl. Wipe out the skillet.
  2. Pat the scallops thoroughly dry and season with salt. Warm the oil in the skillet over medium-high heat. Arrange the scallops with space between them; work in batches if necessary.
  3. Leave the scallops in place until a golden crust forms underneath, about 5 minutes, moving the skillet gently if needed and adding a little more oil if it dries out. Flip and cook about 2 minutes more, until the flesh is firm, pearly and opaque throughout. Timing depends on their size; most seafood should reach 145°F.
  4. Stir the vinegar into the reserved garlic butter. Taste and add salt and pepper as needed. Transfer the scallops to a platter, spoon over the garlic butter and finish with torn basil.

Notes

Dry-packed scallops and a well-dried surface help the scallops sear. Leave space in the pan instead of crowding them.
Let the color and doneness guide you; smaller scallops may finish sooner than the step times suggest.

Tried this recipe?

Let us know how it was!

A couple of useful answers.

Why take the garlic butter out of the skillet?

It lets the scallops sear over higher heat while keeping the already-golden garlic from burning. Add the butter back as a finishing sauce.

When should I turn the scallops?

Wait until the first side is browned and releases from the pan. Finish cooking the second side until the flesh is firm and opaque throughout.

Keep the good food going

Similar Recipes

Find another recipe to bring to the table.