Chili Cheese Bean Dip

🧀 Cheesy Chili Bean Dip – Game Day Favorite

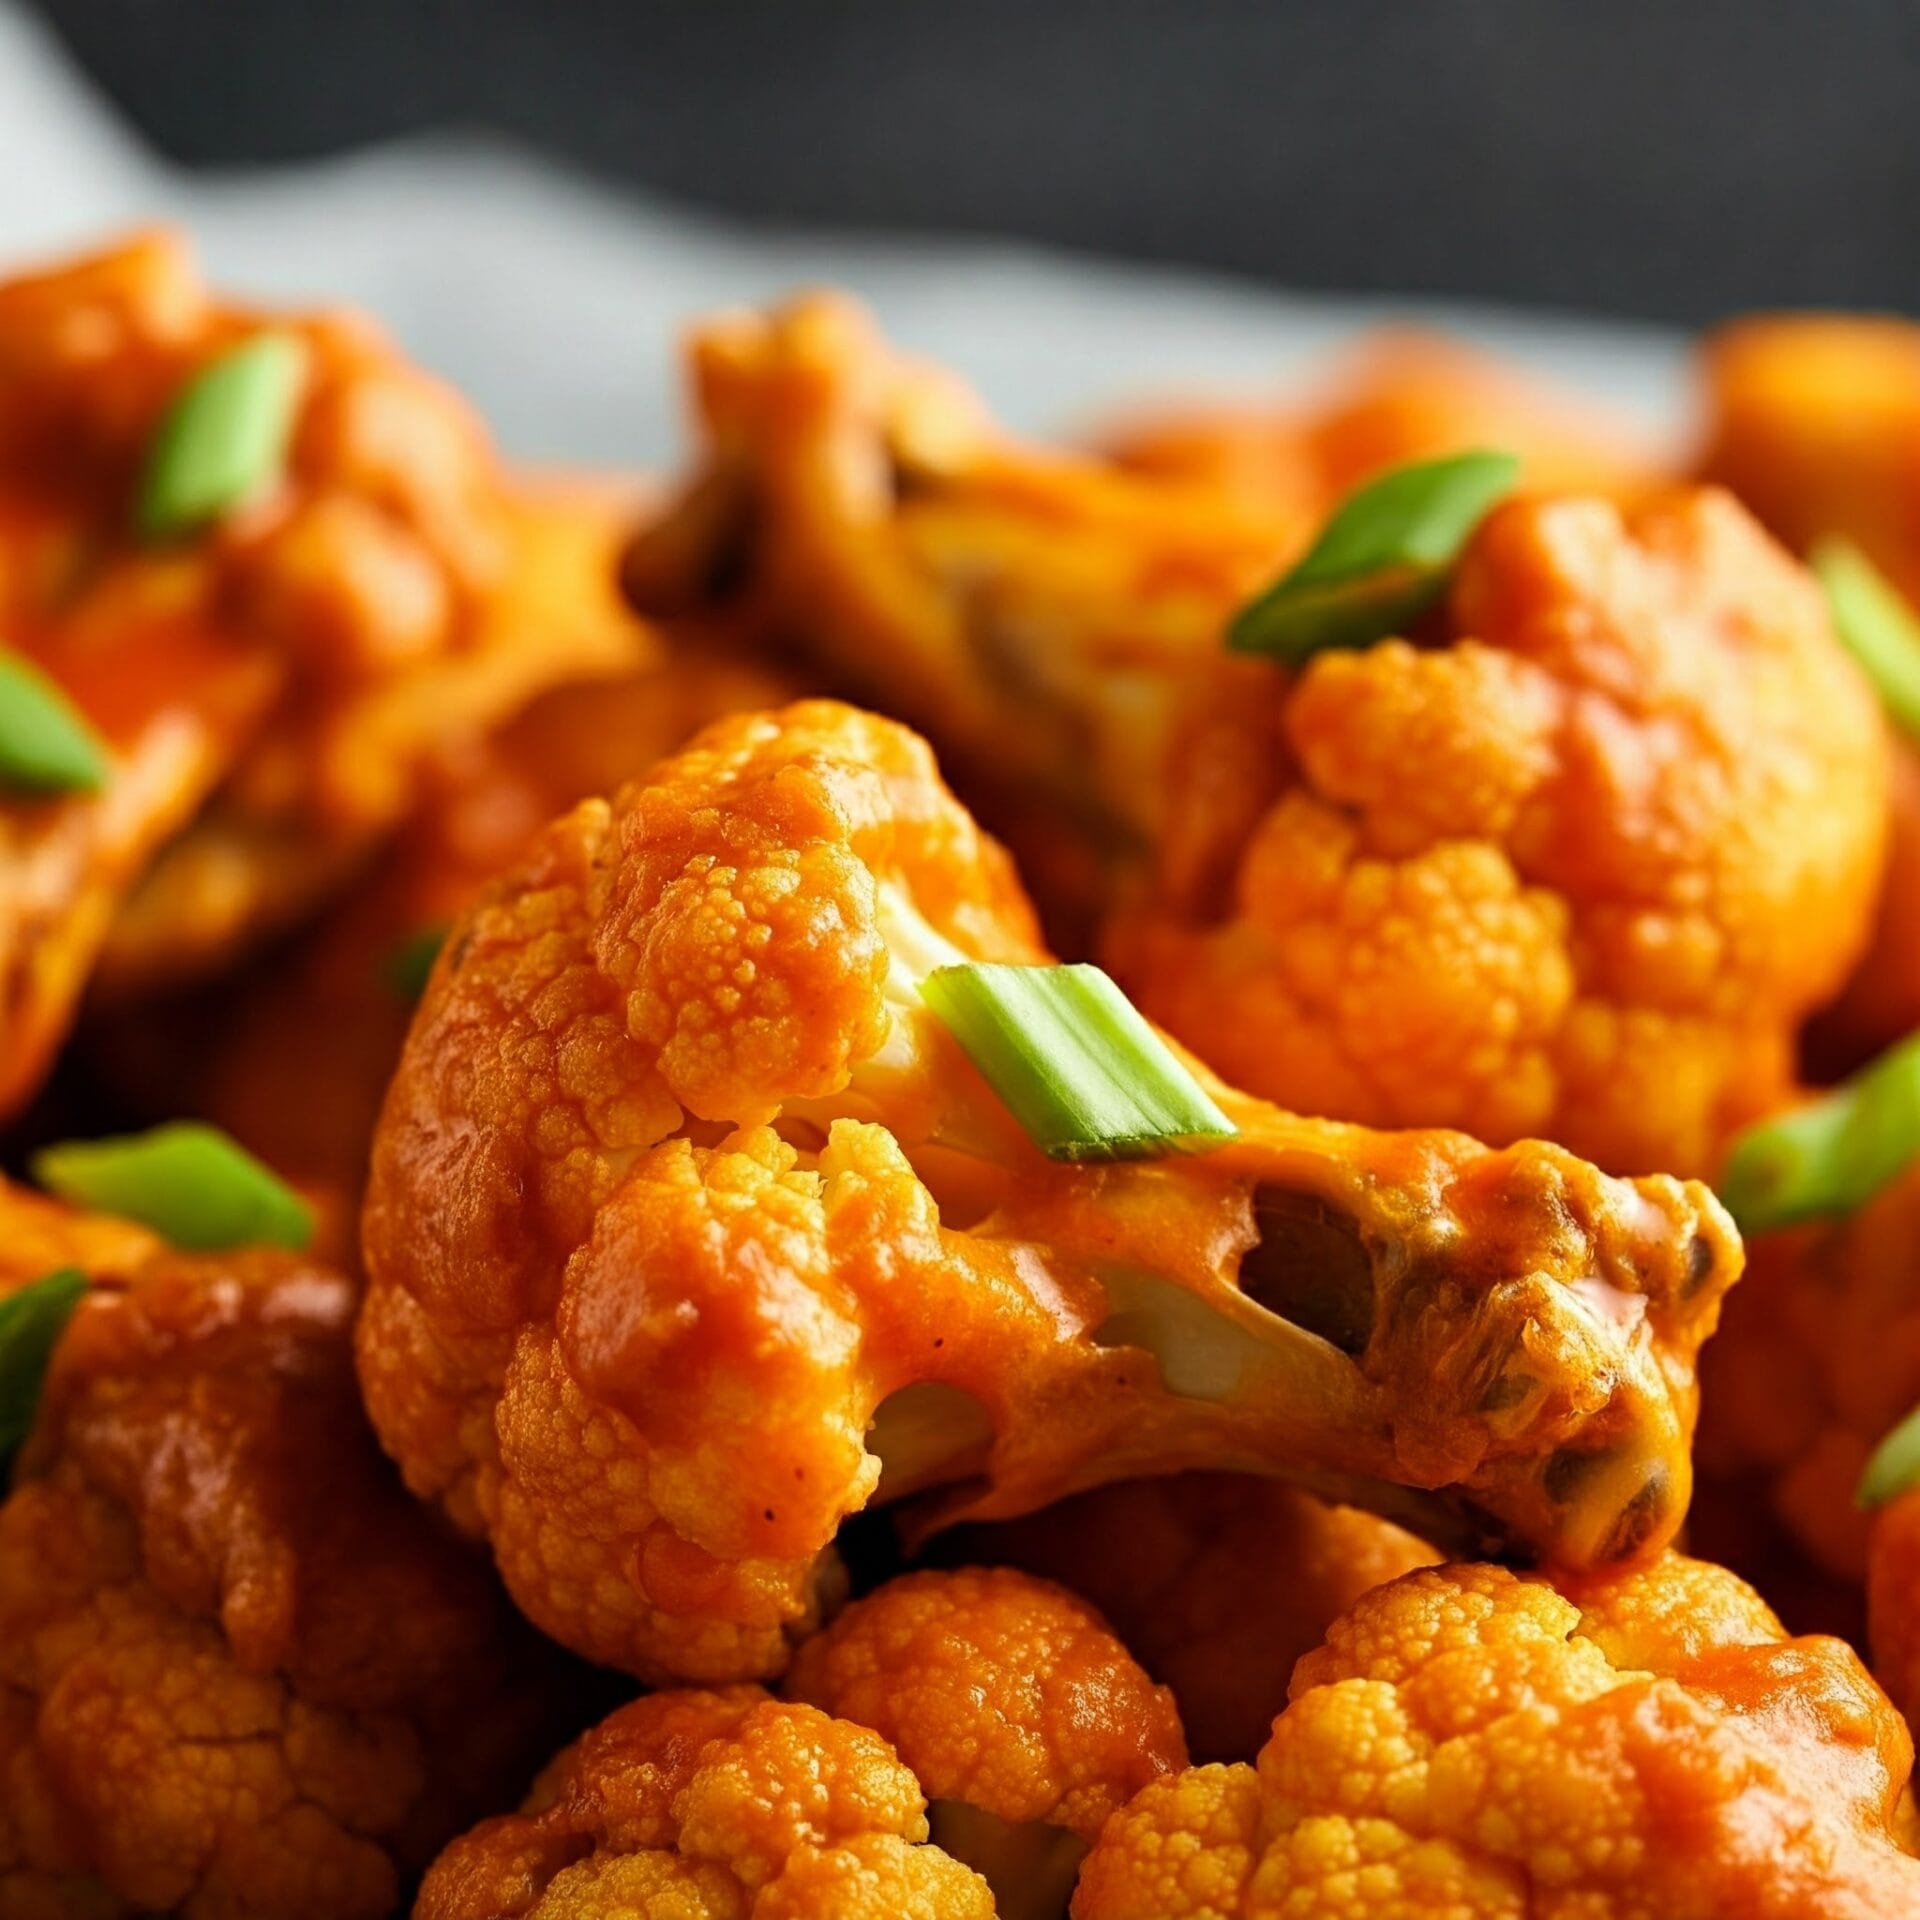
This hot, gooey dip is loaded with melted cheese, hearty beans, and bold chili flavor—perfect for scooping on game day, movie night, or any party!

If you’re looking for the ultimate party dip that’s hot, cheesy, and totally addictive, this Cheesy Chili Bean Dip delivers every time. It’s bold, hearty, and loaded with layers of melted cheese, savory beans, and flavorful chili—everything you want in a game day snack. Whether you’re hosting a party, watching the big game, or just in the mood for something comforting, this dip hits the spot.

Instead of spending hours prepping complicated appetizers, you can throw this together in minutes. Just layer canned chili, creamy refried beans, and shredded cheese into a baking dish, then bake until it’s bubbly and golden. As a result, you get a gooey, scoopable dip that’s perfect with tortilla chips, crackers, or even fresh veggies.

🧄 Why You’ll Love This Cheesy Chili Bean Dip

🧀 Ultra-Cheesy – Every bite is packed with gooey, melty cheese that pulls perfectly with every scoop.

🌶️ Bold Flavor – The combo of savory chili, creamy beans, and spices creates rich, crave-worthy flavor.

🕒 Quick & Easy – In fact, you can prep it in under 10 minutes with just a handful of ingredients.

🍽️ Perfect Party Food – As a result, it’s a guaranteed crowd-pleaser for game day, movie nights, or potlucks.

🔁 Customizable – For example, add jalapeños, ground beef, or green onions for your own twist.

🔥 Serve It Hot & Fresh – It bakes to bubbly, golden perfection in about 20 minutes.

♻️ Great Leftovers – In addition, it reheats well and makes a killer nacho topping the next day.

One Dish, No Fuss – Therefore, cleanup is easy and you’ll spend less time in the kitchen.

🔪 How to Make Cheesy Chili Bean Dip

Preheat the Oven
Set your oven to 375°F (190°C) and lightly grease a small baking dish.

Layer the Dip
Spread refried beans in an even layer, followed by your favorite chili. Top generously with shredded cheese.

Bake Until Bubbly
Place the dish in the oven and bake for 15–20 minutes, or until the cheese is fully melted and bubbling.

Garnish and Serve
Top with optional green onions, jalapeños, or cilantro. Serve hot with tortilla chips, crackers, or veggie sticks.

Jump to Section

📱 Follow Us 

📬 Subscribe for Updates

* indicates required

Intuit Mailchimp

Chili Cheese Bean Dip

No ratings yet
Looking for a quick and easy appetizer that's sure to impress? This Chili Cheese Bean Dip is the answer! It comes together in minutes with just a few simple ingredients, making it the perfect go-to for busy weeknights or last-minute gatherings. The combination of chili, beans, and cheese is a classic crowd-pleaser, and the warm, cheesy dip is simply irresistible. Serve it with your favorite dippers and enjoy!
Prep Time 10 minutes
Cook Time 1 hour
Servings: 6 people
Course: Appetizer, Snacks
Cuisine: American, American Fusion
Calories: 197

Ingredients
  

  • 16 oz Refried Beans can
  • 2 oz Monterey Jack cheese shredded
  • 2 oz Cheddar Cheese shredded
  • 2 Tbsp Avocado oil
  • 1 Large Lime juiced
  • ¼ Cup Sour Cream or Mexican crema
  • 3 Cloves Garlic crushed or finely minced
  • ¼ Cup Green Onions thinly sliced
  • ¼ Cup Fresh Cilantro leaves, packed, chopped
  • ½ tsp Ground Cumin
  • 1 tsp Chipotle ground
  • 1 tsp Chili Powder
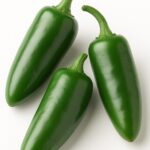
  • 1 Large Jalapeno Peppers seeded and minced

Equipment

1 9x9 Baking Dish (Ideal for layering and evenly baking the dip to bubbly perfection.)
1 Mixing bowl (For stirring together beans, chili, and spices if combining first.)
1 Spatula (Helps spread each layer evenly in the baking dish.)
1 Cheese Grater (For shredding fresh Monterey Jack or cheddar for maximum melt.)
1 Can Opener (Essential if you’re using canned chili or refried beans.)
1 Oven Mitts (To safely remove the hot, bubbly dish from the oven.)
1 Small Ladle (Great for scooping into bowls or onto plates.)
1 Serving Tray (Makes it easy to transport the dip and chips for parties.)

Method
 

  1. In a large bowl, add the refried beans, shredded Monterey Jack cheese, shredded cheddar cheese, avocado oil, lime juice, sour cream, minced garlic, chopped green onions, chopped cilantro, ground cumin, chipotle powder, chili powder, and finely diced jalapeño. Use a spatula to stir the mixture thoroughly until all the ingredients are evenly distributed and well combined. Make sure the cheese is evenly mixed throughout the dip.
    Note: If making the day before, do not add garlic, onions, and cilantro until 1 to 2 hours before serving; otherwise, the flavors might overpower the dip.
    Wrap and chill for 1 to 2 hours before serving for best results, but the dip can be served immediately, if desired.
    16 oz Refried Beans, 2 oz Monterey Jack cheese, 2 oz Cheddar Cheese, 2 Tbsp Avocado oil, 1 Large Lime, ¼ Cup Sour Cream, 3 Cloves Garlic, ¼ Cup Green Onions, ¼ Cup Fresh Cilantro, ½ tsp Ground Cumin, 1 tsp Chipotle, 1 tsp Chili Powder, 1 Large Jalapeno Peppers

Nutrition

Serving: 12ozCalories: 197kcalCarbohydrates: 12gProtein: 8gFat: 13gSaturated Fat: 5gPolyunsaturated Fat: 1gMonounsaturated Fat: 5gCholesterol: 24mgSodium: 564mgPotassium: 75mgFiber: 4gSugar: 3gVitamin A: 510IUVitamin C: 8mgCalcium: 185mgIron: 1mg

Notes

Ingredients:
  • Refried Beans: Use your favorite brand or homemade refried beans.
  • Cheese: A blend of Monterey Jack and cheddar cheese provides a good melting and flavor combination.
  • Avocado Oil: Avocado oil adds a healthy fat and a creamy texture. You can substitute with another oil, like olive oil.
  • Lime Juice: Fresh lime juice adds a bright and zesty flavor.
  • Sour Cream: Sour cream adds a tangy creaminess. You can substitute with Greek yogurt for a healthier option.
  • Garlic: Freshly minced garlic adds a pungent flavor.
  • Green Onions: Green onions provide a mild onion flavor and a pop of color.
  • Cilantro: Fresh cilantro adds a fresh, herbaceous note.
  • Spices: Cumin, chipotle powder, and chili powder create a warm and smoky flavor base.
  • Jalapeño: Finely diced jalapeño adds a spicy kick. Adjust the amount to your liking.
Preparation Tips:
  • Combine Ingredients: In a large bowl, combine all ingredients and stir with a spatula until well combined. Make sure the cheese is evenly distributed throughout the dip.
  • Adjust Consistency: If the dip is too thick, add a tablespoon or two of water or milk to thin it out. If it's too thin, add more cheese or refried beans.
  • Taste and Adjust: Taste the dip and adjust the seasonings to your liking. You may want to add more lime juice, hot sauce, or spices.
Serving Suggestions:
  • Serve Warm: This dip is best served warm. You can heat it in the microwave or in a small saucepan on the stovetop.
  • Dippers: Serve with tortilla chips, crackers, pita bread, or fresh vegetables.
  • Garnish: Garnish with extra chopped cilantro, green onions, or a dollop of sour cream.
Variations:
  • Spicy: Add more jalapeño, chipotle powder, or your favorite hot sauce for extra heat.
  • Hearty: Add cooked ground beef, chorizo, or black beans for a more substantial dip.
  • Creamy: Add more sour cream or Greek yogurt for a creamier texture.
  • Cheesy: Add more cheese or use a different type of cheese, like pepper jack.
With these tips, you'll be able to create a delicious and crowd-pleasing Chili Cheese Bean Dip that's perfect for any occasion!

Tried this recipe?

Let us know how it was!

🍽️ What to Serve With Cheesy Chili Bean Dip

This gooey, bold-flavored dip is the life of the party—and it pairs perfectly with all your favorite dippers and sides. Whether you’re hosting game day or setting up a snack table, here are some delicious ways to serve it:

🧂 Classic Dippers

  • Tortilla chips – The obvious choice for maximum scoopability

  • Crackers – Try buttery rounds or sturdy wheat crackers for a crispy contrast

  • Toasted baguette slices – Great for a heartier dip base

  • Soft pretzel bites – A warm, salty pairing with melty cheese

🥕 Fresh Crunch

  • Celery sticks – Adds a refreshing crunch

  • Carrot sticks – Naturally sweet and perfect with heat

  • Bell pepper strips – Colorful and sturdy enough to hold every bite

🌮 Sidekicks & Add-ons

  • Nachos – Drizzle over chips and top with jalapeños and sour cream

  • Baked potatoes – Spoon over for an indulgent twist

  • Quesadillas or tacos – Use leftovers as a bold filling

🥑 Crave-Worthy Recipes to Try Next

❓ Cheesy Chili Bean Dip FAQ

Q: Can I make this dip ahead of time?
A: Yes! You can assemble the dip a day in advance, cover it, and store it in the fridge. When you’re ready to serve, bake it as directed until hot and bubbly.


Q: Can I make it in the microwave instead of the oven?
A: Absolutely. Use a microwave-safe dish and heat in 30-second intervals until the cheese is fully melted. It won’t get quite as bubbly or golden, but it still tastes great.


Q: Does this recipe work with homemade chili?
A: Definitely! If you have leftover chili, it works beautifully. Just make sure it’s not too watery—thicker chili holds up better in this layered dip.


Q: Can I make it vegetarian or vegan?
A: Yes. Use vegetarian chili and skip the meat, or go fully vegan by using plant-based cheese and beans. The result is still hearty and satisfying.


Q: What’s the best cheese to use?
A: Sharp cheddar is a classic, but feel free to mix in Monterey Jack, pepper jack, or even a little cream cheese for extra creaminess.

Please follow and like us:
onpost_follow
fb-share-icon197
Tweet120
Pinterest20
Share 20
submit to reddit

Buffalo Cauliflower Wings

Cauliflower Wings with a Kick – Buffalo Style!

Spicy, crispy, and totally addictive—these Buffalo cauliflower wings are the ultimate crowd-pleasing snack! 

Craving the ultimate plant-based snack that’s bold, crispy, and full of flavor? These Buffalo Cauliflower Wings are the spicy, satisfying treat you’ve been searching for. Whether you’re throwing a game day bash, prepping party appetizers, or simply want to elevate your weekday meals, this easy recipe delivers big on flavor—without the meat.

Instead of traditional chicken wings, this version features tender cauliflower florets that are oven-baked or air-fried until perfectly crisp. As a result, you get a bite that’s crunchy on the outside, tender on the inside, and absolutely packed with bold Buffalo spice.

In addition, the ingredients are simple and likely already in your kitchen. Moreover, the method is easy enough for beginners, yet tasty enough to win over even the most devoted wing lovers. For example, you can adjust the heat level by using mild or extra-hot sauce, depending on your preference.

Because these wings are so versatile, they work for nearly any occasion. Serve them with ranch or blue cheese dip, plus a side of celery and carrots for that classic presentation. Therefore, whether you’re hosting friends, meal prepping for the week, or just feeding your own spicy cravings, this recipe is sure to impress.

In conclusion, Buffalo Cauliflower Wings are everything a great appetizer should be—crispy, flavorful, and absolutely addictive. Once you try them, you may never go back to chicken again.

💥 Why You’ll Love These Buffalo Cauliflower Wings

🔥 Bold Buffalo FlavorAs a result, every bite is spicy, tangy, and totally addictive.
🥦 Plant-Based & Vegan-FriendlyMoreover, it’s a satisfying meatless option for everyone.
Crispy Without FryingInstead of deep-frying, it’s oven-baked or air-fried for crunch without grease.
🧄 Simple Pantry IngredientsIn fact, you likely already have everything in your kitchen.
⏱️ Quick & Easy PrepBecause of that, it’s perfect for weeknights or spontaneous gatherings.
🍽️ Crowd-Pleasing Snack or AppetizerFor example, serve it at parties, game day, or brunch.
🧡 Customizable Heat LevelTherefore, you can make it mild, medium, or hot—just how you like

🔪 How to Make Buffalo Cauliflower Wings

Step 1: Prep the Cauliflower
Cut a medium head of cauliflower into bite-sized florets. Rinse and pat them dry for maximum crispiness.

Step 2: Make the Batter
In a bowl, whisk together flour, plant-based milk (or regular milk), garlic powder, onion powder, salt, and pepper until smooth. The batter should be thick enough to coat the cauliflower.

Step 3: Coat the Cauliflower
Dip each floret into the batter, letting the excess drip off. Place them on a lined baking sheet or into your air fryer basket in a single layer.

Step 4: Bake or Air Fry
Bake at 425°F for 20–25 minutes (flip halfway), or air fry at 400°F for about 15 minutes until golden and crispy.

Step 5: Toss in Buffalo Sauce
Remove from oven and gently toss the crispy cauliflower in your favorite Buffalo sauce. Want it extra spicy? Add a pinch of cayenne or hot sauce.

Step 6: Return to Crisp Up
Place the coated cauliflower back in the oven or air fryer for another 10 minutes to let the sauce bake in and edges crisp up.

Step 7: Serve & Enjoy
Serve hot with ranch or blue cheese dip, celery sticks, and maybe a sprinkle of fresh parsley or green onions. Dig in while they’re warm and crispy!

Jump to Section

📱 Follow Us 

📬 Subscribe for Updates

* indicates required

Intuit Mailchimp

Buffalo Cauliflower Wings

No ratings yet
These Buffalo Cauliflower Wings are crispy, spicy, and totally addictive! 🥦🔥 In addition, they’re baked or air-fried to golden perfection, then tossed in bold Buffalo sauce and served with creamy ranch or blue cheese dip. As a result, they make the perfect crowd-pleasing snack. Whether you're hosting game day or craving plant-based heat, this recipe delivers bold flavor without the meat. Therefore, it’s always a hit! 🌶️💥
Prep Time 10 minutes
Cook Time 35 minutes
Servings: 4 people
Course: Appetizer, Snacks
Cuisine: American, American Fusion
Calories: 170

Ingredients
  

  • Cup All-Purpose Flour Leveled
  • ¼ Cup Cornstarch
  • 1 tsp Garlic Powder
  • 1 tsp Onion Powder
  • 1 tsp Paprika
  • ½ tsp Sea Salt
  • ¾ Cup water
  • 2 Lbs Cauliflower Head

Equipment

1 Large mixing bowl (for coating the cauliflower in batter and tossing with sauce.)
1 Small bowl (for preparing the batter or buffalo sauce separately.)
1 Whisk or fork (to mix batter ingredients until smooth.)
1 Measuring cups & spoons ( for accuracy in flour, spices, and liquids.)
1 Cutting board (for chopping cauliflower into florets.)
1 Sharp chef’s knife (to cut through the cauliflower cleanly and safely)
1 Tongs ( for flipping the wings or tossing them in sauce without breaking them.)

Method
 

  1. Start by preheating your oven to 450 degrees Fahrenheit. While the oven is heating up, prepare two large baking sheets by lining them with parchment paper. This will help prevent the cauliflower from sticking to the baking sheets and make cleanup easier.
  2. In a large bowl, combine the flour, cornstarch, garlic powder, onion powder, paprika, and salt. Whisk the dry ingredients together until they are well combined. Gradually add the water to the bowl, whisking constantly, until a smooth batter forms. Make sure there are no lumps in the batter. Add the cauliflower florets to the bowl and use your hands or a spoon to gently stir until all the florets are evenly coated in the batter.
    ⅔ Cup All-Purpose Flour, ¼ Cup Cornstarch, 1 tsp Garlic Powder, 1 tsp Onion Powder, 1 tsp Paprika, ½ tsp Sea Salt, ¾ Cup water
  3. Using tongs or a fork, carefully lift the cauliflower florets out of the batter, allowing any excess batter to drip back into the bowl. Arrange the florets in a single layer on the prepared baking sheets, making sure they are not touching each other. Bake the cauliflower for 10 minutes, then remove the baking sheets from the oven. Use a spatula to carefully flip the florets. Return the baking sheets to the oven, swapping their positions on the oven racks. This will help ensure even cooking. Bake for another 10 minutes, or until the cauliflower is golden brown and crispy.
    2 Lbs Cauliflower Head
  4. Remove the baking sheets from the oven. Using a pastry brush or a spoon, brush the cauliflower florets with some of the buffalo wing sauce, making sure to coat them evenly. Return the baking sheets to the oven and bake for another 12 to 15 minutes, or until the cauliflower is dark golden brown and crisp around the edges. The exact cooking time will depend on your oven and the size of the cauliflower florets.
  5. Remove the baking sheets from the oven and let the cauliflower cool slightly. Brush the cauliflower florets with additional buffalo wing sauce, making sure to coat them evenly. This will add extra flavor and spice. Transfer the cauliflower wings to a serving platter or individual plates. Serve immediately while they are still hot and crispy. For dipping, ranch dressing is a classic pairing that helps to cool the heat of the buffalo sauce.

Nutrition

Serving: 12ozCalories: 170kcalCarbohydrates: 36gProtein: 7gFat: 1gSaturated Fat: 0.3gPolyunsaturated Fat: 0.2gMonounsaturated Fat: 0.1gSodium: 363mgPotassium: 726mgFiber: 5gSugar: 4gVitamin A: 247IUVitamin C: 109mgCalcium: 58mgIron: 2mg

Notes

📝 Recipe Notes – Buffalo Cauliflower Wings

  • Flour Options: You can use all-purpose flour, chickpea flour, or a gluten-free blend. Each offers a slightly different texture, so pick your favorite based on dietary needs.
  • Make It Extra Crispy: For extra crunch, add a tablespoon of cornstarch to the batter and bake on a wire rack instead of directly on parchment paper.
  • Buffalo Sauce Tip: Want more heat? Add cayenne or a splash of hot sauce. Prefer mild? Mix the Buffalo sauce with melted butter or Greek yogurt to tone it down.
  • Air Fryer Instructions: Cook at 400°F for 15–18 minutes, shaking the basket halfway through. They’ll come out extra crispy with minimal oil!
  • Vegan-Friendly: Use plant-based milk and vegan Buffalo sauce (most are!). Pair with dairy-free ranch or blue cheese for a fully vegan snack.
  • Reheating: Re-crisp leftovers in the oven or air fryer at 375°F for 5–8 minutes. Microwaving will soften the coating.
  • Serving Tip: These wings are best served immediately with cold celery sticks, carrot slices, and your favorite dip. Great as an appetizer, snack, or even a light main dish!

Tried this recipe?

Let us know how it was!

🧂 What to Serve with Buffalo Cauliflower Wings

These spicy, saucy bites are a total flavor bomb — but they’re even better when paired with the perfect sides and sips. Whether you’re planning a game day spread, party platter, or just spicing up your snack routine, here are some delicious ideas to serve alongside your Buffalo Cauliflower Wings:

🥕 Cool & Crunchy

Celery & Carrot Sticks: The classic combo — crisp, refreshing, and the perfect cooling contrast to all that heat.
Cucumber Ranch Salad: Sliced cucumbers, red onion, and dill tossed in creamy ranch dressing. Light, cooling, and super easy.
Apple Slaw: A sweet and tangy slaw made with cabbage, apples, and a light vinaigrette for a little crunch and contrast.

🍚 Hearty & Comforting

Mac & Cheese: Creamy, cheesy, and oh-so-satisfying — the ultimate comfort food to balance the spice.
Loaded Potato Wedges: Crispy wedges topped with cheese, scallions, and a drizzle of ranch or hot sauce.
Cauliflower Fried Rice: Keep the cauliflower theme going with a lighter twist that still satisfies.

🥑 Dips & Extras

Ranch or Blue Cheese Dip: A must-have for dunking — cool, creamy, and made to pair with Buffalo heat.
Avocado Crema: Smooth, tangy, and a little unexpected — like guac, but silkier.
Garlic Hummus: A savory side that tones down the spice and boosts the flavor variety.

🍹 Drinks to Cool the Heat

Iced Lemonade or Limeade: Sweet, citrusy, and perfectly refreshing.
Cucumber Mint Sparkler: Fizzy, crisp, and cooling — ideal for those fiery bites.
Non-Alcoholic Beer or a Cold Lager: Classic pairings for wings that just work.

❓ FAQ – Buffalo Cauliflower Wings


Can I make Buffalo Cauliflower Wings in an air fryer?

Yes! The air fryer is a great option for extra crispiness. Cook at 400°F for 15–18 minutes, flipping halfway. They’ll turn out perfectly golden and crunchy with less oil.


Are Buffalo Cauliflower Wings vegan?

They can be! Just use plant-based milk for the batter and a vegan Buffalo sauce (many are naturally vegan). Serve with dairy-free ranch or blue cheese dip to keep it fully plant-based. 🌱


Can I make them gluten-free?

Absolutely. Swap the all-purpose flour with a gluten-free flour blend or chickpea flour for a delicious GF version. Just make sure your hot sauce is also gluten-free.


How spicy are these wings?

They’re moderately spicy, depending on the Buffalo sauce you use. You can reduce the heat by using a mild sauce or mixing it with a bit of melted butter or Greek yogurt to mellow it out.


How do I keep them crispy after tossing in sauce?

For the best texture, return them to the oven or air fryer for 5–10 minutes after tossing in sauce. This helps the coating re-crisp and bakes in the flavor.


What should I serve with Buffalo Cauliflower Wings?

Classic sides include celery sticks, carrots, and ranch or blue cheese dip. You can also pair them with mac and cheese, slaw, or seasoned fries. Check out our full “What to Serve” section for tasty ideas!


Can I prep these ahead of time?

You can prep the batter and cut the cauliflower in advance, but for the best texture, bake or air-fry them right before serving. Reheating can work, but they’re crispiest when fresh.

Please follow and like us:
onpost_follow
fb-share-icon197
Tweet120
Pinterest20
Share 20
submit to reddit

Beef Stroganoff Soup

Beef Stroganoff Soup

This hearty and comforting Beef Stroganoff Soup transforms the classic dish into a rich, soul-warming bowl of goodness. Tender ground beef is simmered with savory mushrooms and aromatic onions in a creamy beef broth infused with garlic, Worcestershire sauce, and tangy sour cream. Swirls of egg noodles soak up all the flavor, making every spoonful creamy, beefy, and deeply satisfying. Finished with a sprinkle of fresh parsley, this soup is the perfect fusion of cozy comfort and bold flavor—ideal for chilly nights or an easy weeknight dinner.

Beef Stroganoff Soup

No ratings yet
This Beef Stroganoff Soup is a flavor adventure! Tender beef and earthy mushrooms swim in a rich, savory broth, all brought together with a touch of red wine and a swirl of creamy sour cream. It's comfort food with a sophisticated twist, perfect for a cozy night in.
With simple ingredients and easy-to-follow instructions, this recipe is a winner for seasoned cooks and beginners alike. Each bite is an explosion of texture and taste, from the tender beef to the chewy egg noodles. You'll be amazed at how quickly this soup disappears from your bowls!
Prep Time 15 minutes
Cook Time 1 hour
Servings: 6 people
Course: Dinner, Lunch, Main Course
Cuisine: Eastern European, Ukraine
Calories: 361

Ingredients
  

  • 1 Tbsp Unsalted Butter
  • 3 Tbsp Olive Oil divided
  • 1 lb Stew Beef
  • 8 oz Cremini mushrooms sliced
  • 1 Cup Yellow Onion diced
  • 3 Cloves Garlic minced
  • 2 Tbsp Tomato Paste
  • 1 Tbsp Worcestershire Sauce
  • ½ Cup Dry Red Wine
  • 6 Cups Beef Stock low sodium
  • 2 Cups Egg noodles
  • ½ Cup Sour Cream
  • 2 Tbsp All-Purpose Flour
  • 1 Bunch Parsley fresh, for garnish
  • 1 pinch Kosher Salt to taste
  • 1 pinch Ground Black Pepper to taste

Method
 

  1. In a Dutch oven, melt the butter with 2 tablespoons of olive oil over medium-high heat. Add the beef, season with salt and pepper, and cook until browned on all sides. Remove the beef from the pot and set it aside.
  2. Add the onion to the pot with the remaining oil and cook until softened. Then, add the mushrooms and cook until they are tender.
  3. Stir in the tomato paste and Worcestershire sauce, making sure they are evenly distributed throughout the mushroom and onion mixture.
  4. Carefully pour the red wine into the pot, ensuring it covers the bottom, to deglaze. Bring the mixture to a boil over medium-high heat, then let the wine simmer and reduce for approximately 1-2 minutes, or until slightly thickened.
  5. Gently return the browned beef to the pot and pour in 5 cups of rich beef stock. Over medium-high heat, bring the liquid to a rolling boil. Once boiling, reduce the heat to low, cover the pot snugly, and let it simmer for 35-40 minutes. The beef will be perfectly tender and infused with flavor.
  6. Stir in the noodles, cover the pot, and simmer for 5-7 minutes, or until the noodles reach your desired level of tenderness.
  7. While the noodles cook, combine the sour cream and flour in a small bowl. Ladle 2 cups of the hot soup into the bowl and whisk until well combined. Return the mixture back into the pot and simmer for 1-2 minutes, stirring frequently, until thickened. If the noodles absorbed too much liquid, add more broth.
  8. Finish the soup with a sprinkle of salt and freshly ground black pepper according to your preference. Just before serving, stir in a handful of chopped fresh parsley for a bright, herbaceous lift.

Nutrition

Serving: 12ozCalories: 361kcalCarbohydrates: 22gProtein: 26gFat: 17gSaturated Fat: 6gPolyunsaturated Fat: 1gMonounsaturated Fat: 8gTrans Fat: 0.1gCholesterol: 74mgSodium: 628mgPotassium: 1112mgFiber: 2gSugar: 5gVitamin A: 1072IUVitamin C: 17mgCalcium: 93mgIron: 4mg

Notes

Beef Choice & Prep:
  • Cut: Use a tender cut of beef like sirloin, tenderloin, or New York strip.
  • Slicing: Slice the beef against the grain for maximum tenderness. Aim for thin, bite-sized pieces.
  • Don't overcrowd the pan: When searing the beef, work in batches to ensure proper browning. Overcrowding will cause the beef to steam instead of sear.
Flavor Boosters:
  • Umami: Don't be afraid to add a splash of Worcestershire sauce or a dollop of tomato paste to deepen the savory flavors.
  • Mushrooms: While not traditional in every stroganoff, mushrooms add a wonderful earthy note. Use cremini, button, or even wild mushrooms.
  • Aromatics: Sautéing onions and garlic with the mushrooms builds a flavorful foundation for the soup.
  • Herbs: Fresh thyme or a bay leaf simmered with the broth adds subtle complexity.
Texture & Consistency:
  • Noodles: Egg noodles are classic, but you can experiment with pappardelle, wide egg noodles, or even small pasta shapes.
  • Sour cream: For the creamiest texture, use full-fat sour cream.
  • Tempering: To prevent the sour cream from curdling, temper it by gradually whisking in a small amount of the hot soup before adding it to the pot.
  • Thickness: If your soup is too thin, you can thicken it with a cornstarch slurry (cornstarch mixed with a little cold water or broth).
Serving Suggestions:
  • Garnishes: Fresh parsley is a must, but you can also try chives, dill, or a dollop of crème fraîche.
  • Sides: Serve with crusty bread, a simple salad, or roasted vegetables.
Other Tips:
  • Broth: Use a good quality beef broth for the best flavor. Homemade is ideal, but a store-bought low-sodium broth works well too.
  • Simmering: Don't rush the simmering process. This allows the beef to become tender and the flavors to meld.
  • Salt & Pepper: Season gradually throughout the cooking process, tasting and adjusting as needed.
Enjoy your delicious homemade beef stroganoff soup!

Tried this recipe?

Let us know how it was!

Related Recipes

Ingredients

Ingredients:

  • 1 tablespoon unsalted butter
  • 3 tablespoons olive oil, divided
  • 1 pound stew beef, cut into 1-inch cubes
  • 8 ounces cremini mushrooms, sliced
  • 1 cup yellow onion, diced
  • 3 cloves garlic, minced
  • 2 tablespoons tomato paste
  • 1 tablespoon Worcestershire sauce
  • ½ cup dry red wine
  • 6 cups beef stock, low sodium
  • 2 cups egg noodles
  • ½ cup sour cream
  • 2 tablespoons all-purpose flour
  • 1 bunch fresh parsley, for garnish
  • Kosher salt, to taste
  • Ground black pepper, to taste

Image Gallery Beef Stroganoff Soup

Storage & Leftovers

Refrigerator:
Let the soup cool to room temperature, then transfer to an airtight container. Store in the refrigerator for up to 4 days. The noodles may absorb more liquid over time, so you can add a splash of broth or water when reheating to restore the consistency.

Freezer:
For best results, freeze the soup without the noodles (they can become mushy). Store the base in freezer-safe containers for up to 2 months. When ready to eat, thaw overnight in the fridge, reheat gently, and stir in freshly cooked noodles.

Reheating:
Warm leftovers on the stovetop over medium heat or microwave in short bursts, stirring in between. Add broth or milk as needed to loosen the soup. Stir in a spoonful of sour cream after reheating if you’d like to refresh the creaminess.

Please follow and like us:
onpost_follow
fb-share-icon197
Tweet120
Pinterest20
Share 20
submit to reddit

Subscribe for New Recipes

* indicates required

Intuit Mailchimp

Sopa De Lima

Sopa De Lima

Ditch the ordinary and dive into a bowl of sunshine with Sopa de Lima—Mexico’s bold and beautiful answer to chicken soup! This is no plain bowl of broth. It’s a flavor fiesta, bursting with tangy lime, tender chicken, warm spices, and the satisfying crunch of crispy tortilla strips.

Each spoonful is like a mini vacation for your taste buds, transporting you straight to the colorful streets of the Yucatán.

Why You’ll Love This Recipe:
🌞 Flavor Fusion – Bright lime meets savory chicken with subtle notes of cinnamon and clove—unexpected, unforgettable, and oh-so-delicious.
🌶️ Comfort Food with a Kick – Warm and soothing, yet lively enough to keep you on your toes.
👩‍🍳 Beginner-Friendly – Exotic flavors, simple steps. You’ll be a sopa superstar in no time!
💪 Healthy & Nourishing – Lean protein, fresh veggies, and a vibrant, feel-good broth.
🎉 Crowd-Pleaser – Great for gatherings or a cozy solo night in. Seconds are basically guaranteed.

So grab your limes, crank up the mariachi music, and bring the magic of Sopa de Lima to your kitchen!

Sopa de Lima

No ratings yet
Sopa de lima is a traditional Mexican soup that originates from the Yucatán Peninsula. It's known for its refreshing and zesty flavor, thanks to the prominent use of lime juice. The soup typically features a light chicken or turkey broth, shredded meat (often turkey), and a blend of vegetables and spices.
Prep Time 10 minutes
Cook Time 45 minutes
Servings: 6 people
Course: Soup, Starter
Cuisine: Mexican
Calories: 139

Ingredients
  

  • 2 Tbsp Olive Oil
  • 2 Roma Tomatoes
  • 1 Large Yellow Onion fine dice
  • 1 Anahiem Pepper
  • ¼ tsp Ground Cinnamon
  • tsp Ground Cloves
  • 2 tsp Kosher Salt
  • 3 Cloves Garlic minced
  • l lbs Chicken Breast boneless & skinless
  • 8 Cups Chicken Broth
  • ½ Cup Lime Juice fresh squeezed
For Topping
  • 1 Corn Tortillas cut into strips and fry
  • 1 Avocado diced

Method
 

  1. Heat the olive oil in a large pot or Dutch oven over medium-high heat. Add the chopped tomatoes, onion, and bell peppers. Cook, stirring occasionally, until the vegetables are softened and slightly caramelized.
  2. Add the ground cinnamon, cloves, and kosher salt to the pot. Stir well to incorporate the spices into the vegetables. Continue cooking for another 5 minutes, allowing the flavors to meld.
  3. Stir in the minced garlic and cook until it becomes aromatic and softens slightly, about 1 minute.
  4. Pour the chicken broth into the pot, then add the chicken breasts. Bring the mixture to a boil over high heat. Once boiling, reduce the heat to low, cover the pot, and simmer for 20 minutes. Remove the pot from the heat.
  5. Remove any foam or impurities from the surface of the soup. Shred the cooked chicken with two forks and set it aside.
  6. Add the shredded chicken back to the pot. Stir in the lime juice. Taste the soup and add more salt if needed.
  7. Now, ladle the steaming soup into bowls and finish with a sprinkle of crispy tortilla strips and some creamy diced avocado. Enjoy!

Nutrition

Serving: 12ozCalories: 139kcalCarbohydrates: 10gProtein: 3gFat: 10gSaturated Fat: 1gPolyunsaturated Fat: 1gMonounsaturated Fat: 7gCholesterol: 6mgSodium: 1961mgPotassium: 360mgFiber: 3gSugar: 4gVitamin A: 310IUVitamin C: 25mgCalcium: 33mgIron: 1mg

Notes

Ingredients:
  • Broth: While chicken broth is most common, you can use turkey broth for a more traditional Yucatecan flavor. Homemade broth will add the most depth.
  • Meat: Shredded chicken is widely used, but turkey is more traditional in the Yucatán. You can use leftover cooked poultry or poach chicken breasts specifically for the soup.
  • Vegetables: The classic base includes tomatoes, onions, and bell peppers. Some recipes also add carrots or jalapeños for a bit of heat.
  • Spices: Oregano is essential. Cumin, cloves, and cinnamon are also common additions.
  • Lime Juice: Freshly squeezed lime juice is key for the signature tart flavor. Use plenty!
  • Tortilla Strips: These add a wonderful crunch. You can use store-bought or make your own by frying or baking corn tortillas.
  • Avocado: Diced avocado is a popular garnish, adding creaminess and a contrasting flavor.
Cooking Tips:
  • Sauté the Vegetables: Don't rush the sautéing of the vegetables. Allow them to soften and develop a bit of sweetness.
  • Bloom the Spices: Cooking the spices briefly in the oil helps to intensify their flavor.
  • Simmer Gently: Simmering the soup allows the flavors to meld and the chicken to become tender.
  • Skim the Broth: Skim off any foam or impurities that rise to the surface of the soup for a clearer broth.
  • Lime Juice at the End: Add most of the lime juice towards the end of cooking to preserve its fresh flavor.
  • Taste and Adjust: Taste the soup before serving and adjust the seasonings (especially salt and lime juice) to your liking.
Serving Suggestions:
  • Garnish: Don't forget the tortilla strips and avocado! Cilantro sprigs and lime wedges are also nice additions.
  • Sides: Sopa de lima is often served with warm tortillas or crusty bread for dipping.
  • Pairings: It's a great starter for heavier Mexican dishes like enchiladas, tacos, or mole.
Variations:
  • Spicy: Add some diced jalapeños or serrano peppers to the soup for extra heat.
  • Vegetarian: Omit the chicken or turkey and use vegetable broth. You can add more vegetables like zucchini or corn.
  • Hearty: Add cooked rice or noodles to the soup for a more filling meal.
With these tips, you'll be able to make a delicious and authentic sopa de lima that captures the essence of Yucatecan cuisine!

Tried this recipe?

Let us know how it was!

Related Recipes

Ingredients

Ingredients:

  • 2 tablespoons olive oil
  • 1 large yellow onion, finely diced
  • 2 Roma tomatoes, chopped
  • 1 Anaheim pepper, seeded and chopped
  • ¼ teaspoon ground cinnamon
  • ⅛ teaspoon ground cloves
  • 2 teaspoons kosher salt
  • 3 cloves garlic, minced
  • 1 pound boneless, skinless chicken breasts
  • 8 cups chicken broth
  • ½ cup freshly squeezed lime juice

For Topping:

  • 1 corn tortilla, cut into strips and fried
  • 1 avocado, diced

Image Gallery Sopa de Lima

Storage & Leftovers

Storing Your Leftover Sopa de Lima:

  • Cool it Down: Before storing, let the soup cool to room temperature. This prevents condensation, which can make the soup watery.
  • The Right Container: Use an airtight container to keep the soup fresh and prevent it from absorbing other flavors in your fridge. 
  • Refrigerator Storage: Store leftover sopa de lima in the refrigerator for 3 to 4 days.
  • Freezer-Friendly: You can freeze it for up to 2 months. For best results, freeze the soup without the toppings, as they might not hold up well in the freezer.

Reheating Tips:

  • Thaw if Frozen: Thaw the soup in the refrigerator overnight or in a bowl of cold water.
  • Stovetop Reheating: Reheat gently in a saucepan over medium-low heat, stirring occasionally.
  • Microwave Reheating: Heat in short bursts, stirring between each burst, until warmed through.  
  • Adjust Consistency: If the soup is too thick after reheating, add a little chicken broth or water to thin it out.

Topping Tips:

  • Tortilla Strips: Store leftover tortilla strips separately in an airtight container at room temperature to maintain their crispiness.
  • Avocado: Add fresh avocado when serving the reheated soup, as it tends to brown quickly.

Extra Tips for Sopa Savvy:

  • Separate Storage: If possible, store the toppings (tortilla strips and avocado) separately from the soup to prevent them from getting soggy.
  • Flavor Boost: When reheating, add a squeeze of fresh lime juice and a sprinkle of fresh cilantro to brighten the flavors.

With these tips, you can enjoy your homemade sopa de lima even days after you’ve made it! 🍲

Please follow and like us:
onpost_follow
fb-share-icon197
Tweet120
Pinterest20
Share 20
submit to reddit

Subscribe for New Recipes

* indicates required

Intuit Mailchimp

Blackened Shrimp & Grits

🔥🦐 Southern-Style Blackened Shrimp & Grits 🍽️

Smoky, spicy shrimp served over rich, creamy grits—this Southern-style classic is bold, comforting, and impossible to resist.


🦐 Southern-Style Blackened Shrimp and Grits

Looking to bring a little Southern comfort to your table? This Southern-Style Blackened Shrimp and Grits recipe is the ultimate combination of smoky heat, creamy texture, and bold flavor. 🧈🔥 Whether you’re planning a cozy brunch, a laid-back dinner, or simply craving something rich and satisfying, this dish delivers big on taste without complicated steps.

It starts with tender shrimp, generously coated in a homemade blackened seasoning blend that’s equal parts smoky, spicy, and savory. After a quick sear in a hot skillet, the shrimp develop that crave-worthy charred crust that locks in flavor. 🦐 Meanwhile, the grits cook low and slow until they’re silky-smooth—then we stir in butter, cream, and sharp cheddar cheese for maximum comfort-food energy. 🧀

What makes this shrimp and grits recipe truly special is its balance of heat and creaminess. The spicy blackened shrimp contrast beautifully with the richness of the grits, creating a layered bite that’s both comforting and exciting. 🌶️

Even better, it comes together quickly and uses pantry-friendly ingredients, making it weeknight-friendly without sacrificing that restaurant-quality feel. Add a squeeze of lemon, a sprinkle of green onions, or even a poached egg on top—there’s plenty of room to make it your own.

So if you’re looking for a Southern-style shrimp and grits recipe that’s bold, buttery, and totally unforgettable, this one’s guaranteed to impress. Serve it hot and dig in—you’ve just found your new comfort food favorite. 🍽️

  • Why You’ll Love This Recipe

    • 🦐 Blackened Shrimp: Coated in bold Cajun spices and seared to perfection

    • 🧈 Creamy Grits: Buttery, cheesy, and ultra-smooth

    • 🌶️ Big Flavor: Spicy, smoky, and savory in every bite

    • 🧄 Simple Ingredients: Pantry staples with Southern soul

    • ⏱️ Quick to Make: Ready in under 30 minutes

    • 🍳 Versatile Meal: Perfect for brunch, dinner, or date night

    • 🧺 Comfort Food Favorite: Cozy, filling, and deeply satisfying

    • 🍋 Customizable: Add lemon, green onions, or a poached egg for a twist

👩‍🍳 How to Make Southern-Style Blackened Shrimp & Grits

Making this bold and comforting dish is easier than you think. Follow these simple steps to bring Southern flavor to your table:

🔥 Step 1: Make the Blackened Seasoning

In a small bowl, mix together paprika, garlic powder, onion powder, cayenne, dried thyme, oregano, salt, and black pepper.
Tip: Adjust the cayenne for more or less heat. 🌶️

🍤 Step 2: Season the Shrimp

Pat the shrimp dry, then toss them in olive oil and coat with the blackened spice mix until fully covered.

🍳 Step 3: Sear the Shrimp

Heat a large skillet over medium-high heat. Cook the shrimp for 1–2 minutes per side, just until blackened and cooked through. Set aside.

🍚 Step 4: Cook the Grits

In a saucepan, bring water or chicken broth to a boil. Slowly whisk in the grits and reduce to a simmer. Cook according to package instructions (usually 15–20 minutes), stirring often.

🧀 Step 5: Make Them Creamy

Once thickened, stir in butter, heavy cream (or milk), and shredded sharp cheddar cheese until melted and smooth.

🧂 Step 6: Season to Taste

Add salt and pepper as needed. For extra richness, you can stir in a bit more butter or cheese. 😋

🍽️ Step 7: Assemble

Spoon the creamy grits into shallow bowls. Top with a generous helping of blackened shrimp.

🧑‍🍳 Step 8: Garnish & Serve

Finish with sliced green onions, a squeeze of lemon, or even a poached egg on top for extra flair. Serve immediately and enjoy!

Jump to Section

📱 Follow Us 

📬 Subscribe for Updates

* indicates required

Intuit Mailchimp

Blackened Shrimp & Grits

No ratings yet
Blackened shrimp and grits is a classic Southern dish that features shrimp coated in a flavorful blend of spices and cooked over high heat until blackened, served over creamy, cheesy grits. It's a delicious and satisfying meal that's perfect for any occasion.
Prep Time 5 minutes
Cook Time 44 minutes
Servings: 6 People
Course: Brunch, Main Course
Cuisine: American, Cajun, Creole, Southern
Calories: 450

Ingredients
  

For The Grits
  • Cups Chicken Broth low sodium, divided
  • Cups Milk fat free
  • ¼ Cup Water
  • 1 tsp Kosher Salt
  • 1 Cup Grits stone ground
  • ½ Tbsp Unsalted Butter
  • oz Cheddar Cheese sharp,freshly grated, divided
  • 1 Tbsp Parmesan Cheese
For the shrimp
  • ½ tsp Paprika
  • ¼ tsp Cayenne Pepper
  • ½ tsp Garlic powder
  • ½ tsp Thyme Dried
  • ½ tsp Oregano
  • ¼ tsp Kosher Salt
  • 1 Olive oil spray
  • tsp Ground Black Pepper
  • 24 Jumbo Shrimp Cleaned & Deviened
  • 3 tbsp Green Onions sliced
  • 1 Small Lime cut into wedges

Method
 

Spice Mix:
  1. Combine paprika, cayenne pepper, garlic powder, thyme, oregano, salt, and ground black pepper in a bowl.
    ½ tsp Paprika, ¼ tsp Cayenne Pepper, ½ tsp Garlic powder, ½ tsp Thyme, ½ tsp Oregano, ¼ tsp Kosher Salt, ⅛ tsp Ground Black Pepper
Shrimp:
  1. Lightly oil the shrimp and coat them generously in the spice mix.
    24 Jumbo Shrimp
Grits:
  1. Bring broth, milk, water, and salt to a boil. Slowly whisk in grits and cook, covered, for 35-45 minutes, stirring occasionally. Remove from heat and stir in butter, cheddar cheese, and Parmesan.
    2½ Cups Chicken Broth, 1¼ Cups Milk, ¼ Cup Water, 1 tsp Kosher Salt, 1 Cup Grits, ½ Tbsp Unsalted Butter, 1 Tbsp Parmesan Cheese
Cooking the Shrimp:
  1. Heat olive oil in a cast-iron skillet over medium-high heat. Cook shrimp for 2 minutes per side until opaque and spices are fragrant.
    1 Olive oil spray
Assembly:
  1. Divide grits among plates and top with cheddar cheese. Nestle cooked shrimp on top of grits. Deglaze the pan with broth, reduce by half, and drizzle over each plate. Garnish with scallions and serve with lime wedges.
    1½ oz Cheddar Cheese, 3 tbsp Green Onions, 1 Small Lime

Nutrition

Serving: 10ozCalories: 450kcalCarbohydrates: 73gProtein: 29gFat: 7gSaturated Fat: 4gPolyunsaturated Fat: 1gMonounsaturated Fat: 2gTrans Fat: 0.1gCholesterol: 112mgSodium: 1142mgPotassium: 373mgFiber: 2gSugar: 60gVitamin A: 950IUVitamin C: 6mgCalcium: 504mgIron: 2mg

Notes

Grits:
  • Type of Grits: Stone-ground grits will take longer to cook (35-40 minutes) but have a nuttier flavor. Quick grits cook faster (5 minutes) but have a softer texture. Choose based on your preference.
  • Creamy vs. Cheesy: This recipe uses butter and cheese for creaminess. For a lighter version, omit the cheese or use less. You can also add a splash of heavy cream at the end for extra richness.
  • Adjusting Liquid: The amount of liquid needed for grits can vary depending on the type and brand. Start with the amount in the recipe and add more water, a tablespoon at a time, if the grits become too thick before they are cooked through.
Shrimp:
  • Don't overcrowd: Cook the shrimp in batches to avoid overcrowding the pan. This will ensure even cooking and a nice sear on the shrimp.
  • Watch the heat: Blackened seasoning can burn easily. Keep an eye on the pan and adjust the heat as needed to prevent the spices from burning.
  • Shrimp size: Larger shrimp will take a few minutes longer to cook through than smaller shrimp. Adjust cooking time accordingly.
Other Tips:
  • Deglazing: The drippings in the pan from cooking the shrimp have a lot of flavor. Deglazing with broth helps loosen them up and creates a delicious pan sauce for your dish.
  • Serving Temperature: Serve immediately to enjoy the creamy grits and the crispy shrimp.
  • Substitutions: You can use vegetable broth instead of chicken broth for a vegetarian option. If you don't have Parmesan cheese, you can use all cheddar cheese.

Tried this recipe?

Let us know how it was!

🍽️ What to Serve with Blackened Shrimp and Grits

🥬 Fresh & Light Sides (to balance the richness)

  • Garlicky Collard Greens – Sautéed with garlic and a splash of vinegar

  • Southern-Style Green Beans – Stewed or sautéed with onions and bacon

  • Simple Arugula Salad – Light lemon vinaigrette cuts through the creamy grits

  • Grilled Asparagus or Zucchini – Adds a crisp, charred element


🍞 Breads & Starchy Add-Ons

  • Skillet Cornbread – Buttery, crumbly, and perfect for soaking up the sauce

  • Buttermilk Biscuits – Fluffy and comforting alongside creamy grits

  • Fried Green Tomatoes – A tangy, crispy contrast to the soft texture of the grits


🥂 Drink Pairings

  • Sweet Tea or Lemonade – Southern classics that balance the heat

  • Sparkling Water with Lime – Keeps the palate refreshed

  • Crisp White Wine – Try a Sauvignon Blanc or Chardonnay

  • Spicy Bloody Mary – Especially great if serving for brunch


🍮 Dessert Ideas to Finish the Meal

  • Peach Cobbler – Warm, fruity, and a perfect Southern finish

  • Banana Pudding – Light, creamy, and nostalgic

  • Pecan Pie Bars – A sweet bite-size option for easy cleanup

❓ Frequently Asked Questions

🔥 What does “blackened” mean in this recipe?

“Blackened” refers to a cooking method where shrimp are coated in a bold spice mix—typically including paprika, garlic powder, cayenne, thyme, and oregano—then seared in a hot skillet. The high heat forms a charred, flavorful crust on the outside while keeping the shrimp juicy inside.


⏱️ Can I make this recipe ahead of time?

Yes! You can cook the grits ahead and reheat them with a splash of milk or broth. The shrimp are best cooked just before serving, but you can prep the spice mix and marinate the shrimp a few hours in advance.


🧈 What kind of grits should I use?

Stone-ground or quick-cooking grits both work well. Stone-ground grits offer more texture and flavor, while quick grits are great for saving time. Avoid instant grits for this recipe—they lack the creaminess needed to balance the bold shrimp.


🥶 Can I use frozen shrimp?

Absolutely. Just be sure to thaw the shrimp completely and pat them dry before seasoning. Extra moisture can prevent them from searing properly and developing that classic blackened crust.


🌽 What goes well with shrimp and grits?

Try it with sautéed greens, skillet cornbread, or a fresh arugula salad. You can also check out our full list of what to serve with shrimp and grits for more pairing ideas.


🔄 Can I make it dairy-free?

Yes—just substitute dairy-free butter and use a plant-based milk (like oat or almond) for the grits. For the cheese, use your favorite dairy-free shredded alternative or skip it altogether for a lighter version.


🌶️ How spicy is this dish?

It’s moderately spicy, thanks to cayenne and paprika in the seasoning. You can easily adjust the heat up or down to suit your taste. For extra fire, add a pinch of crushed red pepper or serve with hot sauce on the side.

Please follow and like us:
onpost_follow
fb-share-icon197
Tweet120
Pinterest20
Share 20
submit to reddit