Chicken Ranch Tacos

🌮 Chicken Ranch Tacos: Creamy, Crispy, Crowd-Pleasing

These Chicken Ranch Tacos are loaded with juicy chicken, tangy ranch, and your favorite toppings for a fast, flavorful meal everyone will love. 🌮🔥

🌮 Zesty, Creamy, Ranchy Goodness – In a Taco

Are you looking for a quick and flavorful way to elevate taco night? If so, these Chicken Ranch Tacos are exactly what you need. As a result of combining juicy shredded chicken, cool and creamy ranch, and fresh toppings, they’re bold, satisfying, and simple to prepare. In particular, the contrast of warm tortillas with crisp lettuce and tangy sauce makes every bite memorable.

Furthermore, this recipe is easy to customize. For example, you can add sliced jalapeños for heat, toss in avocado for creaminess, or use lettuce wraps for a low-carb option. Because of this flexibility, it’s perfect for both picky eaters and adventurous food lovers.

In addition, these tacos are ideal for meal prep or weeknight dinners. Thanks to the use of simple ingredients and minimal cooking, you’ll have dinner on the table in no time. Therefore, if you’re short on time but still want something crave-worthy, Chicken Ranch Tacos are the answer. As a bonus, they’re guaranteed to be a crowd-pleaser.

🐔 Protein-Packed Chicken

🥬 Fresh & Crunchy Toppings

🧄 Zesty Ranch Flavor

⏱️ 30-Minute Meal

🌮 Taco Night Favorite

🔥 Optional Heat Kick

🧀 Cheesy & Creamy

🍽️ Family-Approved

🔪 How to Make Chicken Ranch Tacos

Step 1: Prepare the Chicken
In a bowl, toss the cooked, shredded or chopped chicken with ranch dressing. For extra flavor, mix in taco seasoning or ranch seasoning if desired.

Step 2: Warm the Tortillas
Heat tortillas in a dry skillet over medium heat for about 30 seconds per side, or microwave them in a damp towel for 20–30 seconds until soft and pliable.

Step 3: Build Your Tacos
Spoon the ranch-coated chicken into each tortilla. Top with shredded cheese, lettuce, tomatoes, red onions, and jalapeños.

Step 4: Add Finishing Touches
Drizzle with more ranch or a spicy sauce if you like. Garnish with chopped cilantro and a squeeze of fresh lime juice.

Step 5: Serve & Enjoy
Serve immediately while warm. Great with tortilla chips, rice, or a crisp side salad.

Jump to Section

📱 Follow Us 

📬 Subscribe for Updates

* indicates required

Intuit Mailchimp

Chicken Ranch Tacos

No ratings yet
Creamy, Zesty, Totally Craveable 🌮🐔🥗Juicy chicken tossed in ranch seasoning, loaded into warm tortillas, and topped with all your favorite fixings. These tacos are quick, flavorful, and a guaranteed hit on any night! 🎉🔥
Prep Time 15 minutes
Cook Time 10 minutes
Servings: 6 people
Course: Appetizer, Main Course
Cuisine: American, American Fusion
Calories: 520

Ingredients
  

  • ½ Cup Ranch Dressing
  • ¼ Cup Sour Cream
  • 1 oz Taco Seasoning Mix divided
  • 1 Tbsp Salsa mild chunky
  • 2 Cups Rotisserie chicken shredded
  • 8 Corn Tortillas 6 inch
  • 1 Cup Lettuce Shredded
  • 1 Large Tomato chopped
  • 4 Large Green Onions sliced
  • 4 oz Black Olives slices
  • 1 Large Avocado peeled, pitted and diced (optional)
  •  
    1 Cup Colby-Monterey Jack Cheese shredded

Equipment

1 Non Stick Pan (Flip it, fry it, love it 🍳🧼🔥Cook without the mess! This non-stick pan makes flipping, searing, and cleanup a total breeze—no sticking, no scrubbing.)
1 Cutting board (Chop it like it’s hot 🔪🥕🍗A sturdy cutting board keeps your prep clean, safe, and smooth—veggies, meats, and everything in between. Kitchen must-have!)
1 Chef's knife (Slice, dice, and chop like a pro 🔪🌿🍗A sharp chef’s knife makes prep fast and easy—perfect for herbs, meats, and veggies. Balanced, reliable, and ready for anything.)

Method
 

  1. In a small bowl, combine the ranch dressing, sour cream, 1 teaspoon of the taco seasoning, and salsa. Stir well to ensure all the ingredients are evenly distributed. Cover the bowl and refrigerate the sauce until you're ready to serve the tacos.
    ½ Cup Ranch Dressing, ¼ Cup Sour Cream, 1 oz Taco Seasoning Mix, 1 Tbsp Salsa
  2. In a separate bowl, add the cooked chicken and the remaining taco seasoning. Toss the chicken to coat it evenly in the seasoning. Cover the bowl loosely with wax paper or plastic wrap to prevent splattering. In a skillet, heat oil over medium heat. Add chicken and remaining taco seasoning; cook until heated through.
    2 Cups Rotisserie chicken, 1 oz Taco Seasoning Mix
  3. Warm the tortillas in a dry skillet over medium heat for about a minute on each side, or until they are soft and pliable. This will make them easier to fold and prevent them from cracking.
    8 Corn Tortillas
  4. Place a warm tortilla on a plate. Add a generous scoop of the seasoned chicken to the center of the tortilla. Top the chicken with your desired toppings, such as shredded lettuce, diced tomatoes, chopped green onions, sliced olives, diced avocado, shredded cheese, and a spoonful of the creamy ranch dressing mixture.
    1 Cup Lettuce, 1 Large Tomato, 4 Large Green Onions, 4 oz Black Olives, 1 Large Avocado, 1 Cup Colby-Monterey Jack Cheese

Nutrition

Serving: 10ozCalories: 520kcalCarbohydrates: 27gProtein: 31gFat: 34gSaturated Fat: 10gPolyunsaturated Fat: 7gMonounsaturated Fat: 10gCholesterol: 109mgSodium: 1315mgPotassium: 430mgFiber: 7gSugar: 4gVitamin A: 1350IUVitamin C: 13mgCalcium: 228mgIron: 2mg

Notes

Ingredients:
  • Chicken: Use cooked chicken. Leftovers or rotisserie chicken are great options.
  • Tortillas: Use your favorite type of tortillas, such as corn or flour.
  • Ranch Dressing: Use your favorite brand of ranch dressing or make your own.
  • Sour Cream: Sour cream adds a creamy tanginess to the sauce. You can substitute with Greek yogurt for a lighter option.
  • Taco Seasoning: Use a store-bought packet or make your own blend of spices.
  • Salsa: Choose your favorite type of salsa, from mild to spicy.
  • Toppings: Common toppings include shredded lettuce, diced tomatoes, chopped green onions, sliced olives, diced avocado, and shredded cheese.
Cooking Tips:
  • Prepare the Sauce: Combine the ranch dressing, sour cream, taco seasoning, and salsa in a bowl. Cover and refrigerate until ready to serve.
  • Season and Heat the Chicken: Toss the cooked chicken with taco seasoning and heat it in a skillet with a drizzle of oil until warmed through and fragrant.
  • Warm the Tortillas: Warm the tortillas in a dry skillet over medium heat to make them pliable and prevent them from cracking.
  • Assemble the Tacos: Fill the tortillas with the seasoned chicken and your favorite toppings.
  • Don't Overcrowd: When cooking the chicken in the skillet, avoid overcrowding the pan. This will ensure that the chicken heats evenly and doesn't steam.
Serving Suggestions:
  • Garnish: Garnish with extra chopped cilantro, a squeeze of lime juice, or a dollop of guacamole.
  • Sides: Serve with rice, beans, or a side salad for a complete meal.
  • Presentation: Arrange the tacos on a platter or in a basket for a fun and casual presentation.
Variations:
  • Spicy: Add more hot sauce or jalapeños to the chicken or the sauce.
  • Vegetarian: Use a plant-based chicken substitute or omit the chicken altogether and add more vegetables to the tacos.
  • Different Proteins: Try using ground beef, pork, or shrimp instead of chicken.
With these tips, you'll be able to create delicious and satisfying Ranch Chicken Tacos that are perfect for any occasion!

Tried this recipe?

Let us know how it was!

🧂 What to Serve with Chicken Ranch Tacos

These tacos are bold, creamy, and bursting with flavor — but they’re even better when paired with the right sides. Whether you’re putting together a taco night for family or serving a crowd, here are some quick and tasty ideas to round out your meal:

🌽 Fresh & Crunchy

  • Mexican Street Corn (Elote): Sweet corn with cotija, mayo, lime, and chili powder — messy, spicy, and irresistible.

  • Simple Corn Salsa: A refreshing mix of corn, red onion, lime, and cilantro. Bonus: it doubles as a topping and a side.

  • Southwest Coleslaw: Creamy slaw with cabbage, carrots, and lime to balance the richness of the ranch.

🍚 Hearty & Filling

  • Cilantro Lime Rice: A zesty rice side that complements ranch flavors and soaks up any leftover sauce.

  • Refried Beans or Black Beans: Warm, comforting, and budget-friendly — a classic for taco night.

  • Taco Pasta Salad: Add ranch-flavored pasta salad to echo the main flavor theme.

🥑 Dips & Add-Ons

  • Homemade Guacamole: Creamy avocado with lime and garlic brings freshness to every bite.

  • Queso Dip + Chips: Because cheese makes everything better.

  • Pico de Gallo or Chunky Salsa: Bright, acidic, and perfect to spoon over your tacos or scoop up with chips.

🍹 Drinks to Pair

  • Pineapple Agua Fresca: Refreshing, light, and fruity — perfect for cooling down.

  • Sparkling Limeade or Margaritas: If you’re celebrating, go all out.

Chicken Ranch Tacos FAQ

Q: Can I make these tacos ahead of time?
A: Yes! You can prep the chicken filling up to 3 days in advance. Store it in an airtight container and warm it up when ready to assemble. For best results, add toppings just before serving.


Q: What kind of chicken works best?
A: Shredded rotisserie chicken, grilled chicken breasts, or baked thighs all work well. Just make sure it’s cooked and seasoned before adding ranch dressing.


Q: Can I use store-bought ranch?
A: Absolutely. Bottled ranch works great, but you can also use homemade for a fresher flavor. For a twist, try chipotle ranch or avocado ranch.


Q: Are these tacos spicy?
A: Not by default, but you can easily turn up the heat with jalapeños, hot sauce, or spicy ranch.


Q: What sides go well with these tacos?
A: Serve them with tortilla chips, Mexican rice, black bean salad, or a simple corn salsa.

Please follow and like us:
onpost_follow
fb-share-icon197
Tweet120
Pinterest20
Share 20
submit to reddit

Cottage Pie Baked Potato

Cottage Pie Baked Potato

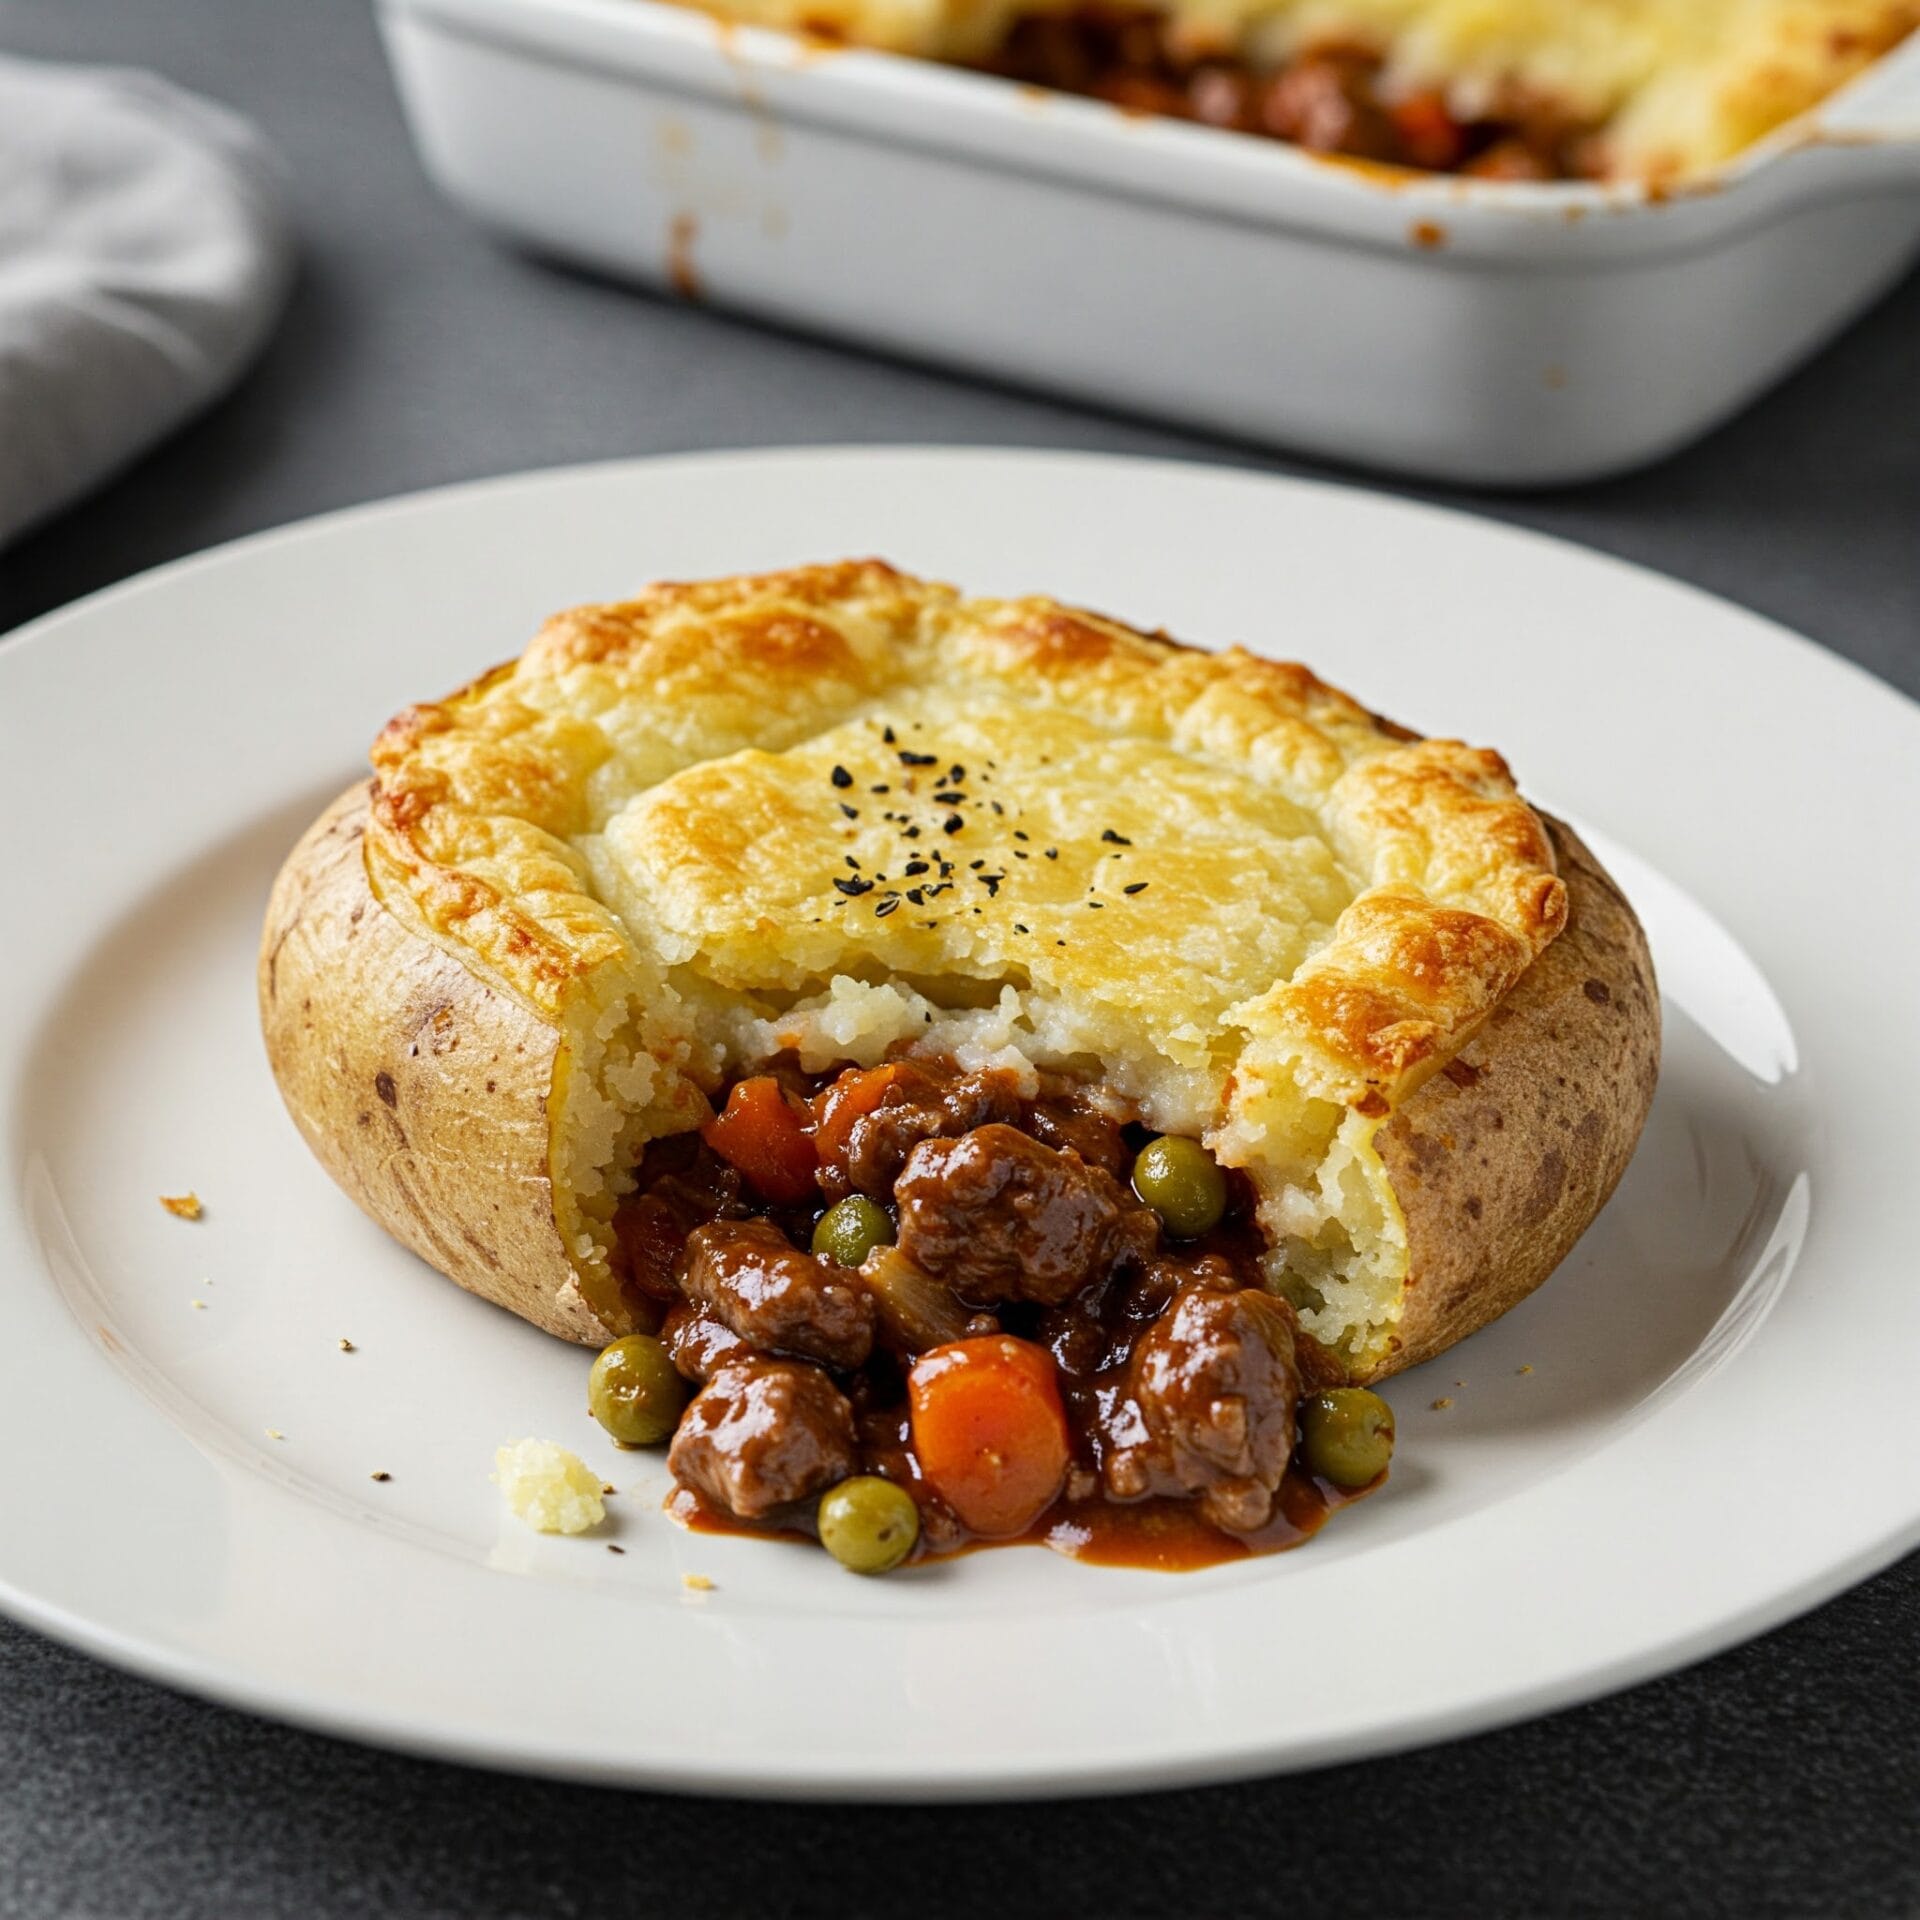
The Ultimate Comfort Food Mashup: Cottage Pie Baked Potato

Forget everything you thought you knew about cottage pie and baked potatoes! This dish takes two classic comfort foods and mashes them up into one incredible culinary creation.

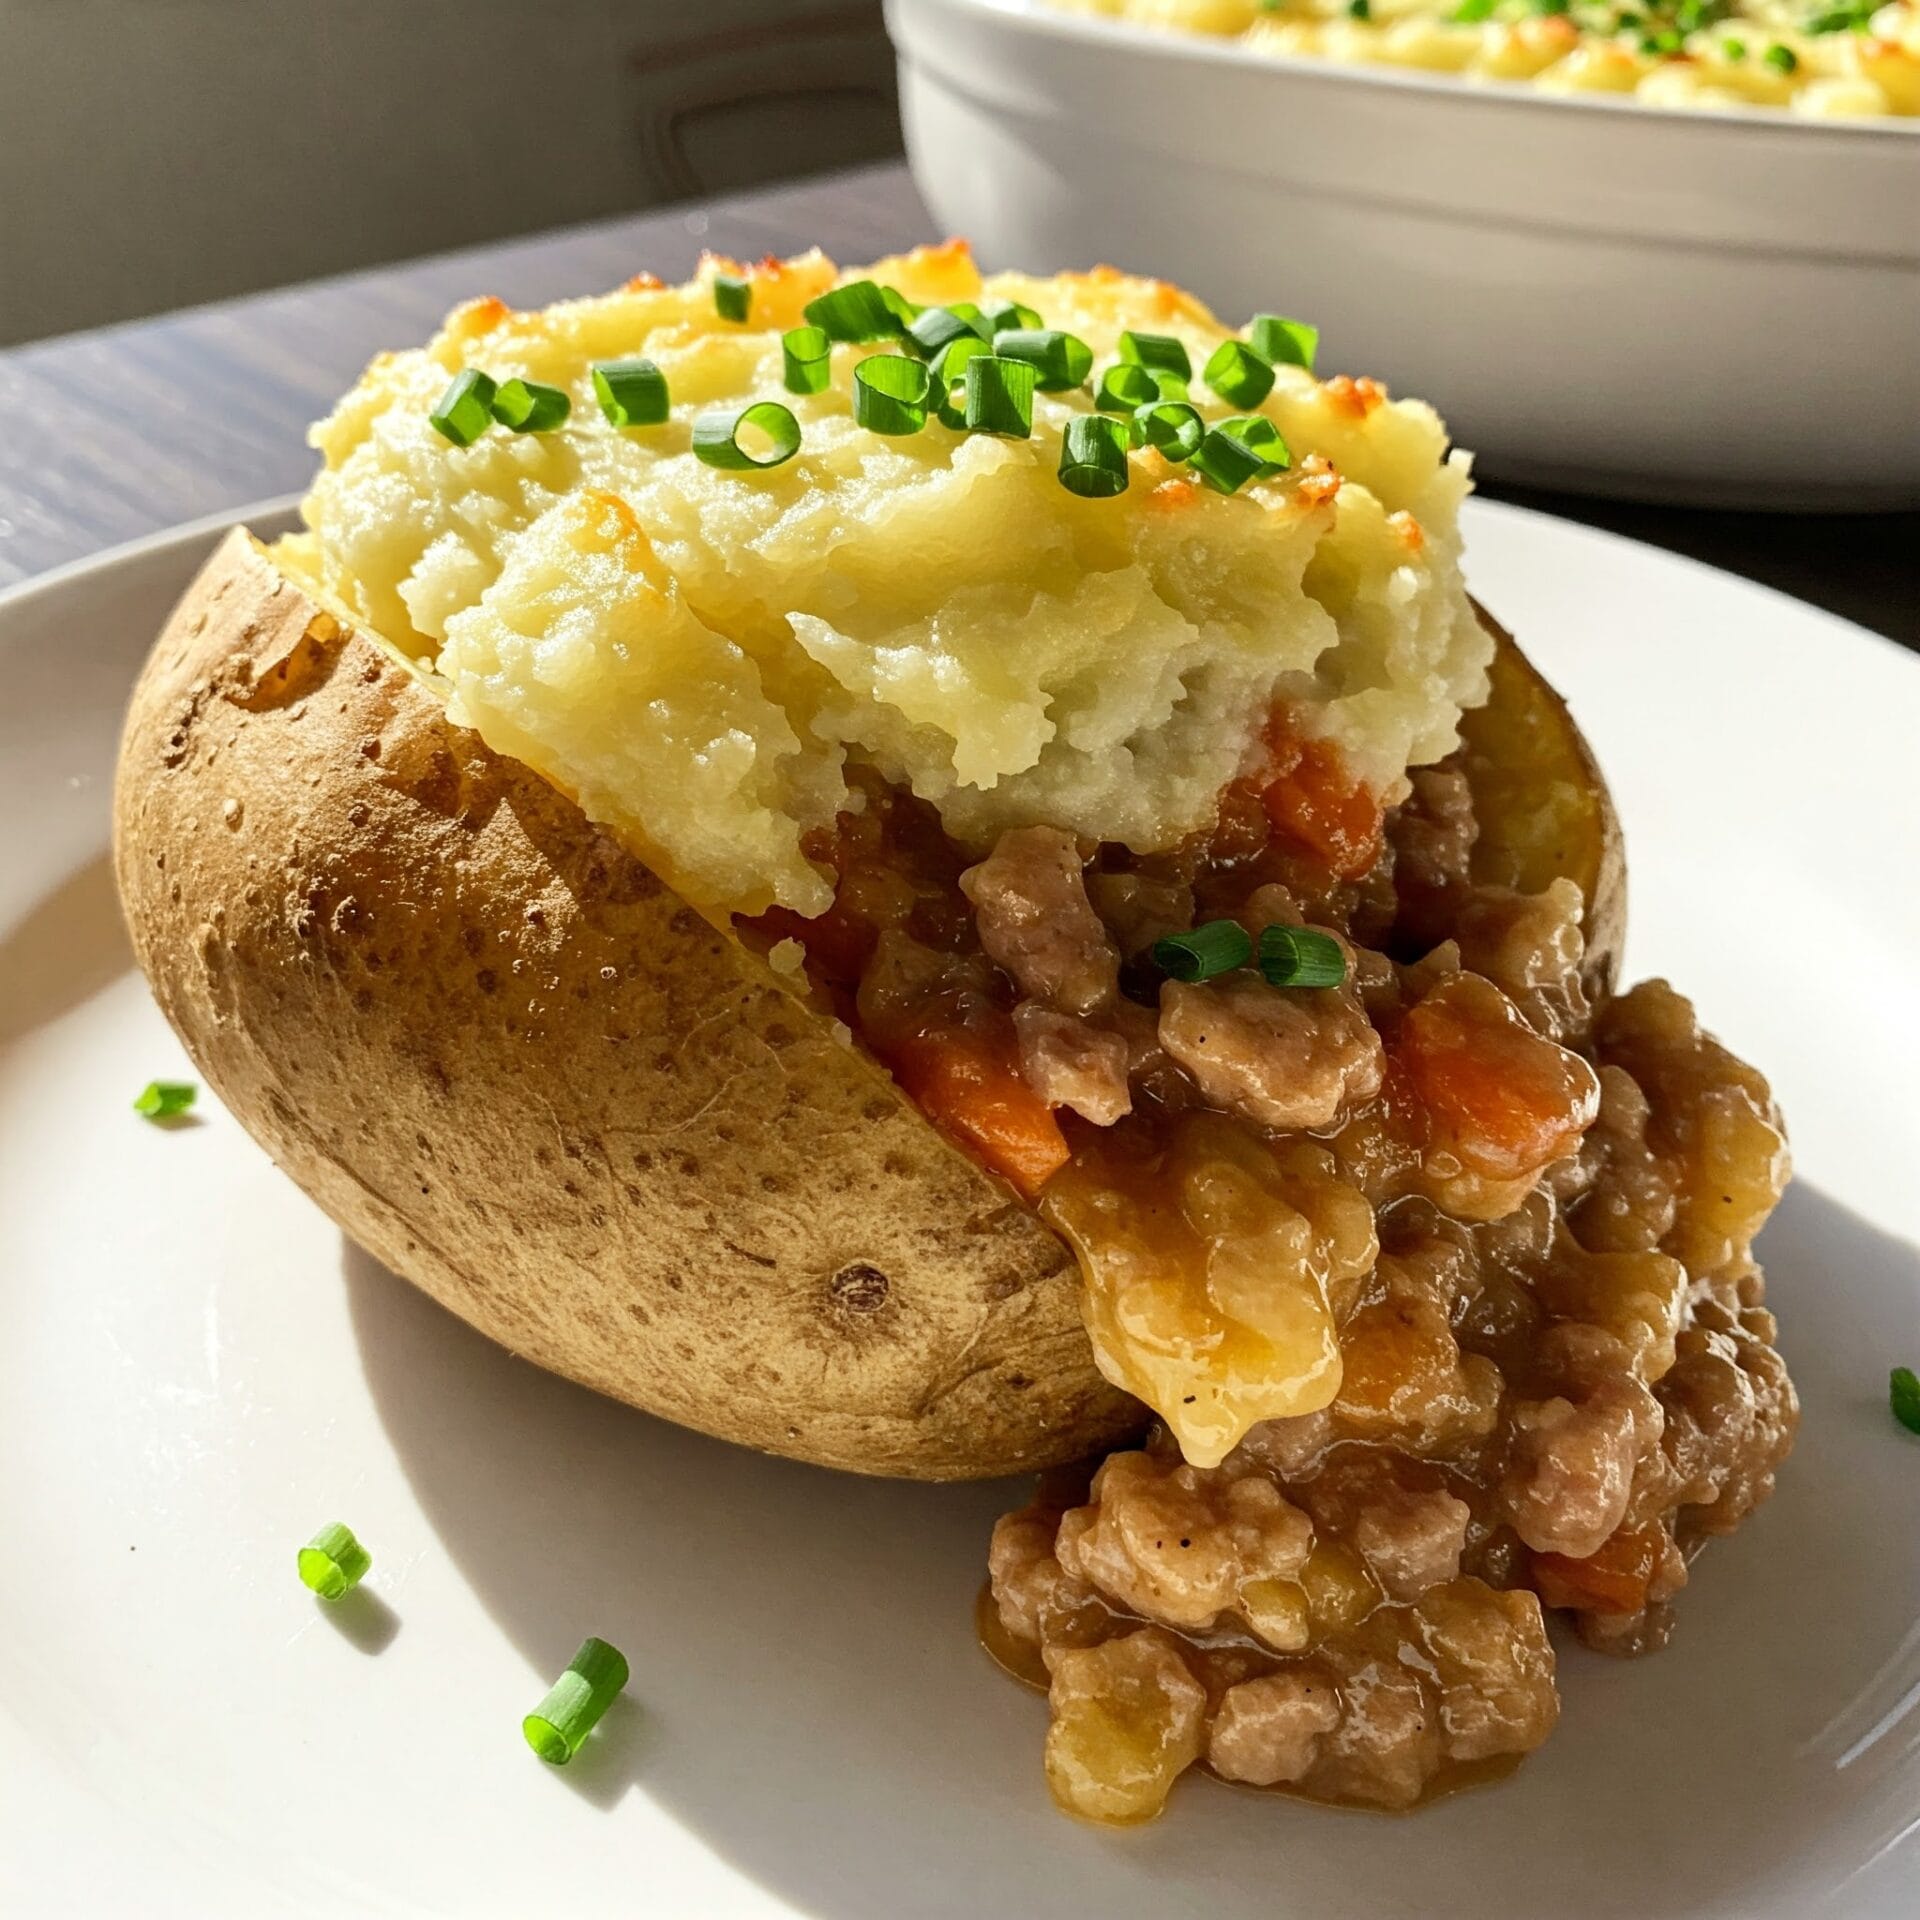
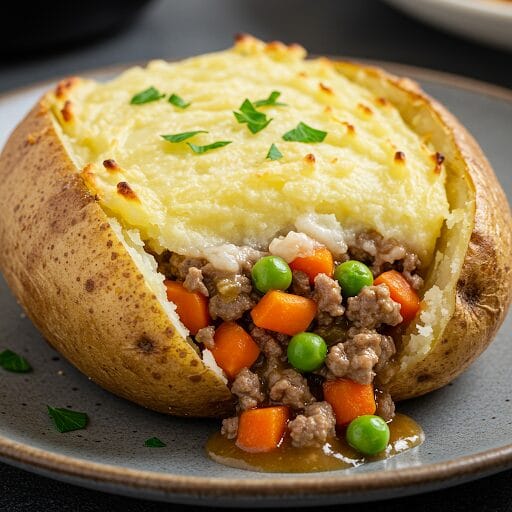
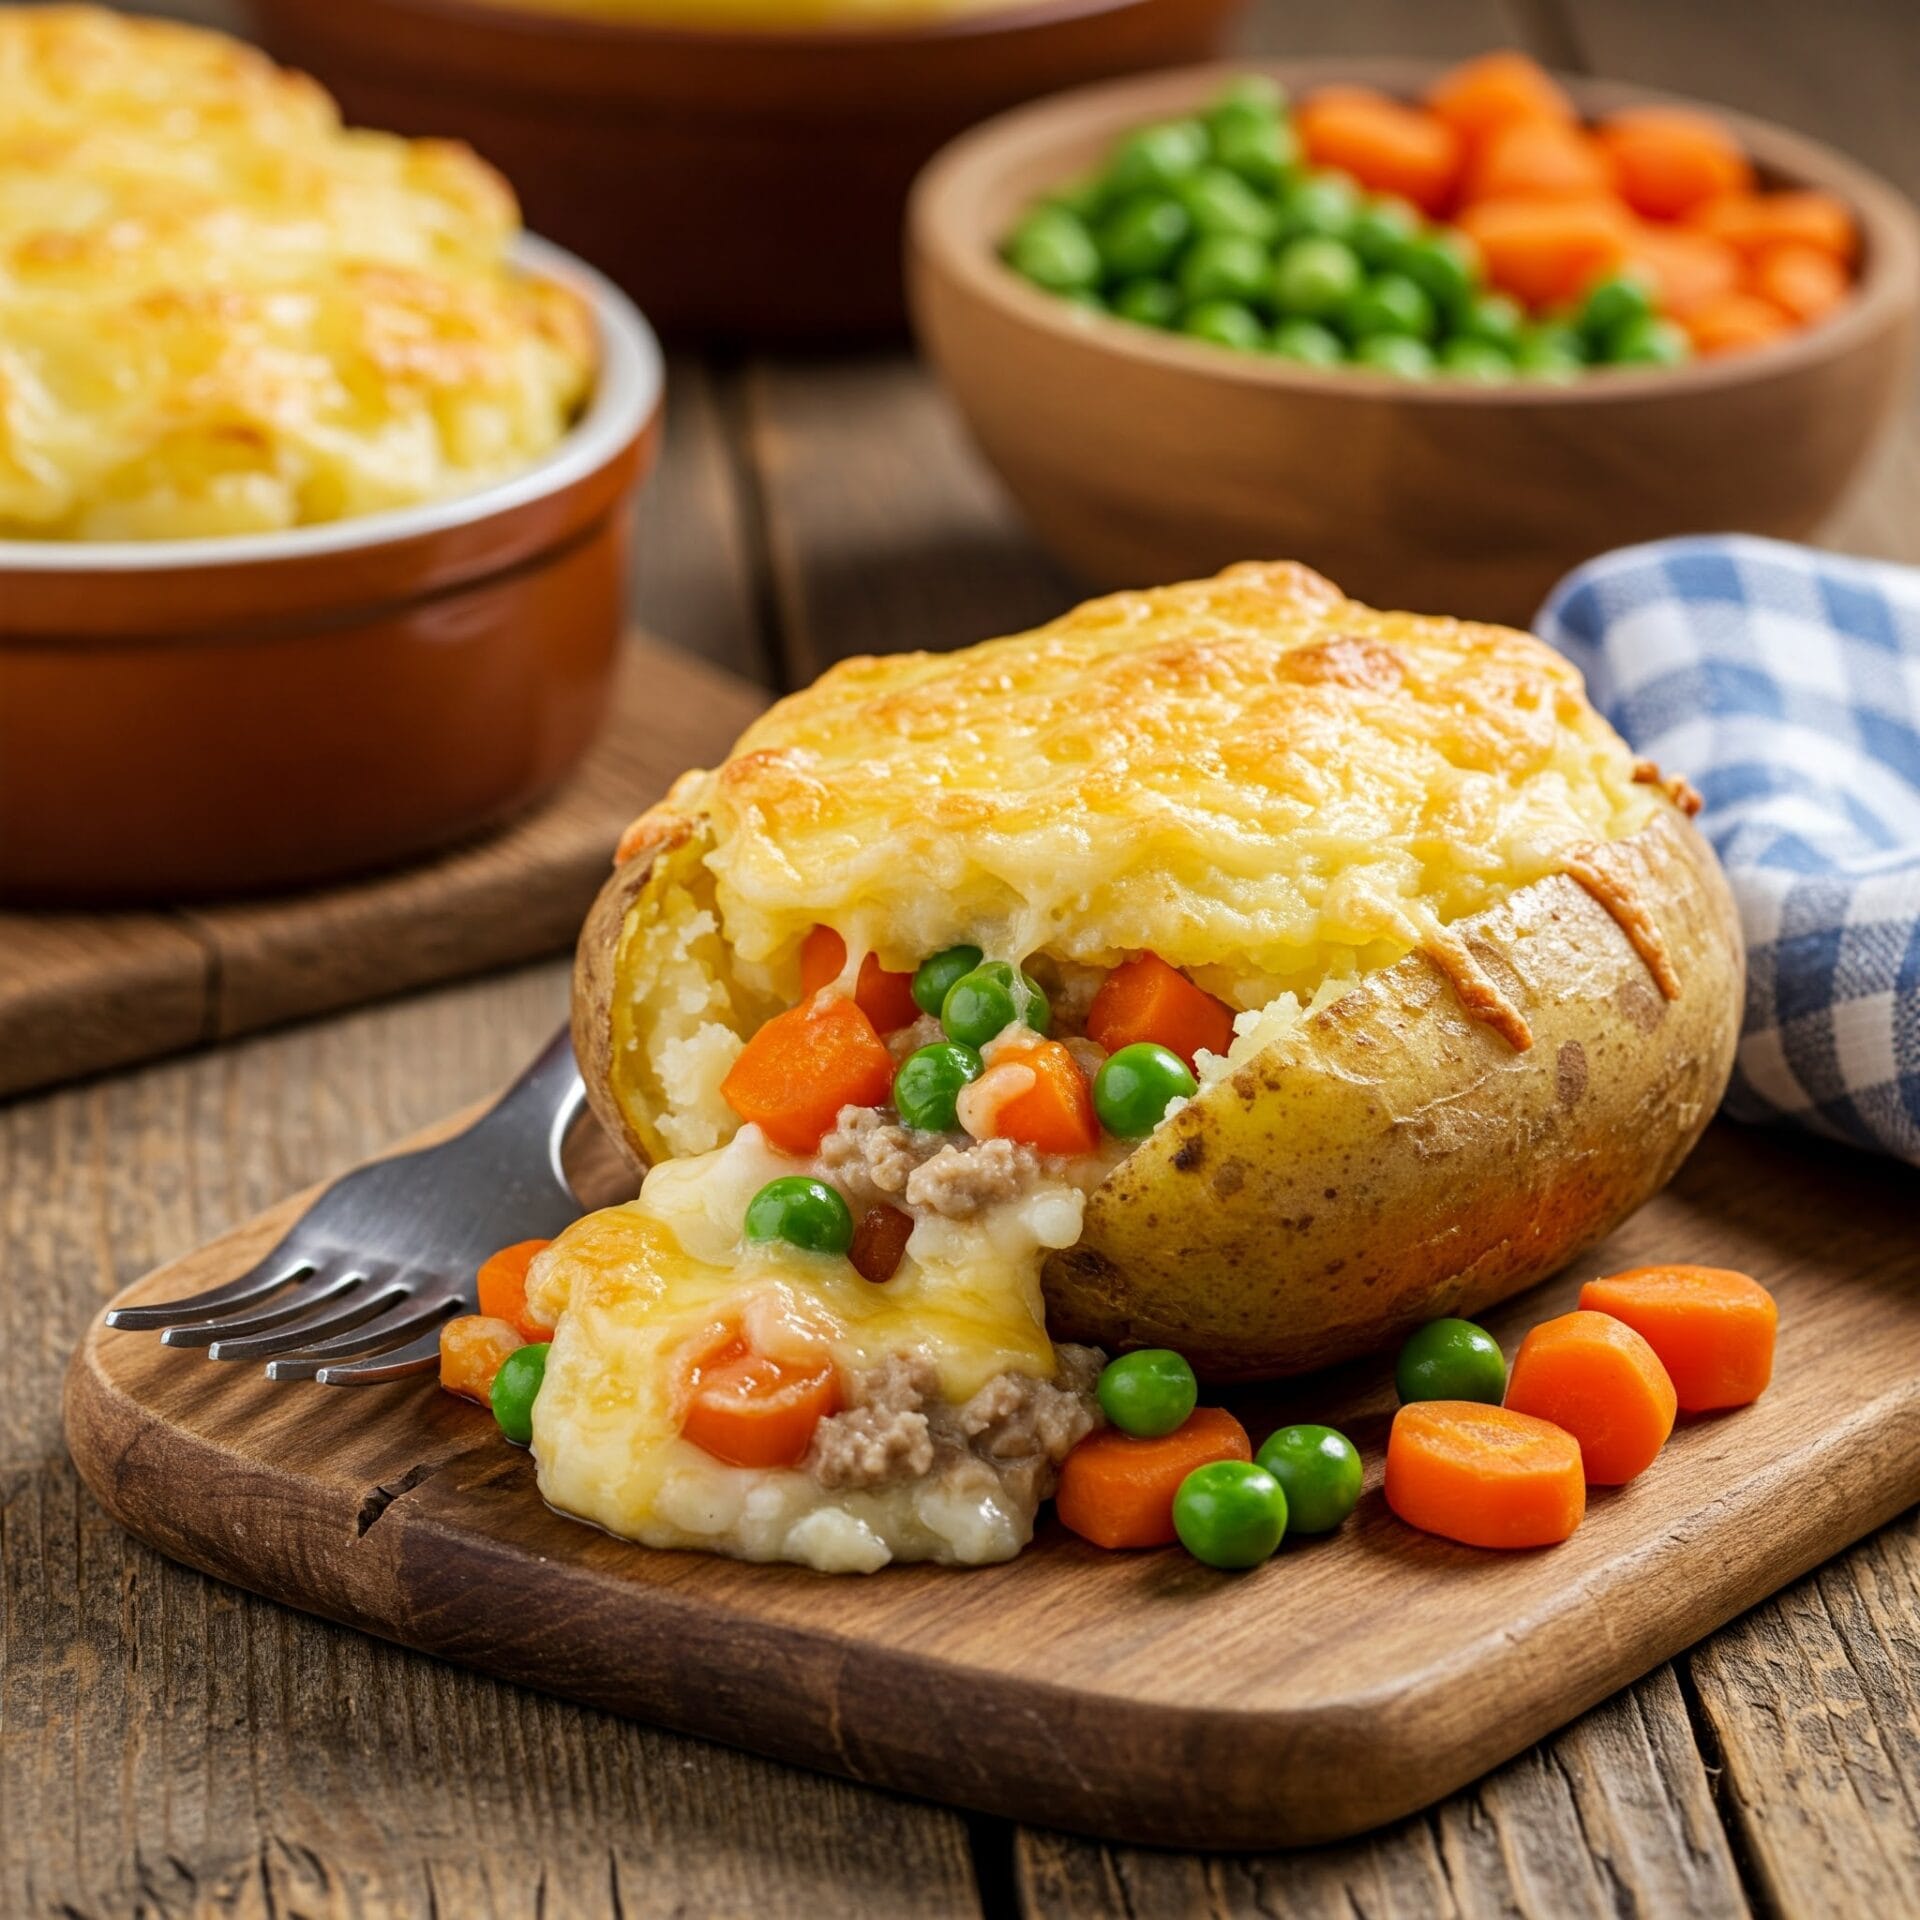
Imagine this: a fluffy baked potato, its skin crispy from the oven, becomes a vessel for a savory and satisfying cottage pie filling. Think seasoned ground beef simmered with vegetables in a rich gravy, all nestled inside that warm potato. But wait, there’s more! Melted cheese oozes over the filling, and a generous dollop of creamy mashed potato tops it all off.

This is pure comfort food bliss, perfect for a cozy night in or a fun and satisfying family meal. It’s hearty, flavorful, and oh-so-easy to make. Get ready to take your taste buds on a wild ride with the Cottage Pie Baked Potato – it’s a flavor explosion you won’t want to miss!

Cottage Pie Baked Potato

No ratings yet
A cottage pie baked potato is a delicious twist on two classic comfort foods. It takes the savory, meaty filling of a traditional cottage pie (ground beef simmered with vegetables in a rich gravy) and uses a fluffy baked potato as the base instead of a pastry crust.
Prep Time 20 minutes
Cook Time 1 hour 45 minutes
Servings: 4 People
Course: Dinner, Main Course
Cuisine: American, British-American
Calories: 568

Ingredients
  

  • 1 lb Ground beef
  • 1 Yellow Onion Fine Dice
  • 1 cup Carrots Sliced thin
  • 2 cloves Garlic
  • 1 tsp Salt
  • ½ tsp Ground Black Pepper
  • ¼ cup All-Purpose Flour
  • 2 Tbsp Tomato paste
  • cups Beef broth Low sodium
  • 2 tsp Worcestershire sauce
  • ¼ tsp Oregano
  • ¼ tsp Thyme
  • ½ cup Peas Frozen
  • ½ cup Corn Frozen
  • 2 cups Cheddar cheese Shredded
  • 8 Russet potatoes
  • 4 Tbsp Olive oil
  • ¼ cup Milk

Equipment

1 Large skillet with high sides
1 Baking pan
1 Potato masher

Method
 

  1. First, gather all the ingredients for your cottage pie baked potatoes. Preheat your oven to 425°F (220°C). Wash your potatoes and pat them dry. Line a baking sheet with wax paper or parchment paper, then place the potatoes on the sheet. Drizzle them with olive oil, rubbing it all over, and season with salt and pepper. Bake the potatoes in the preheated oven for about 1 hour, or until they are tender when pierced with a fork.
    8 Russet potatoes, 4 Tbsp Olive oil
  2. To make the cottage pie filling, start by setting a large skillet over medium-high heat. Add the ground meat, onion, carrots, garlic, salt, and pepper to the skillet. Cook, breaking up the meat with a spoon, until it's browned and no longer pink; make sure the carrots are tender. If there's a lot of fat in the pan, carefully drain it off. Then, sprinkle the flour over the meat and vegetables. Stir well to combine and cook for 2-3 minutes. This will create a roux and help thicken the sauce for your cottage pie filling.
    1 lb Ground beef, 1 Yellow Onion, 1 cup Carrots, 2 cloves Garlic, 1 tsp Salt, ½ tsp Ground Black Pepper
  3. After adding the flour, stir in the tomato paste, beef broth, Worcestershire sauce, oregano, and thyme. Make sure everything is well combined, then bring the mixture to a boil. Once it starts boiling, reduce the heat to low and simmer for 25-30 minutes, allowing the filling to thicken nicely.
    2 Tbsp Tomato paste, 2½ cups Beef broth, 2 tsp Worcestershire sauce, ¼ tsp Oregano, ¼ tsp Thyme
  4. Once the cottage pie filling has thickened, stir in the peas and corn. Continue to simmer for another 5-8 minutes, just until the vegetables are heated through.
    ½ cup Peas, ½ cup Corn
  5. Once the filling is thickened and the vegetables are heated through, your cottage pie filling is complete. By this time, your potatoes should also be baked and ready. To fill the potatoes, carefully cut a small opening in the top of each potato. Scoop out the inside flesh, leaving about a ¼-inch thick shell. Save the scooped-out potato for later use, perhaps to mash and add to the filling or to make a potato side dish.
  6. Take the fluffy potato centers you scooped out and place them in a bowl. Add a splash of whole milk – just enough to help with the mashing. Now, using a fork or a potato masher, mash the potatoes until you have a chunky consistency. You don't want it completely smooth; a few lumps are perfectly fine!
    ¼ cup Milk
  7. To assemble your cottage pie baked potatoes, start by sprinkling the bottom of each potato shell with shredded cheddar cheese. Next, carefully fill the shells with the savory cottage pie filling, being mindful not to overfill. Top the filling with another layer of shredded cheddar cheese. Finally, dollop the mashed potato mixture over the cheese, covering the filling completely. For an extra cheesy touch, sprinkle a little more cheddar cheese over the mashed potatoes.
    2 cups Cheddar cheese
  8. Once the potatoes are filled and topped with cheese and mashed potato, place the baking sheet back in the oven for about 15 minutes. This will allow the cheese to melt completely and the mashed potato topping to brown slightly. Serve your cottage pie baked potatoes hot. They can be enjoyed on their own or with a simple side salad for a complete and satisfying meal.

Nutrition

Serving: 12ozCalories: 568kcalCarbohydrates: 54gProtein: 24gFat: 29gSaturated Fat: 11gPolyunsaturated Fat: 2gMonounsaturated Fat: 12gTrans Fat: 1gCholesterol: 70mgSodium: 877mgPotassium: 1292mgFiber: 5gSugar: 4gVitamin A: 3166IUVitamin C: 19mgCalcium: 282mgIron: 4mg

Notes

Potato Perfection:
  • Choose the right potato: Russet potatoes are ideal for baking because of their fluffy interior and sturdy skin.
  • Even baking: Choose potatoes that are roughly the same size so they cook evenly.
  • Prick before baking: Prick the potatoes with a fork before baking to allow steam to escape and prevent them from bursting.
  • Don't overbake: Overbaked potatoes will be dry and crumbly. Bake until tender when pierced with a fork.
Flavorful Filling:
  • Quality ingredients: Use good quality ground beef, fresh vegetables, and flavorful broth for the best results.
  • Don't overcrowd the pan: Brown the meat in batches to ensure it browns properly and doesn't steam.
  • Build the flavor: Sauté the onions and carrots until softened to develop their sweetness.
  • Season generously: Don't be shy with the salt and pepper, and feel free to add other herbs and spices to your liking.
Assembly and Baking:
  • Don't overfill: Leave some space at the top of the potato for the mashed topping.
  • Cheese variations: Experiment with different types of cheese, such as Gruyère, cheddar, or even a sprinkle of Parmesan.
  • Broil for extra crispness: For a crispy mashed potato topping, broil the potatoes for the last few minutes of baking.
  • Garnish: Add a sprinkle of fresh herbs, like parsley or chives, before serving for a pop of color and flavor.
Make it your own:
  • Spice it up: Add a pinch of red pepper flakes or a dash of hot sauce to the filling for some heat.
  • Veggie boost: Include other vegetables in the filling, such as diced celery, mushrooms, or leeks.
  • Make it a meal: Serve with a side salad or your favorite vegetables for a complete and balanced meal.
Enjoy experimenting and creating your own perfect cottage pie baked potato!

Tried this recipe?

Let us know how it was!

Related Recipes

Ingredients

For the Baked Potatoes:

  • 8 Russet potatoes
  • 4 Tbsp olive oil

For the Cottage Pie Filling:

  • 1 lb ground beef
  • 1 yellow onion, finely diced
  • 1 cup carrots, sliced thin
  • 2 cloves garlic, minced
  • 1 tsp salt
  • ½ tsp ground pepper
  • ¼ cup all-purpose flour
  • 2 Tbsp tomato paste
  • 2 ½ cups low sodium beef broth
  • 2 tsp Worcestershire sauce
  • ¼ tsp dried oregano
  • ¼ tsp dried thyme
  • ½ cup frozen peas
  • ½ cup frozen corn

For the Toppings:

  • 2 cups shredded cheddar cheese
  • ¼ cup milk

Image Gallery Cottage Pie Baked Potato

Storage & Leftovers

Storing Leftovers:

  • Cool it down: Before storing, allow the cottage pie baked potatoes to cool completely at room temperature. This prevents condensation from forming and making them soggy.
  • Separate components: If possible, store the potato shells, filling, and mashed potato topping separately. This helps maintain their textures and prevents the filling from making the potatoes soggy.
  • Airtight containers: Store leftovers in airtight containers to keep them fresh and prevent them from absorbing odors from other foods in your fridge.  
  • Refrigerate promptly: Store leftovers in the refrigerator within 2 hours of cooking.  

Reheating:

  • Oven for best results: Reheat individual potatoes in a preheated oven at 350°F (175°C) for about 15-20 minutes, or until heated through. This helps maintain their texture and crispness.
  • Microwave in a pinch: You can also reheat them in the microwave, but be aware that the potato skin may become slightly soft.
  • Add moisture: If reheating the filling separately, add a splash of broth or water to prevent it from drying out.

Freezing:

  • Fully cooked: Ensure the potatoes are fully cooked before freezing.
  • Wrap tightly: Wrap individual potatoes tightly in plastic wrap, then in aluminum foil or freezer bags. This helps prevent freezer burn.
  • Freeze for up to 3 months: For best quality, freeze cottage pie baked potatoes for up to 3 months.

Tips for using leftover filling:

  • Shepherd’s pie: Use leftover filling to make a traditional shepherd’s pie with a mashed potato topping.
  • Pasties: Fill pastry dough with leftover filling to make savory hand pies. 
  • Stuffed vegetables: Use the filling to stuff bell peppers, zucchini boats, or mushrooms.
  • Nachos: Top tortilla chips with leftover filling, cheese, and your favorite nacho toppings.

By following these tips, you can ensure that your cottage pie baked potatoes are just as delicious the second time around!

Please follow and like us:
onpost_follow
fb-share-icon197
Tweet120
Pinterest20
Share 20
submit to reddit