Creamy Chimichurri Roast Chicken

Flavor Explosion: Creamy Chimichurri Roast Chicken 🌿🔥

Juicy roasted chicken topped with a bold, herb-packed creamy chimichurri sauce—every bite is pure flavor! 🌿🔥

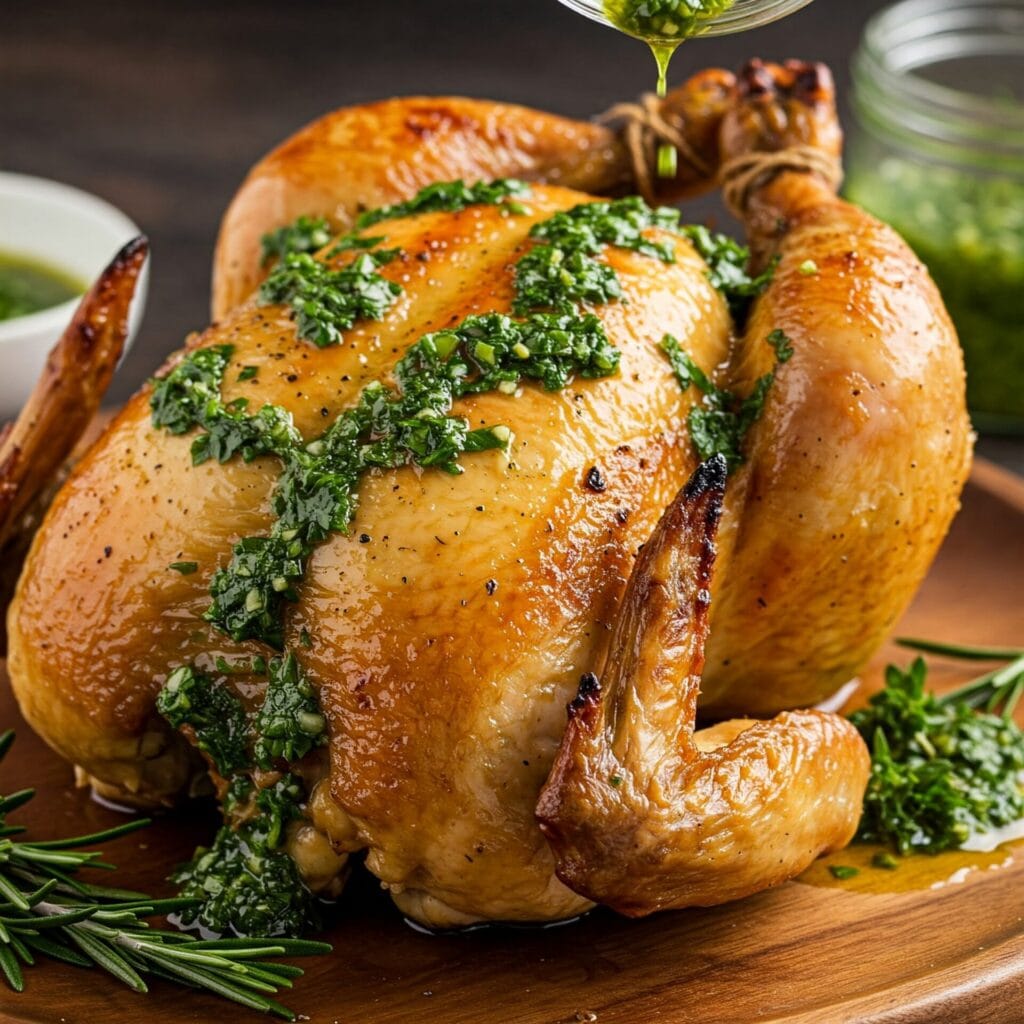
If you’re searching for a roast chicken recipe that goes beyond basic, this Creamy Chimichurri Roast Chicken is guaranteed to impress. With crispy, golden-brown skin, juicy meat, and a bold, herbaceous chimichurri cream sauce drizzled over the top, every bite bursts with flavor.

Not only is this dish beautiful to serve, but it also delivers a perfect balance of richness and freshness. Thanks to a creamy twist on traditional chimichurri, the sauce combines garlic, parsley, olive oil, vinegar, and a touch of cream.

As a result, it’s bright, savory, and just tangy enough to cut through the richness of the roast. Meanwhile, the roasted chicken brings satisfying comfort and hearty texture to the table.

Even better, the recipe is surprisingly simple to prepare. From seasoning the bird to roasting it to golden perfection, the steps are easy to follow. While the chicken cooks, you can blend the sauce—no complicated prep required.

Because this dish is so versatile, it’s perfect for a cozy family dinner or an impressive weekend meal with guests. Furthermore, it pairs beautifully with roasted potatoes, crusty bread, or a fresh green salad. And if you’re lucky enough to have leftovers, they’re just as delicious the next day.

In conclusion, if you’re ready to elevate your roast chicken game with bold herbs and creamy goodness, this recipe is calling your name. It’s easy, elegant, and guaranteed to wow.

For example, you can use boneless thighs for a faster cook time. In addition, the chimichurri sauce can be made in advance and refrigerated. Furthermore, any leftovers are excellent in wraps or sandwiches. As a result, this recipe is both practical and elevated. Therefore, it’s great for busy nights or special dinners alike.

Why You’ll Love It

🍗 Juicy, Golden Roast Chicken – Crispy on the outside, tender and flavorful on the inside.
🌿 Bold Chimichurri Flavor – A vibrant blend of parsley, garlic, vinegar, and herbs brings the dish to life.
🧄 Creamy Twist – This version adds smooth cream to classic chimichurri for a sauce that’s both fresh and indulgent.
Simple Yet Impressive – It requires minimal ingredients and steps, yet the presentation looks stunning.
🕒 Perfect for Any Occasion – Whether it’s a weeknight dinner or an elegant meal for guests, it works beautifully.
🥔 Pairs Beautifully – For example, try it with roasted veggies, potatoes, or crusty bread.
🔥 Elevates the Everyday – It’s a comforting dish with restaurant-quality flavor.
♻️ Tasty Leftovers – As a bonus, leftovers are great in wraps, salads, or grain bowls the next day.

🔪 How to Make Creamy Chimichurri Roast Chicken

Step 1: Preheat & Prep
Preheat your oven to 425°F (220°C). Pat your whole chicken (or chicken parts) dry with paper towels for extra crispy skin.

Step 2: Season the Chicken
Rub the chicken all over with olive oil, salt, pepper, garlic powder, and paprika. Make sure to season under the skin and inside the cavity if using a whole bird.

Step 3: Roast Until Golden
Place the chicken in a roasting pan or oven-safe skillet. Roast for about 45–60 minutes, or until the internal temperature reaches 165°F and the skin is golden and crispy.

Step 4: Make the Creamy Chimichurri
While the chicken roasts, blend fresh parsley, garlic, olive oil, red wine vinegar, a pinch of chili flakes, and a spoonful of sour cream or Greek yogurt until smooth and creamy. Adjust salt and spice to taste.

Step 5: Let the Chicken Rest
Remove chicken from the oven and let it rest for 10–15 minutes. This helps keep the juices locked in.

Step 6: Slice, Drizzle & Serve
Carve the chicken and drizzle generously with the creamy chimichurri sauce. Serve with extra sauce on the side and your favorite sides!

Jump to Section

📱 Follow Us 

📬 Subscribe for Updates

* indicates required

Intuit Mailchimp

Creamy Chimichurri Roast Chicken

No ratings yet
This Creamy Chimichurri Roast Chicken combines crispy, golden-roasted chicken with a bold, herb-loaded chimichurri sauce—elevated with a rich and creamy twist. It’s easy to make, bursting with flavor, and perfect for weeknight dinners or impressing guests. Serve it with your favorite sides and get ready for a dish that’s anything but ordinary! 🌿🍗✨
Prep Time 20 minutes
Cook Time 1 hour
Marinate & Chill 12 hours
Total Time 13 hours 20 minutes
Servings: 6 people
Course: Dinner, Main Course
Cuisine: Argentinian, Argentinian Fusion, South America
Calories: 579

Ingredients
  

Sauce:
  • 5 Cloves Garlic
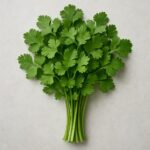
  • Cups Fresh Cilantro packed
  • 2 Cups Parsley packed
  • ¼ Cup Red Wine Vinegar
  • tsp Kosher Salt
  • 4 tsp Dried Oregano
  • 2 tsp Crushed Red Pepper Flakes
  • ¾ Cup Extra Virgin Olive Oil divided
  • 1 Cup Greek Yogurt Plain Whole-Milk

Chicken And Assembly:
  • 4 Lb Whole Chicken whole, backbone removed, patted dry
  • tsp Kosher Salt

Equipment

1 Chef's knife (For chopping parsley, cilantro, garlic, and shallots with precision.)
1 Cutting board (A large, sturdy board to handle raw chicken and herbs. Preferably non-slip.)
1 Mixing Bowls (Set) (For marinating chicken and mixing the chimichurri and creamy sauce separately. Stainless steel or glass preferred.)
1 Garlic Press (Speeds up garlic prep and keeps your hands clean.)
1 Citrus Juicer (Handy for juicing fresh lemons or limes for the chimichurri.)
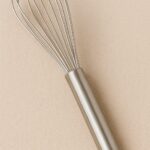
1 Whisk (For emulsifying the chimichurri and blending in the creamy base.)
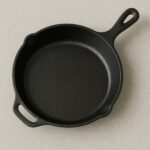
1 Cast Iron Skillet (Ideal for getting a golden sear on the chicken and finishing it in the oven.)
1 Tongs (For turning chicken safely without losing juices.)
1 Meat Thermometer (Ensures chicken reaches 165°F for safe cooking.)
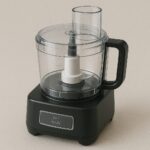
1 Food processor (Optional, but helps make a smooth chimichurri quickly.)
1 Measuring Cups & Spoons (Essential for consistent flavor in your marinade and sauce.)
1 Serving Platter (For presenting the finished creamy chimichurri chicken beautifully.)

Method
 

Sauce:
  1. Alright, let's make that chimichurri magic happen! In your food processor, combine the garlic, cilantro, parsley, vinegar, salt, oregano, and red pepper flakes. Drizzle in ¼ cup of olive oil, then pulse everything together until the herbs are finely chopped but not completely pulverized. We want a bit of texture in that vibrant green sauce!
    5 Cloves Garlic, 2½ Cups Fresh Cilantro, 2 Cups Parsley, ¼ Cup Red Wine Vinegar, 2¼ tsp Kosher Salt, 4 tsp Dried Oregano, 2 tsp Crushed Red Pepper Flakes, ¾ Cup Extra Virgin Olive Oil
  2. Now, let's bring that chimichurri to life! Transfer the vibrant herb mixture to a medium bowl. Add the yogurt and the remaining ½ cup of olive oil. Grab a whisk and vigorously whisk everything together until the mixture is emulsified. This means the oil and yogurt will combine into a creamy, cohesive sauce. You should have about 2½ cups of this luscious chimichurri—plenty to coat that chicken and have some leftover for dipping!
    1 Cup Greek Yogurt, ¾ Cup Extra Virgin Olive Oil
Chicken and Assembly:
  1. Time to prep that chicken! Place the chicken breast-side up on a cutting board. Open it up like a book, spreading it out as much as you can. Now, using your palms, press firmly down on the breastbone to flatten the chicken. You might hear a satisfying crack—that's the breastbone giving way to create a more even surface for cooking. Transfer the flattened chicken to a large bowl and generously rub it all over with salt and ¾ cup of that glorious chimichurri sauce. Make sure to get the sauce into every nook and cranny! Cover the bowl and let the chicken chill in the refrigerator for at least 2 hours, or preferably up to 12 hours. This allows the flavors to meld and the chicken to marinate beautifully. No need to bring it to room temperature before roasting—it's ready to go straight from the fridge to the oven!
    4 Lb Whole Chicken, 1¼ tsp Kosher Salt
  2. Okay, time to roast this bird to perfection! Place a rack in the middle of your oven and preheat it to 375°F (190°C). Now, carefully transfer the marinated chicken to a wire rack set inside a large rimmed baking sheet. Don't let that precious marinade go to waste! Spread any leftover chimichurri from the bowl over the skin of the chicken. This will help create a beautifully browned and flavorful crust. Slide the baking sheet into the oven and roast the chicken, rotating the baking sheet halfway through, until the skin is a deep golden brown and an instant-read thermometer inserted into the thickest part of a thigh registers 165°F (74°C). This should take about 50-60 minutes. Once it's cooked through, take the chicken out of the oven and let it rest for 10 minutes before carving. This allows the juices to redistribute, ensuring a tender and flavorful result.
  3. And now for the grand finale! Carefully transfer the roasted chicken to a serving platter. Take a look at that remaining chimichurri sauce. If it has separated a bit while the chicken was roasting, just give it a quick whisk in the bowl to bring it back together. Now, generously spoon that vibrant chimichurri over the chicken, or serve it alongside for dipping. Get ready to savor every bite of this flavor-packed masterpiece!

Nutrition

Serving: 12ozCalories: 579kcalCarbohydrates: 14gProtein: 57gFat: 34gSaturated Fat: 6gPolyunsaturated Fat: 4gMonounsaturated Fat: 22gTrans Fat: 0.04gCholesterol: 156mgSodium: 4511mgPotassium: 1328mgFiber: 2gSugar: 4gVitamin A: 2415IUVitamin C: 30mgCalcium: 133mgIron: 3mg

Notes

🐔 Chicken Champion: Tips for Roast Chicken Perfection

  • Butterfly the Bird: Flattening (spatchcocking) your chicken helps it cook more evenly and keeps the breasts from drying out. Don’t be shy—give that breastbone a good crack!
  • Marinate for Maximum Flavor: The longer the chicken marinates, the more intense and delicious the flavor. Aim for at least 2 hours, but overnight is ideal.
  • Give It Space: Don’t overcrowd the pan! Allowing room on your baking sheet promotes better air circulation and golden-brown skin.
  • Use a Meat Thermometer: An instant-read thermometer ensures your chicken is cooked perfectly—look for an internal temp of 165°F (74°C).
  • Let It Rest: Rest the chicken for at least 10 minutes after roasting to lock in juices and boost tenderness.

🌿 Chimichurri Cheer: Sauce Secrets for Maximum Flavor

  • Fresh Herbs Are Key: Always use the freshest herbs for vibrant color and unbeatable flavor.
  • Pulse, Don’t Puree: Use a food processor and pulse until finely chopped—you want texture, not a smoothie.
  • Whisk to Emulsify: To achieve that creamy chimichurri magic, whisk the oil and yogurt well until the sauce is smooth and cohesive.
  • Taste & Adjust: Chimichurri is all about balance. Add extra vinegar for tang, red pepper flakes for heat, or salt to brighten the flavors.

🍽️ Serving Sensations: How to Make It a Meal

  • Serve It Hot or Cold: This dish shines straight from the oven or served at room temperature—your call!
  • Choose the Right Sides: Roasted veggies, fresh salad, or crusty bread are perfect companions for soaking up all that creamy chimichurri.
  • Love Your Leftovers: Leftover sauce is gold—drizzle it over grilled meats, fish, veggies, or even use it as a zippy salad dressing or marinade.

🎉 Bonus Tip: Make It a Party

Feeding a crowd? No problem! This recipe easily scales up. Just double or triple the ingredients and you’ve got yourself a crowd-pleasing main dish worthy of any celebration.

With these tips and tricks, you’ll master the art of Creamy Chimichurri Roast Chicken—and trust us, your taste buds will thank you! 🌿🐔😋

Tried this recipe?

Let us know how it was!

🧂 What to Serve with Creamy Chimichurri Roast Chicken

This roast chicken is juicy, herb-packed, and drizzled with creamy chimichurri sauce—so it’s begging for sides that can soak up all that flavor. Whether you’re hosting a dinner party or just making a cozy family meal, here are some delicious pairings to round out your plate:

🥔 Comforting & Hearty

Garlic Mashed Potatoes: Creamy, buttery potatoes that pair perfectly with the tangy chimichurri drizzle.
Roasted Fingerling Potatoes: Crispy edges + tender centers = the perfect match for juicy chicken.
Herbed Rice Pilaf: Light, fluffy, and subtly seasoned so the chimichurri shines.

🥗 Fresh & Vibrant

Simple Arugula Salad: Peppery greens with a lemon vinaigrette bring brightness to the dish.
Grilled Veggie Medley: Zucchini, peppers, and red onion roasted or grilled for extra char and color.
Tomato & Avocado Salad: Creamy, juicy, and perfectly balanced against the bold chimichurri.

🍞 Breads & Bonus Bites

Warm Crusty Bread or Garlic Bread: Ideal for soaking up every last drop of sauce.
Polenta Cakes or Grits: A southern-style twist that adds richness and texture.
Crispy Chickpeas or Roasted Cauliflower: Great as a crunchy, spiced side.

🍷 Drinks to Pair

Chilled White Wine (Sauvignon Blanc or Albariño): Refreshing and herb-friendly.
Sparkling Water with Lime: Clean and citrusy to balance the creaminess.
Iced Green Tea or Light Beer: Earthy or crisp, depending on your vibe.
FAQ – Creamy Chimichurri Roast Chicken


Can I use chicken breasts or thighs instead of a whole chicken?

Yes! This recipe works beautifully with bone-in, skin-on chicken thighs, breasts, or even drumsticks. Just adjust the cooking time accordingly—smaller cuts usually roast in 25–35 minutes.


Can I make the chimichurri sauce ahead of time?

Absolutely. In fact, it tastes even better after a few hours in the fridge. You can make the chimichurri up to 3 days in advance, then stir in the yogurt or sour cream just before serving for the freshest texture.


How do I store leftovers?

Store leftover chicken and sauce separately in airtight containers. The chicken will keep for 3–4 days in the fridge, and the chimichurri sauce lasts up to 5 days. Reheat chicken gently in the oven or enjoy cold!


Is this recipe gluten-free?

Yes! The ingredients used in both the roasted chicken and chimichurri sauce are naturally gluten-free. Just double-check any packaged seasonings or yogurt brands to be sure.


What herbs can I substitute if I don’t have fresh parsley?

While parsley is traditional, you can use cilantro, basil, or even a mix of herbs like oregano and mint. The fresher, the better!


Can I grill the chicken instead of roasting it?

Definitely! Grilled chicken adds smoky depth and works especially well in warm weather. Just marinate, then grill over medium heat until the internal temp hits 165°F.


What can I serve with creamy chimichurri roast chicken?

It pairs well with roasted vegetables, mashed potatoes, herbed rice, simple salads, or crusty bread to soak up all that sauce. See the full “What to Serve” section above for more ideas!

Please follow and like us:
onpost_follow
fb-share-icon197
Tweet120
Pinterest20
Share 20
submit to reddit

Creamy Asparagus & Mushroom Pasta

Creamy Asparagus & Mushroom Pasta

Earthy, elegant, and incredibly satisfying—this Creamy Asparagus & Mushroom Pasta is comfort food with a seasonal twist. Tender pasta is tossed in a silky parmesan cream sauce, loaded with savory sautéed mushrooms and crisp-tender asparagus. Every bite is rich with flavor, yet balanced by the freshness of spring veggies and aromatic herbs. It’s the kind of dish that feels gourmet, but comes together effortlessly—perfect for cozy nights in or when you want to impress without the fuss.

Creamy Asparagus & Mushroom Pasta

5 from 1 vote
Indulge in a symphony of flavors and textures with this Creamy Asparagus and Mushroom Pasta! Imagine tender fettuccine noodles, cooked to perfection, coated in a luscious, velvety Parmesan sauce that clings to every strand. Each bite is a delightful explosion of taste and texture, with the earthy notes of sautéed mushrooms complementing the bright, fresh flavor of tender-crisp asparagus.
This dish is a true culinary masterpiece, a harmonious blend of simple ingredients transformed into an elegant and satisfying meal. The creamy sauce, infused with the subtle sweetness of shallots and the warmth of garlic, elevates the pasta to new heights. And a sprinkle of fresh parsley adds a final touch of vibrancy, both visually and on the palate.
Whether you're seeking a comforting weeknight dinner or an impressive dish to share with friends, this Creamy Asparagus and Mushroom Pasta is sure to delight. It's a culinary adventure that will tantalize your taste buds and leave you wanting more.
Prep Time 10 minutes
Cook Time 15 minutes
Servings: 4 people
Course: Main Course
Cuisine: American, Italian American
Calories: 549

Ingredients
  

  • 8 oz Fettuccine
  • 1 Tbsp Olive Oil
  • 1 Tbsp Unsalted Butter
  •  
    2 Cups Asparagus sliced 1½ inches
  • Cup Shallot thinly slice
  • 2 Cups Button Mushrooms fresh not canned.
  • tsps Garlic minced
  • 1 tsp Italian Seasoning
  • ¾ Cup Heavy Cream
  • ¾ Cup Parmesan Cheese
  • 1 Pinch Salt to taste
  • 1 Pinch Ground Black Pepper to taste

Method
 

  1. Bring a large pot of salted water to a boil. Add the fettuccine and cook for 7 to 10 minutes. You want the pasta to be tender but still have a slight bite to it (al dente). Drain the pasta and reserve some of the pasta cooking water.
    8 oz Fettuccine, 1 Pinch Salt
  2. In a large nonstick skillet, heat the olive oil and butter over medium heat. Swirl the skillet to mix the oil and butter once the butter has melted.
    1 Tbsp Olive Oil, 1 Tbsp Unsalted Butter
  3. Add the asparagus and shallot to the skillet. Cook for about 2 to 3 minutes, stirring occasionally. Season with salt and pepper.
    2 Cups Asparagus, ⅓ Cup Shallot, 1 Pinch Ground Black Pepper, 1 Pinch Salt
  4. Add the mushrooms to the skillet and cook, stirring occasionally, for about 2 minutes, or until they are softened and lightly browned. Then, add the minced garlic and Italian seasoning, and cook for another 30 seconds, or until fragrant.
    2 Cups Button Mushrooms, 1½ tsps Garlic, 1 tsp Italian Seasoning
  5. Gently stir the heavy cream into the skillet, making sure it's fully incorporated with the vegetables. Bring the mixture to a gentle boil, then reduce the heat to low to prevent the cream from curdling. Add the grated Parmesan cheese and stir continuously until the cheese is melted and the sauce is smooth and creamy. If you find the sauce is too thick, stir in ¼ to ½ cup of the reserved pasta water until it reaches your desired consistency.
    ¾ Cup Heavy Cream, ¾ Cup Parmesan Cheese
  6. Now, add the pasta! Pour the cooked and drained fettuccine directly into the skillet with the sauce. Stir gently to combine.
  7. Use tongs or a large fork to divide the pasta among serving plates or bowls. Serve the pasta immediately while it is still hot. Garnish each serving with a sprinkle of fresh parsley for a pop of color and a fresh, herbaceous flavor.

Nutrition

Serving: 16ozCalories: 549kcalCarbohydrates: 52gProtein: 19gFat: 31gSaturated Fat: 16gPolyunsaturated Fat: 2gMonounsaturated Fat: 9gTrans Fat: 0.2gCholesterol: 123mgSodium: 364mgPotassium: 587mgFiber: 5gSugar: 6gVitamin A: 1476IUVitamin C: 7mgCalcium: 254mgIron: 3mg

Notes

Ingredients:
  • Pasta: Fettuccine is classic, but you can use other long pasta shapes like linguine, tagliatelle, or pappardelle.
  • Asparagus: Choose fresh, tender asparagus. Snap off the woody ends before cooking.
  • Mushrooms: Cremini or button mushrooms are common choices. You can also use shiitake, oyster, or portobello mushrooms.
  • Shallot: Shallots have a milder flavor than onions. You can substitute with a small yellow or white onion if needed.
  • Garlic: Freshly minced garlic adds a pungent flavor to the sauce.
  • Heavy Cream: Heavy cream creates a rich and creamy sauce. You can use half-and-half for a lighter option.
  • Parmesan Cheese: Use freshly grated Parmesan cheese for the best flavor.
  • Seasonings: Salt, pepper, and Italian seasoning are essential. You can add other herbs like thyme or oregano.
Cooking Tips:
  • Cook Pasta Al Dente: Cook the pasta until it's tender but still slightly firm to the bite. This prevents it from becoming mushy in the sauce.
  • Reserve Pasta Water: The starchy pasta water is a great way to adjust the consistency of the sauce.
  • Don't Overcrowd the Pan: When sautéing the vegetables, make sure the pan isn't overcrowded. This will ensure they cook evenly.
  • Cook in Stages: Sauté the asparagus and shallot first, then add the mushrooms, and finally the garlic and Italian seasoning. This allows each ingredient to cook properly.
  • Simmer Gently: Simmer the sauce gently to prevent the cream from curdling.
  • Melt the Cheese: Stir in the Parmesan cheese until it's melted and the sauce is smooth.
  • Taste and Adjust: Always taste the sauce before serving and adjust the seasonings to your liking.
Serving Suggestions:
  • Garnish: Garnish with fresh parsley, grated Parmesan cheese, or a drizzle of olive oil.
  • Sides: Serve with a side salad and crusty bread for a complete meal.
Variations:
  • Protein: Add grilled chicken, shrimp, or salmon for extra protein.
  • Vegetables: Incorporate other vegetables like peas, zucchini, or bell peppers.
  • Spicy: Add a pinch of red pepper flakes for heat.
  • Vegan: Use plant-based butter, cream, and Parmesan cheese for a vegan version.
With these tips, you'll be able to make a delicious and satisfying creamy asparagus and mushroom pasta dish!

Tried this recipe?

Let us know how it was!

Related Recipes

Ingredients

  • 8 oz fettuccine pasta
  • 1 tablespoon olive oil
  • 1 tablespoon unsalted butter
  • 2 cups asparagus, sliced 1 ½ inches
  • ⅓ cup shallot, thinly sliced
  • 2 cups fresh button mushrooms (not canned)
  • 1 ½ teaspoons garlic, minced
  • 1 teaspoon Italian seasoning
  • ¾ cup heavy cream
  • ¾ cup grated Parmesan cheese
  • Pinch of salt, to taste
  • Pinch of ground black pepper, to taste

Image Gallery Creamy Asparagus & Mushroom Pasta

Storage & Leftovers

Storage:

  • Refrigerator:
    Let the pasta cool completely, then store in an airtight container in the fridge for up to 3–4 days.

  • Freezer:
    Not recommended—cream-based sauces can separate and veggies may become mushy when thawed.

Reheating:

  • Stovetop (Best method):
    Reheat gently over medium-low heat with a splash of milk, cream, or pasta water to loosen the sauce and restore creaminess. Stir frequently to prevent sticking.

  • Microwave:
    Use a microwave-safe container with a loose lid or paper towel cover. Heat in 30–45 second bursts, stirring in between. Add a splash of liquid if it looks too thick.

Tips:

  • The asparagus may soften slightly after storage, but will still taste great.

  • Add a handful of fresh herbs, a squeeze of lemon juice, or a sprinkle of parmesan when serving to brighten the flavors.

  • Great as a next-day lunch or as a side to grilled chicken or tofu!

Please follow and like us:
onpost_follow
fb-share-icon197
Tweet120
Pinterest20
Share 20
submit to reddit

Subscribe for New Recipes

* indicates required

Intuit Mailchimp

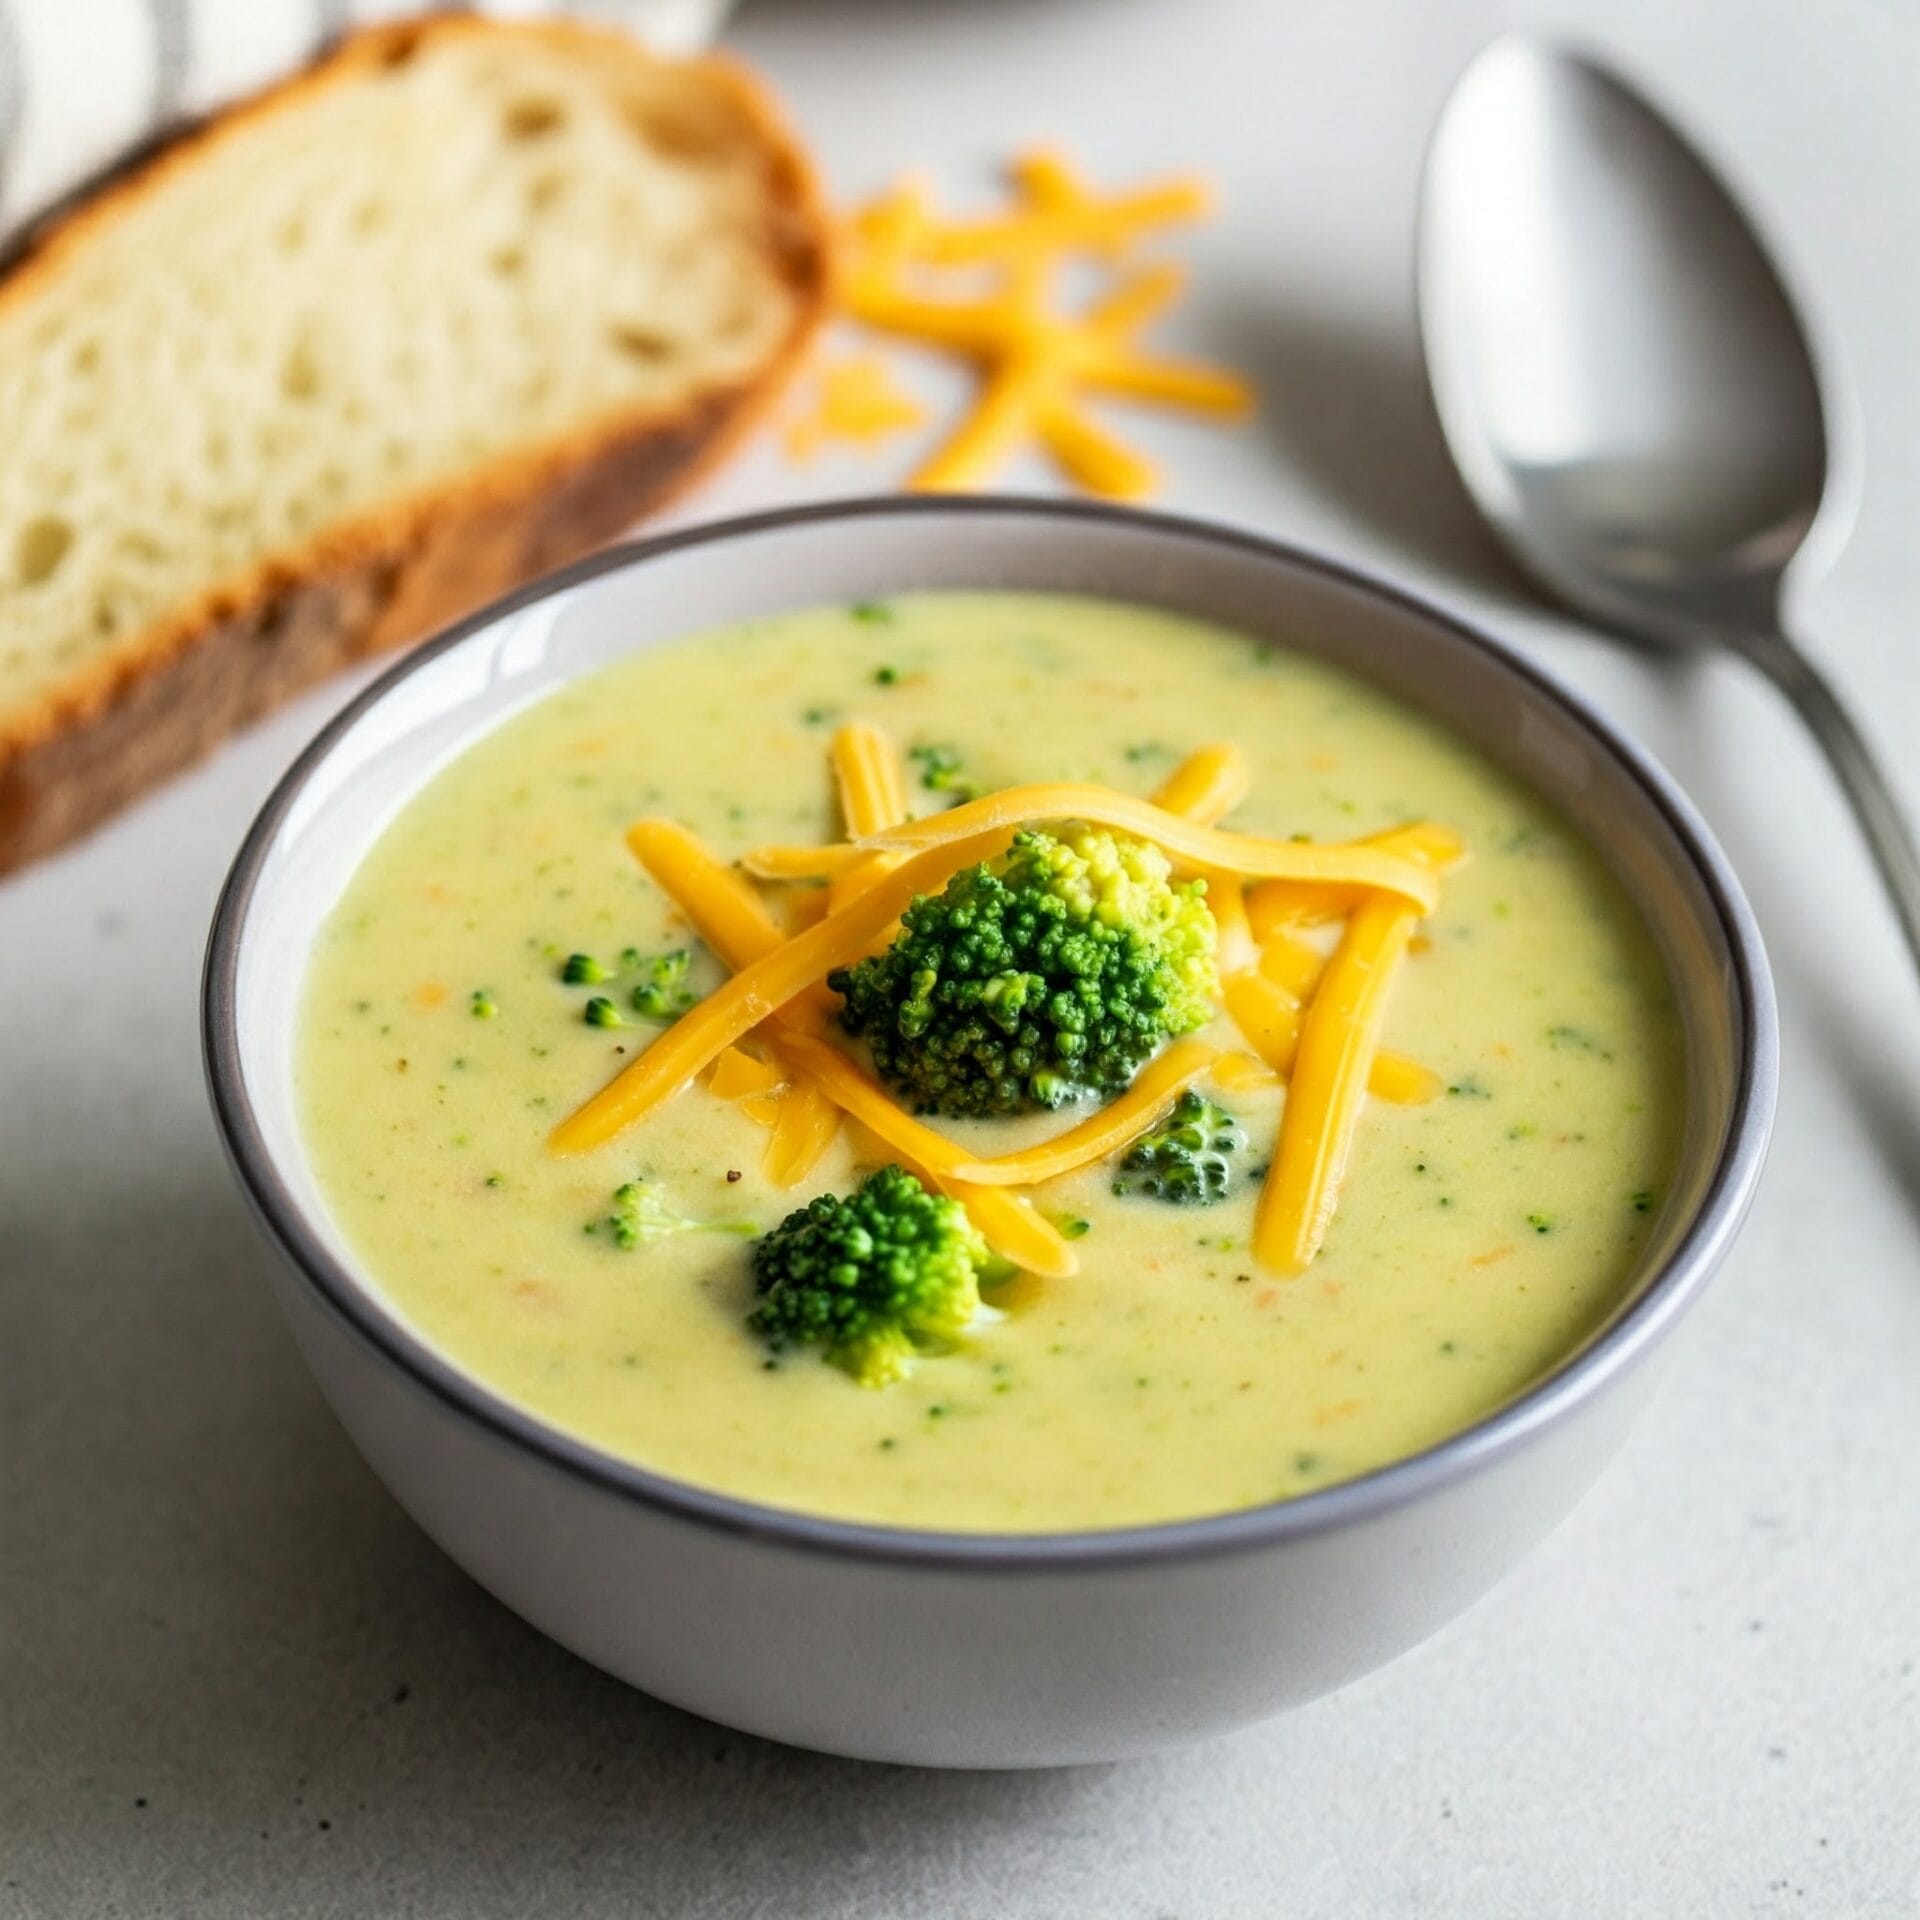
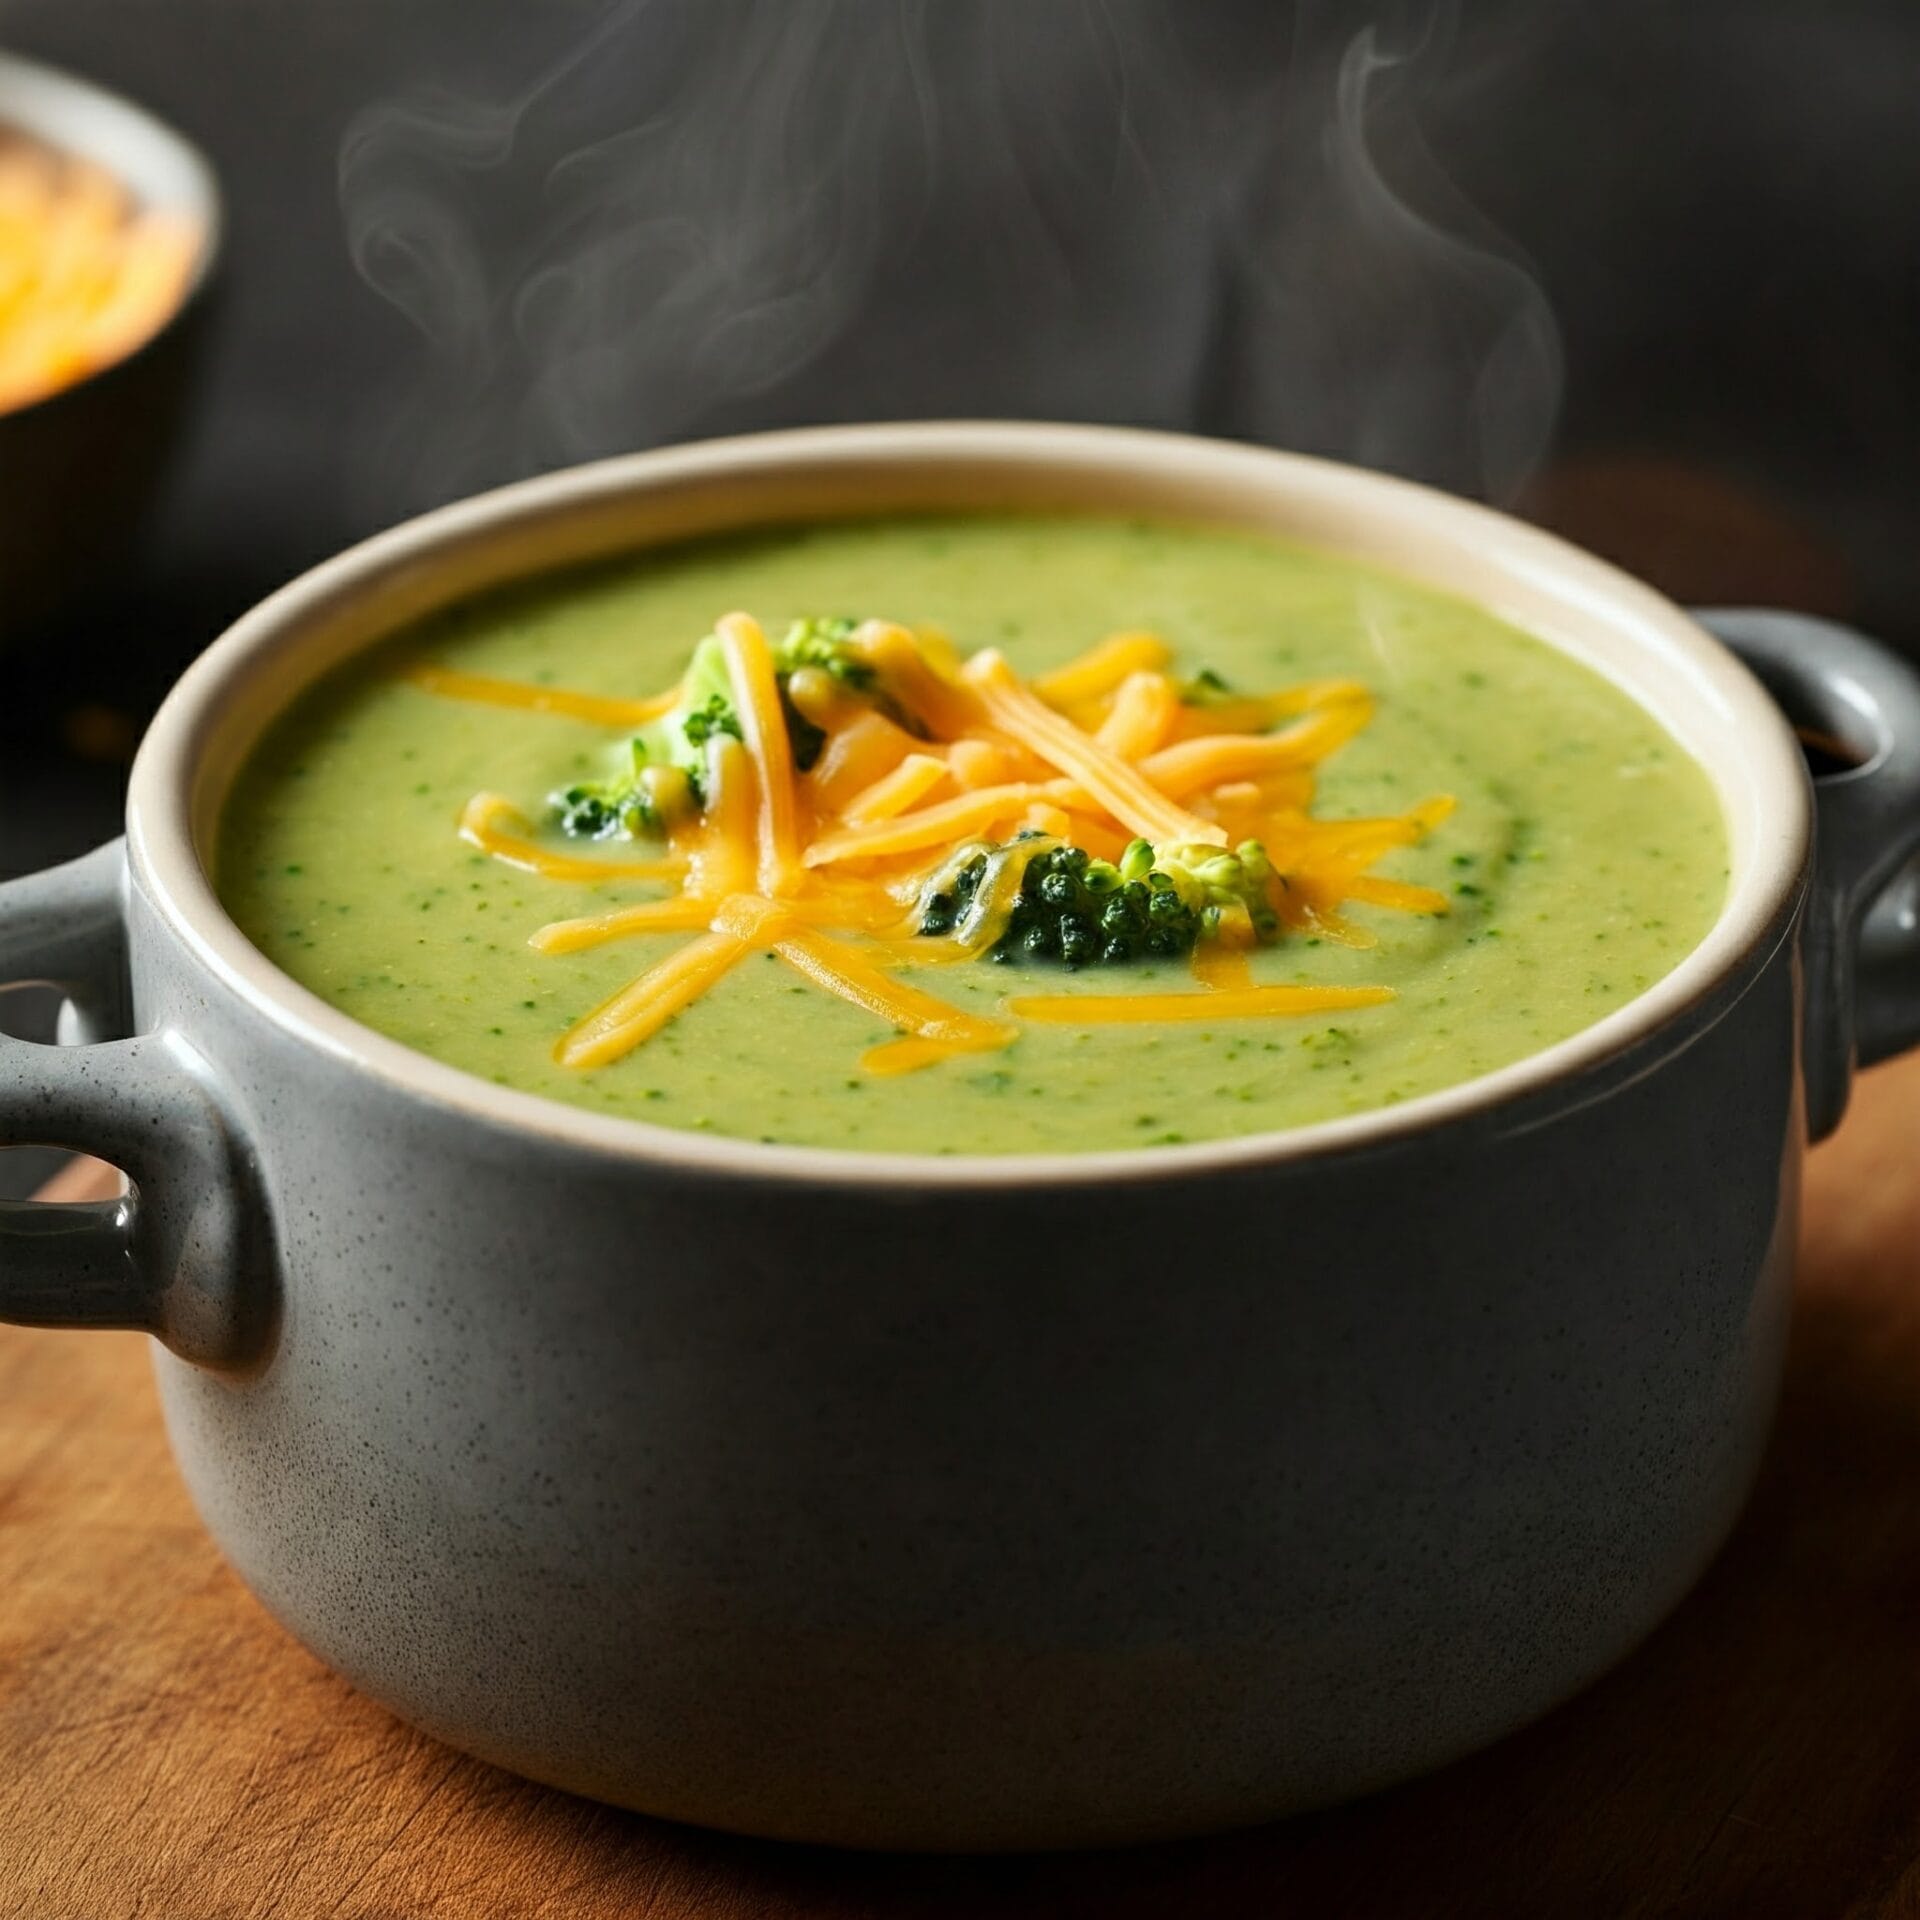
Broccoli Cheddar Soup

Broccoli Cheddar Soup

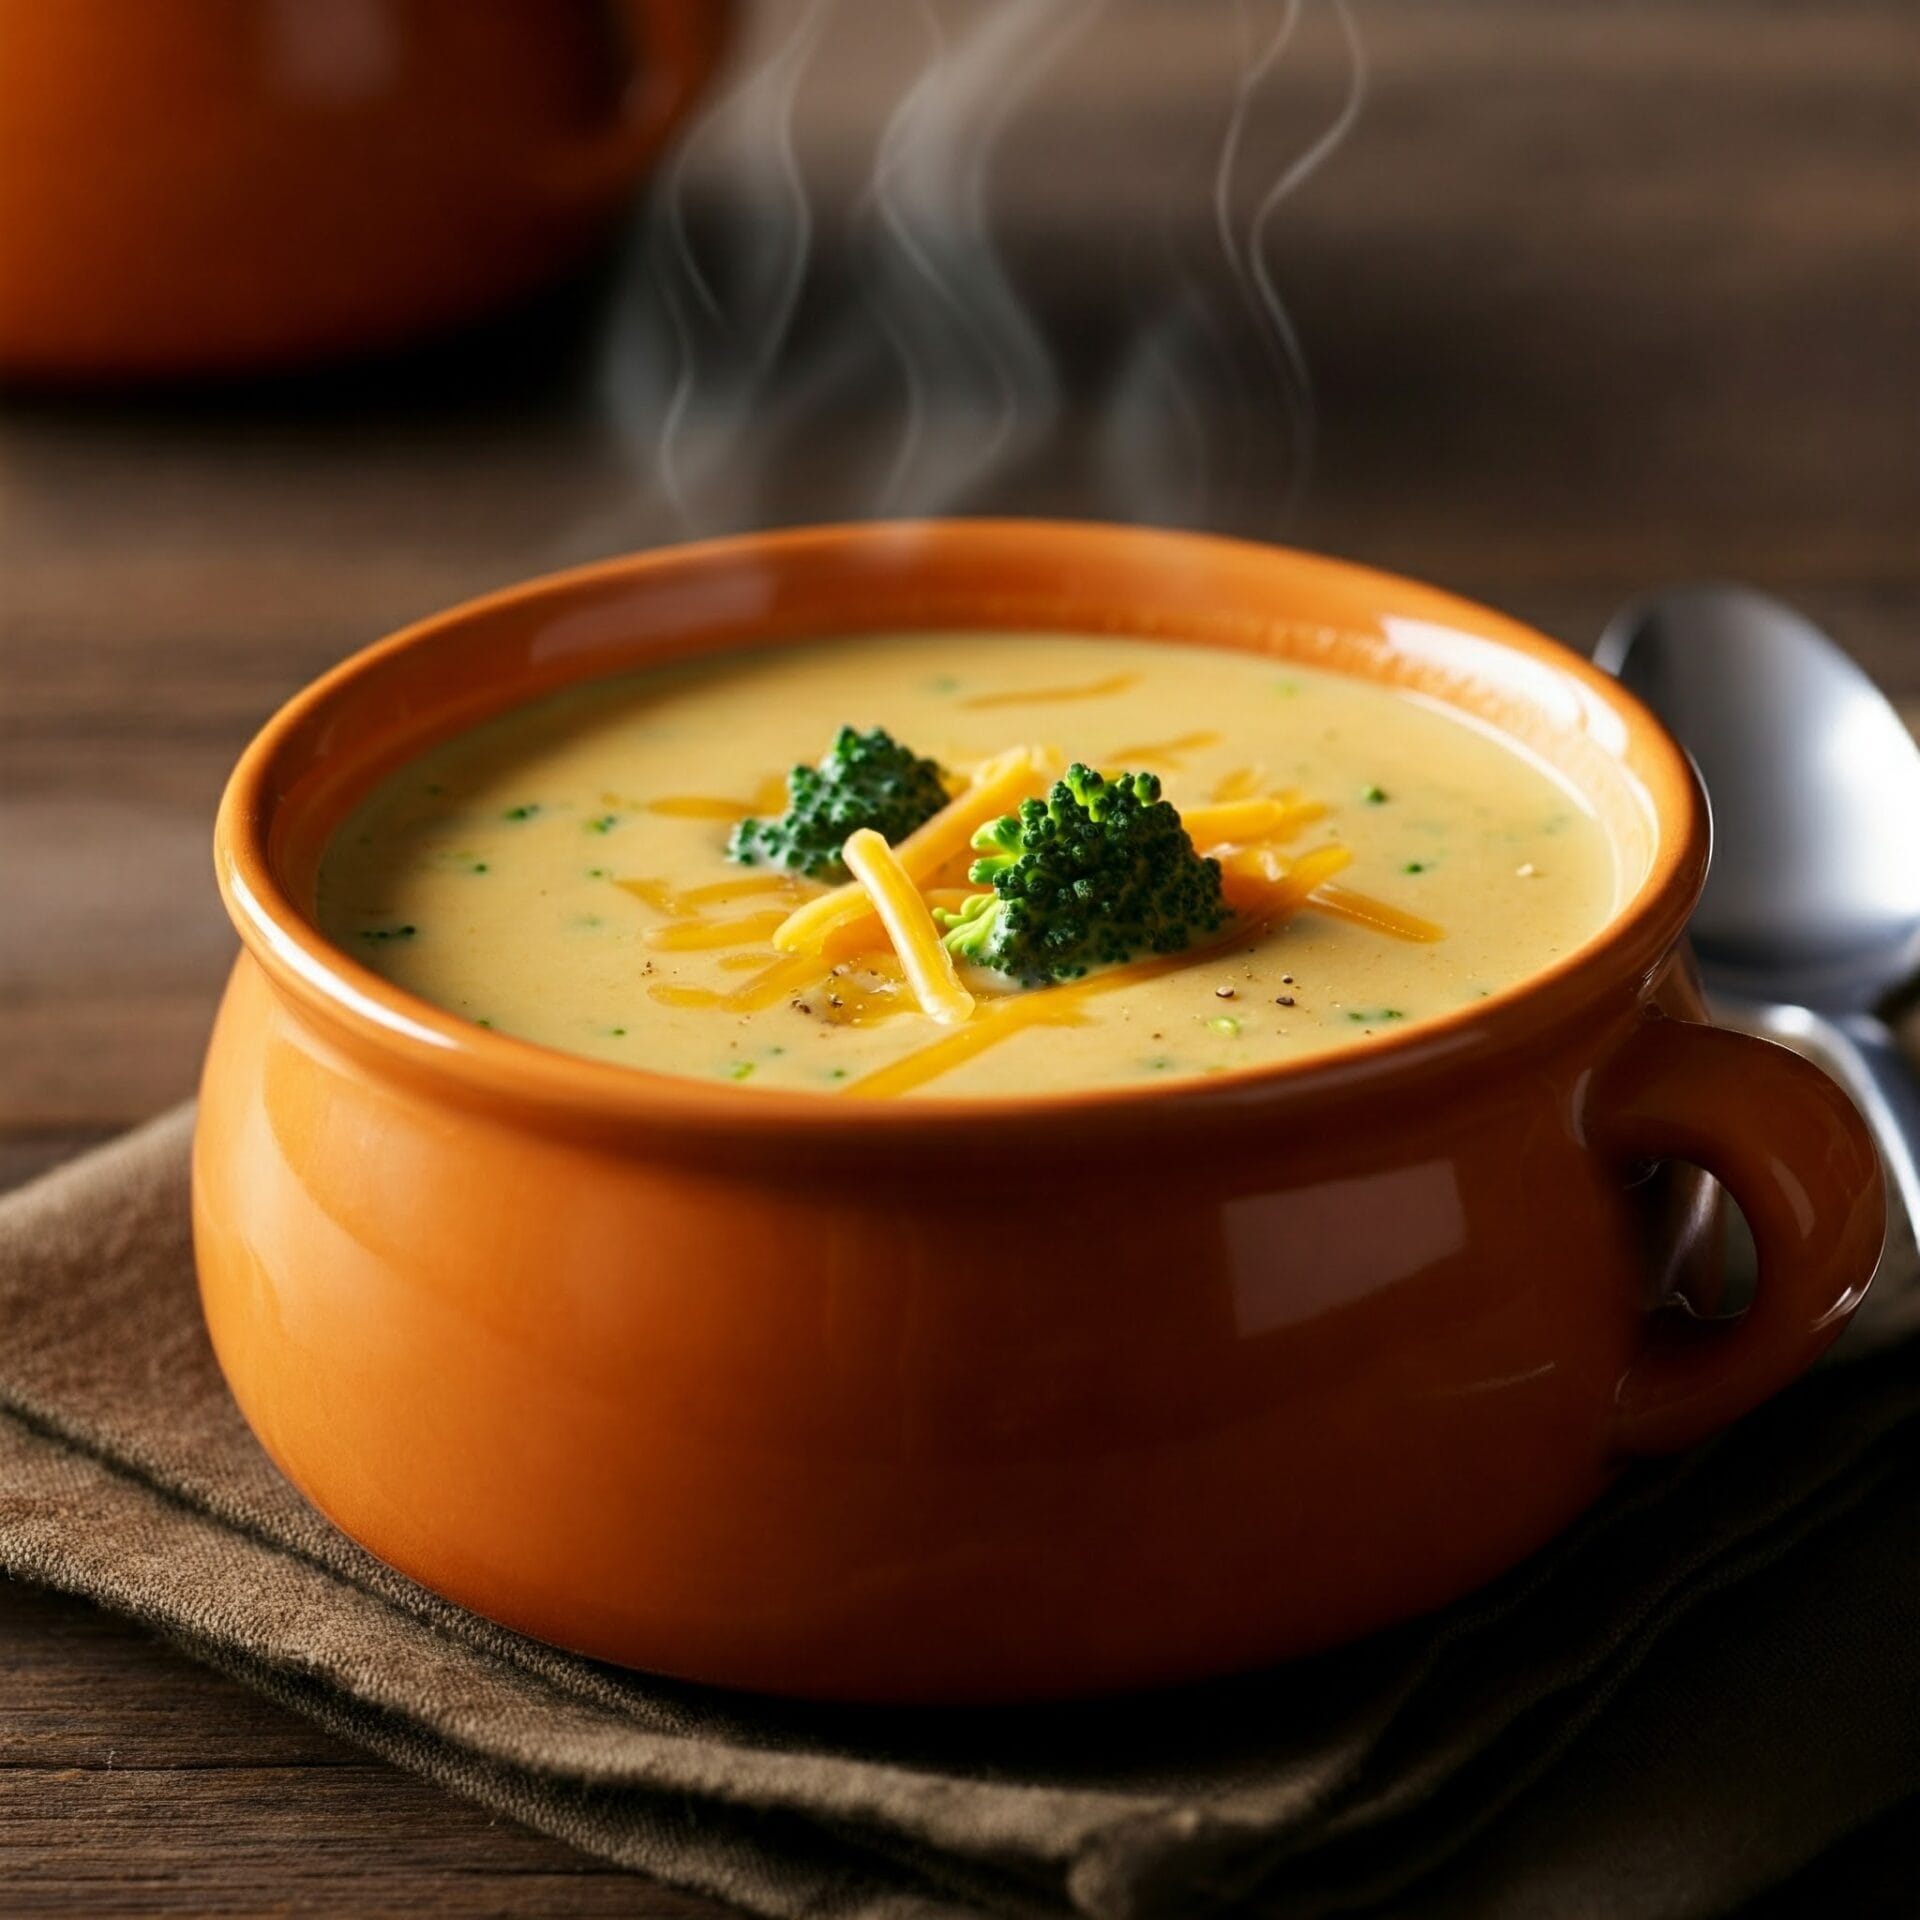
Imagine a bowl of steaming, velvety soup, brimming with tender broccoli florets and a rich, cheesy flavor that will warm you from the inside out. That’s broccoli cheddar soup—a comforting classic that’s perfect for chilly days and cozy nights.

This creamy delight starts with a base of sautéed onions and garlic, creating a fragrant foundation for the soup. Then comes the star of the show: broccoli, simmered to tender perfection in a rich and flavorful broth. But the real magic happens when a generous amount of sharp cheddar cheese is melted into the soup, creating a velvety smooth texture and an irresistible cheesy flavor.

Each spoonful is a symphony of textures and tastes—tender broccoli, creamy broth, and that sharp cheddar bite. It’s a simple yet satisfying dish that’s perfect for a quick weeknight meal or a cozy weekend lunch.

Whether you’re a cheese lover, a soup enthusiast, or simply seeking a comforting and flavorful meal, broccoli cheddar soup is sure to hit the spot. It’s a classic for a reason—a delicious and satisfying dish that’s perfect for any occasion.

Broccoli & Cheddar Cheese Soup

No ratings yet
Broccoli cheddar soup is a classic comfort food loved for its creamy texture and rich flavor. It typically consists of broccoli florets, onions, carrots, and sometimes potatoes, simmered in a broth and then blended or partially blended with sharp cheddar cheese for a velvety smooth finish. Often seasoned with garlic, mustard, and pepper, it's a satisfying and flavorful meal. This soup can be enjoyed as is, or topped with croutons, shredded cheese, or a dollop of sour cream for extra richness.
Prep Time 15 minutes
Cook Time 30 minutes
Servings: 6
Course: Appetizer, Dinner, Lunch, Main Course, Snacks
Cuisine: American
Calories: 345

Ingredients
  

  • 4 Tbsp Unsalted Butter
  • 1 Med Yellow Onion diced
  • ½ tsp Sea Salt
  • 1 tsp Ground Black Pepper to taste
  • 3 Cloves Garlic minced
  • ¼ Cup All-Purpose Flour
  • 2 Cups Milk whole milk is best
  • 2 Cups Vegetable Broth
  • 3 Cups Broccoli florets, chopped
  • 1 Large Carrots Julienned or finely chopped
  • ½ tsp Dijon Mustard
  • 8 oz Cheddar Cheese shredded
  • 1 Cup Croutons homemade or store bought

Method
 

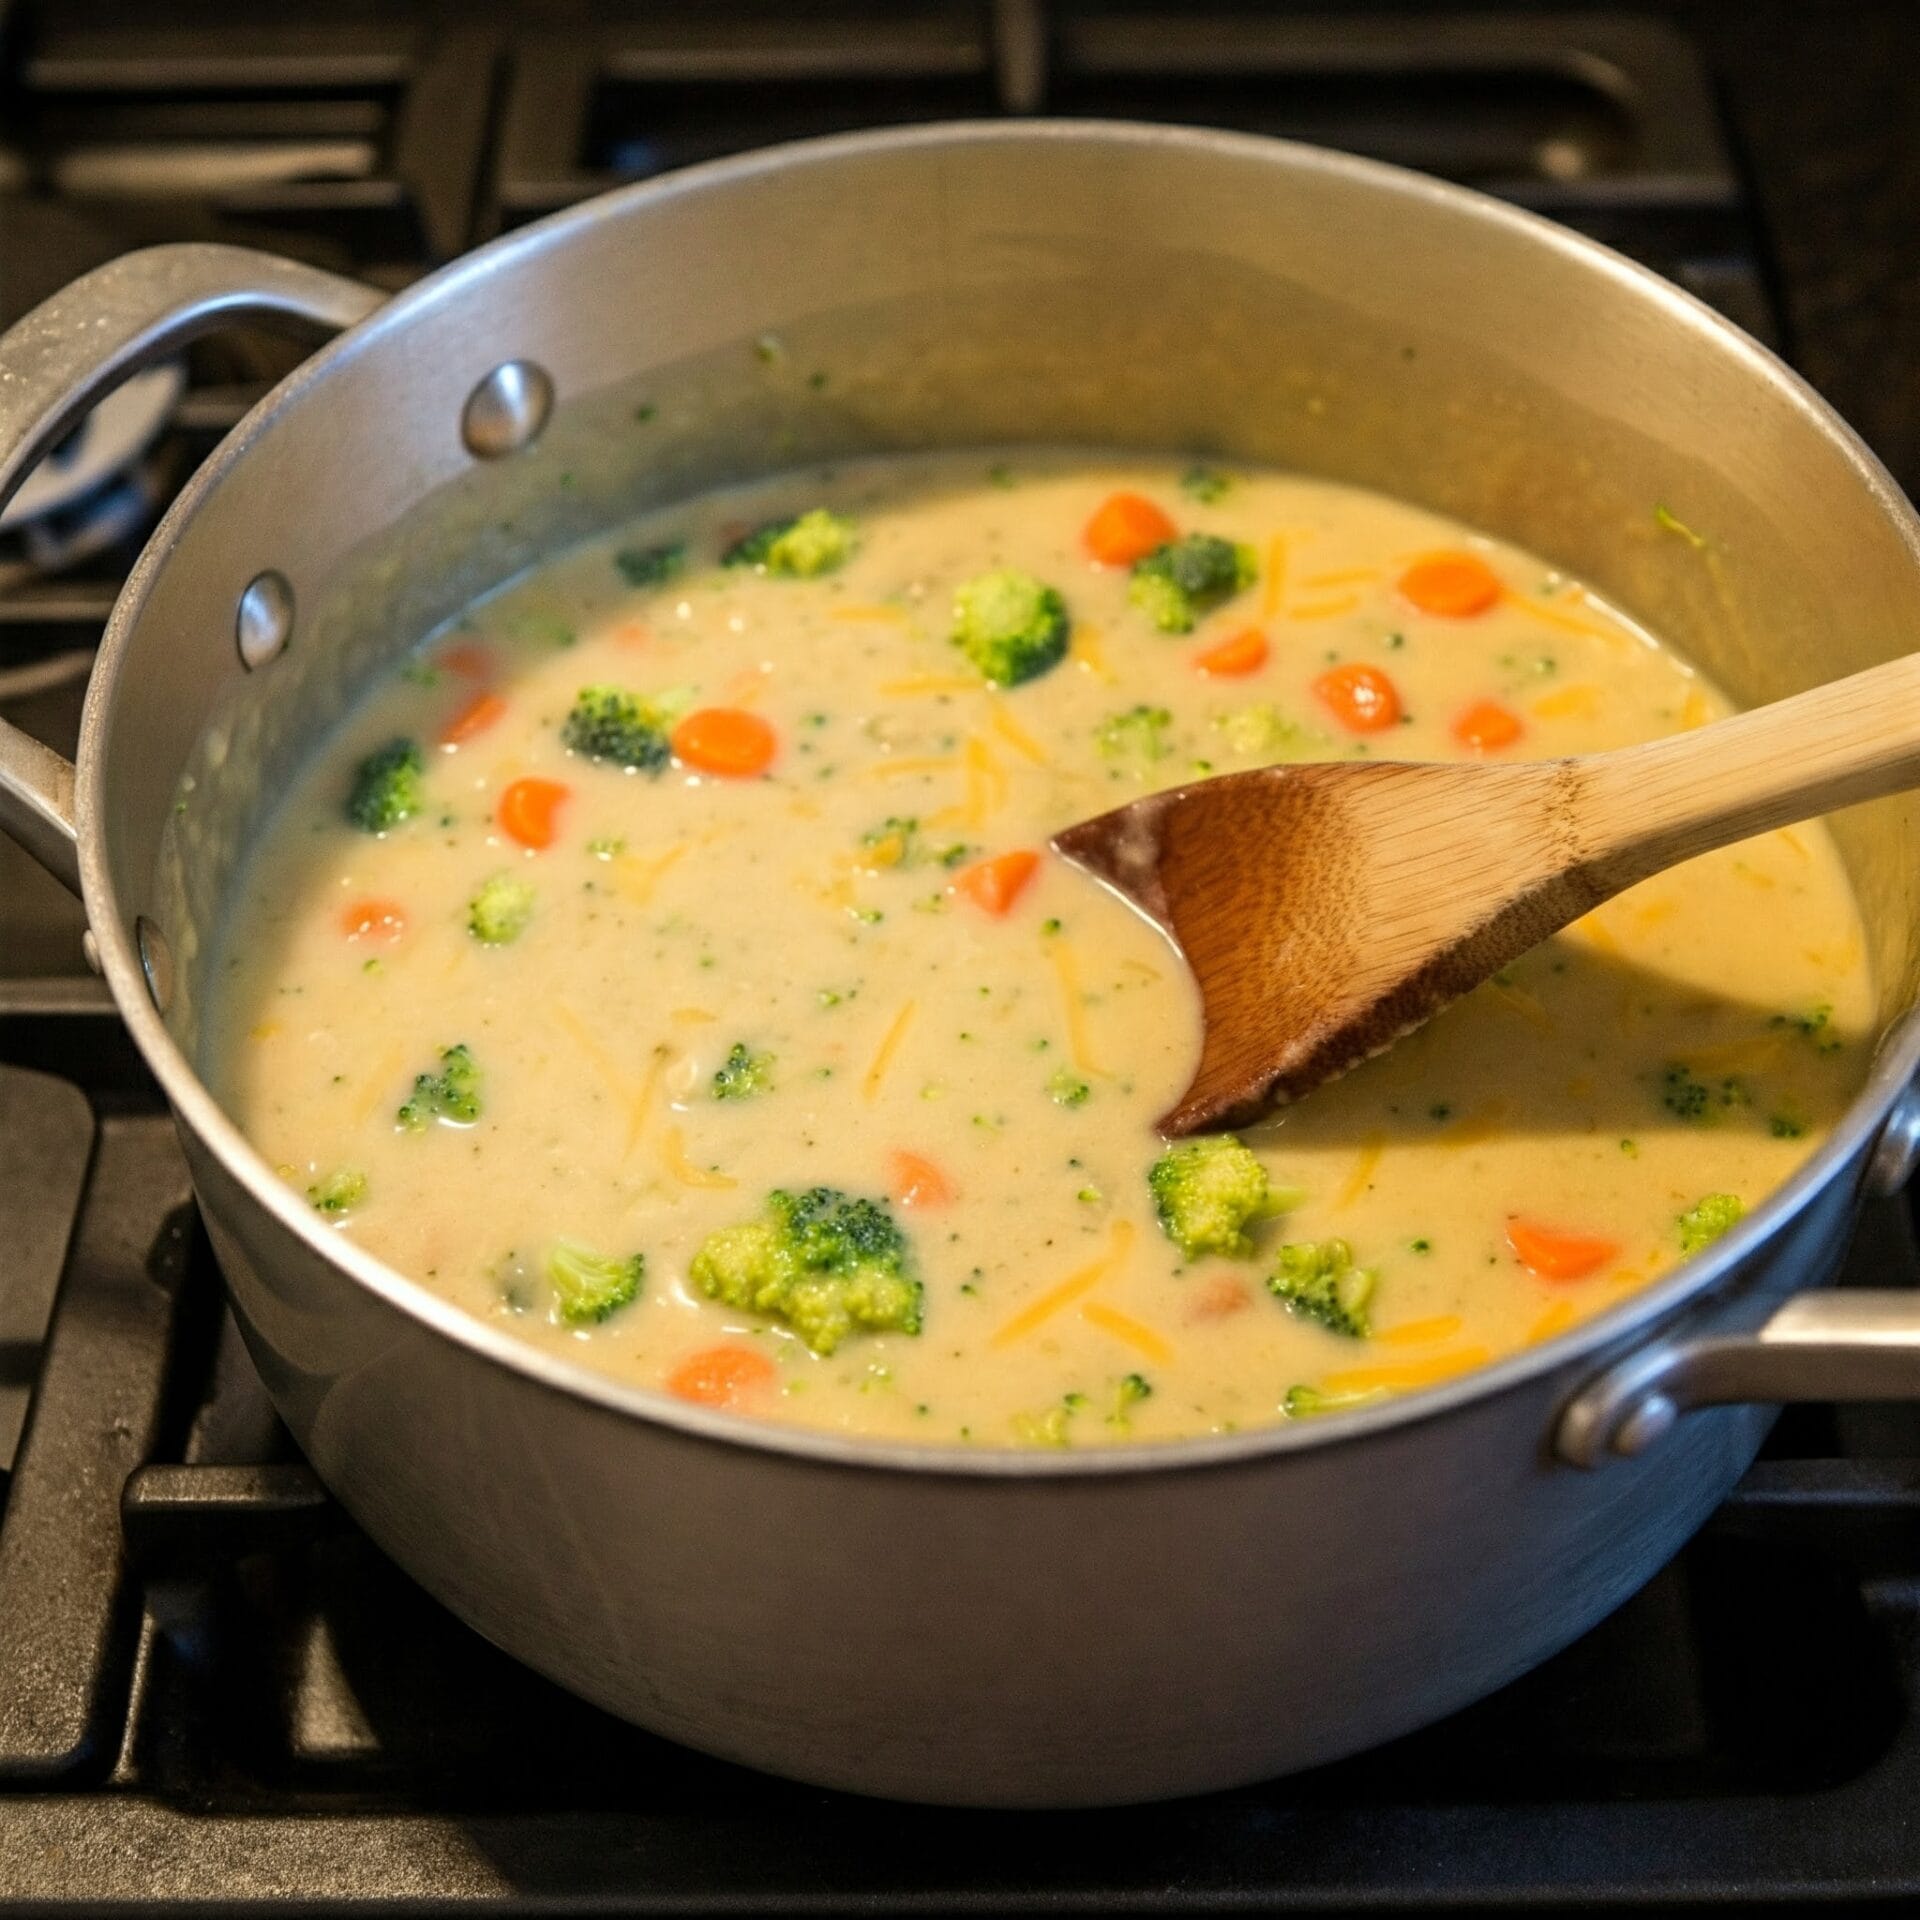
  1. Melt the butter in a large pot over medium heat. Add the onion, salt, and pepper. Cook and stir until the onion becomes translucent and softens. Stir in the garlic until fragrant. Sprinkle in the flour and whisk until it turns a light golden brown. Slowly pour in the milk while whisking constantly.
    4 Tbsp Unsalted Butter, 1 Med Yellow Onion, ½ tsp Sea Salt, 1 tsp Ground Black Pepper, 3 Cloves Garlic, ¼ Cup All-Purpose Flour, 2 Cups Milk
  2. Now, add the broth, broccoli florets, chopped carrots, and mustard to the pot. Give everything a good stir to combine. Bring the mixture to a simmer, then reduce the heat to low, and cook until the broccoli is tender, about 15 to 20 minutes. You can test the broccoli with a fork to make sure it's cooked to your liking.
    2 Cups Vegetable Broth, 3 Cups Broccoli, 1 Large Carrots, ½ tsp Dijon Mustard
  3. Now, for the best part! Slowly add the shredded cheese to the soup, stirring after each addition, until all of the cheese is melted and the soup has reached a lovely, creamy consistency. Season to taste with salt and pepper. Ladle the soup into bowls and serve hot. Croutons make a nice addition for a bit of crunch.
    1 Cup Croutons, 8 oz Cheddar Cheese

Nutrition

Serving: 12ozCalories: 345kcalCarbohydrates: 20gProtein: 14gFat: 24gSaturated Fat: 14gPolyunsaturated Fat: 1gMonounsaturated Fat: 6gTrans Fat: 0.3gCholesterol: 68mgSodium: 855mgPotassium: 384mgFiber: 2gSugar: 7gVitamin A: 3200IUVitamin C: 42mgCalcium: 409mgIron: 1mg

Notes

Ingredients:
  • Broccoli: Fresh broccoli florets are best. If using frozen, thaw it completely before adding it to the soup.
  • Cheese: Use a good-quality sharp cheddar cheese for the best flavor. You can also add other cheeses like Gruyère or fontina for complexity.
  • Aromatics: Onions and garlic form the flavor base of the soup.
  • Carrot: Adds a touch of sweetness and color.
  • Mustard: A small amount of Dijon mustard adds depth and a subtle tanginess.
  • Broth: Use a good-quality vegetable or chicken broth. Homemade broth will add the most flavor.
  • Milk: Whole milk creates a creamy texture. You can use 2% milk if you prefer a lighter soup.
  • Butter and Flour: These create a roux, which thickens the soup.
  • Seasonings: Salt and pepper are essential. You can also add other spices like nutmeg or paprika.
Cooking Tips:
  • Don't Overcook the Broccoli: Simmer the broccoli just until it's tender-crisp. Overcooked broccoli will be mushy.
  • Make a Roux: Cooking the flour with the butter creates a roux, which helps to thicken the soup and prevent lumps.
  • Stir in the Cheese Gradually: Add the cheese a little at a time, stirring constantly until it's melted and smooth. This helps to prevent the cheese from clumping.
  • Adjust Consistency: If the soup is too thick, add a bit more broth to thin it out.
  • Taste and Adjust: Always taste the soup before serving and adjust the seasonings to your liking.
Serving Suggestions:
  • Garnish: Garnish with croutons, shredded cheese, or a dollop of sour cream.
  • Sides: Serve with crusty bread or a side salad for a complete meal.
Variations:
  • Spicy: Add a pinch of red pepper flakes or a dash of hot sauce for heat.
  • Creamier: Use heavy cream instead of milk for an even richer soup.
  • Veggie-Packed: Add other vegetables like cauliflower, carrots, or potatoes.
  • Hearty: Add cooked bacon or ham for a smoky flavor.
With these tips, you'll be able to make a delicious and satisfying broccoli cheddar soup!

Tried this recipe?

Let us know how it was!

Related Recipes

Ingredients

Ingredients:

  • 4 Tbsp Unsalted Butter: The base of your soup’s rich flavor. Unsalted allows you to control the saltiness.
  • 1 Med Yellow Onion, diced: Adds sweetness and depth.
  • ½ tsp Sea Salt: Enhances the flavors; you can adjust to taste later.
  • 1 tsp Ground Black Pepper, to taste: Provides a bit of warmth and spice.
  • 3 Cloves Garlic, minced: Classic aromatic for savory depth.
  • ¼ Cup All-Purpose Flour: This will thicken the soup.
  • 2 Cups Milk (whole milk is best): Creates creaminess. Whole milk adds richness, but you can use 2% in a pinch.
  • 2 Cups Vegetable Broth: Forms the soup’s base; use a good quality one for the best flavor.
  • 3 Cups Broccoli, florets, chopped: The star ingredient!
  • 1 Large Carrot, Julienned or finely chopped: Adds a touch of sweetness and color.
  • ½ tsp Dijon Mustard: A secret ingredient that adds complexity.
  • 8 oz Cheddar Cheese, shredded: Sharp cheddar is recommended for the best flavor.
  • 1 Cup Croutons, homemade or store-bought: For a crunchy topping.

Tips for the Best Broccoli Cheddar Soup:

  • Don’t overcook the broccoli: Aim for tender-crisp broccoli that retains its vibrant green color.
  • Use quality cheese: The better the cheddar, the better the soup!
  • Adjust seasonings to taste: Start with the recommended amounts of salt and pepper, then add more to your liking.
  • Blend carefully: If using an immersion blender, be careful not to over-blend, which can make the soup gummy.
  • Thicken gradually: Add the flour slowly to avoid lumps.
  • Garnish generously: Croutons are a must, but you can also add extra shredded cheese, a dollop of sour cream, or even some fresh parsley.

Image Gallery Broccoli Cheddar Soup

Storage & Leftovers

Storage

  • Refrigerator: Broccoli Cheddar Soup is best enjoyed fresh, but leftovers can be stored in the refrigerator for 3-4 days. Make sure to transfer the soup to an airtight container once it has cooled completely.

  • Freezer: While freezing is an option, it’s not generally recommended for Broccoli Cheddar Soup. Dairy-based soups can sometimes separate or become grainy when frozen and thawed. However, if you do choose to freeze it, store it in a freezer-safe container or bag for up to 1 month.

Reheating

  • Stovetop: The best way to reheat Broccoli Cheddar Soup is gently on the stovetop over low heat. Stir occasionally to prevent sticking and scorching. If the soup seems thick, you can thin it out with a splash of milk or broth. 

  • Microwave: While you can use a microwave, it’s not ideal as it can heat unevenly and may cause the cheese sauce to separate. If you do use a microwave, heat it in short bursts, stirring frequently, until warmed through.  

Tips and Tricks for Leftovers

  • Separation: If your soup separates slightly after refrigeration, don’t worry! A quick whisk or a blend with an immersion blender can often restore its creamy texture.
  • Thinning: Broccoli Cheddar Soup tends to thicken as it sits in the refrigerator. Add a little extra milk or broth when reheating to achieve your desired consistency.
  • Freshness: Always check for any signs of spoilage before consuming leftovers. Look for any off-putting smells, discoloration, or mold.

By following these storage and reheating tips, you can enjoy your homemade Broccoli Cheddar Soup even after the first day!

Please follow and like us:
onpost_follow
fb-share-icon197
Tweet120
Pinterest20
Share 20
submit to reddit

Creamy Chicken Soup With Pasta & Spinach

Creamy Chicken Soup With Pasta & Spinach

Cozy up with a bowl of this hearty Creamy Chicken Soup, the ultimate feel-good meal for any day of the week. Tender shredded chicken, al dente pasta, and baby spinach are simmered in a rich, velvety broth flavored with garlic, herbs, and a splash of cream. It’s nourishing, filling, and packed with comfort—perfect for chilly nights, meal prep, or when you just need something soul-soothing and delicious. One pot, easy to make, and impossible to resist.

Creamy Chicken Soup With Pasta & Spinach

No ratings yet
Creamy chicken soup with pasta and spinach is a comforting and flavorful dish that combines tender chicken, hearty pasta, and nutritious spinach in a rich and creamy broth. It's a versatile soup that can be adapted to different tastes and preferences, making it a popular choice for a quick and satisfying meal.
Prep Time 15 minutes
Cook Time 25 minutes
Servings: 6 people
Course: Lunch, Main Course
Cuisine: American, Northeast
Calories: 691

Ingredients
  

  • 1 lb Chicken Breast shredded or chopped
  • 4 Cups Chicken Broth low sodium (or vegetable broth)
  • 2 tsp Olive Oil
  • ½ Cup Yellow Onion chopped fine
  • 1 Cup Carrots small diced
  • ½ Cup Celery fine dice
  • 2 Cloves Garlic minced
  • Cups Mild Cheddar Cheese
  •  
    1 Cup Cream Cheese softened
  • ½ Cup Heavy Cream
  • ½ tsp Kosher Salt to taste
  • ½ tsp Ground Black Pepper to taste
  •  
    2 Cups Ditalini Pasta or comparable small pasta
  • 2 Cups Spinach Chopped
Garnish
  • ½ Cup Parmesan Cheese

Method
 

  1. Heat your pot or Dutch oven, then add the vegetables and get those aromatics going! Stir them around as they cook until they're nice and tender.
  2. Now, introduce the cooked chicken to the pan. Let it heat through and absorb the flavors of the vegetables for a couple of minutes, stirring occasionally.
  3. It's time to build the creamy base. Pour in the rich broth, followed by the heavy cream and cream cheese. Give it a stir, then cover the pot and bring the soup to a boil. Once it's bubbling, reduce the heat and let it simmer gently for 15 minutes, allowing the flavors to meld.
  4. Now, add the pasta to the simmering soup. Let it bubble away gently until the pasta is cooked to your liking, usually around 8-10 minutes. Once the pasta is ready, stir in the cheddar cheese, allowing it to melt into the creamy broth and create a luscious texture.
  5. As the pasta reaches perfect tenderness, it's time to add the spinach. Gently fold it into the simmering soup, watching as it wilts and releases its vibrant color. Be sure to taste and adjust the seasoning with a sprinkle of salt and a grind of black pepper. Then, ladle the soup into bowls and savor the comforting flavors.

Nutrition

Serving: 12ozCalories: 691kcalCarbohydrates: 51gProtein: 38gFat: 37gSaturated Fat: 20gPolyunsaturated Fat: 2gMonounsaturated Fat: 10gTrans Fat: 0.01gCholesterol: 147mgSodium: 1354mgPotassium: 709mgFiber: 3gSugar: 6gVitamin A: 5796IUVitamin C: 7mgCalcium: 402mgIron: 2mg

Notes

Chicken:
  • Cooked chicken is key: Using pre-cooked chicken (rotisserie, leftover, etc.) saves time and ensures tender results.
  • Dark meat for flavor: While chicken breasts work, using some dark meat (thighs, legs) adds richness.
  • Shred or dice: Shredding creates a more integrated texture, while dicing offers more defined bites.
Vegetables:
  • Aromatics are essential: The classic trio of onions, carrots, and celery builds flavor.
  • Sautéing is key: Don't skip this step! It develops depth and sweetness in the vegetables.
  • Garlic for punch: Freshly minced garlic is best for its pungent aroma and flavor.
  • Spinach at the end: Add spinach towards the end of cooking to preserve its color and nutrients.
Creamy Base:
  • Broth choice matters: Homemade or low-sodium store-bought broth is ideal.
  • Cream content: Heavy cream or half-and-half create richness. Adjust the amount for desired creaminess.
  • Cream cheese for tang: Cream cheese adds a subtle tang and helps thicken the soup.
  • Cheese matters: Cheddar adds sharpness, Parmesan adds saltiness. Consider a blend!
Pasta:
  • Small shapes are best: Ditalini, orzo, mini shells, etc., cook quickly and hold the sauce well.
  • Cook to al dente: Slightly firm pasta is ideal. Overcooked pasta can make the soup mushy.
Seasoning:
  • Salt and pepper are essential: Season to taste throughout the cooking process.
  • Herbs and spices: Fresh or dried herbs (thyme, Italian seasoning) add complexity.
  • Optional extras: A pinch of red pepper flakes or a squeeze of lemon juice can brighten the flavors.
Other Tips:
  • Don't overcook: Simmer gently to avoid curdling the dairy or overcooking the chicken and vegetables.
  • Adjust consistency: If the soup is too thick, add more broth. If it's too thin, simmer uncovered to reduce or use a cornstarch slurry.
  • Garnish generously: Fresh parsley, a sprinkle of cheese, or croutons add visual appeal and flavor.

Tried this recipe?

Let us know how it was!

Related Recipes

Ingredients

Ingredients:

  1. 1 lb (450g) cooked shredded or chopped chicken breast (rotisserie chicken works great!)
  2. 4 cups (1L) low-sodium chicken broth (or vegetable broth)
  3. 2 teaspoons olive oil
  4. 1/2 cup chopped onion
  5. 1 cup diced carrots
  6. 1/2 cup diced celery
  7. 2 garlic cloves, minced
  8. 1 1/2 cups shredded mild cheddar cheese
  9. 1 cup cream cheese, softened
  10. 1/2 cup heavy cream
  11. 1/2 teaspoon kosher salt
  12. Fresh black pepper (to taste)
  13. 2 cups uncooked ditalini pasta (or any other small pasta)
  14. 2 cups chopped spinach
  15. 1/2 cup parmesan cheese for garnish (optional)


Image Gallery Creamy Chicken Soup With Pasta & Spinach

Storage & Leftovers

Storage:

  • Refrigerator:
    Let the soup cool completely, then store in an airtight container in the fridge for up to 4 days.

  • Freezer:
    Freeze in individual portions (without the pasta if possible) for up to 2 months. Creamy soups can sometimes separate when frozen, so stir well when reheating. Cooked pasta may become soft, so consider freezing the soup without it and adding fresh pasta when serving.

Reheating:

  • Stovetop (Best Method):
    Reheat over medium-low heat, stirring often. Add a splash of broth or milk to loosen the soup if it has thickened.

  • Microwave:
    Heat in 1-minute intervals, stirring between each, until hot. Add a little liquid if needed.

Pro Tips:

  • If prepping ahead, cook and store the pasta separately to avoid it becoming mushy.

  • Add a handful of fresh spinach right before serving leftovers to revive the vibrant texture and flavor.

  • Garnish with a fresh grind of black pepper or grated parmesan for a just-made feel.

Please follow and like us:
onpost_follow
fb-share-icon197
Tweet120
Pinterest20
Share 20
submit to reddit

Subscribe for New Recipes

* indicates required

Intuit Mailchimp

Beef Stroganoff Soup

Beef Stroganoff Soup

This hearty and comforting Beef Stroganoff Soup transforms the classic dish into a rich, soul-warming bowl of goodness. Tender ground beef is simmered with savory mushrooms and aromatic onions in a creamy beef broth infused with garlic, Worcestershire sauce, and tangy sour cream. Swirls of egg noodles soak up all the flavor, making every spoonful creamy, beefy, and deeply satisfying. Finished with a sprinkle of fresh parsley, this soup is the perfect fusion of cozy comfort and bold flavor—ideal for chilly nights or an easy weeknight dinner.

Beef Stroganoff Soup

No ratings yet
This Beef Stroganoff Soup is a flavor adventure! Tender beef and earthy mushrooms swim in a rich, savory broth, all brought together with a touch of red wine and a swirl of creamy sour cream. It's comfort food with a sophisticated twist, perfect for a cozy night in.
With simple ingredients and easy-to-follow instructions, this recipe is a winner for seasoned cooks and beginners alike. Each bite is an explosion of texture and taste, from the tender beef to the chewy egg noodles. You'll be amazed at how quickly this soup disappears from your bowls!
Prep Time 15 minutes
Cook Time 1 hour
Servings: 6 people
Course: Dinner, Lunch, Main Course
Cuisine: Eastern European, Ukraine
Calories: 361

Ingredients
  

  • 1 Tbsp Unsalted Butter
  • 3 Tbsp Olive Oil divided
  • 1 lb Stew Beef
  • 8 oz Cremini mushrooms sliced
  • 1 Cup Yellow Onion diced
  • 3 Cloves Garlic minced
  • 2 Tbsp Tomato Paste
  • 1 Tbsp Worcestershire Sauce
  • ½ Cup Dry Red Wine
  • 6 Cups Beef Stock low sodium
  • 2 Cups Egg noodles
  • ½ Cup Sour Cream
  • 2 Tbsp All-Purpose Flour
  • 1 Bunch Parsley fresh, for garnish
  • 1 pinch Kosher Salt to taste
  • 1 pinch Ground Black Pepper to taste

Method
 

  1. In a Dutch oven, melt the butter with 2 tablespoons of olive oil over medium-high heat. Add the beef, season with salt and pepper, and cook until browned on all sides. Remove the beef from the pot and set it aside.
  2. Add the onion to the pot with the remaining oil and cook until softened. Then, add the mushrooms and cook until they are tender.
  3. Stir in the tomato paste and Worcestershire sauce, making sure they are evenly distributed throughout the mushroom and onion mixture.
  4. Carefully pour the red wine into the pot, ensuring it covers the bottom, to deglaze. Bring the mixture to a boil over medium-high heat, then let the wine simmer and reduce for approximately 1-2 minutes, or until slightly thickened.
  5. Gently return the browned beef to the pot and pour in 5 cups of rich beef stock. Over medium-high heat, bring the liquid to a rolling boil. Once boiling, reduce the heat to low, cover the pot snugly, and let it simmer for 35-40 minutes. The beef will be perfectly tender and infused with flavor.
  6. Stir in the noodles, cover the pot, and simmer for 5-7 minutes, or until the noodles reach your desired level of tenderness.
  7. While the noodles cook, combine the sour cream and flour in a small bowl. Ladle 2 cups of the hot soup into the bowl and whisk until well combined. Return the mixture back into the pot and simmer for 1-2 minutes, stirring frequently, until thickened. If the noodles absorbed too much liquid, add more broth.
  8. Finish the soup with a sprinkle of salt and freshly ground black pepper according to your preference. Just before serving, stir in a handful of chopped fresh parsley for a bright, herbaceous lift.

Nutrition

Serving: 12ozCalories: 361kcalCarbohydrates: 22gProtein: 26gFat: 17gSaturated Fat: 6gPolyunsaturated Fat: 1gMonounsaturated Fat: 8gTrans Fat: 0.1gCholesterol: 74mgSodium: 628mgPotassium: 1112mgFiber: 2gSugar: 5gVitamin A: 1072IUVitamin C: 17mgCalcium: 93mgIron: 4mg

Notes

Beef Choice & Prep:
  • Cut: Use a tender cut of beef like sirloin, tenderloin, or New York strip.
  • Slicing: Slice the beef against the grain for maximum tenderness. Aim for thin, bite-sized pieces.
  • Don't overcrowd the pan: When searing the beef, work in batches to ensure proper browning. Overcrowding will cause the beef to steam instead of sear.
Flavor Boosters:
  • Umami: Don't be afraid to add a splash of Worcestershire sauce or a dollop of tomato paste to deepen the savory flavors.
  • Mushrooms: While not traditional in every stroganoff, mushrooms add a wonderful earthy note. Use cremini, button, or even wild mushrooms.
  • Aromatics: Sautéing onions and garlic with the mushrooms builds a flavorful foundation for the soup.
  • Herbs: Fresh thyme or a bay leaf simmered with the broth adds subtle complexity.
Texture & Consistency:
  • Noodles: Egg noodles are classic, but you can experiment with pappardelle, wide egg noodles, or even small pasta shapes.
  • Sour cream: For the creamiest texture, use full-fat sour cream.
  • Tempering: To prevent the sour cream from curdling, temper it by gradually whisking in a small amount of the hot soup before adding it to the pot.
  • Thickness: If your soup is too thin, you can thicken it with a cornstarch slurry (cornstarch mixed with a little cold water or broth).
Serving Suggestions:
  • Garnishes: Fresh parsley is a must, but you can also try chives, dill, or a dollop of crème fraîche.
  • Sides: Serve with crusty bread, a simple salad, or roasted vegetables.
Other Tips:
  • Broth: Use a good quality beef broth for the best flavor. Homemade is ideal, but a store-bought low-sodium broth works well too.
  • Simmering: Don't rush the simmering process. This allows the beef to become tender and the flavors to meld.
  • Salt & Pepper: Season gradually throughout the cooking process, tasting and adjusting as needed.
Enjoy your delicious homemade beef stroganoff soup!

Tried this recipe?

Let us know how it was!

Related Recipes

Ingredients

Ingredients:

  • 1 tablespoon unsalted butter
  • 3 tablespoons olive oil, divided
  • 1 pound stew beef, cut into 1-inch cubes
  • 8 ounces cremini mushrooms, sliced
  • 1 cup yellow onion, diced
  • 3 cloves garlic, minced
  • 2 tablespoons tomato paste
  • 1 tablespoon Worcestershire sauce
  • ½ cup dry red wine
  • 6 cups beef stock, low sodium
  • 2 cups egg noodles
  • ½ cup sour cream
  • 2 tablespoons all-purpose flour
  • 1 bunch fresh parsley, for garnish
  • Kosher salt, to taste
  • Ground black pepper, to taste

Image Gallery Beef Stroganoff Soup

Storage & Leftovers

Refrigerator:
Let the soup cool to room temperature, then transfer to an airtight container. Store in the refrigerator for up to 4 days. The noodles may absorb more liquid over time, so you can add a splash of broth or water when reheating to restore the consistency.

Freezer:
For best results, freeze the soup without the noodles (they can become mushy). Store the base in freezer-safe containers for up to 2 months. When ready to eat, thaw overnight in the fridge, reheat gently, and stir in freshly cooked noodles.

Reheating:
Warm leftovers on the stovetop over medium heat or microwave in short bursts, stirring in between. Add broth or milk as needed to loosen the soup. Stir in a spoonful of sour cream after reheating if you’d like to refresh the creaminess.

Please follow and like us:
onpost_follow
fb-share-icon197
Tweet120
Pinterest20
Share 20
submit to reddit

Subscribe for New Recipes

* indicates required

Intuit Mailchimp