Seafood

Seafood

Seafood

Ahoy, seafood lovers! Dive into our treasure trove of seafood recipes. Experience succulent shrimp scampi, hearty cioppino, and flaky cod. From creamy clam chowder to zesty tuna ceviche, our collection offers a symphony of flavors. Whether you crave scallops or bouillabaisse, these recipes are your passport to culinary delights. Grab your aprons and unleash your inner chef! 🌊🦞🐠

Alphabetical List

A B C D E F G H I J K L M N O P Q R S T U V W X Y Z

Please follow and like us:
onpost_follow
fb-share-icon197
Tweet120
Pinterest20
Share 20
submit to reddit

Quick links to our most popular cuisines.

Mexican Cuisine
Italian Cuisine
Chinese Cuisine
Japanese Cuisine
Indian Cuisine
Thai Cuisine
American Cuisine
Mediterranean Cuisine
French Cuisine

Quick links to our most popular sections.

Appetizers
Breakfast


One-Pot Meals
Stir Fry Meals
Top Rated Recipes
Insta-Pot Recipes

Recipes by Ingredient

Ingredients A

Ingredients B

Ingredients C

Ingredients D

Ingredients E

Ingredients F

Ingredients G

Ingredients H

Ingredients I

Ingredients J

[et_pb_row column_structure=”1_6,1_6,1_6,1_6,1_6,1_6″ _builder_version=”4.27.4″ _module_preset=”d

Shrimp Chowder

Shrimp Chowder

This Shrimp Chowder is a creamy coastal dream in a bowl! Tender, juicy shrimp swim in a rich, flavorful broth alongside hearty chunks of potato and sweet bursts of corn—each spoonful delivering a comforting medley of textures and seaside flavor.

It’s a celebration of simple ingredients done right: plump shrimp, velvety potatoes, and a whisper of smoky bacon to deepen the flavor. Whether you’re a seafood lover or just craving something soul-warming, this chowder is sure to hit the spot.

Why You’ll Love It:
🦐 Flavorful – A perfect balance of creamy, savory, and subtly sweet.
🥔 Hearty – Loaded with shrimp, potatoes, and corn for a filling, satisfying meal.
Weeknight-friendly – Quick and easy to make, yet elegant enough for guests.

Grab a spoon and dive in—this homemade Shrimp Chowder brings the cozy charm of a seaside kitchen straight to your table.

Shrimp Chowder

No ratings yet
Shrimp chowder is a creamy, comforting soup packed with tender shrimp, potatoes, and often other vegetables like corn and celery. It's a flavorful and satisfying dish, perfect for a cozy meal.
Prep Time 15 minutes
Cook Time 25 minutes
Servings: 4 people
Course: Dinner, Main Course
Cuisine: New England, Northeast
Calories: 397

Ingredients
  

  • 2 Slices Bacon chopped
  • 1 Tbsp Extra Virgin Olive Oil a little extra for drizzling
  • 1 small Yellow Onion chopped
  • 1 tsp Tomato Paste
  • 3 Tbsp All-Purpose Flour
  • 3 Cups Chicken Broth low Sodium
  • 2 Cups Half and Half
  • 1 lb Red Skinned Potatoes halved or quartered if large
  • 12 oz Medium Shrimp
  • ½ Cup Fresh Basil Loosely packed and torn into pieces
  • 1 pinch Kosher Salt to taste
  • 1 pinch Ground Black Pepper to taste

Method
 

  1. Cook the bacon in a Dutch oven over medium heat, stirring occasionally, until it becomes crispy. Add the oil and onion to the pot and cook until the onion softens. Stir in the tomato paste and cook briefly until it darkens slightly. Sprinkle in the flour and cook, stirring constantly, to create a roux.
    2 Slices Bacon, 1 Tbsp Extra Virgin Olive Oil, 1 small Yellow Onion, 1 tsp Tomato Paste, 3 Tbsp All-Purpose Flour
  2. Gradually whisk in the broth and half-and-half, stirring constantly until the mixture is smooth and there are no lumps of flour remaining. Add the potatoes, 1 teaspoon of salt, and 1/2 teaspoon of pepper. Bring the chowder to a boil over medium-high heat, then reduce the heat to medium-low, cover the pot, and simmer until the potatoes are tender, about 15 minutes.
    3 Cups Chicken Broth, 2 Cups Half and Half, 1 lb Red Skinned Potatoes, 1 pinch Kosher Salt, 1 pinch Ground Black Pepper
  3. Gently stir in the shrimp and cook until they turn pink and opaque, about 4 minutes. Taste the chowder and adjust the seasoning with more salt and pepper if needed. If the chowder is too thick, thin it out with a little bit of water. Ladle the chowder into bowls, drizzle with a touch of olive oil, and garnish with fresh basil leaves and a sprinkle of black pepper.
    1 Tbsp Extra Virgin Olive Oil, 12 oz Medium Shrimp, ½ Cup Fresh Basil, 1 pinch Ground Black Pepper

Nutrition

Serving: 12ozCalories: 397kcalCarbohydrates: 31gProtein: 26gFat: 20gSaturated Fat: 9gPolyunsaturated Fat: 2gMonounsaturated Fat: 7gTrans Fat: 0.003gCholesterol: 184mgSodium: 941mgPotassium: 995mgFiber: 3gSugar: 8gVitamin A: 630IUVitamin C: 13mgCalcium: 217mgIron: 2mg

Notes

Ingredients:
  • Shrimp: Use fresh or frozen shrimp, peeled and deveined. If using frozen, thaw them completely before adding to the chowder.
  • Bacon: Bacon adds a smoky depth of flavor. You can use pancetta or salt pork as substitutes. 
  • Vegetables: The classic base includes onions, celery, and potatoes. You can add other vegetables like corn, carrots, or bell peppers for variety.  
  • Tomato Paste: Tomato paste adds richness and depth of flavor. Make sure to cook it briefly to remove any raw taste.  
  • Flour: Flour is used to thicken the chowder. All-purpose flour is common, but you can use a gluten-free blend if needed.
  • Broth: Use a good-quality chicken or seafood broth. Homemade broth will add the most flavor.
  • Half-and-Half: This adds creaminess. You can use whole milk or a combination of milk and cream as alternatives.
  • Potatoes: Russet or Yukon Gold potatoes work well in chowder.
  • Seasonings: Salt and pepper are essential. Some recipes also add herbs like thyme or bay leaves.  
  • Garnishes: Fresh basil is a classic garnish. You can also use parsley, chives, or a squeeze of lemon juice.
Cooking Tips:
  • Crisp the Bacon: Cook the bacon until it's nice and crispy to render out the fat and add maximum flavor.  
  • Don't Overcrowd the Pot: When sautéing the vegetables, make sure the pot isn't overcrowded. This will ensure they cook evenly.
  • Cook the Tomato Paste: Cook the tomato paste briefly until it darkens slightly to remove any raw taste.
  • Make a Roux: Cooking the flour with the bacon fat and vegetables creates a roux, which helps to thicken the chowder.
  • Simmer Gently: Simmer the chowder gently to allow the potatoes to cook through and the flavors to meld.
  • Don't Overcook the Shrimp: Add the shrimp towards the end of cooking and cook just until they turn pink and opaque. Overcooked shrimp will be tough.
  • Adjust Consistency: If the chowder is too thick, thin it out with a little water or broth.
  • Taste and Adjust: Always taste the chowder before serving and adjust the seasonings to your liking.
Serving Suggestions:
  • Bread: Serve with crusty bread or oyster crackers for dipping.
  • Salad: A simple green salad is a refreshing accompaniment.
  • Sides: Coleslaw or cornbread also pair well with shrimp chowder.  
Variations:
  • Spicy: Add some diced jalapeños or a pinch of cayenne pepper for heat.
  • Smoked: Use smoked paprika or chipotle powder for a smoky flavor.
  • Corn Chowder: Add corn kernels for a sweeter, summery twist.
With these tips, you'll be well on your way to making a delicious and satisfying shrimp chowder!

Tried this recipe?

Let us know how it was!

Related Recipes

Ingredients

Ingredients:

  • 2 Slices Bacon, chopped: The bacon adds a smoky, savory flavor to the soup.
  • 1 Tbsp Extra Virgin Olive Oil: Olive oil is used to sauté the onion and create a flavorful base.
  • 1 small Yellow Onion, chopped: The onion adds sweetness and depth of flavor.
  • 1 tsp Tomato Paste: Tomato paste adds a rich, concentrated tomato flavor.
  • 3 Tbsp All-Purpose Flour: The flour is used to thicken the soup.
  • 3 Cups Chicken Broth (low sodium): Chicken broth forms the base of the soup.
  • 2 Cups Half and Half: Half and half adds creaminess and richness to the soup.
  • 1 lb Red Skinned Potatoes, halved or quartered if large: Potatoes add substance and a comforting texture to the soup.
  • 12 oz Medium Shrimp: The shrimp is the star of the show, adding a delicate seafood flavor.
  • ½ Cup Fresh Basil, loosely packed and torn into pieces: Fresh basil adds a bright, herbaceous flavor.
  • 1 pinch Kosher Salt: Salt enhances the flavors of the soup.
  • 1 pinch Ground Black Pepper: Black pepper adds a subtle warmth and depth of flavor.

Tips for the Best Shrimp Chowder:

  • Don’t overcook the shrimp: Cook the shrimp just until they turn pink and are cooked through. Overcooking can make them tough and rubbery.
  • Use fresh ingredients: Fresh ingredients make a big difference in the flavor of the soup.
  • Don’t overcook the potatoes: Cook the potatoes until they are tender but not mushy.
  • Season to taste: Taste the soup as you go and adjust the seasonings as needed.
  • Garnish with fresh herbs: A sprinkle of fresh herbs like parsley or chives adds a beautiful finishing touch.
  • Serve hot: Serve the soup hot with a side of crusty bread or crackers.

Enjoy your homemade Shrimp Chowder! Let me know if you have any questions or want help with the instructions. 🥣😊

Image Gallery Shrimp Chowder

Storage & Leftovers

Storage

  • Cool it down: Before storing, allow the chowder to cool completely. This prevents condensation, which can lead to bacterial growth and affect the texture.
  • Refrigerator: Transfer the cooled chowder to an airtight container and store it in the refrigerator for up to 2-3 days.
  • Freezer: Freezing Shrimp Chowder isn’t generally recommended as dairy-based soups can separate and become grainy upon thawing. However, if you do freeze it, do so before adding the half and half. Store it in a freezer-safe container or bag for up to 1 month.

Reheating

  • Stovetop: The best way to reheat this chowder is gently on the stovetop over low heat. Stir occasionally to prevent sticking. If the chowder has thickened in the refrigerator, add a splash of milk or broth to thin it out.
  • Microwave: You can reheat it in the microwave, but do so in short bursts, stirring frequently, to prevent overheating and separation.

Tips and Tricks

  • Portioning: If you plan to freeze the chowder, consider freezing it in individual portions for easy grab-and-go meals.
  • Separation: If the chowder separates slightly after refrigeration, don’t worry! A quick whisk or a blend with an immersion blender can often restore its creamy texture.
  • Flavor Boost: When reheating, consider adding a squeeze of fresh lemon juice or a pinch of your favorite herbs to brighten the flavors.
  • Garnish Fresh: If you’re using any fresh herbs as a garnish, add them just before serving to maintain their freshness and flavor.
  • Freshness: Always check for any signs of spoilage before consuming leftovers. Look for any off-putting smells, discoloration, or mold.

By following these tips, you can enjoy your homemade Shrimp Chowder even a couple of days after making it!

Please follow and like us:
onpost_follow
fb-share-icon197
Tweet120
Pinterest20
Share 20
submit to reddit

Subscribe for New Recipes

* indicates required

Intuit Mailchimp

Shrimp Fra Diavolo

Shrimp Fra Diavolo

Turn up the heat with this bold and fiery Shrimp Fra Diavolo, a classic Italian-American seafood dish that’s fast, flavorful, and full of attitude. Juicy shrimp are sautéed until tender, then simmered in a spicy tomato sauce infused with garlic, chili flakes, and white wine — creating a rich, complex flavor with just the right kick.

Tossed over perfectly cooked linguine, this dish is as elegant as it is easy, making it a go-to for date nights, weeknight dinners, or any night you’re craving something with serious flavor. With no shrimp tails to slow you down, every bite is pure, saucy satisfaction.

Whether you’re a spice lover or just looking to elevate your pasta game, Shrimp Fra Diavolo delivers a restaurant-quality experience right at home.

Shrimp Fra Diavolo

No ratings yet
Shrimp fra diavolo is like a party in your mouth! Plump, juicy shrimp get all dressed up in a vibrant tomato sauce that's got a kick. A hint of spice from red pepper flakes and Aleppo pepper adds a little devilish heat, while fresh herbs like parsley and basil bring a cool balance. It's a flavor explosion that's perfect for a quick and satisfying weeknight meal!
Prep Time 15 minutes
Cook Time 25 minutes
Servings: 10
Course: Dinner, Main Course
Cuisine: Italian, Italian American
Calories: 115

Ingredients
  

  • 1 Lb. Extra Large Shrimp (16-20 is the size). Peeled & Deveined, tail on.
  • 2 tbsp Olive Oil
  • 1 tsp Crushed Red Pepper Flakes
  • 1 tsp Salt
  •  
    1 Pinch Aleppo Pepper Flakes
  • ½ Large Yellow Onion Sliced
  • 3 Cloves Garlic Minced
  • ½ tsp Dried Oregano
  • 1 Cup White Wine
  •  
    Cups Crushed Tomatoes
  • 2 tbsp Parsley Flat Leaf
  • 2 tbsp Dried Basil Fresh and slice thin

Method
 

  1. Gather all ingredients and have ready.
  2. In a bowl, combine red pepper flakes, salt, and Aleppo pepper flakes. Drizzle with olive oil and toss to create a spiced oil mixture. Add the shrimp and toss thoroughly to coat them. Let the shrimp marinate for 10-15 minutes for deeper flavor, or skip this step and cook them right away.
  3. Heat a large skillet over high heat until very hot. Add the shrimp in a single layer and cook undisturbed for about 2 minutes until the bottoms are nicely browned. Flip the shrimp and cook for another minute or so on the other side. Transfer the cooked shrimp to a bowl.
  4. Reduce the heat to medium and add a pinch of salt to the same skillet. Add the onions and cook, stirring occasionally, for 2-4 minutes until softened and slightly golden.
  5. Stir in the garlic and oregano, cooking for 15-30 seconds to release their fragrance. Pour in the white wine and bring it to a boil, scraping up any browned bits from the bottom of the pan with a wooden spoon.
  6. Add the crushed tomatoes and reduce the heat to medium-low. Simmer the sauce for 10-15 minutes, stirring occasionally, until it thickens slightly and the flavors come together.
  7. Return the cooked shrimp and any juices from the bowl back to the skillet with the tomato sauce. Gently heat everything through for 2-4 minutes until the shrimp are warmed through.
  8. Turn off the heat. Stir in the chopped parsley and basil for freshness. Season the sauce with additional salt, red pepper flakes, and Aleppo pepper flakes to your taste preference.

Nutrition

Serving: 12OzCalories: 115kcalCarbohydrates: 10gProtein: 8gFat: 4gSaturated Fat: 0.5gPolyunsaturated Fat: 0.4gMonounsaturated Fat: 2gTrans Fat: 0.004gCholesterol: 57mgSodium: 810mgPotassium: 498mgFiber: 2gSugar: 5gVitamin A: 842IUVitamin C: 11mgCalcium: 49mgIron: 2mg

Tried this recipe?

Let us know how it was!

Related Recipes

Ingredients

  • 1 lb extra-large shrimp (16–20 count), peeled & deveined

  • 2 tbsp olive oil

  • 1 tsp red pepper flakes

  • Pinch Aleppo pepper flakes (optional for smoky heat)

  • ½ large yellow onion, sliced

  • 3 cloves garlic, minced

  • ½ tsp dried oregano

  • 1 cup white wine

  • 1½ cups crushed tomatoes

  • 2 tbsp flat-leaf parsley

  • 2 tbsp fresh basil, thinly sliced

Image Gallery Shrimp Fra Diavolo

Storage & Leftovers

Refrigerator:
Let the dish cool completely, then store in an airtight container in the refrigerator for up to 2–3 days. For best quality, store the shrimp and sauce separately from the pasta if possible.

Freezer:
Freezing is not recommended for this dish. Shrimp can become rubbery when thawed and reheated, and cream or wine-based sauces may separate. If you must freeze, do so without the pasta and use within 1 month.

Reheating:

  • Stovetop (preferred): Gently reheat shrimp and sauce in a skillet over medium-low heat until just warmed through. Avoid boiling or overcooking the shrimp.

  • Microwave: Reheat in short bursts (30–45 seconds) on medium power to prevent overcooking. Stir gently between bursts.

Best Enjoyed:
Shrimp Fra Diavolo is best served fresh, but leftovers can still be delicious if reheated carefully to maintain the shrimp’s texture and flavor.

Please follow and like us:
onpost_follow
fb-share-icon197
Tweet120
Pinterest20
Share 20
submit to reddit

Subscribe for New Recipes

* indicates required

Intuit Mailchimp

Chorizo Encrusted Cod

Chorizo Encrusted Cod

Elevate your seafood game with this vibrant and savory Chorizo Encrusted Cod. Mild, flaky cod fillets are topped with a golden, crispy crust made from finely chopped Spanish chorizo, breadcrumbs, garlic, and herbs — creating the perfect contrast of rich flavor and delicate texture. Baked until perfectly tender and finished with a burst of citrus or fresh herbs, this dish delivers restaurant-quality results in under 30 minutes. Whether served over mashed potatoes, roasted vegetables, or a bright salad, this cod is a stunning centerpiece packed with smoky, spicy goodness.

Chorizo Encrusted Cod

No ratings yet
Baked cod with a chorizo crust is definitely a recipe packed full of flavor and perfect for enjoying the flavors of Spain at home.
Prep Time 20 minutes
Cook Time 15 minutes
Servings: 2 People
Course: Dinner, Lunch, Main Course
Cuisine: Spanish
Calories: 289

Ingredients
  

  •  
    1 lb Fresh cod
  • 3 tbsp Parmesan Cheese
  •  
    ¼ lb Spanish chorizo
  •  
    2 oz Breadcrumbs
  • 2 tbsp Olive oil

Equipment

1 Brush
1 Chopper
1 Sheet pan

Method
 

  1. Peel the chorizo and cut into small pieces. Blend in food processor.
  2. Grate the Parmesan cheese.
  3. Mix the Parmesan cheese with the chorizo.
  4. Add the breadcrumbs to the Parmesan and chorizo mix.
  5. Brush the olive oil on the cod using a brush. Gently pat the chorizo paste on top of the cod.
  6. Bake at 390℉ for 10-15 minutes, depending on the thickness of the cod. The cod should be flaky and the chorizo should have a very nice golden brown color when done.
  7. Plate and enjoy.

Nutrition

Serving: 6ozCalories: 289kcalCarbohydrates: 4gProtein: 22gFat: 20gSaturated Fat: 4gPolyunsaturated Fat: 2gMonounsaturated Fat: 11gCholesterol: 57mgSodium: 179mgPotassium: 432mgFiber: 0.2gSugar: 0.3gVitamin A: 137IUVitamin C: 1mgCalcium: 69mgIron: 1mg

Video

Notes

🔪 Cooking Tips & Tricks for Chorizo Encrusted Cod

  • Choose the Right Cod: Use thick, firm fillets of cod so they hold up well under the chorizo crust and stay moist during cooking. Fresh or properly thawed frozen fillets work best.
  • Dry the Fish: Pat the cod dry with paper towels before applying the crust. This helps the topping adhere better and ensures a crispy finish.
  • Use Cured or Semi-Cured Chorizo: For the crust, use finely chopped dry (Spanish-style) or semi-cured chorizo, not raw Mexican-style chorizo, as the latter will release too much grease and fall apart.
  • Make the Crust Crisp: Combine the chorizo with breadcrumbs (panko works great), olive oil or melted butter, and optional herbs like parsley or thyme. Toast the mixture slightly in a skillet before pressing it onto the cod for extra crunch.
  • Press the Topping Firmly: Gently press the chorizo mixture onto the fish to help it stay in place while baking or broiling.
  • Watch the Bake Time: Cod cooks quickly! Depending on thickness, bake at 400°F (200°C) for 10–12 minutes or until the fish flakes easily with a fork and the crust is golden.
  • Broil for Extra Crisp: If the chorizo topping isn’t as crispy as you'd like, finish under the broiler for 1–2 minutes — but watch closely to avoid burning.
  • Flavor Balance: Chorizo is rich and salty, so avoid over-salting the fish or sides. Serve with something bright or acidic (like a lemon wedge, aioli, or salsa verde) to balance the flavors.

Tried this recipe?

Let us know how it was!

Related Recipes

Ingredients

  • 1 lb fresh cod fillets, skinless

  • ¼ lb Spanish chorizo, finely diced or grated

  • 2 oz breadcrumbs (panko or regular)

  • 3 tbsp grated Parmesan cheese

  • 2 tbsp olive oil (plus more for brushing)

  • 1 clove garlic, minced (optional, for added depth)

  • 1 tbsp fresh parsley, chopped (or 1 tsp dried)

  • ½ tsp smoked paprika (optional, for extra smokiness)

  • Salt & freshly ground black pepper, to taste

  • Lemon wedges, for serving

Image Gallery Chorizo Encrusted Cod

Storage & Leftovers

  • Refrigeration: Store leftovers in an airtight container in the refrigerator for up to 2 days. The crust may soften slightly but will still be flavorful.

  • Reheating: Reheat in a 350°F (175°C) oven or toaster oven for 8–10 minutes until warmed through. Avoid microwaving, as it can make the fish rubbery and the crust soggy.

  • Crisp It Back Up: For best texture, reheat uncovered and consider placing the fish under the broiler for 1–2 minutes at the end to re-crisp the chorizo topping.

  • Freezing: Not recommended — cod can become mushy and the chorizo crust loses texture after thawing.

  • ⏱️ Make-Ahead Tips

    • Prep the Topping in Advance: You can make the chorizo crust mixture (chorizo, breadcrumbs, Parmesan, herbs, garlic) up to 2 days ahead. Store it in an airtight container in the fridge.

    • Ready-to-Bake Option: Assemble the cod with the crust and refrigerate for up to 12 hours before baking. Let it sit at room temp for 10–15 minutes before placing it in the oven.


    🥗 Leftover Ideas

    • Fish Tacos: Flake the leftover cod and serve it in warm tortillas with slaw, avocado, and a drizzle of lime crema.

    • Seafood Salad: Chop and mix the cod with greens, cherry tomatoes, and a lemon vinaigrette for a flavorful protein-packed salad.

    • Savory Breakfast: Reheat a portion and top it with a poached or fried egg for a bold brunch option.

    • Rice Bowl: Serve over rice or quinoa with roasted veggies and a dollop of garlic yogurt or herbed aioli.

Please follow and like us:
onpost_follow
fb-share-icon197
Tweet120
Pinterest20
Share 20
submit to reddit

Subscribe for New Recipes

* indicates required

Intuit Mailchimp

Creamy Alfredo Sauce

Creamy Alfredo Sauce

Get ready to unleash your inner culinary rockstar and whip up a batch of creamy Alfredo sauce that will make your taste buds sing! This isn’t just any sauce, folks; it’s a symphony of flavor, a creamy concerto for your palate.

First, we’ll melt some buttery goodness in a pan—a golden pool of deliciousness. Then, in goes the garlic, sizzling and dancing in the heat, releasing its aromatic magic. (Careful not to burn it, or your garlic will stage a bitter protest!)

Next, we’ll bring in the heavy cream, a velvety cascade of richness. Whisk it all together like a maestro conducting an orchestra, creating a harmonious blend of flavors.

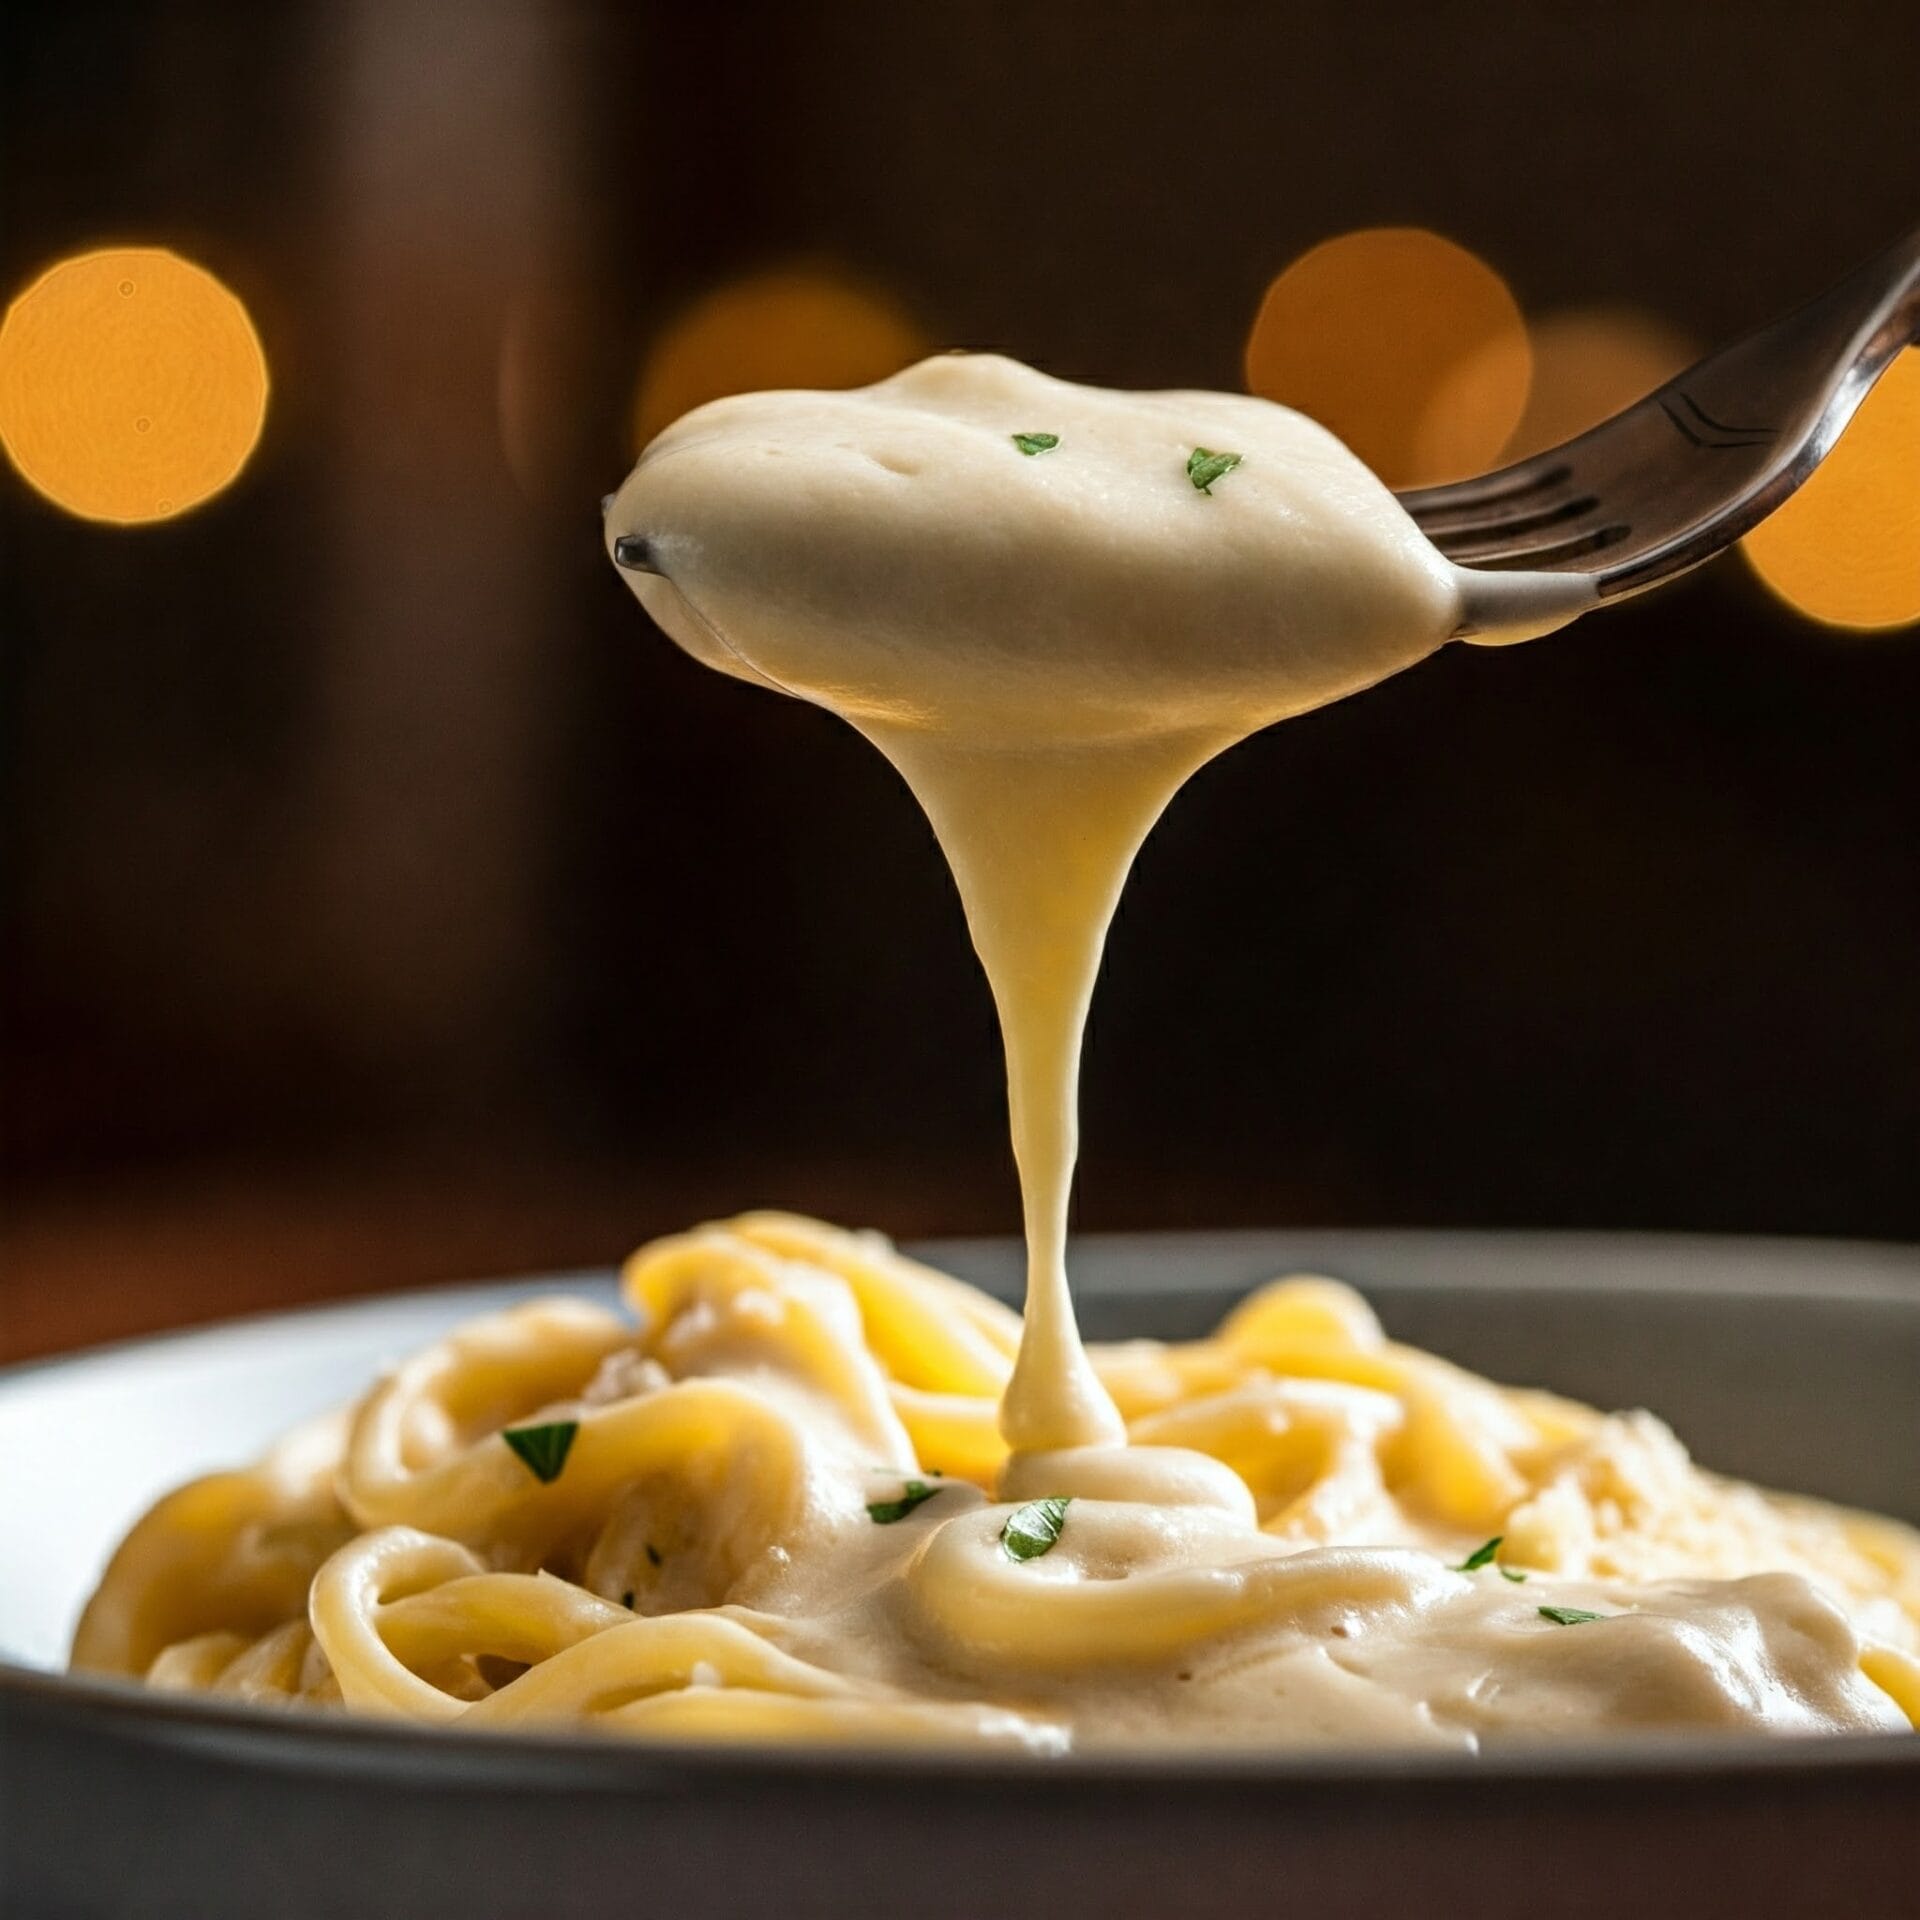
Now, for the grand finale: a shower of Parmesan cheese! Watch as it melts into the creamy embrace of the sauce, transforming into a luscious, velvety dream.

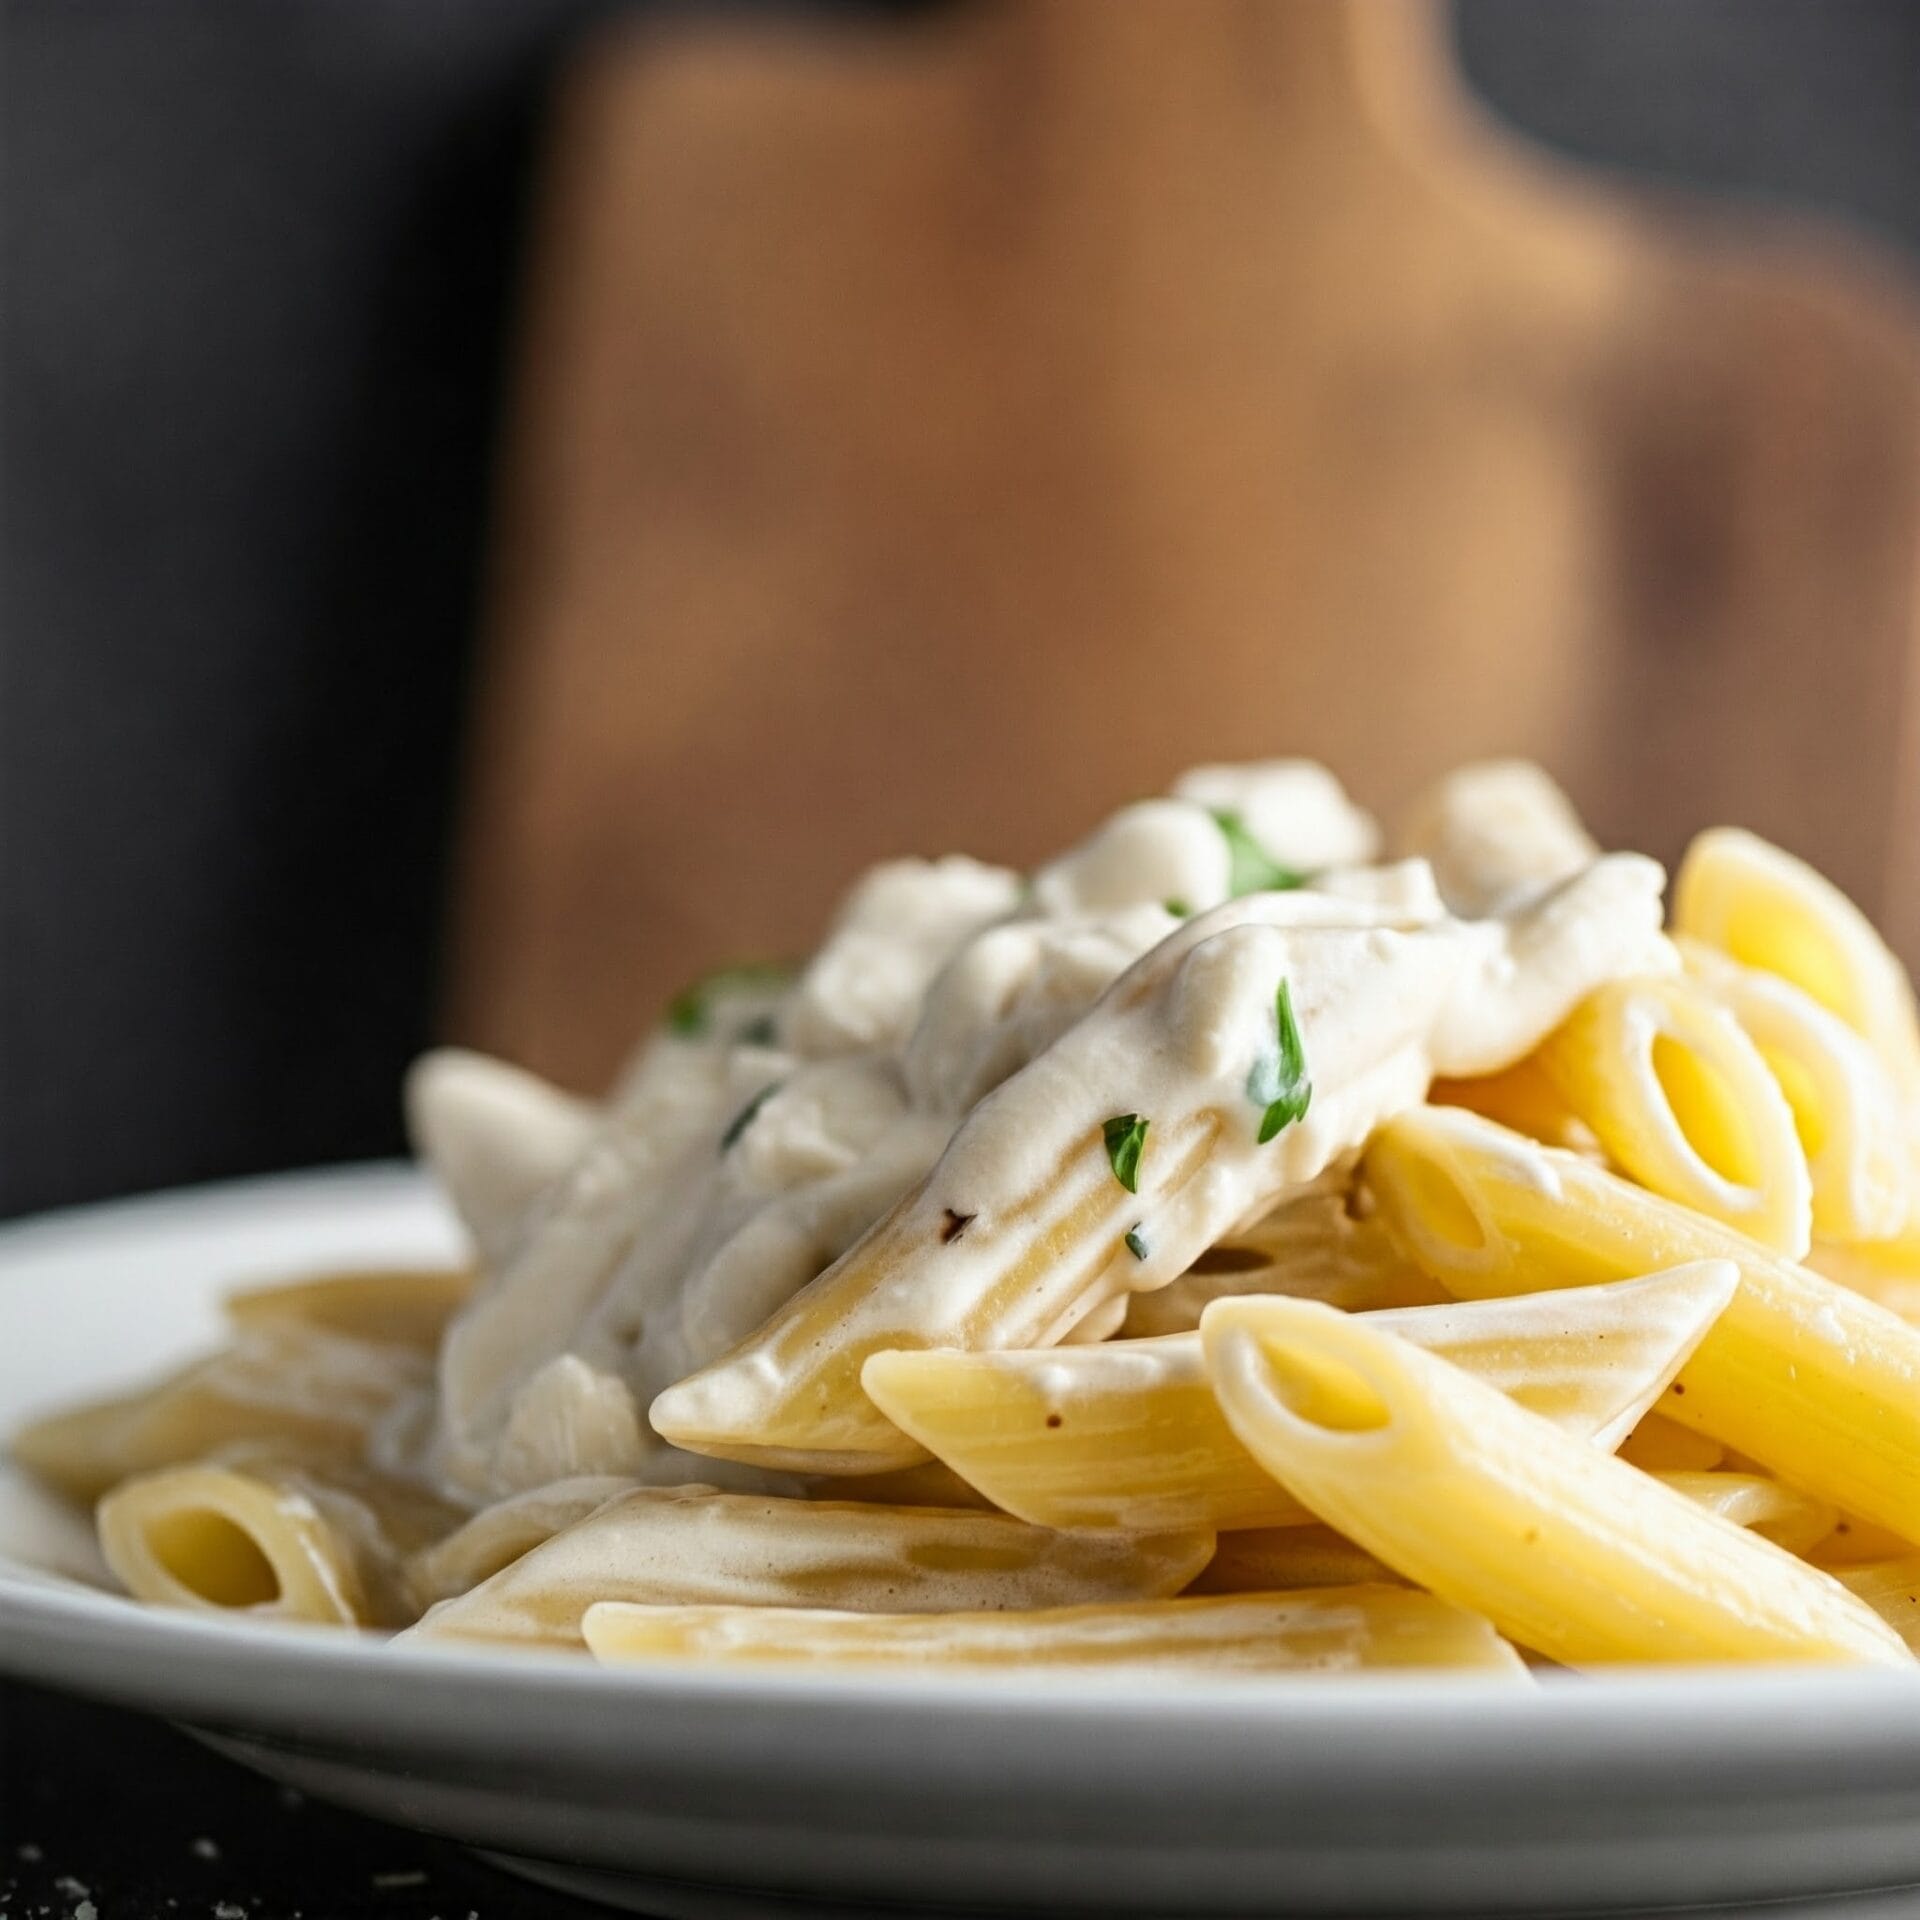
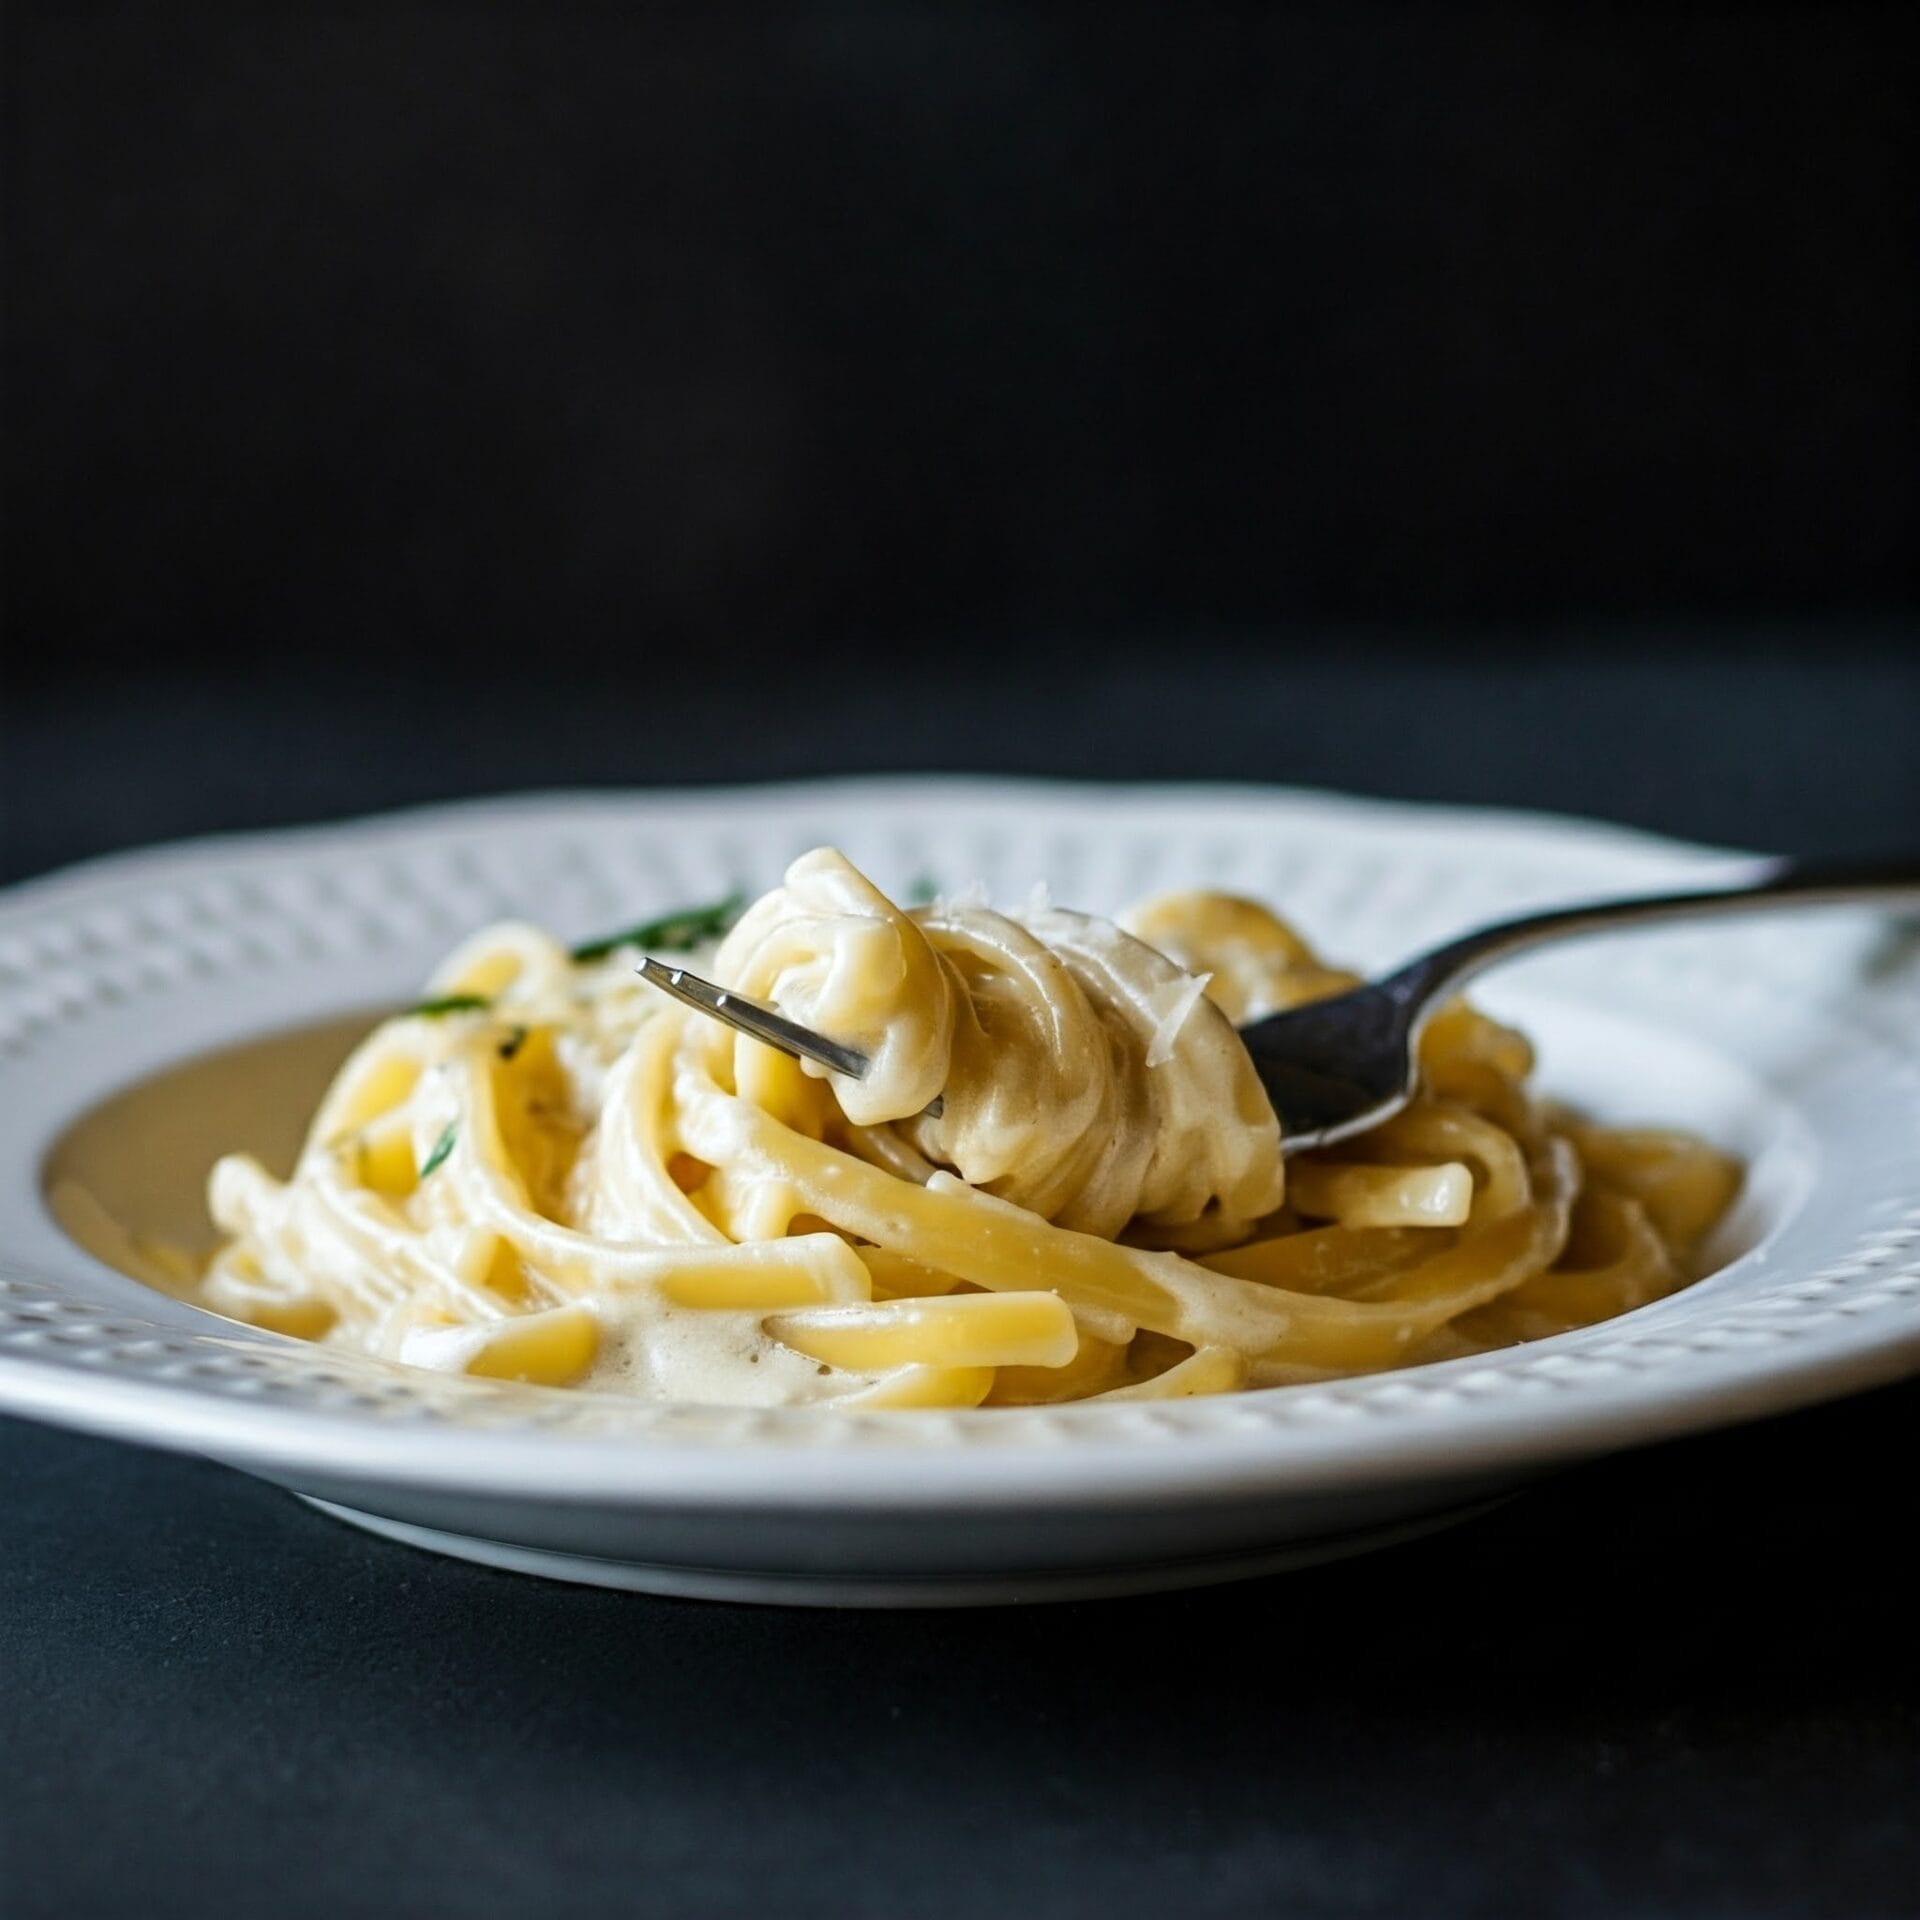
And there you have it—a creamy Alfredo sauce so good, it’ll have you shouting “Encore!” Get ready to twirl your pasta and savor every drop of this culinary masterpiece. You’ve earned it, chef!

Creamy Alfredo Sauce

No ratings yet
Indulge in the luxurious taste of Alfredo sauce, a creamy Italian creation that elevates any pasta dish. This rich blend of butter, heavy cream, and Parmesan cheese creates a velvety smooth texture and savory flavor that's simply irresistible. Imagine it coating each strand of fettuccine or linguine, offering a decadent experience in every bite.
Prep Time 5 minutes
Cook Time 12 minutes
Servings: 4 cups
Course: Main Course
Cuisine: American, Italian, Italian American
Calories: 658

Ingredients
  

  • 6 tbsp Butter
  • 1 tsp Garlic
  • cups Heavy cream
  • oz Parmesan Cheese
  • 1 tsp Salt
  • 1 tsp Black pepper
  • 1 tbsp Thyme dried

Method
 

  1. Measure out your butter, ensuring it's softened for easier melting. Finely mince your garlic cloves. Have your heavy cream ready in a convenient pouring container. Grate your Parmesan cheese and keep it nearby.
    6 tbsp Butter, 1½ cups Heavy cream, 1 tsp Garlic
  2. Place a saucepan (medium size works well) over medium-low heat. Add the butter and allow it to melt completely, swirling the pan occasionally for even melting.
    6 tbsp Butter, 1 tsp Garlic
  3. Add the minced garlic and a pinch of dried thyme (about ¼ to ½ teaspoon) to the melted butter. Stir it frequently and sauté until the garlic becomes fragrant and turns a light golden brown color. Be careful not to burn the garlic, as this will impart a bitter flavor. The thyme will infuse its flavor into the butter and garlic as they cook.
    1 tsp Garlic, 1 tbsp Thyme
  4. Take the saucepan off the heat and let it cool for about 3-5 minutes. This brief cooling period is essential to prevent the cream from curdling when you add it in the next step.
  5. Slowly pour the heavy cream into the saucepan while whisking constantly. This gradual addition and continuous whisking will create a smooth emulsion and prevent the sauce from separating. Continue whisking until the cream is fully blended with the butter and garlic.
    1½ cups Heavy cream
  6. Place the saucepan back on the stove over low heat. Now, gradually add the grated Parmesan cheese, a handful at a time, whisking continuously as you do so. This slow addition and constant whisking will ensure the cheese melts evenly into the sauce, creating a luscious, creamy texture.
    6½ oz Parmesan Cheese
  7. Continue to cook the sauce over low heat, stirring occasionally, until it reaches your desired consistency. If it becomes too thick, you can thin it out with a tablespoon or two of warm milk or pasta water.
  8. Have a taste! You might want to add a pinch of salt and freshly ground black pepper to enhance the flavors. Some people like a touch of nutmeg in their Alfredo sauce as well.
    1 tsp Black pepper , 1 tsp Salt
  9. Once the cheese is completely melted, the sauce is smooth, and the seasoning is perfect, remove the pan from the heat. Your homemade Alfredo sauce is ready to be tossed with your favorite pasta, like fettuccine, linguine, or even tortellini! Garnish with some fresh parsley and extra Parmesan cheese for a beautiful presentation.

Nutrition

Serving: 8ozCalories: 658kcalCarbohydrates: 10gProtein: 17gFat: 63gSaturated Fat: 39gPolyunsaturated Fat: 3gMonounsaturated Fat: 16gTrans Fat: 1gCholesterol: 188mgSodium: 1996mgPotassium: 199mgFiber: 0.3gSugar: 3gVitamin A: 2337IUVitamin C: 4mgCalcium: 482mgIron: 1mg

Notes

1. Quality Ingredients are Key
  • Freshly Grated Parmesan: Use a block of Parmesan cheese and grate it yourself. Pre-grated cheese often contains cellulose, which can make the sauce grainy. 
  • Good Butter: Use a high-quality butter for the best flavor.
  • Fresh Garlic: If possible, use fresh garlic cloves instead of garlic powder for a more robust flavor.
2. Temperature Control is Crucial
  • Low and Slow: Cook the sauce over low heat to prevent the cream from curdling or the sauce from becoming too thick.
  • Cool Slightly Before Adding Cream: Taking the pan off the heat for a few minutes after sautéing the garlic will help prevent the cream from separating.
3. Technique Matters
  • Whisk Continuously: Whisk the cream and cheese into the sauce gradually and continuously to ensure a smooth, lump-free consistency.
  • Don't Overcook: The sauce is ready when the cheese is melted and the sauce is smooth. Overcooking can make it thick and oily.
4. Adjust as Needed
  • Thin it Out: If the sauce becomes too thick, add a tablespoon or two of warm milk or pasta water to thin it out.
  • Season to Taste: Don't forget to season with salt and freshly ground black pepper to your liking. A pinch of nutmeg can also add a lovely warmth.
5. For Extra Richness and Flavor
  • Add Cream Cheese: A tablespoon or two of cream cheese whisked in with the Parmesan can add extra richness and tang.
  • A Touch of Wine: A splash of dry white wine, like Sauvignon Blanc or Pinot Grigio, can add complexity and depth of flavor.
  • Finish with Fresh Herbs: Stir in some chopped fresh parsley or basil at the end for a burst of freshness and color.
Bonus Tip: For the ultimate creamy Alfredo experience, toss the cooked pasta directly into the sauce and cook for a minute or two to allow the pasta to absorb the flavors.

Tried this recipe?

Let us know how it was!

Related Recipes

Ingredients

Ingredients:

  • 6 tablespoons butter
  • 1 teaspoon minced garlic
  • 1 ½ cups heavy cream
  • 6.5 ounces grated Parmesan cheese (about 1 ½ cups)
  • 1 teaspoon salt
  • 1 teaspoon black pepper
  • 1 tablespoon dried thyme

Image Gallery Creamy Alfredo Sauce

Storage & Leftovers

Storing Your Leftover Alfredo Sauce:

  • Cool it Down: Before storing, let the sauce cool to room temperature. This prevents condensation from forming in the container, which can lead to spoilage.
  • Choose the Right Container: An airtight container is essential to maintain the quality and prevent the sauce from absorbing odors from other foods in your fridge. Glass containers or high-quality plastic containers with tight-fitting lids work well. 
  • Refrigerator Storage: Store your leftover Alfredo sauce in the refrigerator for 3 to 4 days.
  • Freezer Storage: For longer storage, you can freeze Alfredo sauce for up to 3 months. It’s best to freeze it in smaller portions for easier thawing and use. Consider using freezer-safe bags (laid flat to save space) or small airtight containers.   

Reheating Tips:

  • Thaw Safely: If frozen, thaw the sauce in the refrigerator overnight or in a bowl of cold water.
  • Gentle Reheating: Reheat the sauce gently over low heat on the stovetop, stirring frequently. Alternatively, you can reheat it in the microwave in short bursts, stirring between each burst, until warmed through.
  • Thin if Needed: Alfredo sauce tends to thicken upon cooling and reheating. If it’s too thick, you can thin it out with a little warm milk, cream, or pasta water.  

Creative Ways to Use Leftover Alfredo Sauce:

Don’t let those precious leftovers go to waste! Here are some ideas:

  • Alfredo Dip: Serve it warm as a dip for breadsticks, vegetables, or even chicken strips.
  • Pizza Topping: Use it as a base for a white pizza with your favorite toppings.
  • Pasta Bake: Incorporate it into a creamy pasta bake with chicken, vegetables, or seafood. 
  • Soup Enhancer: Stir a spoonful or two into your favorite soup for extra creaminess and flavor.
  • Vegetable Gratin: Use it to make a creamy and cheesy vegetable gratin.

With these tips, you can enjoy your homemade Alfredo sauce to the fullest, even days after you’ve made it!

Please follow and like us:
onpost_follow
fb-share-icon197
Tweet120
Pinterest20
Share 20
submit to reddit