Mushroom Duxelles with Shallot and Thyme

Condiment

Mushroom Duxelles with Shallot and Thyme

Pulse the mushrooms in batches so they stay finely chopped rather than turning into a paste. A wide skillet helps release their moisture for a concentrated savory filling or topping.

Yield
1 small batch
Cuisine
French-inspired

Bring it to the table

Cook until dry

Do not stop while liquid pools in the pan. Stir and cook until the mushrooms are tender and the mixture holds together without visible free liquid.

At the table

Use as a savory filling, spread on toast, or spoon over a finished dish.

Before you start

Gather your ingredients.

Full quantities and serving adjustments are in the recipe card below.

See the ingredient checklist
  • 4 cups button mushrooms — cleaned and quartered; measure before pulsing
  • 1/2 cup shallots — peeled and cut into chunks; measure before pulsing
  • 2 tbsp unsalted butter
  • 1 tsp fresh thyme leaves
  • salt — to taste
  • ground black pepper — to taste

A few useful notes.

The mushrooms are measured after quartering and before processing.

A home batch can cook faster than a large restaurant pan; use dryness as the endpoint rather than a fixed hour.

The cooking plan

How to make Mushroom Duxelles with Shallot and Thyme.

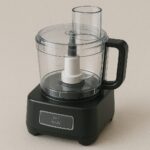
  1. Pulse the shallots in a food processor until finely chopped, then transfer to a bowl. Pulse the quartered mushrooms in small batches until finely chopped; stop before they become a puree.

  2. Melt the butter in a wide skillet over medium-low heat. Add the shallots and thyme, then cook, stirring, until the shallots soften without browning.

  3. Add the mushrooms and stir well. Cook uncovered, stirring frequently and scraping the bottom, until the mushrooms are tender and their released moisture has evaporated. Adjust the heat to keep them cooking without scorching.

  4. Season with salt and pepper. Use warm, or spread in a shallow container to cool promptly and refrigerate within 2 hours. Keep at 40°F or below and use within 3–4 days.

Let’s cook

The full recipe.

Check off ingredients as you get them ready.

Changing servings? The ingredient list scales automatically. Adjust quantities named in the steps to match, and choose pans and cooking times for your batch.

Mushroom Duxelles with Shallot and Thyme

No ratings yet
Finely chopped mushrooms and shallots cooked with butter and thyme until their moisture has evaporated.
Servings: 1 small batch
Course: Condiment
Cuisine: French-inspired

Some ingredient links are affiliate links. We may earn a commission at no extra cost to you. As an Amazon Associate I earn from qualifying purchases.

Ingredients
  

  • 4 cups button mushrooms cleaned and quartered; measure before pulsing
  • Whole, halved and chopped pink shallots½ cup Shallot peeled and cut into chunks; measure before pulsing
  • 2 tbsp unsalted butter
  • 1 tsp fresh thyme leaves
  • salt to taste
  • ground black pepper to taste

Equipment images are illustrative. Exact products may vary.

Instructions
 

  1. Pulse the shallots in a food processor until finely chopped, then transfer to a bowl. Pulse the quartered mushrooms in small batches until finely chopped; stop before they become a puree.
  2. Melt the butter in a wide skillet over medium-low heat. Add the shallots and thyme, then cook, stirring, until the shallots soften without browning.
  3. Add the mushrooms and stir well. Cook uncovered, stirring frequently and scraping the bottom, until the mushrooms are tender and their released moisture has evaporated. Adjust the heat to keep them cooking without scorching.
  4. Season with salt and pepper. Use warm, or spread in a shallow container to cool promptly and refrigerate within 2 hours. Keep at 40°F or below and use within 3–4 days.

Notes

The mushrooms are measured after quartering and before processing.
A home batch can cook faster than a large restaurant pan; use dryness as the endpoint rather than a fixed hour.

Tried this recipe?

Let us know how it was!

A couple of useful answers.

Why pulse in batches?

Small batches make it easier to chop evenly without pureeing the mushrooms.

What should the finished texture be?

Finely chopped and moist enough to hold together, with no liquid pooling in the pan.

Keep the good food going

Similar Recipes

Find another recipe to bring to the table.

Garlic, Parsley and Pastis Butter

Condiment

Garlic, Parsley and Pastis Butter

Two forms of garlic give this butter both a fresh edge and a softer roasted note. Blend the flavorings first, then work in softened butter until evenly flecked with parsley.

Yield
1 batch
Cuisine
French-inspired

Bring it to the table

Drain the confit

Lift the garlic cloves from their oil and drain before weighing. Use freshly prepared confit or a safely refrigerated batch still within its storage limit.

At the table

Spoon over hot vegetables or use to finish cooked seafood. It also works as a garlic butter for escargots prepared separately.

Base recipe: Slow-Roasted Garlic Confit and Oil

Before you start

Gather your ingredients.

Full quantities and serving adjustments are in the recipe card below.

See the ingredient checklist
  • 227 g unsalted butter — softened
  • 6 g fresh garlic — finely chopped
  • 48 g garlic confit — drained and cooled
  • 1 tsp pastis — anise-flavored aperitif
  • 20 g flat-leaf parsley leaves — washed, thoroughly dried and chopped
  • 6 g shallot — finely chopped
  • salt — to taste

A few useful notes.

There are no snails or other seafood in the butter itself.

Pastis contributes an anise flavor and contains alcohol; this uncooked butter is not alcohol-free.

Making the butter does not extend the storage life of homemade garlic confit.

The cooking plan

How to make Garlic, Parsley and Pastis Butter.

  1. Check the preparation date of the garlic confit before starting. Drain the cloves, weigh the required amount and let any refrigerator-cold butter soften just enough to mix.

  2. Pulse the fresh garlic, confit garlic, parsley, shallot and pastis in a small food processor until finely combined. Scrape the sides as needed.

  3. Add the softened butter and pulse or mix until the herbs and garlic are evenly distributed. Taste and add salt gradually.

  4. Transfer to a clean covered container, or shape into a log in parchment and wrap. Refrigerate promptly at 40°F or below. Use within 4 days of the original garlic confit preparation date, or freeze promptly in small portions.

Let’s cook

The full recipe.

Check off ingredients as you get them ready.

Changing servings? The ingredient list scales automatically. Adjust quantities named in the steps to match, and choose pans and cooking times for your batch.

Garlic, Parsley and Pastis Butter

No ratings yet
A French-style compound butter with fresh garlic, soft garlic confit, parsley, shallot and a little anise-flavored pastis.
Servings: 1 batch
Course: Condiment
Cuisine: French-inspired

Some ingredient links are affiliate links. We may earn a commission at no extra cost to you. As an Amazon Associate I earn from qualifying purchases.

Ingredients
  

  • 227 g unsalted butter softened
  • 6 g fresh garlic finely chopped
  •  
    48 g garlic confit drained and cooled
  •  
    1 tsp pastis anise-flavored aperitif
  •  
    20 g flat-leaf parsley leaves washed, thoroughly dried and chopped
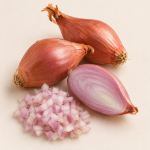
  • Whole, halved and chopped pink shallots6 g shallot finely chopped
  • salt to taste

Equipment images are illustrative. Exact products may vary.

Instructions
 

  1. Check the preparation date of the garlic confit before starting. Drain the cloves, weigh the required amount and let any refrigerator-cold butter soften just enough to mix.
  2. Pulse the fresh garlic, confit garlic, parsley, shallot and pastis in a small food processor until finely combined. Scrape the sides as needed.
  3. Add the softened butter and pulse or mix until the herbs and garlic are evenly distributed. Taste and add salt gradually.
  4. Transfer to a clean covered container, or shape into a log in parchment and wrap. Refrigerate promptly at 40°F or below. Use within 4 days of the original garlic confit preparation date, or freeze promptly in small portions.

Notes

There are no snails or other seafood in the butter itself.
Pastis contributes an anise flavor and contains alcohol; this uncooked butter is not alcohol-free.
Making the butter does not extend the storage life of homemade garlic confit.
Base recipe: Slow-Roasted Garlic Confit and Oil

Tried this recipe?

Let us know how it was!

A couple of useful answers.

Does escargot butter contain snails?

This is the garlic and herb butter component. Any snails or other seafood are prepared separately.

Can I use older garlic confit to make it last longer?

No. Count the refrigerated storage limit from the original confit preparation date.

Keep the good food going

Similar Recipes

Find another recipe to bring to the table.

Slow-Roasted Garlic Confit and Oil

Condiment

Slow-Roasted Garlic Confit and Oil

A small, deep baking dish keeps the garlic covered without an oversized pool of oil. Cook gently until the cloves yield easily to a fork, then cool promptly and refrigerate.

Yield
1 batch
Cuisine
French-inspired

Bring it to the table

Choose a snug dish

Arrange the peeled garlic in a compact layer. The oil should cover the cloves; a wide dish will require more oil.

At the table

Mash the cloves onto toast or into a sauce, and use a little of the oil to cook or dress food.

Before you start

Gather your ingredients.

Full quantities and serving adjustments are in the recipe card below.

See the ingredient checklist
  • 3 heads garlic — cloves separated and peeled
  • 1 1/2 cups olive oil — or neutral vegetable oil; a little more only if needed to cover
  • 2 small sprigs rosemary

A few useful notes.

This is a refrigerated preparation, not a canning or pantry-storage recipe.

Do not leave the garlic or oil at room temperature for storage.

Actual batch volume depends on the size of the garlic heads and dish; no fixed cup yield is assumed.

The cooking plan

How to make Slow-Roasted Garlic Confit and Oil.

  1. Heat the oven to 200°F. Place the peeled garlic and rosemary in a small, deep ovenproof dish. Pour in the oil, adding only enough extra to cover the cloves.

  2. Roast gently, checking after about 1 hour and continuing as needed, often around 2 hours, until the cloves are very soft and only lightly golden. Do not let them become dark or crisp.

  3. Carefully remove the dish from the oven and discard the rosemary. Transfer to a shallow heatproof metal container. Set it in an ice-water bath without letting water enter, and stir carefully to cool promptly.

  4. Refrigerate the garlic and oil in a clean covered container at 40°F or below within 2 hours. Date the container and use within 4 days of preparation; discard any remaining refrigerated garlic and oil after that. Freeze small portions promptly if keeping longer, and thaw in the refrigerator.

Let’s cook

The full recipe.

Check off ingredients as you get them ready.

Changing servings? The ingredient list scales automatically. Adjust quantities named in the steps to match, and choose pans and cooking times for your batch.

Slow-Roasted Garlic Confit and Oil

No ratings yet
Soft garlic cloves gently roasted in olive oil with rosemary, with flavored oil to use alongside them.
Servings: 1 batch
Course: Condiment
Cuisine: French-inspired

Some ingredient links are affiliate links. We may earn a commission at no extra cost to you. As an Amazon Associate I earn from qualifying purchases.

Ingredients
  

  • 3 heads garlic cloves separated and peeled
  • 1 ½ cups olive oil or neutral vegetable oil; a little more only if needed to cover
  •  
    2 small sprigs rosemary

Equipment images are illustrative. Exact products may vary.

Instructions
 

  1. Heat the oven to 200°F. Place the peeled garlic and rosemary in a small, deep ovenproof dish. Pour in the oil, adding only enough extra to cover the cloves.
  2. Roast gently, checking after about 1 hour and continuing as needed, often around 2 hours, until the cloves are very soft and only lightly golden. Do not let them become dark or crisp.
  3. Carefully remove the dish from the oven and discard the rosemary. Transfer to a shallow heatproof metal container. Set it in an ice-water bath without letting water enter, and stir carefully to cool promptly.
  4. Refrigerate the garlic and oil in a clean covered container at 40°F or below within 2 hours. Date the container and use within 4 days of preparation; discard any remaining refrigerated garlic and oil after that. Freeze small portions promptly if keeping longer, and thaw in the refrigerator.

Notes

This is a refrigerated preparation, not a canning or pantry-storage recipe.
Do not leave the garlic or oil at room temperature for storage.
Actual batch volume depends on the size of the garlic heads and dish; no fixed cup yield is assumed.

Tried this recipe?

Let us know how it was!

A couple of useful answers.

Can I keep it in the cupboard?

No. Cool promptly and refrigerate at 40°F or below, using within 4 days, or freeze promptly for longer storage.

How do I know the garlic is ready?

A clove should mash easily with a fork. Look for soft, lightly golden cloves rather than browned, crisp edges.

Keep the good food going

Similar Recipes

Find another recipe to bring to the table.

Small-Batch Pistachio Crème Brûlée

Dessert

Small-Batch Pistachio Crème Brûlée

Weigh the yolks for this two-custard batch, then gently combine them with warm cream, honey and pistachio paste. Chill the baked custards before adding the thin sugar crust.

Yield
2 small custards
Cuisine
French-inspired

Bring it to the table

Weigh the yolks

Egg yolks vary in size. Stir them together and weigh out 36 g so the small batch keeps its intended balance.

At the table

Caramelize the tops just before serving so the sugar stays crisp against the cold custard.

Before you start

Gather your ingredients.

Full quantities and serving adjustments are in the recipe card below.

See the ingredient checklist
  • 180 g heavy cream
  • 36 g egg yolks — weighed without whites
  • 13.5 g honey
  • 6.75 g smooth pistachio paste
  • 9 g granulated sugar
  • 2 tsp granulated sugar — approximately; enough for a thin even layer on both custards

A few useful notes.

Two small custards are a serving suggestion for this batch.

Use smooth pistachio paste rather than chopped nuts. Sweetened pistachio spreads can change the sweetness and texture.

Keep the custards refrigerated. Add the sugar crust shortly before serving.

The cooking plan

How to make Small-Batch Pistachio Crème Brûlée.

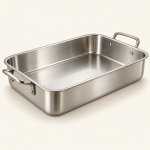
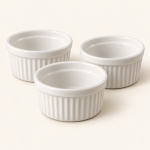
  1. Heat the oven to 250°F. Set two ovenproof ramekins of about 150 ml capacity in a deep roasting pan. Heat water separately for the water bath.

  2. Warm the cream in a small saucepan until steaming, without boiling. Meanwhile, stir the weighed yolks and 9 g sugar until smooth. Blend in the honey and pistachio paste.

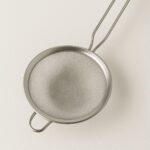
  3. Slowly pour the warm cream into the yolk mixture, stirring constantly. Scrape the bowl thoroughly, then pass the mixture through a fine sieve. Divide between the ramekins and skim off surface bubbles.

  4. Put the pan on the oven rack and carefully add hot water around the ramekins to about halfway up their sides. Keep water out of the custards. Bake, starting to check at about 40 minutes, until the edges are set and the centers tremble gently rather than slosh. Check with a food thermometer that the centers reach at least 160°F; continue baking as needed.

  5. Lift the ramekins out of the hot water carefully. Let the initial heat subside, then refrigerate within 2 hours of baking. Chill until fully cold and set, allowing at least 4 hours.

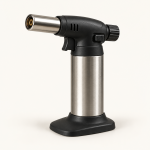
  6. Just before serving, blot any condensation from the cold custard tops. Sprinkle each with about 1 teaspoon sugar in a thin even layer. On a heatproof surface, use a kitchen torch according to its instructions to melt and caramelize the sugar. Let the crust harden briefly, then serve.

Let’s cook

The full recipe.

Check off ingredients as you get them ready.

Changing servings? The ingredient list scales automatically. Adjust quantities named in the steps to match, and choose pans and cooking times for your batch.

Small-Batch Pistachio Crème Brûlée

No ratings yet
A small batch of pistachio and honey custard with a crisp caramelized sugar top.
Servings: 2 small custards
Course: Dessert
Cuisine: French-inspired

Some ingredient links are affiliate links. We may earn a commission at no extra cost to you. As an Amazon Associate I earn from qualifying purchases.

Ingredients

  

Custard
  • 180 g heavy cream
  • Three separated raw egg yolks in a clear glass bowl36 g egg yolks weighed without whites
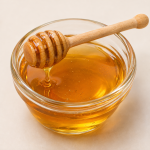
  • Golden honey in a glass bowl with a wooden honey dipper13.5 g honey
  •  
    6.75 g smooth pistachio paste
  • 9 g granulated sugar
Sugar crust
  • 2 tsp granulated sugar approximately; enough for a thin even layer on both custards

Equipment images are illustrative. Exact products may vary.

Instructions
 

  1. Heat the oven to 250°F. Set two ovenproof ramekins of about 150 ml capacity in a deep roasting pan. Heat water separately for the water bath.
  2. Warm the cream in a small saucepan until steaming, without boiling. Meanwhile, stir the weighed yolks and 9 g sugar until smooth. Blend in the honey and pistachio paste.
  3. Slowly pour the warm cream into the yolk mixture, stirring constantly. Scrape the bowl thoroughly, then pass the mixture through a fine sieve. Divide between the ramekins and skim off surface bubbles.
  4. Put the pan on the oven rack and carefully add hot water around the ramekins to about halfway up their sides. Keep water out of the custards. Bake, starting to check at about 40 minutes, until the edges are set and the centers tremble gently rather than slosh. Check with a food thermometer that the centers reach at least 160°F; continue baking as needed.
  5. Lift the ramekins out of the hot water carefully. Let the initial heat subside, then refrigerate within 2 hours of baking. Chill until fully cold and set, allowing at least 4 hours.
  6. Just before serving, blot any condensation from the cold custard tops. Sprinkle each with about 1 teaspoon sugar in a thin even layer. On a heatproof surface, use a kitchen torch according to its instructions to melt and caramelize the sugar. Let the crust harden briefly, then serve.

Notes

Two small custards are a serving suggestion for this batch.
Use smooth pistachio paste rather than chopped nuts. Sweetened pistachio spreads can change the sweetness and texture.
Keep the custards refrigerated. Add the sugar crust shortly before serving.

Tried this recipe?

Let us know how it was!

A couple of useful answers.

Can I measure the yolks by egg count?

For this small batch, weighing 36 g of stirred yolks is more consistent than using a fixed number of eggs.

When should I caramelize the sugar?

Wait until the custards are completely cold, then caramelize just before serving.

Keep the good food going

Similar Recipes

Find another recipe to bring to the table.

Craquelin Topping for Cream Puffs

Dessert

Craquelin Topping for Cream Puffs

Mix a small dough and chill before rolling between parchment sheets. Cut the frozen sheet to match your piped choux, then bake the topping with the pastries.

Yield
1 batch
Cuisine
French-inspired

Bring it to the table

Roll between parchment

A thin, even layer is easier to freeze and cut without adding extra flour.

At the table

Place frozen discs on piped choux just before baking according to a complete cream-puff recipe.

Before you start

Gather your ingredients.

Full quantities and serving adjustments are in the recipe card below.

See the ingredient checklist
  • 50 g unsalted butter — softened
  • 60 g granulated sugar
  • 60 g all-purpose flour

A few useful notes.

This is the topping component; choux pastry is prepared separately.

Disc count depends on thickness and cutter size.

The cooking plan

How to make Craquelin Topping for Cream Puffs.

  1. Mix sugar and flour in a bowl. Work in softened butter until a smooth dough forms.

  2. Cover and refrigerate for about 20 minutes. Roll between two parchment sheets into a thin, even layer, about 2 mm thick.

  3. Freeze flat until firm, using about 2 hours as a guide. Cut discs sized to sit on the piped choux buns you intend to bake.

  4. Keep the discs frozen until needed. Place them on piped choux before baking and follow the complete choux recipe until the pastries are fully baked.

Let’s cook

The full recipe.

Check off ingredients as you get them ready.

Changing servings? The ingredient list scales automatically. Adjust quantities named in the steps to match, and choose pans and cooking times for your batch.

Craquelin Topping for Cream Puffs

No ratings yet
A butter, sugar and flour topping rolled thin, frozen and cut for cream puffs.
Servings: 1 batch
Course: Dessert
Cuisine: French-inspired

Some ingredient links are affiliate links. We may earn a commission at no extra cost to you. As an Amazon Associate I earn from qualifying purchases.

Ingredients
  

  • 50 g unsalted butter softened
  • 60 g granulated sugar
  • 60 g all-purpose flour

Equipment images are illustrative. Exact products may vary.

Instructions
 

  1. Mix sugar and flour in a bowl. Work in softened butter until a smooth dough forms.
  2. Cover and refrigerate for about 20 minutes. Roll between two parchment sheets into a thin, even layer, about 2 mm thick.
  3. Freeze flat until firm, using about 2 hours as a guide. Cut discs sized to sit on the piped choux buns you intend to bake.
  4. Keep the discs frozen until needed. Place them on piped choux before baking and follow the complete choux recipe until the pastries are fully baked.

Notes

This is the topping component; choux pastry is prepared separately.
Disc count depends on thickness and cutter size.

Tried this recipe?

Let us know how it was!

A couple of useful answers.

Do I bake the discs separately?

They are intended to bake on top of piped choux pastry.

When do I put them on the buns?

Place the frozen discs on the piped dough just before baking.

Keep the good food going

Similar Recipes

Find another recipe to bring to the table.