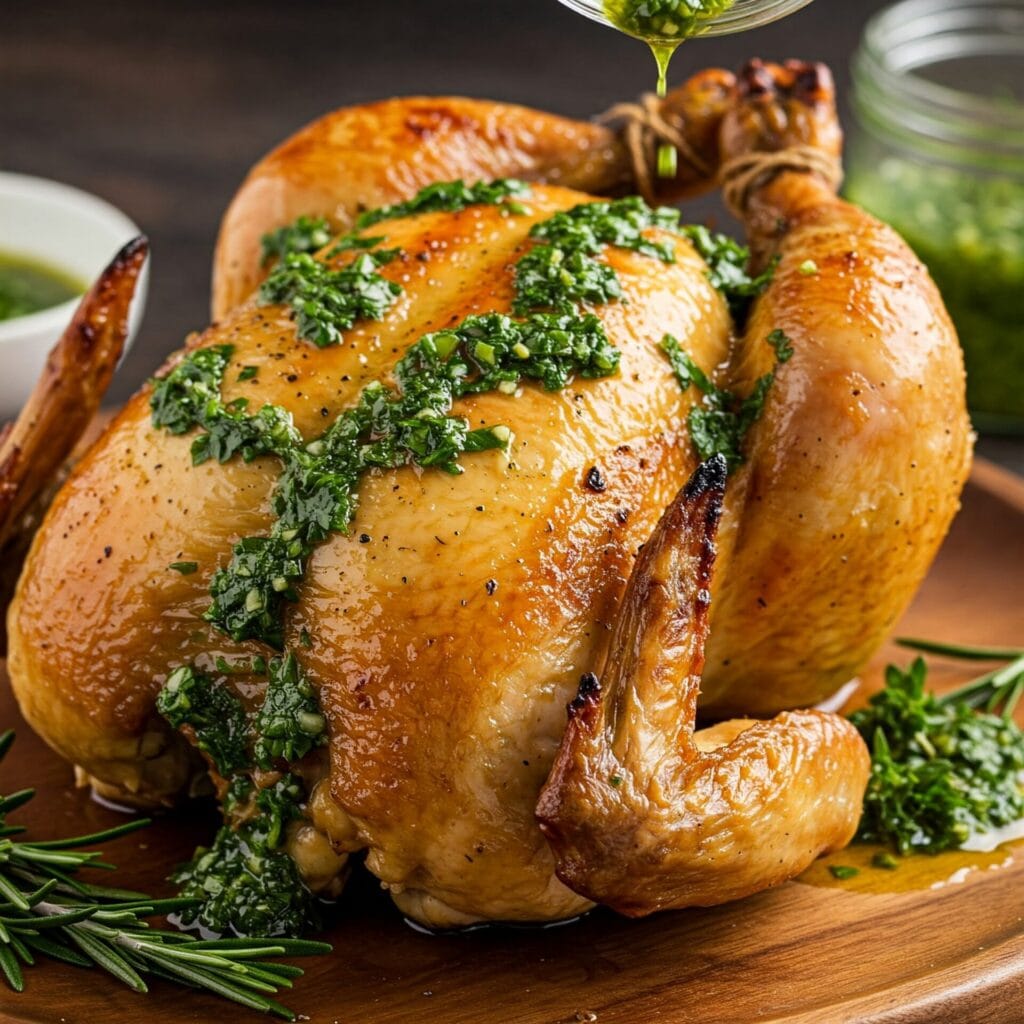
Creamy Chimichurri Roast Chicken

Flavor Explosion: Creamy Chimichurri Roast Chicken 🌿🔥

Juicy roasted chicken topped with a bold, herb-packed creamy chimichurri sauce—every bite is pure flavor! 🌿🔥

If you’re searching for a roast chicken recipe that goes beyond basic, this Creamy Chimichurri Roast Chicken is guaranteed to impress. With crispy, golden-brown skin, juicy meat, and a bold, herbaceous chimichurri cream sauce drizzled over the top, every bite bursts with flavor.

Not only is this dish beautiful to serve, but it also delivers a perfect balance of richness and freshness. Thanks to a creamy twist on traditional chimichurri, the sauce combines garlic, parsley, olive oil, vinegar, and a touch of cream.

As a result, it’s bright, savory, and just tangy enough to cut through the richness of the roast. Meanwhile, the roasted chicken brings satisfying comfort and hearty texture to the table.

Even better, the recipe is surprisingly simple to prepare. From seasoning the bird to roasting it to golden perfection, the steps are easy to follow. While the chicken cooks, you can blend the sauce—no complicated prep required.

Because this dish is so versatile, it’s perfect for a cozy family dinner or an impressive weekend meal with guests. Furthermore, it pairs beautifully with roasted potatoes, crusty bread, or a fresh green salad. And if you’re lucky enough to have leftovers, they’re just as delicious the next day.

In conclusion, if you’re ready to elevate your roast chicken game with bold herbs and creamy goodness, this recipe is calling your name. It’s easy, elegant, and guaranteed to wow.

For example, you can use boneless thighs for a faster cook time. In addition, the chimichurri sauce can be made in advance and refrigerated. Furthermore, any leftovers are excellent in wraps or sandwiches. As a result, this recipe is both practical and elevated. Therefore, it’s great for busy nights or special dinners alike.

Why You’ll Love It

🍗 Juicy, Golden Roast Chicken – Crispy on the outside, tender and flavorful on the inside.
🌿 Bold Chimichurri Flavor – A vibrant blend of parsley, garlic, vinegar, and herbs brings the dish to life.
🧄 Creamy Twist – This version adds smooth cream to classic chimichurri for a sauce that’s both fresh and indulgent.
Simple Yet Impressive – It requires minimal ingredients and steps, yet the presentation looks stunning.
🕒 Perfect for Any Occasion – Whether it’s a weeknight dinner or an elegant meal for guests, it works beautifully.
🥔 Pairs Beautifully – For example, try it with roasted veggies, potatoes, or crusty bread.
🔥 Elevates the Everyday – It’s a comforting dish with restaurant-quality flavor.
♻️ Tasty Leftovers – As a bonus, leftovers are great in wraps, salads, or grain bowls the next day.

🔪 How to Make Creamy Chimichurri Roast Chicken

Step 1: Preheat & Prep
Preheat your oven to 425°F (220°C). Pat your whole chicken (or chicken parts) dry with paper towels for extra crispy skin.

Step 2: Season the Chicken
Rub the chicken all over with olive oil, salt, pepper, garlic powder, and paprika. Make sure to season under the skin and inside the cavity if using a whole bird.

Step 3: Roast Until Golden
Place the chicken in a roasting pan or oven-safe skillet. Roast for about 45–60 minutes, or until the internal temperature reaches 165°F and the skin is golden and crispy.

Step 4: Make the Creamy Chimichurri
While the chicken roasts, blend fresh parsley, garlic, olive oil, red wine vinegar, a pinch of chili flakes, and a spoonful of sour cream or Greek yogurt until smooth and creamy. Adjust salt and spice to taste.

Step 5: Let the Chicken Rest
Remove chicken from the oven and let it rest for 10–15 minutes. This helps keep the juices locked in.

Step 6: Slice, Drizzle & Serve
Carve the chicken and drizzle generously with the creamy chimichurri sauce. Serve with extra sauce on the side and your favorite sides!

Jump to Section

📱 Follow Us 

📬 Subscribe for Updates

* indicates required

Intuit Mailchimp

Creamy Chimichurri Roast Chicken

No ratings yet
This Creamy Chimichurri Roast Chicken combines crispy, golden-roasted chicken with a bold, herb-loaded chimichurri sauce—elevated with a rich and creamy twist. It’s easy to make, bursting with flavor, and perfect for weeknight dinners or impressing guests. Serve it with your favorite sides and get ready for a dish that’s anything but ordinary! 🌿🍗✨
Prep Time 20 minutes
Cook Time 1 hour
Marinate & Chill 12 hours
Total Time 13 hours 20 minutes
Servings: 6 people
Course: Dinner, Main Course
Cuisine: Argentinian, Argentinian Fusion, South America
Calories: 579

Ingredients
  

Sauce:
  • 5 Cloves Garlic
  • Cups Fresh Cilantro packed
  • 2 Cups Parsley packed
  • ¼ Cup Red Wine Vinegar
  • tsp Kosher Salt
  • 4 tsp Dried Oregano
  • 2 tsp Crushed Red Pepper Flakes
  • ¾ Cup Extra Virgin Olive Oil divided
  • 1 Cup Greek Yogurt Plain Whole-Milk

Chicken And Assembly:
  • 4 Lb Whole Chicken whole, backbone removed, patted dry
  • tsp Kosher Salt

Equipment

1 Chef's knife (For chopping parsley, cilantro, garlic, and shallots with precision.)
1 Cutting board (A large, sturdy board to handle raw chicken and herbs. Preferably non-slip.)
1 Mixing Bowls (Set) (For marinating chicken and mixing the chimichurri and creamy sauce separately. Stainless steel or glass preferred.)
1 Garlic Press (Speeds up garlic prep and keeps your hands clean.)
1 Citrus Juicer (Handy for juicing fresh lemons or limes for the chimichurri.)
1 Whisk (For emulsifying the chimichurri and blending in the creamy base.)
1 Cast Iron Skillet (Ideal for getting a golden sear on the chicken and finishing it in the oven.)
1 Tongs (For turning chicken safely without losing juices.)
1 Meat Thermometer (Ensures chicken reaches 165°F for safe cooking.)
1 Food processor (Optional, but helps make a smooth chimichurri quickly.)
1 Measuring Cups & Spoons (Essential for consistent flavor in your marinade and sauce.)
1 Serving Platter (For presenting the finished creamy chimichurri chicken beautifully.)

Method
 

Sauce:
  1. Alright, let's make that chimichurri magic happen! In your food processor, combine the garlic, cilantro, parsley, vinegar, salt, oregano, and red pepper flakes. Drizzle in ¼ cup of olive oil, then pulse everything together until the herbs are finely chopped but not completely pulverized. We want a bit of texture in that vibrant green sauce!
    5 Cloves Garlic, 2½ Cups Fresh Cilantro, 2 Cups Parsley, ¼ Cup Red Wine Vinegar, 2¼ tsp Kosher Salt, 4 tsp Dried Oregano, 2 tsp Crushed Red Pepper Flakes, ¾ Cup Extra Virgin Olive Oil
  2. Now, let's bring that chimichurri to life! Transfer the vibrant herb mixture to a medium bowl. Add the yogurt and the remaining ½ cup of olive oil. Grab a whisk and vigorously whisk everything together until the mixture is emulsified. This means the oil and yogurt will combine into a creamy, cohesive sauce. You should have about 2½ cups of this luscious chimichurri—plenty to coat that chicken and have some leftover for dipping!
    1 Cup Greek Yogurt, ¾ Cup Extra Virgin Olive Oil
Chicken and Assembly:
  1. Time to prep that chicken! Place the chicken breast-side up on a cutting board. Open it up like a book, spreading it out as much as you can. Now, using your palms, press firmly down on the breastbone to flatten the chicken. You might hear a satisfying crack—that's the breastbone giving way to create a more even surface for cooking. Transfer the flattened chicken to a large bowl and generously rub it all over with salt and ¾ cup of that glorious chimichurri sauce. Make sure to get the sauce into every nook and cranny! Cover the bowl and let the chicken chill in the refrigerator for at least 2 hours, or preferably up to 12 hours. This allows the flavors to meld and the chicken to marinate beautifully. No need to bring it to room temperature before roasting—it's ready to go straight from the fridge to the oven!
    4 Lb Whole Chicken, 1¼ tsp Kosher Salt
  2. Okay, time to roast this bird to perfection! Place a rack in the middle of your oven and preheat it to 375°F (190°C). Now, carefully transfer the marinated chicken to a wire rack set inside a large rimmed baking sheet. Don't let that precious marinade go to waste! Spread any leftover chimichurri from the bowl over the skin of the chicken. This will help create a beautifully browned and flavorful crust. Slide the baking sheet into the oven and roast the chicken, rotating the baking sheet halfway through, until the skin is a deep golden brown and an instant-read thermometer inserted into the thickest part of a thigh registers 165°F (74°C). This should take about 50-60 minutes. Once it's cooked through, take the chicken out of the oven and let it rest for 10 minutes before carving. This allows the juices to redistribute, ensuring a tender and flavorful result.
  3. And now for the grand finale! Carefully transfer the roasted chicken to a serving platter. Take a look at that remaining chimichurri sauce. If it has separated a bit while the chicken was roasting, just give it a quick whisk in the bowl to bring it back together. Now, generously spoon that vibrant chimichurri over the chicken, or serve it alongside for dipping. Get ready to savor every bite of this flavor-packed masterpiece!

Nutrition

Serving: 12ozCalories: 579kcalCarbohydrates: 14gProtein: 57gFat: 34gSaturated Fat: 6gPolyunsaturated Fat: 4gMonounsaturated Fat: 22gTrans Fat: 0.04gCholesterol: 156mgSodium: 4511mgPotassium: 1328mgFiber: 2gSugar: 4gVitamin A: 2415IUVitamin C: 30mgCalcium: 133mgIron: 3mg

Notes

🐔 Chicken Champion: Tips for Roast Chicken Perfection

  • Butterfly the Bird: Flattening (spatchcocking) your chicken helps it cook more evenly and keeps the breasts from drying out. Don’t be shy—give that breastbone a good crack!
  • Marinate for Maximum Flavor: The longer the chicken marinates, the more intense and delicious the flavor. Aim for at least 2 hours, but overnight is ideal.
  • Give It Space: Don’t overcrowd the pan! Allowing room on your baking sheet promotes better air circulation and golden-brown skin.
  • Use a Meat Thermometer: An instant-read thermometer ensures your chicken is cooked perfectly—look for an internal temp of 165°F (74°C).
  • Let It Rest: Rest the chicken for at least 10 minutes after roasting to lock in juices and boost tenderness.

🌿 Chimichurri Cheer: Sauce Secrets for Maximum Flavor

  • Fresh Herbs Are Key: Always use the freshest herbs for vibrant color and unbeatable flavor.
  • Pulse, Don’t Puree: Use a food processor and pulse until finely chopped—you want texture, not a smoothie.
  • Whisk to Emulsify: To achieve that creamy chimichurri magic, whisk the oil and yogurt well until the sauce is smooth and cohesive.
  • Taste & Adjust: Chimichurri is all about balance. Add extra vinegar for tang, red pepper flakes for heat, or salt to brighten the flavors.

🍽️ Serving Sensations: How to Make It a Meal

  • Serve It Hot or Cold: This dish shines straight from the oven or served at room temperature—your call!
  • Choose the Right Sides: Roasted veggies, fresh salad, or crusty bread are perfect companions for soaking up all that creamy chimichurri.
  • Love Your Leftovers: Leftover sauce is gold—drizzle it over grilled meats, fish, veggies, or even use it as a zippy salad dressing or marinade.

🎉 Bonus Tip: Make It a Party

Feeding a crowd? No problem! This recipe easily scales up. Just double or triple the ingredients and you’ve got yourself a crowd-pleasing main dish worthy of any celebration.

With these tips and tricks, you’ll master the art of Creamy Chimichurri Roast Chicken—and trust us, your taste buds will thank you! 🌿🐔😋

Tried this recipe?

Let us know how it was!

🧂 What to Serve with Creamy Chimichurri Roast Chicken

This roast chicken is juicy, herb-packed, and drizzled with creamy chimichurri sauce—so it’s begging for sides that can soak up all that flavor. Whether you’re hosting a dinner party or just making a cozy family meal, here are some delicious pairings to round out your plate:

🥔 Comforting & Hearty

Garlic Mashed Potatoes: Creamy, buttery potatoes that pair perfectly with the tangy chimichurri drizzle.
Roasted Fingerling Potatoes: Crispy edges + tender centers = the perfect match for juicy chicken.
Herbed Rice Pilaf: Light, fluffy, and subtly seasoned so the chimichurri shines.

🥗 Fresh & Vibrant

Simple Arugula Salad: Peppery greens with a lemon vinaigrette bring brightness to the dish.
Grilled Veggie Medley: Zucchini, peppers, and red onion roasted or grilled for extra char and color.
Tomato & Avocado Salad: Creamy, juicy, and perfectly balanced against the bold chimichurri.

🍞 Breads & Bonus Bites

Warm Crusty Bread or Garlic Bread: Ideal for soaking up every last drop of sauce.
Polenta Cakes or Grits: A southern-style twist that adds richness and texture.
Crispy Chickpeas or Roasted Cauliflower: Great as a crunchy, spiced side.

🍷 Drinks to Pair

Chilled White Wine (Sauvignon Blanc or Albariño): Refreshing and herb-friendly.
Sparkling Water with Lime: Clean and citrusy to balance the creaminess.
Iced Green Tea or Light Beer: Earthy or crisp, depending on your vibe.
FAQ – Creamy Chimichurri Roast Chicken


Can I use chicken breasts or thighs instead of a whole chicken?

Yes! This recipe works beautifully with bone-in, skin-on chicken thighs, breasts, or even drumsticks. Just adjust the cooking time accordingly—smaller cuts usually roast in 25–35 minutes.


Can I make the chimichurri sauce ahead of time?

Absolutely. In fact, it tastes even better after a few hours in the fridge. You can make the chimichurri up to 3 days in advance, then stir in the yogurt or sour cream just before serving for the freshest texture.


How do I store leftovers?

Store leftover chicken and sauce separately in airtight containers. The chicken will keep for 3–4 days in the fridge, and the chimichurri sauce lasts up to 5 days. Reheat chicken gently in the oven or enjoy cold!


Is this recipe gluten-free?

Yes! The ingredients used in both the roasted chicken and chimichurri sauce are naturally gluten-free. Just double-check any packaged seasonings or yogurt brands to be sure.


What herbs can I substitute if I don’t have fresh parsley?

While parsley is traditional, you can use cilantro, basil, or even a mix of herbs like oregano and mint. The fresher, the better!


Can I grill the chicken instead of roasting it?

Definitely! Grilled chicken adds smoky depth and works especially well in warm weather. Just marinate, then grill over medium heat until the internal temp hits 165°F.


What can I serve with creamy chimichurri roast chicken?

It pairs well with roasted vegetables, mashed potatoes, herbed rice, simple salads, or crusty bread to soak up all that sauce. See the full “What to Serve” section above for more ideas!

Please follow and like us:
onpost_follow
fb-share-icon197
Tweet120
Pinterest20
Share 20
submit to reddit

Breakfast Crunchwrap Casserole

Wake-Up Worthy: Crunchwrap Breakfast Casserole

Crispy tortillas, fluffy eggs, seasoned sausage, and gooey cheese come together in this irresistible breakfast casserole inspired by the iconic crunchwrap.

If you love the satisfying crunch and savory goodness of a classic breakfast crunchwrap, you’re in for a real treat. This Breakfast Crunchwrap Casserole brings together all the bold flavors you crave—fluffy scrambled eggs, crispy sausage, melty cheddar cheese, and golden tortillas—into one warm and irresistible baked dish.

Rather than assembling individual wraps, you simply layer the ingredients, pop the casserole in the oven, and let the magic happen. As a result, you get a dish that’s crispy on top, cheesy in the middle, and perfect for feeding a hungry crowd. Even better, it’s incredibly easy to prepare and works beautifully for weekend brunch, holiday mornings, or busy weekdays when meal prep is key.

This breakfast casserole is quick to assemble, made with affordable, everyday ingredients, and delivers the perfect blend of crunchy, creamy, and cheesy in every bite. It’s also endlessly customizable—feel free to swap in your favorite meats, cheeses, or spices to make it your own. Because of its flexibility, make-ahead convenience, and Tex-Mex flavor, it’s a guaranteed crowd-pleaser that will have everyone asking for seconds.

Whether you’re hosting brunch, prepping for the week, or just craving something comforting and fun, this Breakfast Crunchwrap Casserole checks all the boxes—and then some.

⭐ Why This Breakfast Crunchwrap Casserole Is So Awesome:

🧀 All Your Favorites in One Dish – Eggs, sausage, cheese, and crispy tortillas all baked into one mouthwatering casserole.

⏱️ Time-Saving & No Wrapping Needed – Skip the individual crunchwrap assembly and bake everything together in a single dish.

👨‍👩‍👧‍👦 Feeds a Hungry Crowd – Perfect for family brunches, weekend get-togethers, or holiday mornings.

🔁 Make-Ahead & Meal Prep Friendly – Assemble the night before and bake in the morning, or portion and reheat throughout the week.

🌶️ Totally Customizable – Use bacon, chorizo, or go vegetarian. Swap cheeses, add salsa, or spice it up with jalapeños!

🥑 Pairs with All the Good Stuff – Add avocado, hot sauce, sour cream, or fresh pico for a Tex-Mex breakfast explosion.

🧼 Minimal Cleanup – Fewer dishes than traditional crunchwraps = more time to relax and eat!

🎉 Guaranteed Crowd-Pleaser – Crunchy, cheesy, and full of bold flavor—it disappears fast at every table!

🔪 How to Make Breakfast Crunchwrap Casserole

Prep the Tortillas
Cut large flour tortillas into triangles and lightly toast or crisp them in the oven or skillet.

Cook the Fillings
Brown your sausage (or bacon/chorizo), scramble the eggs, and season with salt and pepper.

Make the Cheese Sauce (Optional)
For extra creaminess, mix shredded cheese with a little milk or sour cream in a bowl.

Layer the Casserole
In a greased baking dish, layer crispy tortilla pieces, scrambled eggs, sausage, shredded cheese (or sauce), and repeat. Top with more tortilla triangles and cheese.

Bake to Perfection
Bake at 375°F (190°C) for 20–25 minutes, or until golden and bubbly.

Garnish & Serve
Top with chopped green onions, avocado, sour cream, or your favorite salsa. Slice and serve hot!

Jump to Section

📱 Follow Us 

📬 Subscribe for Updates

* indicates required

Intuit Mailchimp

Breakfast Crunch Wrap Casserole

No ratings yet
This Breakfast Crunch Wrap Casserole is a crowd-pleasing, make-ahead dish perfect for busy mornings! Layers of crispy tortillas, fluffy eggs, savory sausage or beef, melty cheese, and your favorite toppings are baked to golden perfection. It's the ultimate breakfast comfort food with a fun crunch!
Prep Time 20 minutes
Cook Time 55 minutes
Servings: 6 people
Course: Breakfast
Cuisine: Tex-Mex
Calories: 611

Ingredients
  

  • 10 Hash Browns frozen patties

  • 1 Lb Breakfast Sausage pork sausage roll
  • Cup Salsa jarred, plus more for serving
  • Cup Sour Cream
  • 1 Tbsp Jalapeno Peppers pickled, finely chopped
  • 3 Tbsp Butter melted, divided
  • 6 Flour Tortillas 12"
  • 1 Tbsp Butter
  • 10 Large Eggs
  • 1 Tbsp Water
  • 1 tsp Kosher Salt
  • ½ tsp Ground Black Pepper freshly ground
  • 2 Cups Cheddar Cheese shredded

Equipment

1 9x13 Baking Dish (A standard casserole dish to layer and bake all your ingredients to golden perfection.)
1 Non-Stick Skillet (For cooking sausage, scrambling eggs, and toasting tortilla pieces without sticking.)
1 Mixing Bowls (Set) (Ideal for beating eggs, mixing cheese, or prepping your add-ins.)
1 Whisk (Perfect for fluffy scrambled eggs or combining your creamy cheese mixture.)
1 Cutting board (Use a large surface to chop green onions, slice avocado, and prep tortillas.)
1 Chef's knife (A sharp knife makes chopping and slicing quick and safe)
1 Tongs (Handy for flipping tortillas or serving the casserole cleanly.)
1 Aluminum Foil (Use to tent the casserole during baking if it browns too quickly.)
1 Serving Spatula (Makes slicing and lifting clean portions super easy.)
1 Oven Mitts (Essential for safely handling the hot casserole dish out of the oven.)

Method
 

  1. Preheat your oven to 425°F (220°C). Line a baking sheet with parchment paper to prevent sticking and make cleanup easier. Arrange your frozen hash brown patties in a single layer on the prepared baking sheet, ensuring they have some space to crisp up evenly. Bake them in the preheated oven for 20 to 25 minutes, flipping each patty halfway through to achieve a beautiful golden brown and crispy texture on both sides. Once the hash browns are cooked to perfection, reduce the oven temperature to 375°F (190°C) to prepare for baking the casserole.
    10 Hash Browns
  2. While the hash browns are baking, heat a large skillet over medium-high heat. Add your sausage to the skillet and cook, stirring occasionally, until it is browned and crumbly, about 5-7 minutes. Once the sausage is cooked through, drain off any excess grease.
    1 Lb Breakfast Sausage
  3. In a small bowl, combine your salsa, sour cream, and jalapeños. Give it a good stir to make sure everything is evenly distributed, then set it aside. This will be your flavorful topping for the casserole later on!
    ⅔ Cup Sour Cream, 1 Tbsp Jalapeno Peppers, ⅓ Cup Salsa
  4. Begin by melting a tablespoon of butter and using a pastry brush to evenly coat the bottom and sides of your casserole dish. This will help the tortillas stick and add a delicious buttery flavor. Next, arrange five tortillas in the bottom of the prepared casserole dish, overlapping them slightly to create a snug fit that covers the entire bottom. Allow the edges of the tortillas to drape over the sides of the dish, which will create a crispy tortilla crust once the casserole is baked. Finally, spread the cooked, crumbled sausage evenly over the layer of tortillas to form the savory base of your casserole.
    3 Tbsp Butter, 6 Flour Tortillas
  5. First, melt a tablespoon of butter in a large nonstick skillet over medium heat. In a separate bowl, whisk together eggs, water, salt, and pepper until well combined. Pour the egg mixture into the heated skillet and cook, stirring constantly, until the eggs are set and soft-scrambled, about 3 minutes. Once cooked, spread the scrambled eggs evenly over the sausage layer in the casserole dish.
    1 Tbsp Butter, 10 Large Eggs, 1 Tbsp Water, 1 tsp Kosher Salt, ½ tsp Ground Black Pepper
  6. Now it's time to layer those delicious toppings! Drizzle half of the reserved sour cream mixture over the eggs for a creamy, tangy flavor, followed by three-quarters of a cup of your favorite shredded cheese. Next, arrange the crispy hash browns evenly over the cheese, adding a hearty element to your casserole. Sprinkle the remaining cheese over the hash browns for a golden, crispy top. Take the remaining tortilla and place it in the center of the dish. Gently fold the overlapping tortillas over the center tortilla, pressing down slightly to seal the edges and create a closed, burrito-like shape. Brush the top with the remaining melted butter, which will help the tortillas brown and crisp up in the oven. Finally, gently press down on the folded tortillas to help the edges stick together and create a tight seal, preventing the filling from spilling out during baking.
    ⅔ Cup Sour Cream, 2 Cups Cheddar Cheese
  7. With all the delicious layers assembled, bake your masterpiece in the preheated 375°F oven until the top is toasted to a beautiful golden brown, about 25 to 30 minutes. Once baked, carefully place a large platter or board over the casserole dish and, with a swift motion, invert the casserole onto the board for a stunning presentation. Cut the casserole into squares and serve it up! Don't forget to offer the remaining sour cream sauce and extra salsa on the side for those who want an extra kick of flavor. Enjoy!
    ⅓ Cup Salsa

Nutrition

Serving: 12ozCalories: 611kcalCarbohydrates: 19gProtein: 24gFat: 49gSaturated Fat: 23gPolyunsaturated Fat: 4gMonounsaturated Fat: 15gTrans Fat: 0.5gCholesterol: 128mgSodium: 1474mgPotassium: 337mgFiber: 1gSugar: 4gVitamin A: 938IUVitamin C: 1mgCalcium: 358mgIron: 2mg

Notes

For Extra Crispy Hash Browns:
  • Don't overcrowd the pan: Give those hash browns some space to breathe! Overcrowding the baking sheet prevents proper air circulation and can lead to soggy patties.
  • Consider par-baking: If you want super crispy hash browns, par-bake them for about 10 minutes before adding them to the casserole. This will help them stay crispy even after being layered with other ingredients.
  • Try different hash browns: Experiment with different types of frozen hash browns, like shredded or waffle-cut, for a varied texture.
For Flavorful Filling:
  • Spice it up: Add a pinch of chili powder or cayenne pepper to the scrambled eggs for an extra kick.
  • Get creative with the meat: Instead of sausage, try ground beef, chorizo, or even a plant-based meat substitute.
  • Boost the veggies: Sauté some onions and peppers with the meat for added flavor and nutrients.
For a Perfect Assembly:
  • Warm the tortillas: Warm the tortillas slightly before layering them in the casserole dish. This will make them more pliable and less likely to tear.
  • Don't overfill: Be careful not to overfill the casserole, as this can make it difficult to fold and seal the tortillas.
  • Secure the edges: Use toothpicks to secure the tortilla edges if you're having trouble keeping them sealed.
For Serving and Storage:
  • Let it rest: Allow the casserole to rest for a few minutes after baking before cutting and serving. This will help the filling set and prevent it from being too runny.
  • Make it ahead: Assemble the casserole the night before and bake it in the morning for a quick and easy breakfast.
  • Reheat with care: Reheat leftovers gently in the oven or microwave to avoid overcooking the eggs.
By following these tips, you'll be well on your way to creating a truly delicious and impressive Breakfast Crunchwrap Casserole!

Tried this recipe?

Let us know how it was!

🍽️ What to Serve with Breakfast Crunchwrap Casserole

🥑 Fresh & Zesty Sides

  • Avocado slices or guacamole – Creamy and cooling, perfect with Tex-Mex flavor

  • Pico de gallo or fresh tomato salsa – Adds freshness and a tangy bite

  • Sour cream or crema – For that rich, cooling contrast

  • Fresh fruit salad – Brightens the plate and balances the richness

🧂 Dippable & Crispy Sides

  • Crispy hash browns or home fries – A must-have potato side!

  • Air fryer tater tots – Fun and kid-friendly

  • Tortilla chips & queso – Great for dipping or extra crunch

🌮 Complementary Dishes

  • Mini breakfast tacos – For guests who want variety on their plate

  • Chorizo or bacon-wrapped jalapeño poppers – Bring on the heat!

  • Refried beans or black beans – A hearty, flavorful side

🍹 Drinks to Pair

  • Fresh orange juice or mimosas – For a brunch vibe

  • Iced coffee or cold brew – Strong, chilled, and perfect with savory food

  • Horchata or agua fresca – A sweet, refreshing contrast

❓ Breakfast Crunchwrap Casserole FAQ

Q: Can I make this casserole ahead of time?
A: Yes! You can fully assemble the casserole the night before, cover it, and refrigerate. When ready to bake, just remove it from the fridge 15–20 minutes beforehand and bake as directed.


Q: How do I store leftovers?
A: Store any leftovers in an airtight container in the refrigerator for up to 4 days. Reheat individual portions in the microwave or oven until warmed through.


Q: Can I freeze this casserole?
A: Absolutely. Let it cool completely, then wrap tightly or portion into freezer-safe containers. Freeze for up to 2 months. Thaw in the fridge overnight before reheating.


Q: What other proteins can I use?
A: This recipe works great with bacon, ground turkey, chorizo, or even plant-based sausage for a vegetarian option.


Q: How can I make it spicy?
A: Add chopped jalapeños, use pepper jack cheese, or drizzle hot sauce or chipotle crema before baking for a spicy kick.


Q: Can I make this gluten-free?
A: Yes! Just use gluten-free tortillas and double-check that your sausage and cheese are certified gluten-free.


Q: What’s the best cheese to use?
A: Sharp cheddar is a classic choice, but feel free to mix in Monterey Jack, pepper jack, or even a little cream cheese for extra richness.

Please follow and like us:
onpost_follow
fb-share-icon197
Tweet120
Pinterest20
Share 20
submit to reddit

Chili Cheese Bean Dip

🧀 Cheesy Chili Bean Dip – Game Day Favorite

This hot, gooey dip is loaded with melted cheese, hearty beans, and bold chili flavor—perfect for scooping on game day, movie night, or any party!

If you’re looking for the ultimate party dip that’s hot, cheesy, and totally addictive, this Cheesy Chili Bean Dip delivers every time. It’s bold, hearty, and loaded with layers of melted cheese, savory beans, and flavorful chili—everything you want in a game day snack. Whether you’re hosting a party, watching the big game, or just in the mood for something comforting, this dip hits the spot.

Instead of spending hours prepping complicated appetizers, you can throw this together in minutes. Just layer canned chili, creamy refried beans, and shredded cheese into a baking dish, then bake until it’s bubbly and golden. As a result, you get a gooey, scoopable dip that’s perfect with tortilla chips, crackers, or even fresh veggies.

🧄 Why You’ll Love This Cheesy Chili Bean Dip

🧀 Ultra-Cheesy – Every bite is packed with gooey, melty cheese that pulls perfectly with every scoop.

🌶️ Bold Flavor – The combo of savory chili, creamy beans, and spices creates rich, crave-worthy flavor.

🕒 Quick & Easy – In fact, you can prep it in under 10 minutes with just a handful of ingredients.

🍽️ Perfect Party Food – As a result, it’s a guaranteed crowd-pleaser for game day, movie nights, or potlucks.

🔁 Customizable – For example, add jalapeños, ground beef, or green onions for your own twist.

🔥 Serve It Hot & Fresh – It bakes to bubbly, golden perfection in about 20 minutes.

♻️ Great Leftovers – In addition, it reheats well and makes a killer nacho topping the next day.

One Dish, No Fuss – Therefore, cleanup is easy and you’ll spend less time in the kitchen.

🔪 How to Make Cheesy Chili Bean Dip

Preheat the Oven
Set your oven to 375°F (190°C) and lightly grease a small baking dish.

Layer the Dip
Spread refried beans in an even layer, followed by your favorite chili. Top generously with shredded cheese.

Bake Until Bubbly
Place the dish in the oven and bake for 15–20 minutes, or until the cheese is fully melted and bubbling.

Garnish and Serve
Top with optional green onions, jalapeños, or cilantro. Serve hot with tortilla chips, crackers, or veggie sticks.

Jump to Section

📱 Follow Us 

📬 Subscribe for Updates

* indicates required

Intuit Mailchimp

Chili Cheese Bean Dip

No ratings yet
Looking for a quick and easy appetizer that's sure to impress? This Chili Cheese Bean Dip is the answer! It comes together in minutes with just a few simple ingredients, making it the perfect go-to for busy weeknights or last-minute gatherings. The combination of chili, beans, and cheese is a classic crowd-pleaser, and the warm, cheesy dip is simply irresistible. Serve it with your favorite dippers and enjoy!
Prep Time 10 minutes
Cook Time 1 hour
Servings: 6 people
Course: Appetizer, Snacks
Cuisine: American, American Fusion
Calories: 197

Ingredients
  

  • 16 oz Refried Beans can
  • 2 oz Monterey Jack cheese shredded
  • 2 oz Cheddar Cheese shredded
  • 2 Tbsp Avocado oil
  • 1 Large Lime juiced
  • ¼ Cup Sour Cream or Mexican crema
  • 3 Cloves Garlic crushed or finely minced
  • ¼ Cup Green Onions thinly sliced
  • ¼ Cup Fresh Cilantro leaves, packed, chopped
  • ½ tsp Ground Cumin
  • 1 tsp Chipotle ground
  • 1 tsp Chili Powder
  • 1 Large Jalapeno Peppers seeded and minced

Equipment

1 9x9 Baking Dish (Ideal for layering and evenly baking the dip to bubbly perfection.)
1 Mixing bowl (For stirring together beans, chili, and spices if combining first.)
1 Spatula (Helps spread each layer evenly in the baking dish.)
1 Cheese Grater (For shredding fresh Monterey Jack or cheddar for maximum melt.)
1 Can Opener (Essential if you’re using canned chili or refried beans.)
1 Oven Mitts (To safely remove the hot, bubbly dish from the oven.)
1 Small Ladle (Great for scooping into bowls or onto plates.)
1 Serving Tray (Makes it easy to transport the dip and chips for parties.)

Method
 

  1. In a large bowl, add the refried beans, shredded Monterey Jack cheese, shredded cheddar cheese, avocado oil, lime juice, sour cream, minced garlic, chopped green onions, chopped cilantro, ground cumin, chipotle powder, chili powder, and finely diced jalapeño. Use a spatula to stir the mixture thoroughly until all the ingredients are evenly distributed and well combined. Make sure the cheese is evenly mixed throughout the dip.
    Note: If making the day before, do not add garlic, onions, and cilantro until 1 to 2 hours before serving; otherwise, the flavors might overpower the dip.
    Wrap and chill for 1 to 2 hours before serving for best results, but the dip can be served immediately, if desired.
    16 oz Refried Beans, 2 oz Monterey Jack cheese, 2 oz Cheddar Cheese, 2 Tbsp Avocado oil, 1 Large Lime, ¼ Cup Sour Cream , 3 Cloves Garlic, ¼ Cup Green Onions, ¼ Cup Fresh Cilantro, ½ tsp Ground Cumin, 1 tsp Chipotle, 1 tsp Chili Powder, 1 Large Jalapeno Peppers

Nutrition

Serving: 12ozCalories: 197kcalCarbohydrates: 12gProtein: 8gFat: 13gSaturated Fat: 5gPolyunsaturated Fat: 1gMonounsaturated Fat: 5gCholesterol: 24mgSodium: 564mgPotassium: 75mgFiber: 4gSugar: 3gVitamin A: 510IUVitamin C: 8mgCalcium: 185mgIron: 1mg

Notes

Ingredients:
  • Refried Beans: Use your favorite brand or homemade refried beans.
  • Cheese: A blend of Monterey Jack and cheddar cheese provides a good melting and flavor combination.
  • Avocado Oil: Avocado oil adds a healthy fat and a creamy texture. You can substitute with another oil, like olive oil.
  • Lime Juice: Fresh lime juice adds a bright and zesty flavor.
  • Sour Cream: Sour cream adds a tangy creaminess. You can substitute with Greek yogurt for a healthier option.
  • Garlic: Freshly minced garlic adds a pungent flavor.
  • Green Onions: Green onions provide a mild onion flavor and a pop of color.
  • Cilantro: Fresh cilantro adds a fresh, herbaceous note.
  • Spices: Cumin, chipotle powder, and chili powder create a warm and smoky flavor base.
  • Jalapeño: Finely diced jalapeño adds a spicy kick. Adjust the amount to your liking.
Preparation Tips:
  • Combine Ingredients: In a large bowl, combine all ingredients and stir with a spatula until well combined. Make sure the cheese is evenly distributed throughout the dip.
  • Adjust Consistency: If the dip is too thick, add a tablespoon or two of water or milk to thin it out. If it's too thin, add more cheese or refried beans.
  • Taste and Adjust: Taste the dip and adjust the seasonings to your liking. You may want to add more lime juice, hot sauce, or spices.
Serving Suggestions:
  • Serve Warm: This dip is best served warm. You can heat it in the microwave or in a small saucepan on the stovetop.
  • Dippers: Serve with tortilla chips, crackers, pita bread, or fresh vegetables.
  • Garnish: Garnish with extra chopped cilantro, green onions, or a dollop of sour cream.
Variations:
  • Spicy: Add more jalapeño, chipotle powder, or your favorite hot sauce for extra heat.
  • Hearty: Add cooked ground beef, chorizo, or black beans for a more substantial dip.
  • Creamy: Add more sour cream or Greek yogurt for a creamier texture.
  • Cheesy: Add more cheese or use a different type of cheese, like pepper jack.
With these tips, you'll be able to create a delicious and crowd-pleasing Chili Cheese Bean Dip that's perfect for any occasion!

Tried this recipe?

Let us know how it was!

🍽️ What to Serve With Cheesy Chili Bean Dip

This gooey, bold-flavored dip is the life of the party—and it pairs perfectly with all your favorite dippers and sides. Whether you’re hosting game day or setting up a snack table, here are some delicious ways to serve it:

🧂 Classic Dippers

  • Tortilla chips – The obvious choice for maximum scoopability

  • Crackers – Try buttery rounds or sturdy wheat crackers for a crispy contrast

  • Toasted baguette slices – Great for a heartier dip base

  • Soft pretzel bites – A warm, salty pairing with melty cheese

🥕 Fresh Crunch

  • Celery sticks – Adds a refreshing crunch

  • Carrot sticks – Naturally sweet and perfect with heat

  • Bell pepper strips – Colorful and sturdy enough to hold every bite

🌮 Sidekicks & Add-ons

  • Nachos – Drizzle over chips and top with jalapeños and sour cream

  • Baked potatoes – Spoon over for an indulgent twist

  • Quesadillas or tacos – Use leftovers as a bold filling

🥑 Crave-Worthy Recipes to Try Next

❓ Cheesy Chili Bean Dip FAQ

Q: Can I make this dip ahead of time?
A: Yes! You can assemble the dip a day in advance, cover it, and store it in the fridge. When you’re ready to serve, bake it as directed until hot and bubbly.


Q: Can I make it in the microwave instead of the oven?
A: Absolutely. Use a microwave-safe dish and heat in 30-second intervals until the cheese is fully melted. It won’t get quite as bubbly or golden, but it still tastes great.


Q: Does this recipe work with homemade chili?
A: Definitely! If you have leftover chili, it works beautifully. Just make sure it’s not too watery—thicker chili holds up better in this layered dip.


Q: Can I make it vegetarian or vegan?
A: Yes. Use vegetarian chili and skip the meat, or go fully vegan by using plant-based cheese and beans. The result is still hearty and satisfying.


Q: What’s the best cheese to use?
A: Sharp cheddar is a classic, but feel free to mix in Monterey Jack, pepper jack, or even a little cream cheese for extra creaminess.

Please follow and like us:
onpost_follow
fb-share-icon197
Tweet120
Pinterest20
Share 20
submit to reddit

Loaded Potato Chip Nachos

Loaded Potato Chip Nachos – Easy, Cheesy, and Crowd-Pleasing!

Crispy, cheesy, and totally addictive—these loaded potato chip nachos are the ultimate party snack or game-day treat!

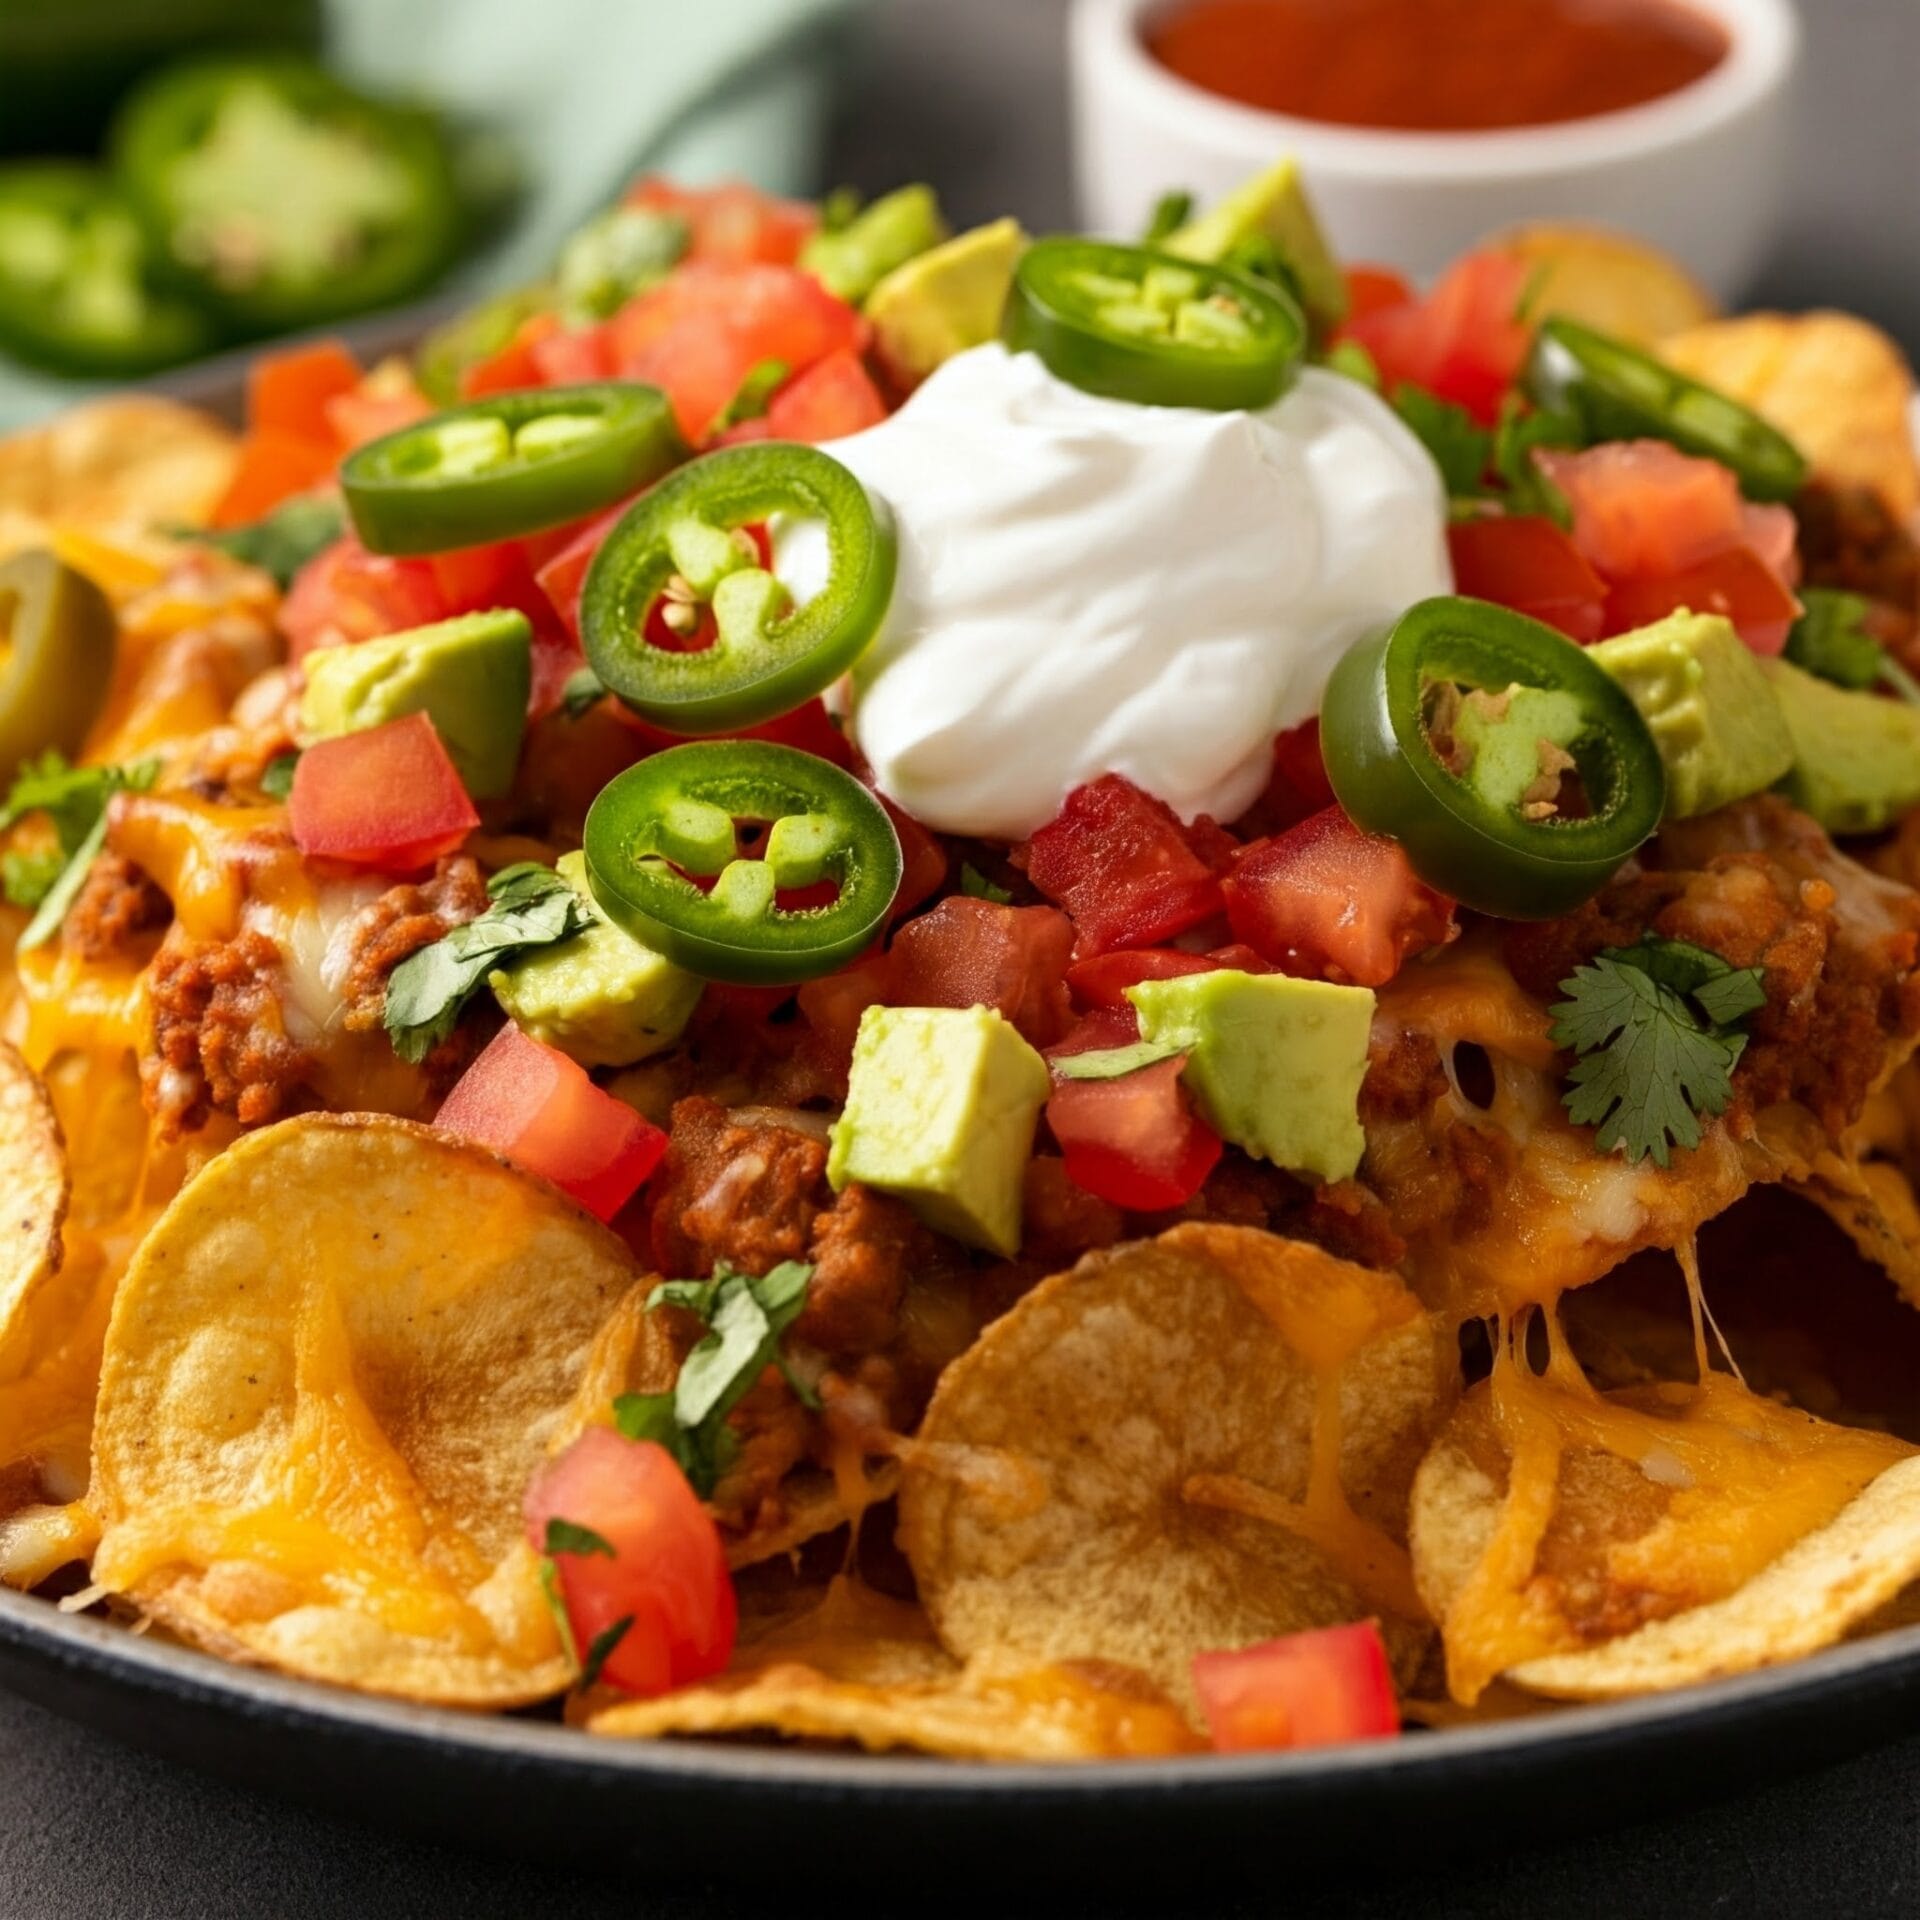
If you’re craving something fun, fast, and guaranteed to be a hit at any gathering, these Loaded Potato Chip Nachos deliver every time. Unlike traditional nachos, these start with crunchy, salty potato chips that are piled high with gooey cheese, crispy bacon, and your favorite toppings. Whether you’re hosting a party or just indulging in a cozy snack night, this recipe is sure to steal the spotlight. Plus, it’s endlessly customizable!

 Why You’ll Love This Recipe

🧀 Extra Cheesy: Melty cheddar and Monterey Jack in every bite!

🥓 Savory & Satisfying: Crispy bacon adds that perfect salty crunch.

🥄 Easy to Make: Just layer and bake—no fuss!

🕒 Fast Prep: Ready in under 20 minutes.

🎉 Party-Perfect: Ideal for game days, potlucks, or movie nights.

🥬 Customizable: Add green onions, sour cream, jalapeños, or whatever you love.

🧂 Bold Flavors: Every bite hits you with rich, salty, cheesy goodness.

🔄 Great for Leftovers: Use up bits of cheese, bacon, or veggies in your fridge.

🔪 How to Make Loaded Potato Chip Nachos

Making these nachos is incredibly simple—and the results are outrageously delicious! Here’s how to do it:

Preheat the Oven
Set your oven to 375°F (190°C). While it’s heating up, line a baking sheet with parchment paper for easy cleanup.

Layer the Chips
Spread a generous layer of wavy potato chips across the baking sheet. Make sure they overlap slightly but don’t stack them too high—you want every chip to get a little love!

Add the Cheese
Sprinkle a mix of shredded cheddar and Monterey Jack cheese over the chips. Be generous—this is where the magic happens.

Top with Bacon & Extras
Scatter cooked, crumbled bacon on top. Want to level it up? Add sliced jalapeños, diced red onions, or chopped tomatoes here.

Bake Until Melty
Place the tray in the oven and bake for 8–10 minutes, or until the cheese is fully melted and bubbly.

Finish with Fresh Toppings
Once out of the oven, add sour cream, green onions, or even a drizzle of hot sauce. This is your moment to get creative!

Serve Immediately
These nachos are best enjoyed right away while the cheese is gooey and the chips are still crispy.

Jump to Section

📱 Follow Us 

📬 Subscribe for Updates

* indicates required

Intuit Mailchimp

Loaded Potato Chip Nachos

No ratings yet
Forget the ordinary! Loaded potato chip nachos are a game-changer in the snack world. Ditch the usual tortilla chips and embrace the irresistible crunch of crispy potato chips. These nachos are a symphony of textures and flavors. Imagine a mountain of golden-brown chips blanketed in a gooey blanket of melted cheese, often a sharp cheddar, but feel free to get creative!
The real magic happens when you pile on the toppings. Crispy bacon crumbles add a salty bite, while vibrant scallions bring a fresh, herbaceous touch. Creamy sour cream provides a cooling contrast, and fiery jalapeños add a kick. But don't stop there! The possibilities are endless.
From smoky pulled pork to tangy salsa, guacamole to diced tomatoes, the flavor combinations are limited only by your imagination. Whether you're hosting a game day party or simply craving a satisfying snack, loaded potato chip nachos are sure to be a crowd-pleaser.
Prep Time 12 minutes
Cook Time 20 minutes
Servings: 6 people
Course: Appetizer, Snacks
Cuisine: American, American Fusion
Calories: 740

Ingredients
  

  • 1 oz Ranch Seasoning packet,divided
  • 1 Cup Sour Cream
  • 10 Slices Bacon
  • 12 oz Potato Chips Wavy are the best, but can use others
  • 2 Cups Cheddar Cheese shredded
  • 2 Cups Monterey Jack Cheese shredded
  • 3 Large Green Onions thinly sliced
  • 1 tsp Hot Sauce or to taste (optional)

Equipment

1 Baking sheet (For layering and baking your loaded chips evenly.)
1 Parchment paper (Prevents sticking and makes cleanup quick and easy.)
1 Cheese Grater (For freshly shredded cheese that melts better than pre-shredded.)
1 Tongs (Handy for layering chips and serving without crushing them.)
1 Oven Mitts ( To safely remove the hot tray from the oven.)
1 Serving Tray (Great for presenting the nachos at parties or gatherings.)

Method
 

  1. Start by preheating your oven to 425 degrees Fahrenheit. While the oven is heating up, prepare a large rimmed baking sheet by lining it with parchment paper. This will help prevent the nachos from sticking to the baking sheet and make cleanup easier. Spread the potato chips out in a single, even layer on the prepared baking sheet. Make sure the chips are evenly distributed to ensure they cook evenly.
    12 oz Potato Chips
  2. In a small bowl, add 1 tablespoon of your favorite ranch dressing to the sour cream. Stir the mixture well until the ranch dressing is fully incorporated into the sour cream and the sauce is smooth and creamy. Set the bowl aside while you prepare the other ingredients.
    1 oz Ranch Seasoning, 1 Cup Sour Cream
  3. Arrange the bacon strips in a single layer in a large skillet. Cook the bacon over medium-high heat, turning occasionally, until it reaches your desired level of crispiness. This should take about 10 minutes. Once the bacon is cooked, transfer the slices to a plate lined with paper towels to drain off any excess grease. When the bacon is cool enough to handle, crumble it into small pieces.
    10 Slices Bacon
  4. In a medium bowl, combine the remaining ranch seasoning packet with the shredded cheddar and Monterey Jack cheeses. Toss the cheese mixture until the seasoning is evenly distributed throughout the cheese. Sprinkle the cheese mixture evenly over the potato chips on the baking sheet, ensuring that each chip has a good amount of cheese. Top the cheese with the crumbled bacon, again making sure it's distributed evenly over the chips.
    2 Cups Cheddar Cheese, 2 Cups Monterey Jack Cheese, 12 oz Potato Chips
  5. Carefully place the baking sheet with the loaded potato chip nachos in the preheated oven. Bake for 10 to 12 minutes, or until the cheese is melted and bubbly and the chips are beginning to brown and crisp around the edges. Keep a close eye on the nachos as they bake, as oven temperatures can vary. Once baked, remove the nachos from the oven and immediately top with the chopped green onions and a drizzle of your favorite hot sauce. Serve the nachos while they are still warm and crispy, with the reserved sour cream dipping sauce on the side for dipping.
    3 Large Green Onions, 1 tsp Hot Sauce, 1 Cup Sour Cream

Nutrition

Serving: 12ozCalories: 740kcalCarbohydrates: 39gProtein: 25gFat: 55gSaturated Fat: 21gPolyunsaturated Fat: 8gMonounsaturated Fat: 20gTrans Fat: 0.03gCholesterol: 95mgSodium: 1367mgPotassium: 837mgFiber: 3gSugar: 2gVitamin A: 1044IUVitamin C: 15mgCalcium: 621mgIron: 2mg

Notes

Here are some tips for making delicious loaded potato chip nachos:
1. Chip Selection:
  • Choose the right chips: Look for sturdy, ridged chips that can hold up to the toppings. Kettle-cooked or wavy chips work well.  
  • Avoid flimsy chips: Thin, delicate chips will likely break under the weight of the toppings.
2. Topping Combinations:
  • Go classic: Combine shredded cheddar cheese, chopped bacon, scallions, and sour cream.
  • Get creative: Experiment with different cheeses (like Monterey Jack or pepper jack), add chopped jalapeños, diced tomatoes, guacamole, salsa, or even pulled pork.
  • Spice it up: Include a sprinkle of chili powder, cumin, or cayenne pepper.
3. Assembly and Baking:
  • Arrange the chips: Spread the chips evenly on a baking sheet.
  • Add cheese: Sprinkle generously with your chosen cheese.
  • Bake: Bake in a preheated oven at 400°F (200°C) for 5-7 minutes, or until the cheese is melted and bubbly.
  • Add toppings: Remove from the oven and immediately top with your desired toppings.
4. Serving:
  • Serve immediately: Enjoy the nachos while they're hot and crispy.
  • Customize: Let guests add their own favorite toppings.
Extra Tips:
  • Use parchment paper: Line the baking sheet with parchment paper for easy cleanup.  
  • Don't overcrowd: Avoid overcrowding the baking sheet, as this can prevent the chips from crisping up properly.
  • Consider a double layer: For extra cheesy nachos, bake a second layer of cheese on top of the first.
Enjoy your delicious and customizable loaded potato chip nachos!

Tried this recipe?

Let us know how it was!

🍽 What to Serve with Loaded Potato Chip Nachos

These nachos are bold, cheesy, and packed with flavor—so it helps to pair them with sides and drinks that balance or enhance the richness. Whether you’re hosting a party or planning a fun dinner night, here are the perfect pairings:

🥗 Crisp Veggie Platter – Cool things down with celery, carrot sticks, cucumber rounds, or bell pepper strips. A light ranch dip or hummus on the side makes it even better!

🍺 Cold Beer or Hard Seltzer – Something light and bubbly helps cut through the richness. Go for a lager, pilsner, or citrusy IPA.

🥤 Sparkling Water with Lime – Want to keep it non-alcoholic? Sparkling water with fresh lime or cucumber slices is super refreshing.

🍹 Spicy Margaritas – If you’re hosting a crowd, serve a pitcher of margaritas to match the spice in the nachos.

🍳 Fried or Scrambled Egg – Turn this into a brunch-worthy dish by topping with a soft-cooked egg. Yes, it’s a thing!

🥬 Simple Green Salad – Balance the saltiness with a light salad tossed in a lemon vinaigrette.

🥑 Crave-Worthy Recipes to Try Next

FAQ – Loaded Potato Chip Nachos

Can I use other types of chips besides wavy potato chips?
Absolutely! While wavy chips hold up best under the weight of the toppings, you can use kettle-cooked, tortilla chips, or even thick-cut pita chips. Just avoid thin, delicate chips—they’ll get soggy or break too easily.


How do I keep the chips from getting soggy?
To prevent sogginess, avoid overloading the chips with wet toppings before baking. Add fresh toppings like sour cream, tomatoes, or salsa after baking. Also, bake just until the cheese is melted—don’t overdo it.


Can I make these in the air fryer or microwave?
You can! For the air fryer, layer a small batch and heat at 350°F for about 3–5 minutes. In the microwave, assemble on a microwave-safe plate and heat in 30-second bursts until cheese melts. The oven will give you the best crispy results, though.


Can I make them ahead of time?
It’s best to bake these right before serving. However, you can prep all the ingredients—cook the bacon, shred the cheese, chop toppings—and store everything separately. Then assemble and bake when ready.


What are the best toppings to add?
Beyond cheese and bacon, try:

  • Sliced jalapeños 🌶️

  • Diced tomatoes 🍅

  • Pickled onions

  • Green onions or scallions

  • Sour cream or Greek yogurt

  • Guacamole or avocado slices 🥑

  • A drizzle of ranch, sriracha, or hot sauce 🔥

Please follow and like us:
onpost_follow
fb-share-icon197
Tweet120
Pinterest20
Share 20
submit to reddit

Buffalo Cauliflower Wings

Cauliflower Wings with a Kick – Buffalo Style!

Spicy, crispy, and totally addictive—these Buffalo cauliflower wings are the ultimate crowd-pleasing snack! 

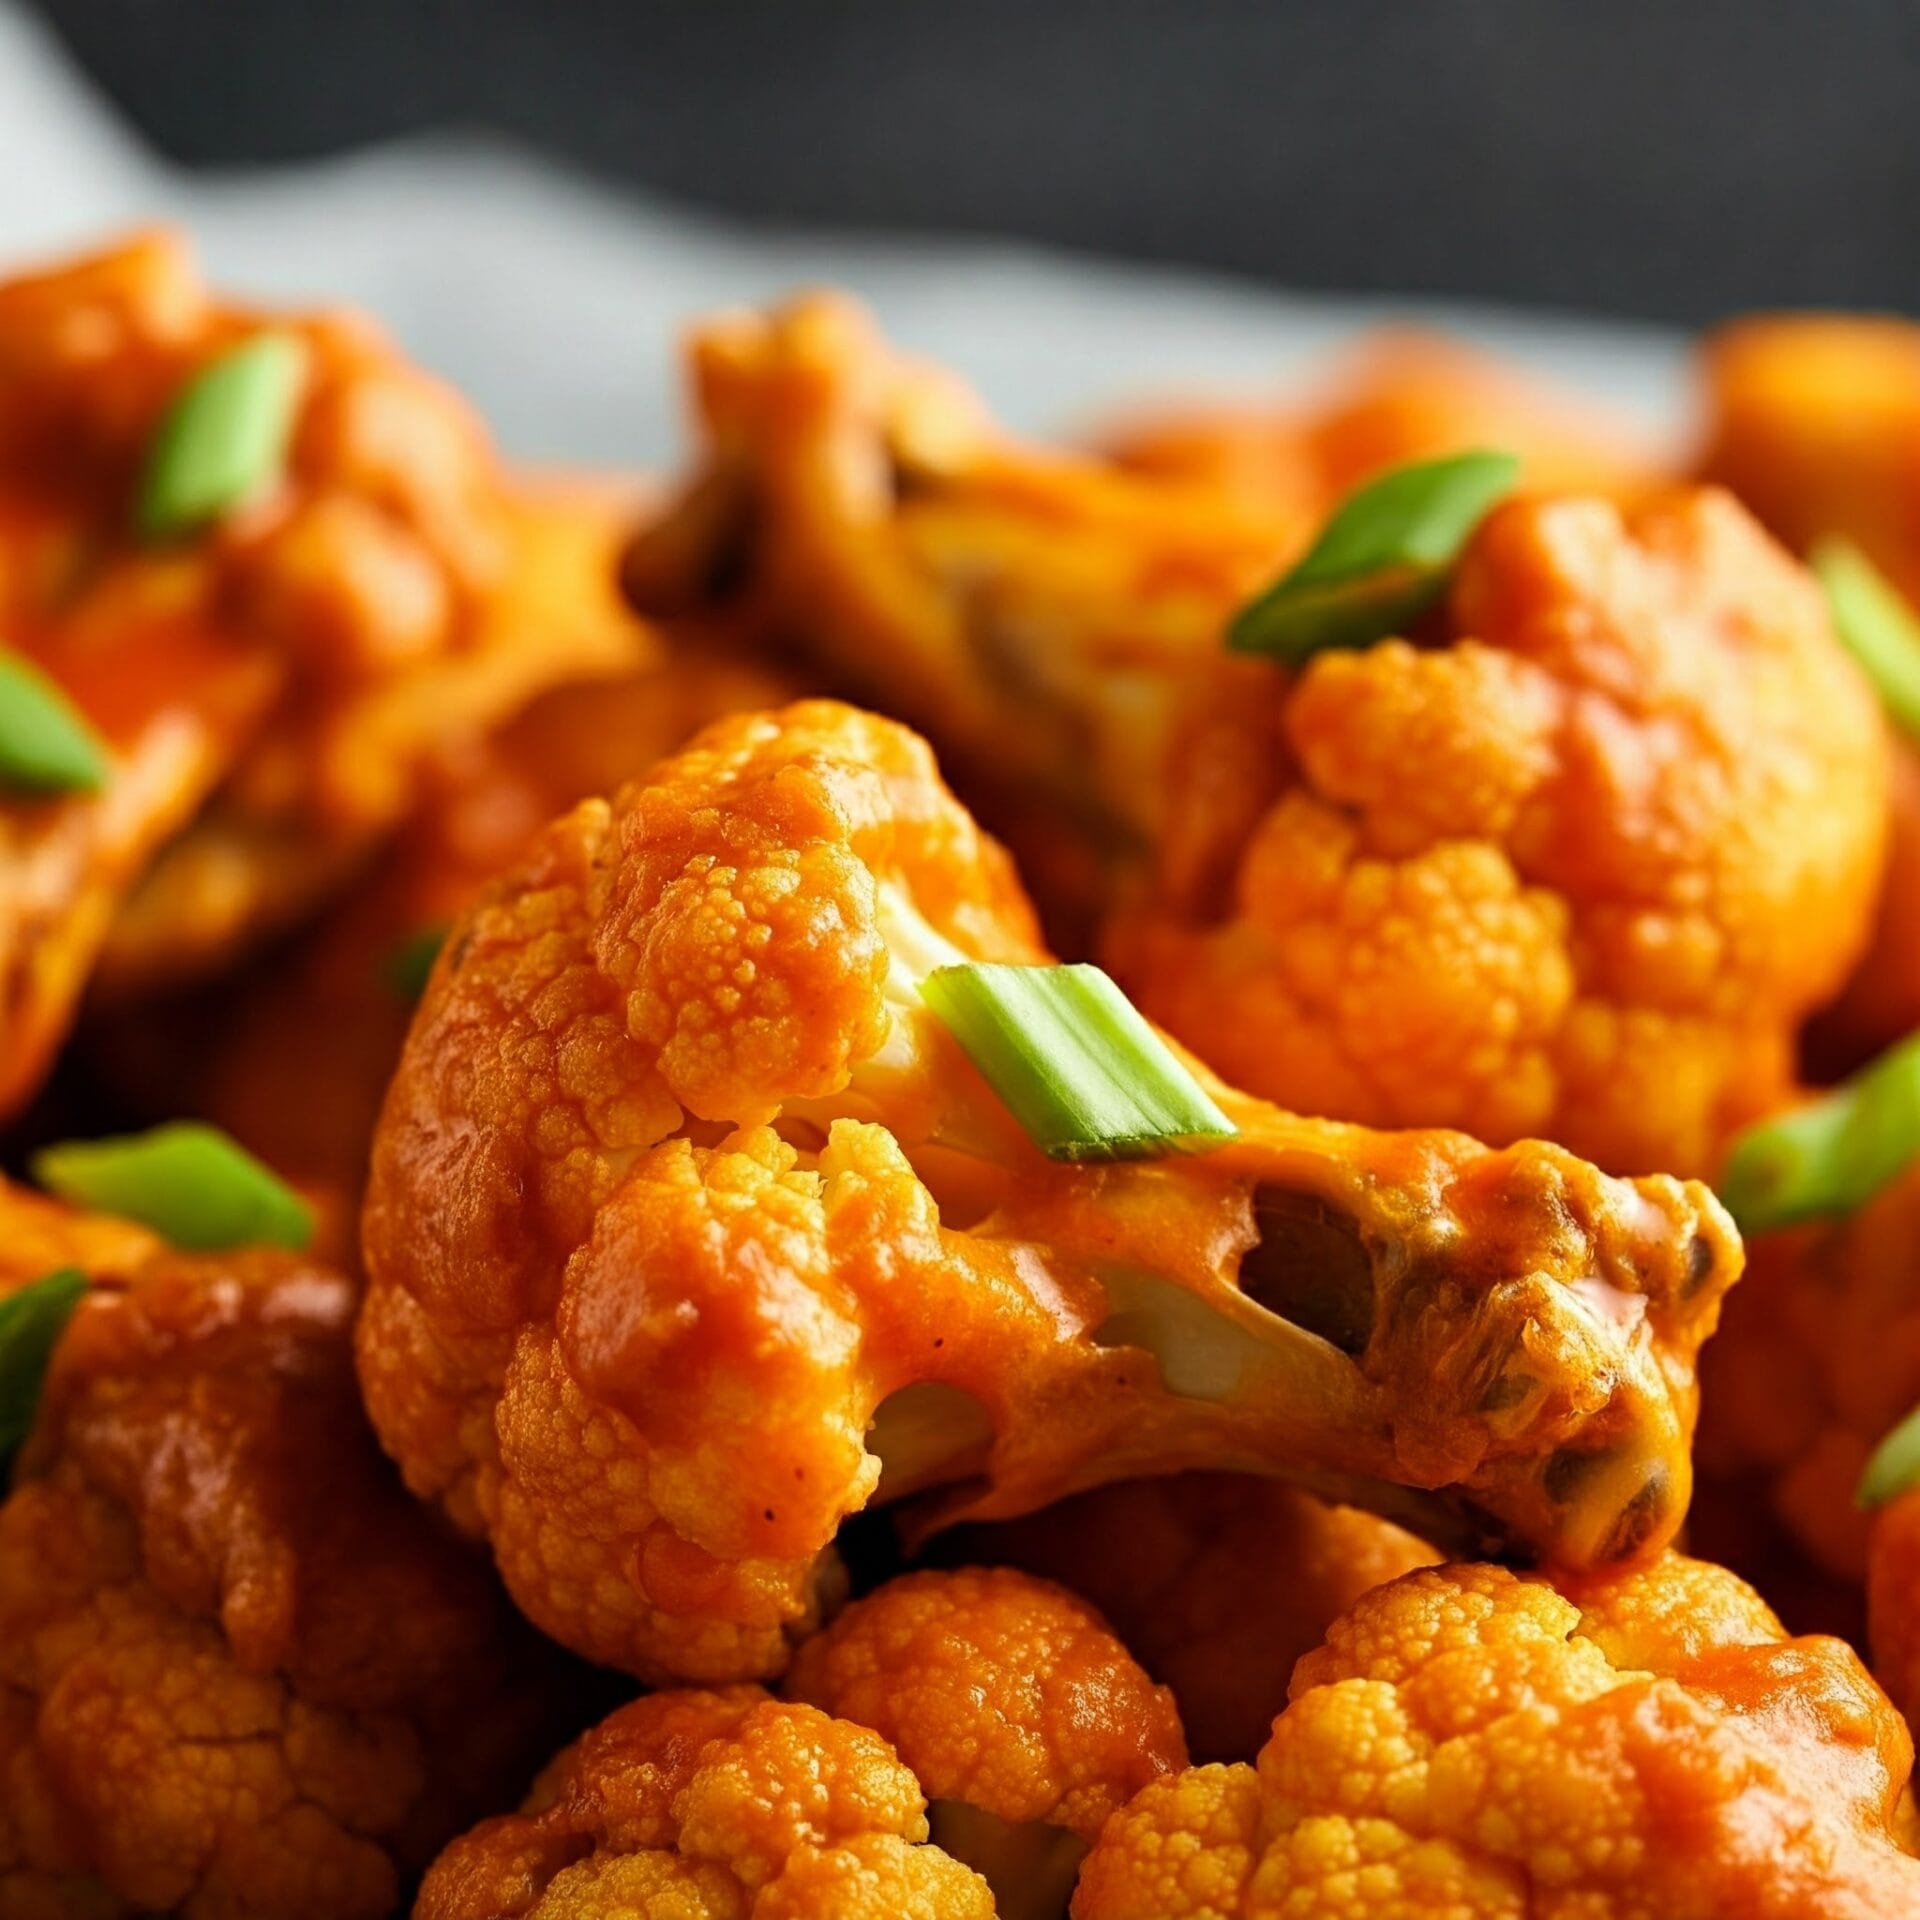
Craving the ultimate plant-based snack that’s bold, crispy, and full of flavor? These Buffalo Cauliflower Wings are the spicy, satisfying treat you’ve been searching for. Whether you’re throwing a game day bash, prepping party appetizers, or simply want to elevate your weekday meals, this easy recipe delivers big on flavor—without the meat.

Instead of traditional chicken wings, this version features tender cauliflower florets that are oven-baked or air-fried until perfectly crisp. As a result, you get a bite that’s crunchy on the outside, tender on the inside, and absolutely packed with bold Buffalo spice.

In addition, the ingredients are simple and likely already in your kitchen. Moreover, the method is easy enough for beginners, yet tasty enough to win over even the most devoted wing lovers. For example, you can adjust the heat level by using mild or extra-hot sauce, depending on your preference.

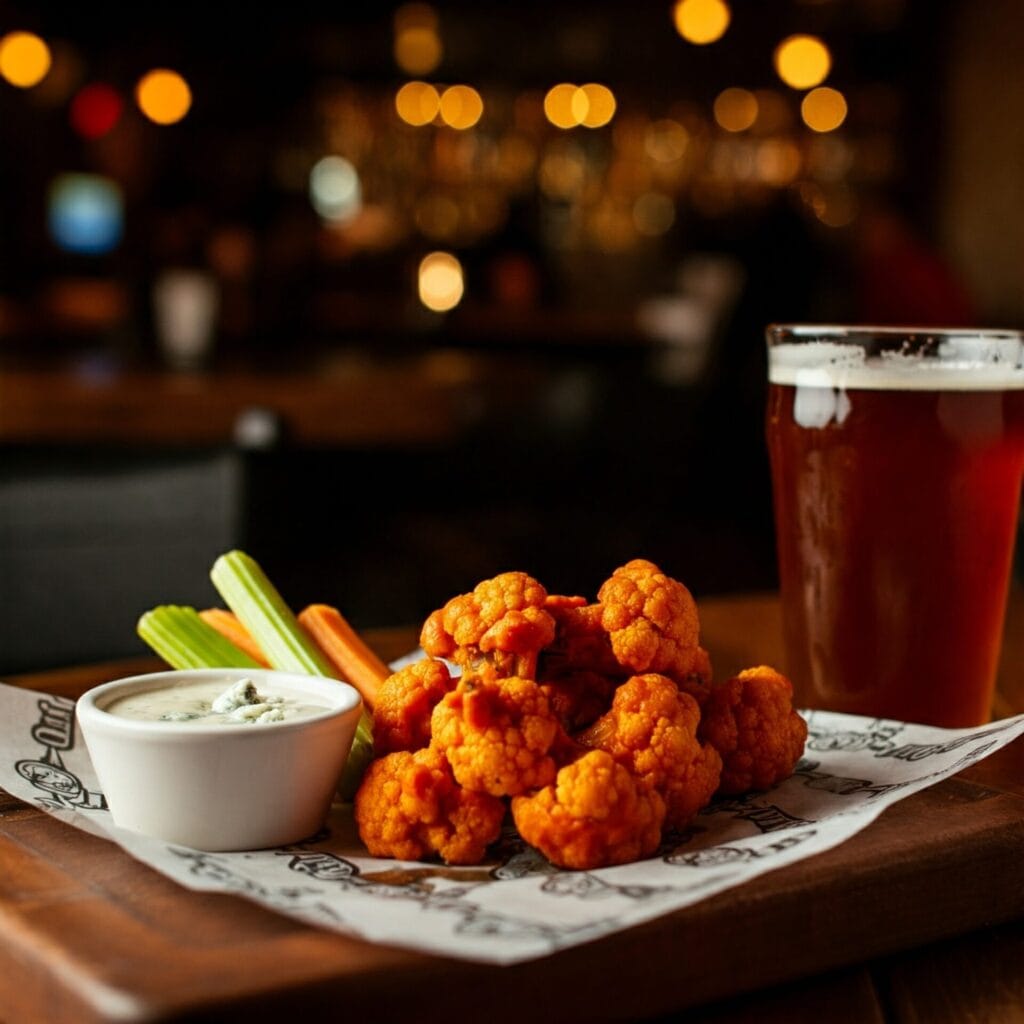
Because these wings are so versatile, they work for nearly any occasion. Serve them with ranch or blue cheese dip, plus a side of celery and carrots for that classic presentation. Therefore, whether you’re hosting friends, meal prepping for the week, or just feeding your own spicy cravings, this recipe is sure to impress.

In conclusion, Buffalo Cauliflower Wings are everything a great appetizer should be—crispy, flavorful, and absolutely addictive. Once you try them, you may never go back to chicken again.

💥 Why You’ll Love These Buffalo Cauliflower Wings

🔥 Bold Buffalo FlavorAs a result, every bite is spicy, tangy, and totally addictive.
🥦 Plant-Based & Vegan-FriendlyMoreover, it’s a satisfying meatless option for everyone.
Crispy Without FryingInstead of deep-frying, it’s oven-baked or air-fried for crunch without grease.
🧄 Simple Pantry IngredientsIn fact, you likely already have everything in your kitchen.
⏱️ Quick & Easy PrepBecause of that, it’s perfect for weeknights or spontaneous gatherings.
🍽️ Crowd-Pleasing Snack or AppetizerFor example, serve it at parties, game day, or brunch.
🧡 Customizable Heat LevelTherefore, you can make it mild, medium, or hot—just how you like

🔪 How to Make Buffalo Cauliflower Wings

Step 1: Prep the Cauliflower
Cut a medium head of cauliflower into bite-sized florets. Rinse and pat them dry for maximum crispiness.

Step 2: Make the Batter
In a bowl, whisk together flour, plant-based milk (or regular milk), garlic powder, onion powder, salt, and pepper until smooth. The batter should be thick enough to coat the cauliflower.

Step 3: Coat the Cauliflower
Dip each floret into the batter, letting the excess drip off. Place them on a lined baking sheet or into your air fryer basket in a single layer.

Step 4: Bake or Air Fry
Bake at 425°F for 20–25 minutes (flip halfway), or air fry at 400°F for about 15 minutes until golden and crispy.

Step 5: Toss in Buffalo Sauce
Remove from oven and gently toss the crispy cauliflower in your favorite Buffalo sauce. Want it extra spicy? Add a pinch of cayenne or hot sauce.

Step 6: Return to Crisp Up
Place the coated cauliflower back in the oven or air fryer for another 10 minutes to let the sauce bake in and edges crisp up.

Step 7: Serve & Enjoy
Serve hot with ranch or blue cheese dip, celery sticks, and maybe a sprinkle of fresh parsley or green onions. Dig in while they’re warm and crispy!

Jump to Section

📱 Follow Us 

📬 Subscribe for Updates

* indicates required

Intuit Mailchimp

Buffalo Cauliflower Wings

No ratings yet
These Buffalo Cauliflower Wings are crispy, spicy, and totally addictive! 🥦🔥 In addition, they’re baked or air-fried to golden perfection, then tossed in bold Buffalo sauce and served with creamy ranch or blue cheese dip. As a result, they make the perfect crowd-pleasing snack. Whether you're hosting game day or craving plant-based heat, this recipe delivers bold flavor without the meat. Therefore, it’s always a hit! 🌶️💥
Prep Time 10 minutes
Cook Time 35 minutes
Servings: 4 people
Course: Appetizer, Snacks
Cuisine: American, American Fusion
Calories: 170

Ingredients
  

  • Cup All-Purpose Flour Leveled
  • ¼ Cup Cornstarch
  • 1 tsp Garlic Powder
  • 1 tsp Onion Powder
  • 1 tsp Paprika
  • ½ tsp Sea Salt
  • ¾ Cup water
  • 2 Lbs Cauliflower Head

Equipment

1 Large mixing bowl (for coating the cauliflower in batter and tossing with sauce.)
1 Small bowl (for preparing the batter or buffalo sauce separately.)
1 Whisk or fork (to mix batter ingredients until smooth.)
1 Measuring cups & spoons ( for accuracy in flour, spices, and liquids.)
1 Cutting board (for chopping cauliflower into florets.)
1 Sharp chef’s knife (to cut through the cauliflower cleanly and safely)
1 Tongs ( for flipping the wings or tossing them in sauce without breaking them.)

Method
 

  1. Start by preheating your oven to 450 degrees Fahrenheit. While the oven is heating up, prepare two large baking sheets by lining them with parchment paper. This will help prevent the cauliflower from sticking to the baking sheets and make cleanup easier.
  2. In a large bowl, combine the flour, cornstarch, garlic powder, onion powder, paprika, and salt. Whisk the dry ingredients together until they are well combined. Gradually add the water to the bowl, whisking constantly, until a smooth batter forms. Make sure there are no lumps in the batter. Add the cauliflower florets to the bowl and use your hands or a spoon to gently stir until all the florets are evenly coated in the batter.
    ⅔ Cup All-Purpose Flour, ¼ Cup Cornstarch, 1 tsp Garlic Powder, 1 tsp Onion Powder, 1 tsp Paprika, ½ tsp Sea Salt, ¾ Cup water
  3. Using tongs or a fork, carefully lift the cauliflower florets out of the batter, allowing any excess batter to drip back into the bowl. Arrange the florets in a single layer on the prepared baking sheets, making sure they are not touching each other. Bake the cauliflower for 10 minutes, then remove the baking sheets from the oven. Use a spatula to carefully flip the florets. Return the baking sheets to the oven, swapping their positions on the oven racks. This will help ensure even cooking. Bake for another 10 minutes, or until the cauliflower is golden brown and crispy.
    2 Lbs Cauliflower Head
  4. Remove the baking sheets from the oven. Using a pastry brush or a spoon, brush the cauliflower florets with some of the buffalo wing sauce, making sure to coat them evenly. Return the baking sheets to the oven and bake for another 12 to 15 minutes, or until the cauliflower is dark golden brown and crisp around the edges. The exact cooking time will depend on your oven and the size of the cauliflower florets.
  5. Remove the baking sheets from the oven and let the cauliflower cool slightly. Brush the cauliflower florets with additional buffalo wing sauce, making sure to coat them evenly. This will add extra flavor and spice. Transfer the cauliflower wings to a serving platter or individual plates. Serve immediately while they are still hot and crispy. For dipping, ranch dressing is a classic pairing that helps to cool the heat of the buffalo sauce.

Nutrition

Serving: 12ozCalories: 170kcalCarbohydrates: 36gProtein: 7gFat: 1gSaturated Fat: 0.3gPolyunsaturated Fat: 0.2gMonounsaturated Fat: 0.1gSodium: 363mgPotassium: 726mgFiber: 5gSugar: 4gVitamin A: 247IUVitamin C: 109mgCalcium: 58mgIron: 2mg

Notes

📝 Recipe Notes – Buffalo Cauliflower Wings

  • Flour Options: You can use all-purpose flour, chickpea flour, or a gluten-free blend. Each offers a slightly different texture, so pick your favorite based on dietary needs.
  • Make It Extra Crispy: For extra crunch, add a tablespoon of cornstarch to the batter and bake on a wire rack instead of directly on parchment paper.
  • Buffalo Sauce Tip: Want more heat? Add cayenne or a splash of hot sauce. Prefer mild? Mix the Buffalo sauce with melted butter or Greek yogurt to tone it down.
  • Air Fryer Instructions: Cook at 400°F for 15–18 minutes, shaking the basket halfway through. They’ll come out extra crispy with minimal oil!
  • Vegan-Friendly: Use plant-based milk and vegan Buffalo sauce (most are!). Pair with dairy-free ranch or blue cheese for a fully vegan snack.
  • Reheating: Re-crisp leftovers in the oven or air fryer at 375°F for 5–8 minutes. Microwaving will soften the coating.
  • Serving Tip: These wings are best served immediately with cold celery sticks, carrot slices, and your favorite dip. Great as an appetizer, snack, or even a light main dish!

Tried this recipe?

Let us know how it was!

🧂 What to Serve with Buffalo Cauliflower Wings

These spicy, saucy bites are a total flavor bomb — but they’re even better when paired with the perfect sides and sips. Whether you’re planning a game day spread, party platter, or just spicing up your snack routine, here are some delicious ideas to serve alongside your Buffalo Cauliflower Wings:

🥕 Cool & Crunchy

Celery & Carrot Sticks: The classic combo — crisp, refreshing, and the perfect cooling contrast to all that heat.
Cucumber Ranch Salad: Sliced cucumbers, red onion, and dill tossed in creamy ranch dressing. Light, cooling, and super easy.
Apple Slaw: A sweet and tangy slaw made with cabbage, apples, and a light vinaigrette for a little crunch and contrast.

🍚 Hearty & Comforting

Mac & Cheese: Creamy, cheesy, and oh-so-satisfying — the ultimate comfort food to balance the spice.
Loaded Potato Wedges: Crispy wedges topped with cheese, scallions, and a drizzle of ranch or hot sauce.
Cauliflower Fried Rice: Keep the cauliflower theme going with a lighter twist that still satisfies.

🥑 Dips & Extras

Ranch or Blue Cheese Dip: A must-have for dunking — cool, creamy, and made to pair with Buffalo heat.
Avocado Crema: Smooth, tangy, and a little unexpected — like guac, but silkier.
Garlic Hummus: A savory side that tones down the spice and boosts the flavor variety.

🍹 Drinks to Cool the Heat

Iced Lemonade or Limeade: Sweet, citrusy, and perfectly refreshing.
Cucumber Mint Sparkler: Fizzy, crisp, and cooling — ideal for those fiery bites.
Non-Alcoholic Beer or a Cold Lager: Classic pairings for wings that just work.

❓ FAQ – Buffalo Cauliflower Wings


Can I make Buffalo Cauliflower Wings in an air fryer?

Yes! The air fryer is a great option for extra crispiness. Cook at 400°F for 15–18 minutes, flipping halfway. They’ll turn out perfectly golden and crunchy with less oil.


Are Buffalo Cauliflower Wings vegan?

They can be! Just use plant-based milk for the batter and a vegan Buffalo sauce (many are naturally vegan). Serve with dairy-free ranch or blue cheese dip to keep it fully plant-based. 🌱


Can I make them gluten-free?

Absolutely. Swap the all-purpose flour with a gluten-free flour blend or chickpea flour for a delicious GF version. Just make sure your hot sauce is also gluten-free.


How spicy are these wings?

They’re moderately spicy, depending on the Buffalo sauce you use. You can reduce the heat by using a mild sauce or mixing it with a bit of melted butter or Greek yogurt to mellow it out.


How do I keep them crispy after tossing in sauce?

For the best texture, return them to the oven or air fryer for 5–10 minutes after tossing in sauce. This helps the coating re-crisp and bakes in the flavor.


What should I serve with Buffalo Cauliflower Wings?

Classic sides include celery sticks, carrots, and ranch or blue cheese dip. You can also pair them with mac and cheese, slaw, or seasoned fries. Check out our full “What to Serve” section for tasty ideas!


Can I prep these ahead of time?

You can prep the batter and cut the cauliflower in advance, but for the best texture, bake or air-fry them right before serving. Reheating can work, but they’re crispiest when fresh.

Please follow and like us:
onpost_follow
fb-share-icon197
Tweet120
Pinterest20
Share 20
submit to reddit