Chicken Ranch Tacos

🌮 Chicken Ranch Tacos: Creamy, Crispy, Crowd-Pleasing

These Chicken Ranch Tacos are loaded with juicy chicken, tangy ranch, and your favorite toppings for a fast, flavorful meal everyone will love. 🌮🔥

🌮 Zesty, Creamy, Ranchy Goodness – In a Taco

Are you looking for a quick and flavorful way to elevate taco night? If so, these Chicken Ranch Tacos are exactly what you need. As a result of combining juicy shredded chicken, cool and creamy ranch, and fresh toppings, they’re bold, satisfying, and simple to prepare. In particular, the contrast of warm tortillas with crisp lettuce and tangy sauce makes every bite memorable.

Furthermore, this recipe is easy to customize. For example, you can add sliced jalapeños for heat, toss in avocado for creaminess, or use lettuce wraps for a low-carb option. Because of this flexibility, it’s perfect for both picky eaters and adventurous food lovers.

In addition, these tacos are ideal for meal prep or weeknight dinners. Thanks to the use of simple ingredients and minimal cooking, you’ll have dinner on the table in no time. Therefore, if you’re short on time but still want something crave-worthy, Chicken Ranch Tacos are the answer. As a bonus, they’re guaranteed to be a crowd-pleaser.

🐔 Protein-Packed Chicken

🥬 Fresh & Crunchy Toppings

🧄 Zesty Ranch Flavor

⏱️ 30-Minute Meal

🌮 Taco Night Favorite

🔥 Optional Heat Kick

🧀 Cheesy & Creamy

🍽️ Family-Approved

🔪 How to Make Chicken Ranch Tacos

Step 1: Prepare the Chicken
In a bowl, toss the cooked, shredded or chopped chicken with ranch dressing. For extra flavor, mix in taco seasoning or ranch seasoning if desired.

Step 2: Warm the Tortillas
Heat tortillas in a dry skillet over medium heat for about 30 seconds per side, or microwave them in a damp towel for 20–30 seconds until soft and pliable.

Step 3: Build Your Tacos
Spoon the ranch-coated chicken into each tortilla. Top with shredded cheese, lettuce, tomatoes, red onions, and jalapeños.

Step 4: Add Finishing Touches
Drizzle with more ranch or a spicy sauce if you like. Garnish with chopped cilantro and a squeeze of fresh lime juice.

Step 5: Serve & Enjoy
Serve immediately while warm. Great with tortilla chips, rice, or a crisp side salad.

Jump to Section

📱 Follow Us 

📬 Subscribe for Updates

* indicates required

Intuit Mailchimp

Chicken Ranch Tacos

No ratings yet
Creamy, Zesty, Totally Craveable 🌮🐔🥗Juicy chicken tossed in ranch seasoning, loaded into warm tortillas, and topped with all your favorite fixings. These tacos are quick, flavorful, and a guaranteed hit on any night! 🎉🔥
Prep Time 15 minutes
Cook Time 10 minutes
Servings: 6 people
Course: Appetizer, Main Course
Cuisine: American, American Fusion
Calories: 520

Ingredients
  

  • ½ Cup Ranch Dressing
  • ¼ Cup Sour Cream
  • 1 oz Taco Seasoning Mix divided
  • 1 Tbsp Salsa mild chunky
  • 2 Cups Rotisserie chicken shredded
  • 8 Corn Tortillas 6 inch
  • 1 Cup Lettuce Shredded
  • 1 Large Tomato chopped
  • 4 Large Green Onions sliced
  • 4 oz Black Olives slices
  • 1 Large Avocado peeled, pitted and diced (optional)
  •  
    1 Cup Colby-Monterey Jack Cheese shredded

Equipment

1 Non Stick Pan (Flip it, fry it, love it 🍳🧼🔥Cook without the mess! This non-stick pan makes flipping, searing, and cleanup a total breeze—no sticking, no scrubbing.)
1 Cutting board (Chop it like it’s hot 🔪🥕🍗A sturdy cutting board keeps your prep clean, safe, and smooth—veggies, meats, and everything in between. Kitchen must-have!)
1 Chef's knife (Slice, dice, and chop like a pro 🔪🌿🍗A sharp chef’s knife makes prep fast and easy—perfect for herbs, meats, and veggies. Balanced, reliable, and ready for anything.)

Method
 

  1. In a small bowl, combine the ranch dressing, sour cream, 1 teaspoon of the taco seasoning, and salsa. Stir well to ensure all the ingredients are evenly distributed. Cover the bowl and refrigerate the sauce until you're ready to serve the tacos.
    ½ Cup Ranch Dressing, ¼ Cup Sour Cream, 1 oz Taco Seasoning Mix, 1 Tbsp Salsa
  2. In a separate bowl, add the cooked chicken and the remaining taco seasoning. Toss the chicken to coat it evenly in the seasoning. Cover the bowl loosely with wax paper or plastic wrap to prevent splattering. In a skillet, heat oil over medium heat. Add chicken and remaining taco seasoning; cook until heated through.
    2 Cups Rotisserie chicken, 1 oz Taco Seasoning Mix
  3. Warm the tortillas in a dry skillet over medium heat for about a minute on each side, or until they are soft and pliable. This will make them easier to fold and prevent them from cracking.
    8 Corn Tortillas
  4. Place a warm tortilla on a plate. Add a generous scoop of the seasoned chicken to the center of the tortilla. Top the chicken with your desired toppings, such as shredded lettuce, diced tomatoes, chopped green onions, sliced olives, diced avocado, shredded cheese, and a spoonful of the creamy ranch dressing mixture.
    1 Cup Lettuce, 1 Large Tomato, 4 Large Green Onions, 4 oz Black Olives, 1 Large Avocado, 1 Cup Colby-Monterey Jack Cheese

Nutrition

Serving: 10ozCalories: 520kcalCarbohydrates: 27gProtein: 31gFat: 34gSaturated Fat: 10gPolyunsaturated Fat: 7gMonounsaturated Fat: 10gCholesterol: 109mgSodium: 1315mgPotassium: 430mgFiber: 7gSugar: 4gVitamin A: 1350IUVitamin C: 13mgCalcium: 228mgIron: 2mg

Notes

Ingredients:
  • Chicken: Use cooked chicken. Leftovers or rotisserie chicken are great options.
  • Tortillas: Use your favorite type of tortillas, such as corn or flour.
  • Ranch Dressing: Use your favorite brand of ranch dressing or make your own.
  • Sour Cream: Sour cream adds a creamy tanginess to the sauce. You can substitute with Greek yogurt for a lighter option.
  • Taco Seasoning: Use a store-bought packet or make your own blend of spices.
  • Salsa: Choose your favorite type of salsa, from mild to spicy.
  • Toppings: Common toppings include shredded lettuce, diced tomatoes, chopped green onions, sliced olives, diced avocado, and shredded cheese.
Cooking Tips:
  • Prepare the Sauce: Combine the ranch dressing, sour cream, taco seasoning, and salsa in a bowl. Cover and refrigerate until ready to serve.
  • Season and Heat the Chicken: Toss the cooked chicken with taco seasoning and heat it in a skillet with a drizzle of oil until warmed through and fragrant.
  • Warm the Tortillas: Warm the tortillas in a dry skillet over medium heat to make them pliable and prevent them from cracking.
  • Assemble the Tacos: Fill the tortillas with the seasoned chicken and your favorite toppings.
  • Don't Overcrowd: When cooking the chicken in the skillet, avoid overcrowding the pan. This will ensure that the chicken heats evenly and doesn't steam.
Serving Suggestions:
  • Garnish: Garnish with extra chopped cilantro, a squeeze of lime juice, or a dollop of guacamole.
  • Sides: Serve with rice, beans, or a side salad for a complete meal.
  • Presentation: Arrange the tacos on a platter or in a basket for a fun and casual presentation.
Variations:
  • Spicy: Add more hot sauce or jalapeños to the chicken or the sauce.
  • Vegetarian: Use a plant-based chicken substitute or omit the chicken altogether and add more vegetables to the tacos.
  • Different Proteins: Try using ground beef, pork, or shrimp instead of chicken.
With these tips, you'll be able to create delicious and satisfying Ranch Chicken Tacos that are perfect for any occasion!

Tried this recipe?

Let us know how it was!

🧂 What to Serve with Chicken Ranch Tacos

These tacos are bold, creamy, and bursting with flavor — but they’re even better when paired with the right sides. Whether you’re putting together a taco night for family or serving a crowd, here are some quick and tasty ideas to round out your meal:

🌽 Fresh & Crunchy

  • Mexican Street Corn (Elote): Sweet corn with cotija, mayo, lime, and chili powder — messy, spicy, and irresistible.

  • Simple Corn Salsa: A refreshing mix of corn, red onion, lime, and cilantro. Bonus: it doubles as a topping and a side.

  • Southwest Coleslaw: Creamy slaw with cabbage, carrots, and lime to balance the richness of the ranch.

🍚 Hearty & Filling

  • Cilantro Lime Rice: A zesty rice side that complements ranch flavors and soaks up any leftover sauce.

  • Refried Beans or Black Beans: Warm, comforting, and budget-friendly — a classic for taco night.

  • Taco Pasta Salad: Add ranch-flavored pasta salad to echo the main flavor theme.

🥑 Dips & Add-Ons

  • Homemade Guacamole: Creamy avocado with lime and garlic brings freshness to every bite.

  • Queso Dip + Chips: Because cheese makes everything better.

  • Pico de Gallo or Chunky Salsa: Bright, acidic, and perfect to spoon over your tacos or scoop up with chips.

🍹 Drinks to Pair

  • Pineapple Agua Fresca: Refreshing, light, and fruity — perfect for cooling down.

  • Sparkling Limeade or Margaritas: If you’re celebrating, go all out.
Chicken Ranch Tacos FAQ

Q: Can I make these tacos ahead of time?
A: Yes! You can prep the chicken filling up to 3 days in advance. Store it in an airtight container and warm it up when ready to assemble. For best results, add toppings just before serving.


Q: What kind of chicken works best?
A: Shredded rotisserie chicken, grilled chicken breasts, or baked thighs all work well. Just make sure it’s cooked and seasoned before adding ranch dressing.


Q: Can I use store-bought ranch?
A: Absolutely. Bottled ranch works great, but you can also use homemade for a fresher flavor. For a twist, try chipotle ranch or avocado ranch.


Q: Are these tacos spicy?
A: Not by default, but you can easily turn up the heat with jalapeños, hot sauce, or spicy ranch.


Q: What sides go well with these tacos?
A: Serve them with tortilla chips, Mexican rice, black bean salad, or a simple corn salsa.

Please follow and like us:
onpost_follow
fb-share-icon197
Tweet120
Pinterest20
Share 20
submit to reddit

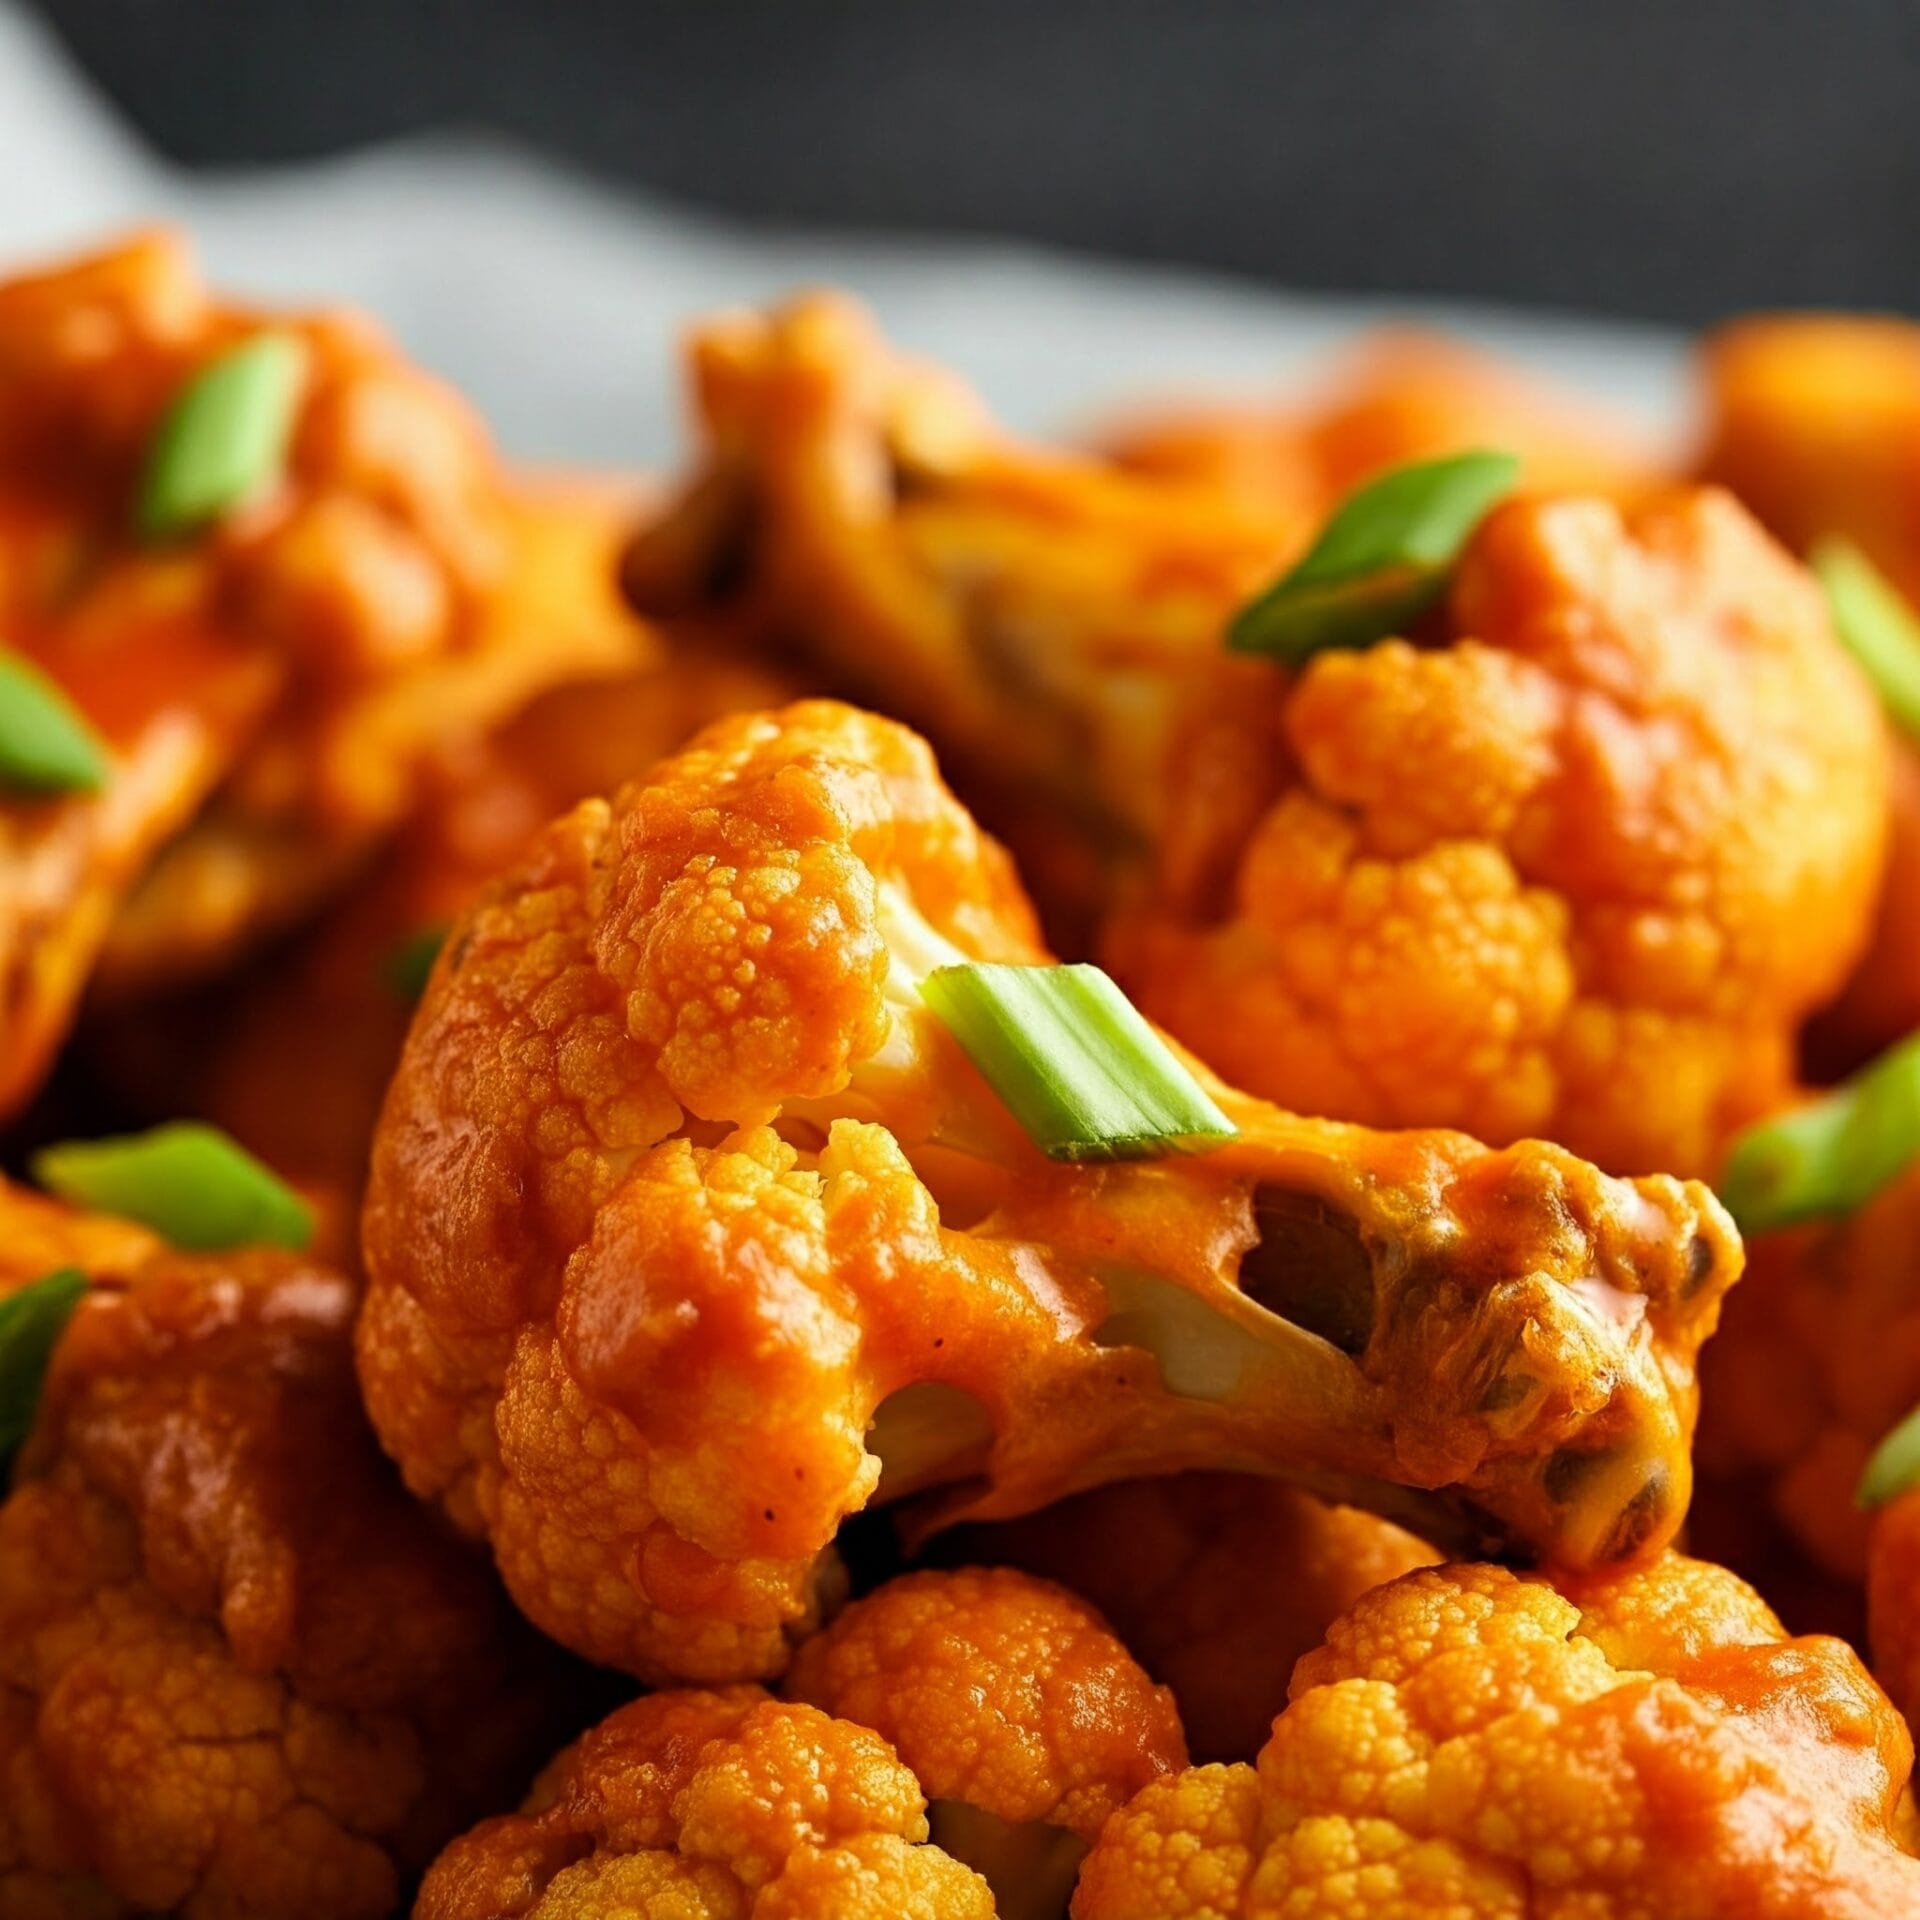
Buffalo Cauliflower Wings

Cauliflower Wings with a Kick – Buffalo Style!

Spicy, crispy, and totally addictive—these Buffalo cauliflower wings are the ultimate crowd-pleasing snack! 

Craving the ultimate plant-based snack that’s bold, crispy, and full of flavor? These Buffalo Cauliflower Wings are the spicy, satisfying treat you’ve been searching for. Whether you’re throwing a game day bash, prepping party appetizers, or simply want to elevate your weekday meals, this easy recipe delivers big on flavor—without the meat.

Instead of traditional chicken wings, this version features tender cauliflower florets that are oven-baked or air-fried until perfectly crisp. As a result, you get a bite that’s crunchy on the outside, tender on the inside, and absolutely packed with bold Buffalo spice.

In addition, the ingredients are simple and likely already in your kitchen. Moreover, the method is easy enough for beginners, yet tasty enough to win over even the most devoted wing lovers. For example, you can adjust the heat level by using mild or extra-hot sauce, depending on your preference.

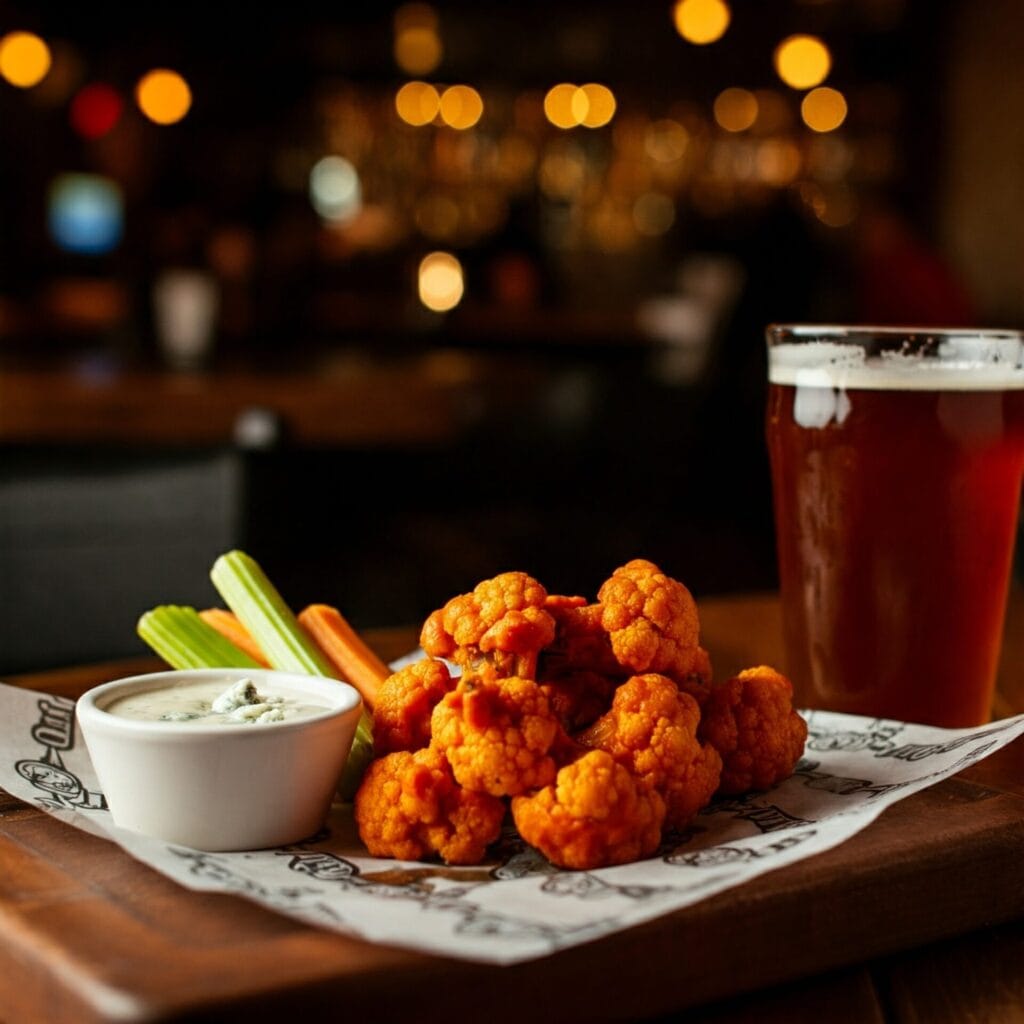
Because these wings are so versatile, they work for nearly any occasion. Serve them with ranch or blue cheese dip, plus a side of celery and carrots for that classic presentation. Therefore, whether you’re hosting friends, meal prepping for the week, or just feeding your own spicy cravings, this recipe is sure to impress.

In conclusion, Buffalo Cauliflower Wings are everything a great appetizer should be—crispy, flavorful, and absolutely addictive. Once you try them, you may never go back to chicken again.

💥 Why You’ll Love These Buffalo Cauliflower Wings

🔥 Bold Buffalo FlavorAs a result, every bite is spicy, tangy, and totally addictive.
🥦 Plant-Based & Vegan-FriendlyMoreover, it’s a satisfying meatless option for everyone.
Crispy Without FryingInstead of deep-frying, it’s oven-baked or air-fried for crunch without grease.
🧄 Simple Pantry IngredientsIn fact, you likely already have everything in your kitchen.
⏱️ Quick & Easy PrepBecause of that, it’s perfect for weeknights or spontaneous gatherings.
🍽️ Crowd-Pleasing Snack or AppetizerFor example, serve it at parties, game day, or brunch.
🧡 Customizable Heat LevelTherefore, you can make it mild, medium, or hot—just how you like

🔪 How to Make Buffalo Cauliflower Wings

Step 1: Prep the Cauliflower
Cut a medium head of cauliflower into bite-sized florets. Rinse and pat them dry for maximum crispiness.

Step 2: Make the Batter
In a bowl, whisk together flour, plant-based milk (or regular milk), garlic powder, onion powder, salt, and pepper until smooth. The batter should be thick enough to coat the cauliflower.

Step 3: Coat the Cauliflower
Dip each floret into the batter, letting the excess drip off. Place them on a lined baking sheet or into your air fryer basket in a single layer.

Step 4: Bake or Air Fry
Bake at 425°F for 20–25 minutes (flip halfway), or air fry at 400°F for about 15 minutes until golden and crispy.

Step 5: Toss in Buffalo Sauce
Remove from oven and gently toss the crispy cauliflower in your favorite Buffalo sauce. Want it extra spicy? Add a pinch of cayenne or hot sauce.

Step 6: Return to Crisp Up
Place the coated cauliflower back in the oven or air fryer for another 10 minutes to let the sauce bake in and edges crisp up.

Step 7: Serve & Enjoy
Serve hot with ranch or blue cheese dip, celery sticks, and maybe a sprinkle of fresh parsley or green onions. Dig in while they’re warm and crispy!

Jump to Section

📱 Follow Us 

📬 Subscribe for Updates

* indicates required

Intuit Mailchimp

Buffalo Cauliflower Wings

No ratings yet
These Buffalo Cauliflower Wings are crispy, spicy, and totally addictive! 🥦🔥 In addition, they’re baked or air-fried to golden perfection, then tossed in bold Buffalo sauce and served with creamy ranch or blue cheese dip. As a result, they make the perfect crowd-pleasing snack. Whether you're hosting game day or craving plant-based heat, this recipe delivers bold flavor without the meat. Therefore, it’s always a hit! 🌶️💥
Prep Time 10 minutes
Cook Time 35 minutes
Servings: 4 people
Course: Appetizer, Snacks
Cuisine: American, American Fusion
Calories: 170

Ingredients
  

  • Cup All-Purpose Flour Leveled
  • ¼ Cup Cornstarch
  • 1 tsp Garlic Powder
  • 1 tsp Onion Powder
  • 1 tsp Paprika
  • ½ tsp Sea Salt
  • ¾ Cup water
  • 2 Lbs Cauliflower Head

Equipment

1 Large mixing bowl (for coating the cauliflower in batter and tossing with sauce.)
1 Small bowl (for preparing the batter or buffalo sauce separately.)
1 Whisk or fork (to mix batter ingredients until smooth.)
1 Measuring cups & spoons ( for accuracy in flour, spices, and liquids.)
1 Cutting board (for chopping cauliflower into florets.)
1 Sharp chef’s knife (to cut through the cauliflower cleanly and safely)
1 Tongs ( for flipping the wings or tossing them in sauce without breaking them.)

Method
 

  1. Start by preheating your oven to 450 degrees Fahrenheit. While the oven is heating up, prepare two large baking sheets by lining them with parchment paper. This will help prevent the cauliflower from sticking to the baking sheets and make cleanup easier.
  2. In a large bowl, combine the flour, cornstarch, garlic powder, onion powder, paprika, and salt. Whisk the dry ingredients together until they are well combined. Gradually add the water to the bowl, whisking constantly, until a smooth batter forms. Make sure there are no lumps in the batter. Add the cauliflower florets to the bowl and use your hands or a spoon to gently stir until all the florets are evenly coated in the batter.
    ⅔ Cup All-Purpose Flour, ¼ Cup Cornstarch, 1 tsp Garlic Powder, 1 tsp Onion Powder, 1 tsp Paprika, ½ tsp Sea Salt, ¾ Cup water
  3. Using tongs or a fork, carefully lift the cauliflower florets out of the batter, allowing any excess batter to drip back into the bowl. Arrange the florets in a single layer on the prepared baking sheets, making sure they are not touching each other. Bake the cauliflower for 10 minutes, then remove the baking sheets from the oven. Use a spatula to carefully flip the florets. Return the baking sheets to the oven, swapping their positions on the oven racks. This will help ensure even cooking. Bake for another 10 minutes, or until the cauliflower is golden brown and crispy.
    2 Lbs Cauliflower Head
  4. Remove the baking sheets from the oven. Using a pastry brush or a spoon, brush the cauliflower florets with some of the buffalo wing sauce, making sure to coat them evenly. Return the baking sheets to the oven and bake for another 12 to 15 minutes, or until the cauliflower is dark golden brown and crisp around the edges. The exact cooking time will depend on your oven and the size of the cauliflower florets.
  5. Remove the baking sheets from the oven and let the cauliflower cool slightly. Brush the cauliflower florets with additional buffalo wing sauce, making sure to coat them evenly. This will add extra flavor and spice. Transfer the cauliflower wings to a serving platter or individual plates. Serve immediately while they are still hot and crispy. For dipping, ranch dressing is a classic pairing that helps to cool the heat of the buffalo sauce.

Nutrition

Serving: 12ozCalories: 170kcalCarbohydrates: 36gProtein: 7gFat: 1gSaturated Fat: 0.3gPolyunsaturated Fat: 0.2gMonounsaturated Fat: 0.1gSodium: 363mgPotassium: 726mgFiber: 5gSugar: 4gVitamin A: 247IUVitamin C: 109mgCalcium: 58mgIron: 2mg

Notes

📝 Recipe Notes – Buffalo Cauliflower Wings

  • Flour Options: You can use all-purpose flour, chickpea flour, or a gluten-free blend. Each offers a slightly different texture, so pick your favorite based on dietary needs.
  • Make It Extra Crispy: For extra crunch, add a tablespoon of cornstarch to the batter and bake on a wire rack instead of directly on parchment paper.
  • Buffalo Sauce Tip: Want more heat? Add cayenne or a splash of hot sauce. Prefer mild? Mix the Buffalo sauce with melted butter or Greek yogurt to tone it down.
  • Air Fryer Instructions: Cook at 400°F for 15–18 minutes, shaking the basket halfway through. They’ll come out extra crispy with minimal oil!
  • Vegan-Friendly: Use plant-based milk and vegan Buffalo sauce (most are!). Pair with dairy-free ranch or blue cheese for a fully vegan snack.
  • Reheating: Re-crisp leftovers in the oven or air fryer at 375°F for 5–8 minutes. Microwaving will soften the coating.
  • Serving Tip: These wings are best served immediately with cold celery sticks, carrot slices, and your favorite dip. Great as an appetizer, snack, or even a light main dish!

Tried this recipe?

Let us know how it was!

🧂 What to Serve with Buffalo Cauliflower Wings

These spicy, saucy bites are a total flavor bomb — but they’re even better when paired with the perfect sides and sips. Whether you’re planning a game day spread, party platter, or just spicing up your snack routine, here are some delicious ideas to serve alongside your Buffalo Cauliflower Wings:

🥕 Cool & Crunchy

Celery & Carrot Sticks: The classic combo — crisp, refreshing, and the perfect cooling contrast to all that heat.
Cucumber Ranch Salad: Sliced cucumbers, red onion, and dill tossed in creamy ranch dressing. Light, cooling, and super easy.
Apple Slaw: A sweet and tangy slaw made with cabbage, apples, and a light vinaigrette for a little crunch and contrast.

🍚 Hearty & Comforting

Mac & Cheese: Creamy, cheesy, and oh-so-satisfying — the ultimate comfort food to balance the spice.
Loaded Potato Wedges: Crispy wedges topped with cheese, scallions, and a drizzle of ranch or hot sauce.
Cauliflower Fried Rice: Keep the cauliflower theme going with a lighter twist that still satisfies.

🥑 Dips & Extras

Ranch or Blue Cheese Dip: A must-have for dunking — cool, creamy, and made to pair with Buffalo heat.
Avocado Crema: Smooth, tangy, and a little unexpected — like guac, but silkier.
Garlic Hummus: A savory side that tones down the spice and boosts the flavor variety.

🍹 Drinks to Cool the Heat

Iced Lemonade or Limeade: Sweet, citrusy, and perfectly refreshing.
Cucumber Mint Sparkler: Fizzy, crisp, and cooling — ideal for those fiery bites.
Non-Alcoholic Beer or a Cold Lager: Classic pairings for wings that just work.

❓ FAQ – Buffalo Cauliflower Wings


Can I make Buffalo Cauliflower Wings in an air fryer?

Yes! The air fryer is a great option for extra crispiness. Cook at 400°F for 15–18 minutes, flipping halfway. They’ll turn out perfectly golden and crunchy with less oil.


Are Buffalo Cauliflower Wings vegan?

They can be! Just use plant-based milk for the batter and a vegan Buffalo sauce (many are naturally vegan). Serve with dairy-free ranch or blue cheese dip to keep it fully plant-based. 🌱


Can I make them gluten-free?

Absolutely. Swap the all-purpose flour with a gluten-free flour blend or chickpea flour for a delicious GF version. Just make sure your hot sauce is also gluten-free.


How spicy are these wings?

They’re moderately spicy, depending on the Buffalo sauce you use. You can reduce the heat by using a mild sauce or mixing it with a bit of melted butter or Greek yogurt to mellow it out.


How do I keep them crispy after tossing in sauce?

For the best texture, return them to the oven or air fryer for 5–10 minutes after tossing in sauce. This helps the coating re-crisp and bakes in the flavor.


What should I serve with Buffalo Cauliflower Wings?

Classic sides include celery sticks, carrots, and ranch or blue cheese dip. You can also pair them with mac and cheese, slaw, or seasoned fries. Check out our full “What to Serve” section for tasty ideas!


Can I prep these ahead of time?

You can prep the batter and cut the cauliflower in advance, but for the best texture, bake or air-fry them right before serving. Reheating can work, but they’re crispiest when fresh.

Please follow and like us:
onpost_follow
fb-share-icon197
Tweet120
Pinterest20
Share 20
submit to reddit