Butter-Sautéed Speculoos Apples

Dessert · Garnish

Butter-Sautéed Speculoos Apples

Keep the apple pieces a similar size and cook them until tender, with enough bite to hold their shape. Their natural sweetness is the starting point; this topping has no added sugar.

Yield
4 topping portions
Cuisine
French-inspired

Bring it to the table

Use a wide pan

Give the diced fruit space in the pan. If the pan is crowded, cook in two batches so you can stir the apples without crushing them.

At the table

Spoon warm or cooled apples over a separately prepared crêpe, yogurt or dessert. This page makes the apple topping only.

Before you start

Gather your ingredients.

Full quantities and serving adjustments are in the recipe card below.

See the ingredient checklist
  • 500 g apples — Golden Delicious or Fuji; peeled, cored and diced, prepared weight
  • 1 tbsp lemon juice
  • 50 g unsalted butter
  • 1.5 g speculoos spice blend — a ground baking-spice blend, not cookie butter

A few useful notes.

Four topping portions are a serving suggestion rather than a measured finished yield.

Use a ground speculoos baking-spice blend; individual brands vary in flavor.

This is not a complete tart recipe and includes no crust or pecan topping.

The cooking plan

How to make Butter-Sautéed Speculoos Apples.

  1. Peel and core the apples, then dice into even pieces about 1/2 inch across. Weigh the prepared fruit and toss with the lemon juice and speculoos spice blend.

  2. Melt the butter in a wide skillet over medium heat. Add the apples and cook, stirring gently and adjusting the heat so the butter does not burn.

  3. Continue until the apples are tender and any loose juices have reduced, checking a piece for doneness. Stop before the fruit breaks down into a puree.

  4. Serve warm, or transfer to a shallow container to cool and refrigerate within 2 hours. Keep covered at 40°F or below and use within 3–4 days.

Let’s cook

The full recipe.

Check off ingredients as you get them ready.

Changing servings? The ingredient list scales automatically. Adjust quantities named in the steps to match, and choose pans and cooking times for your batch.

Butter-Sautéed Speculoos Apples

No ratings yet
Diced apples sautéed in butter with lemon juice and a warm speculoos spice blend.
Servings: 4 topping portions
Course: Dessert, Garnish
Cuisine: French-inspired

Some ingredient links are affiliate links. We may earn a commission at no extra cost to you. As an Amazon Associate I earn from qualifying purchases.

Ingredients
  

  •  
    500 g apples Golden Delicious or Fuji; peeled, cored and diced, prepared weight
  • 1 tbsp lemon juice
  • 50 g unsalted butter
  •  
    1.5 g speculoos spice blend a ground baking-spice blend, not cookie butter

Equipment images are illustrative. Exact products may vary.

Instructions
 

  1. Peel and core the apples, then dice into even pieces about 1/2 inch across. Weigh the prepared fruit and toss with the lemon juice and speculoos spice blend.
  2. Melt the butter in a wide skillet over medium heat. Add the apples and cook, stirring gently and adjusting the heat so the butter does not burn.
  3. Continue until the apples are tender and any loose juices have reduced, checking a piece for doneness. Stop before the fruit breaks down into a puree.
  4. Serve warm, or transfer to a shallow container to cool and refrigerate within 2 hours. Keep covered at 40°F or below and use within 3–4 days.

Notes

Four topping portions are a serving suggestion rather than a measured finished yield.
Use a ground speculoos baking-spice blend; individual brands vary in flavor.
This is not a complete tart recipe and includes no crust or pecan topping.

Tried this recipe?

Let us know how it was!

A couple of useful answers.

Which apples work here?

Golden Delicious and Fuji are suitable choices from the recipe; dice evenly and stop cooking while the pieces still hold their shape.

Is this a finished apple tart?

No. It is the cooked apple component, ready to pair with a separate complete dessert recipe.

Keep the good food going

Similar Recipes

Find another recipe to bring to the table.
Almond and Walnut Crumble

Dessert · Garnish

Almond and Walnut Crumble

Mix the nut flours with butter, sugar and wheat flour, then bake in a thin layer. Let it cool before breaking it into crumbs.

Yield
1 small batch
Cuisine
Contemporary

Bring it to the table

Use fine nut meal

Finely ground walnuts should look like meal, not an oily nut butter. Pulse in short bursts if grinding the nuts yourself.

At the table

Sprinkle over a finished dessert just before serving to keep the crumbs crisp.

Before you start

Gather your ingredients.

Full quantities and serving adjustments are in the recipe card below.

See the ingredient checklist
  • 50 g unsalted butter — softened
  • 50 g confectioners sugar
  • 70 g almond flour
  • 50 g all-purpose flour
  • 37.5 g finely ground walnuts

A few useful notes.

This crumble contains almonds, walnuts and wheat.

The control represents a small batch rather than a measured cup yield.

The cooking plan

How to make Almond and Walnut Crumble.

  1. Heat the oven to 325°F and line a baking tray with a silicone baking mat or parchment.

  2. Mix the softened butter and confectioners sugar until combined. Add the almond flour, all-purpose flour and ground walnuts. Mix just until the mixture holds together; do not beat into an oily paste.

  3. Spread or press into a thin, even layer about 1/4 inch thick on the prepared tray. Bake, starting to check around 15 minutes, until lightly golden and cooked through. Continue as needed for the thickness and tray.

  4. Cool completely on the tray, then break into small crumbs. Store airtight once cold, or freeze for longer keeping. Keep separate from moist toppings until serving.

Let’s cook

The full recipe.

Check off ingredients as you get them ready.

Changing servings? The ingredient list scales automatically. Adjust quantities named in the steps to match, and choose pans and cooking times for your batch.

Almond and Walnut Crumble

No ratings yet
A baked almond-and-walnut crumble for adding a nutty, buttery crunch to desserts.
Servings: 1 small batch
Course: Dessert, Garnish
Cuisine: Contemporary

Some ingredient links are affiliate links. We may earn a commission at no extra cost to you. As an Amazon Associate I earn from qualifying purchases.

Ingredients
  

  • 50 g unsalted butter softened
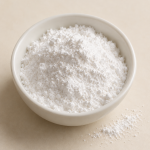
  • Fine white powdered confectioners sugar in a prep bowl50 g confectioners sugar
  •  
    70 g almond flour
  • 50 g all-purpose flour
  •  
    37.5 g finely ground walnuts

Equipment images are illustrative. Exact products may vary.

Instructions
 

  1. Heat the oven to 325°F and line a baking tray with a silicone baking mat or parchment.
  2. Mix the softened butter and confectioners sugar until combined. Add the almond flour, all-purpose flour and ground walnuts. Mix just until the mixture holds together; do not beat into an oily paste.
  3. Spread or press into a thin, even layer about 1/4 inch thick on the prepared tray. Bake, starting to check around 15 minutes, until lightly golden and cooked through. Continue as needed for the thickness and tray.
  4. Cool completely on the tray, then break into small crumbs. Store airtight once cold, or freeze for longer keeping. Keep separate from moist toppings until serving.

Notes

This crumble contains almonds, walnuts and wheat.
The control represents a small batch rather than a measured cup yield.

Tried this recipe?

Let us know how it was!

A couple of useful answers.

Does it use both almonds and walnuts?

Yes. Almond flour and finely ground walnuts are separate ingredients in this version.

When do I break it into crumbs?

Let it cool completely first so the baked mixture can firm.

Keep the good food going

Similar Recipes

Find another recipe to bring to the table.

Pineau and Lime Macerated Strawberries

Dessert · Garnish

Pineau and Lime Macerated Strawberries

Quarter the berries and turn them gently through the sugar, wine and zest. Let them macerate in the refrigerator so they release a little juice.

Yield
1 small batch
Cuisine
French-inspired

Bring it to the table

Chill while the fruit marinates

Keep the covered berries refrigerated for the full marinating time rather than leaving them on the counter.

At the table

Spoon the berries and a little of their juice beside a cake, custard or other dessert prepared separately.

Before you start

Gather your ingredients.

Full quantities and serving adjustments are in the recipe card below.

See the ingredient checklist
  • 300 g strawberries — hulled and quartered
  • 12.5 g Pineau des Charentes — fortified wine
  • 25 g granulated sugar
  • 1/4 lime — finely grated zest only

A few useful notes.

This topping contains alcohol; the wine is not cooked.

It is a fruit component, with no cake or custard included.

The cooking plan

How to make Pineau and Lime Macerated Strawberries.

  1. Rinse the strawberries under cool running water and dry gently before hulling and quartering. Put in a clean bowl.

  2. Add the sugar, Pineau des Charentes and finely grated lime zest. Turn gently until the berries are coated.

  3. Cover and refrigerate at 40°F or below for at least 3 hours, stirring gently once or twice. Serve chilled with a little of the released juice; use promptly, preferably the same day.

Let’s cook

The full recipe.

Check off ingredients as you get them ready.

Changing servings? The ingredient list scales automatically. Adjust quantities named in the steps to match, and choose pans and cooking times for your batch.

Pineau and Lime Macerated Strawberries

No ratings yet
Fresh strawberries chilled with sugar, lime zest and a little Pineau des Charentes for a wine-scented dessert topping.
Servings: 1 small batch
Course: Dessert, Garnish
Cuisine: French-inspired

Some ingredient links are affiliate links. We may earn a commission at no extra cost to you. As an Amazon Associate I earn from qualifying purchases.

Ingredients
  

  •  
    300 g strawberries hulled and quartered
  •  
    12.5 g Pineau des Charentes fortified wine
  • 25 g granulated sugar
  • ¼ lime finely grated zest only

Equipment images are illustrative. Exact products may vary.

Instructions
 

  1. Rinse the strawberries under cool running water and dry gently before hulling and quartering. Put in a clean bowl.
  2. Add the sugar, Pineau des Charentes and finely grated lime zest. Turn gently until the berries are coated.
  3. Cover and refrigerate at 40°F or below for at least 3 hours, stirring gently once or twice. Serve chilled with a little of the released juice; use promptly, preferably the same day.

Notes

This topping contains alcohol; the wine is not cooked.
It is a fruit component, with no cake or custard included.

Tried this recipe?

Let us know how it was!

A couple of useful answers.

Does the wine cook off?

No. The fruit is marinated cold, so this dessert topping contains alcohol.

Should I add lime juice?

This version uses the finely grated zest only. Save the juice for another dish.

Keep the good food going

Similar Recipes

Find another recipe to bring to the table.
Crisp Orange Tuiles

Dessert · Garnish

Crisp Orange Tuiles

Orange juice, sugar, flour and melted butter come together in a simple batter. Chill before portioning and allow plenty of room for each tuile to spread.

Yield
1 small batch
Cuisine
French-inspired

Bring it to the table

Watch the edges

These thin cookies can darken quickly near the end. Look for golden edges, then let them firm on the mat before lifting.

At the table

Use as a crisp garnish beside fruit, custard or ice cream, adding at the last moment.

Before you start

Gather your ingredients.

Full quantities and serving adjustments are in the recipe card below.

See the ingredient checklist
  • 125 g granulated sugar
  • 31 g all-purpose flour
  • 50 g orange juice
  • 50 g unsalted butter — melted

A few useful notes.

This orange version has no nuts added.

The recipe control represents one small batch; cookie count depends on portion size.

The mixture may be soft even when cold. Spoon it rather than forcing it into hand-rolled balls.

The cooking plan

How to make Crisp Orange Tuiles.

  1. Mix the sugar and flour together. Stir in the orange juice and melted butter until evenly combined. Cover and refrigerate until cold and thickened.

  2. Heat the oven to 350°F. Line a baking tray with a silicone baking mat. Place a small teaspoon-sized mound on the mat and bake it first to judge how far the mixture spreads.

  3. Arrange more small mounds with generous space between them. Bake for about 6–8 minutes, watching closely until spread thin and golden at the edges; adjust for the actual portion size and oven.

  4. Let the tuiles firm on the mat before lifting carefully onto a rack. Cool completely, then store airtight away from moisture and add to desserts just before serving.

Let’s cook

The full recipe.

Check off ingredients as you get them ready.

Changing servings? The ingredient list scales automatically. Adjust quantities named in the steps to match, and choose pans and cooking times for your batch.

Crisp Orange Tuiles

No ratings yet
Thin orange-juice tuiles with a crisp, golden edge for finishing desserts.
Servings: 1 small batch
Course: Dessert, Garnish
Cuisine: French-inspired

Some ingredient links are affiliate links. We may earn a commission at no extra cost to you. As an Amazon Associate I earn from qualifying purchases.

Ingredients
  

  • 125 g granulated sugar
  • 31 g all-purpose flour
  • 50 g orange juice
  • 50 g unsalted butter melted

Equipment images are illustrative. Exact products may vary.

Instructions
 

  1. Mix the sugar and flour together. Stir in the orange juice and melted butter until evenly combined. Cover and refrigerate until cold and thickened.
  2. Heat the oven to 350°F. Line a baking tray with a silicone baking mat. Place a small teaspoon-sized mound on the mat and bake it first to judge how far the mixture spreads.
  3. Arrange more small mounds with generous space between them. Bake for about 6–8 minutes, watching closely until spread thin and golden at the edges; adjust for the actual portion size and oven.
  4. Let the tuiles firm on the mat before lifting carefully onto a rack. Cool completely, then store airtight away from moisture and add to desserts just before serving.

Notes

This orange version has no nuts added.
The recipe control represents one small batch; cookie count depends on portion size.
The mixture may be soft even when cold. Spoon it rather than forcing it into hand-rolled balls.

Tried this recipe?

Let us know how it was!

A couple of useful answers.

Does this version include hazelnuts?

No. The orange batter contains sugar, flour, orange juice and butter.

Can I lift the tuiles straight from the oven?

Let them firm briefly on the mat first, then lift gently with a thin spatula.

Keep the good food going

Similar Recipes

Find another recipe to bring to the table.

Raspberry and Hazelnut Tuiles

Dessert · Garnish

Raspberry and Hazelnut Tuiles

Chill the fruit-and-butter mixture before portioning it into small mounds. Leave generous space on the baking mat, since these tuiles spread as they bake.

Yield
1 small batch
Cuisine
French-inspired

Bring it to the table

Start with one small portion

Bake one small mound first to judge its spread in your oven. Keep the rest of the batter chilled while you work in batches.

At the table

Add to a plated dessert just before serving, or enjoy as a small crisp cookie.

Before you start

Gather your ingredients.

Full quantities and serving adjustments are in the recipe card below.

See the ingredient checklist
  • 50 g confectioners sugar
  • 13 g all-purpose flour
  • 25 g hazelnuts — finely chopped; or almonds
  • 25 g raspberry coulis — smooth and seedless
  • 19 g unsalted butter — melted

A few useful notes.

This version contains hazelnuts, or almonds if using the substitution.

The number of tuiles depends on the portion size and spread.

Use a silicone mat and let the tuiles firm before lifting; they are fragile while hot.

The cooking plan

How to make Raspberry and Hazelnut Tuiles.

  1. Stir the confectioners sugar and flour together. Mix in the raspberry coulis and melted butter, then fold in the finely chopped hazelnuts.

  2. Cover and refrigerate until cold and firm enough to portion. Heat the oven to 350°F and line a baking tray with a silicone baking mat.

  3. Place a small mound, about a teaspoon, on the mat. Bake this first portion to judge the spread, then arrange further small mounds with plenty of space between them. Flatten slightly if needed for even thickness.

  4. Bake for about 6–8 minutes, watching closely near the end, until the tuiles have spread and their edges are golden. Adjust as needed for the size of each portion.

  5. Let them cool on the mat until firm enough to lift, then transfer carefully to a rack to cool completely. Once crisp and cold, keep airtight and add to moist desserts only at serving time.

Let’s cook

The full recipe.

Check off ingredients as you get them ready.

Changing servings? The ingredient list scales automatically. Adjust quantities named in the steps to match, and choose pans and cooking times for your batch.

Raspberry and Hazelnut Tuiles

No ratings yet
Thin raspberry and hazelnut cookies baked into delicate, crisp dessert garnishes.
Servings: 1 small batch
Course: Dessert, Garnish
Cuisine: French-inspired

Some ingredient links are affiliate links. We may earn a commission at no extra cost to you. As an Amazon Associate I earn from qualifying purchases.

Ingredients
  

  • Fine white powdered confectioners sugar in a prep bowl50 g confectioners sugar
  • 13 g all-purpose flour
  •  
    25 g hazelnuts finely chopped; or almonds
  • 25 g raspberry coulis smooth and seedless
  • 19 g unsalted butter melted

Equipment images are illustrative. Exact products may vary.

Instructions
 

  1. Stir the confectioners sugar and flour together. Mix in the raspberry coulis and melted butter, then fold in the finely chopped hazelnuts.
  2. Cover and refrigerate until cold and firm enough to portion. Heat the oven to 350°F and line a baking tray with a silicone baking mat.
  3. Place a small mound, about a teaspoon, on the mat. Bake this first portion to judge the spread, then arrange further small mounds with plenty of space between them. Flatten slightly if needed for even thickness.
  4. Bake for about 6–8 minutes, watching closely near the end, until the tuiles have spread and their edges are golden. Adjust as needed for the size of each portion.
  5. Let them cool on the mat until firm enough to lift, then transfer carefully to a rack to cool completely. Once crisp and cold, keep airtight and add to moist desserts only at serving time.

Notes

This version contains hazelnuts, or almonds if using the substitution.
The number of tuiles depends on the portion size and spread.
Use a silicone mat and let the tuiles firm before lifting; they are fragile while hot.

Tried this recipe?

Let us know how it was!

A couple of useful answers.

Can I use almonds?

Yes. Finely chopped almonds are an alternative to the hazelnuts in this batter.

Why keep them away from a moist dessert until serving?

Moisture softens their crisp texture, so add them at the last moment.

Keep the good food going

Similar Recipes

Find another recipe to bring to the table.
Garlic Lace Tuiles

Garnish

Garlic Lace Tuiles

Water, flour and garlic oil make a loose mixture rather than a thick pancake batter. Cook small amounts in a nonstick skillet and let the water bubble away before lifting the crisp garnish.

Yield
1 small batch
Cuisine
Contemporary

Bring it to the table

Let the bubbles settle

The tuile is fragile while wet. Wait until the bubbling has nearly stopped and the edges lift before using a thin spatula.

At the table

Place a small crisp on a finished savory dish just before serving. Moist sauces soften the lace quickly.

Base recipe: Slow-Roasted Garlic Confit and Oil

Before you start

Gather your ingredients.

Full quantities and serving adjustments are in the recipe card below.

See the ingredient checklist
  • 160 g water
  • 20 g all-purpose flour
  • 40 g garlic oil — commercially prepared, or freshly made and safely refrigerated
  • 1 pinch salt
  • neutral oil — a light wipe for the skillet

A few useful notes.

Keep unused mixture refrigerated and cook it promptly.

If using homemade garlic oil, count its 4-day refrigerated limit from the day the oil was prepared. Cooking a tuile does not restart that storage clock.

The number of garnishes depends on the size and thickness of each pour.

The cooking plan

How to make Garlic Lace Tuiles.

  1. Blend the water, flour, garlic oil and salt for about 1 minute until evenly combined. The mixture will be very fluid.

  2. Heat a nonstick skillet over medium heat and wipe with a little neutral oil. Stir or briefly blend the mixture again, then pour in a small spoonful. Stand back from the bubbling oil and steam.

  3. Let the mixture spread into a thin round. Cook until the water has bubbled away, the lace looks dry and lightly golden, and the edges release. Lower the heat if it colors before drying.

  4. Lift carefully with a thin spatula and place on paper towel to drain. Repeat in small batches, stirring the mixture between pours. Let the tuiles cool before handling and add to the finished dish just before serving.

Let’s cook

The full recipe.

Check off ingredients as you get them ready.

Changing servings? The ingredient list scales automatically. Adjust quantities named in the steps to match, and choose pans and cooking times for your batch.

Garlic Lace Tuiles

No ratings yet
Thin, crisp garlic-oil garnishes cooked in a skillet until their bubbling gives way to a delicate lacy pattern.
Servings: 1 small batch
Course: Garnish
Cuisine: Contemporary

Some ingredient links are affiliate links. We may earn a commission at no extra cost to you. As an Amazon Associate I earn from qualifying purchases.

Ingredients
  

  • 160 g water
  • 20 g all-purpose flour
  •  
    40 g garlic oil commercially prepared, or freshly made and safely refrigerated
  • 1 pinch salt
  • neutral oil a light wipe for the skillet

Equipment images are illustrative. Exact products may vary.

Instructions
 

  1. Blend the water, flour, garlic oil and salt for about 1 minute until evenly combined. The mixture will be very fluid.
  2. Heat a nonstick skillet over medium heat and wipe with a little neutral oil. Stir or briefly blend the mixture again, then pour in a small spoonful. Stand back from the bubbling oil and steam.
  3. Let the mixture spread into a thin round. Cook until the water has bubbled away, the lace looks dry and lightly golden, and the edges release. Lower the heat if it colors before drying.
  4. Lift carefully with a thin spatula and place on paper towel to drain. Repeat in small batches, stirring the mixture between pours. Let the tuiles cool before handling and add to the finished dish just before serving.

Notes

Keep unused mixture refrigerated and cook it promptly.
If using homemade garlic oil, count its 4-day refrigerated limit from the day the oil was prepared. Cooking a tuile does not restart that storage clock.
The number of garnishes depends on the size and thickness of each pour.
Base recipe: Slow-Roasted Garlic Confit and Oil

Tried this recipe?

Let us know how it was!

A couple of useful answers.

Is this a crepe batter?

It is much thinner and is cooked until dry and crisp rather than soft and foldable.

When should I add the garnish?

Add it immediately before serving, since moisture softens the crisp lace.

Keep the good food going

Similar Recipes

Find another recipe to bring to the table.