Thai Coconut Curry Noodle Soup

Thai Coconut Curry Noodle Soup

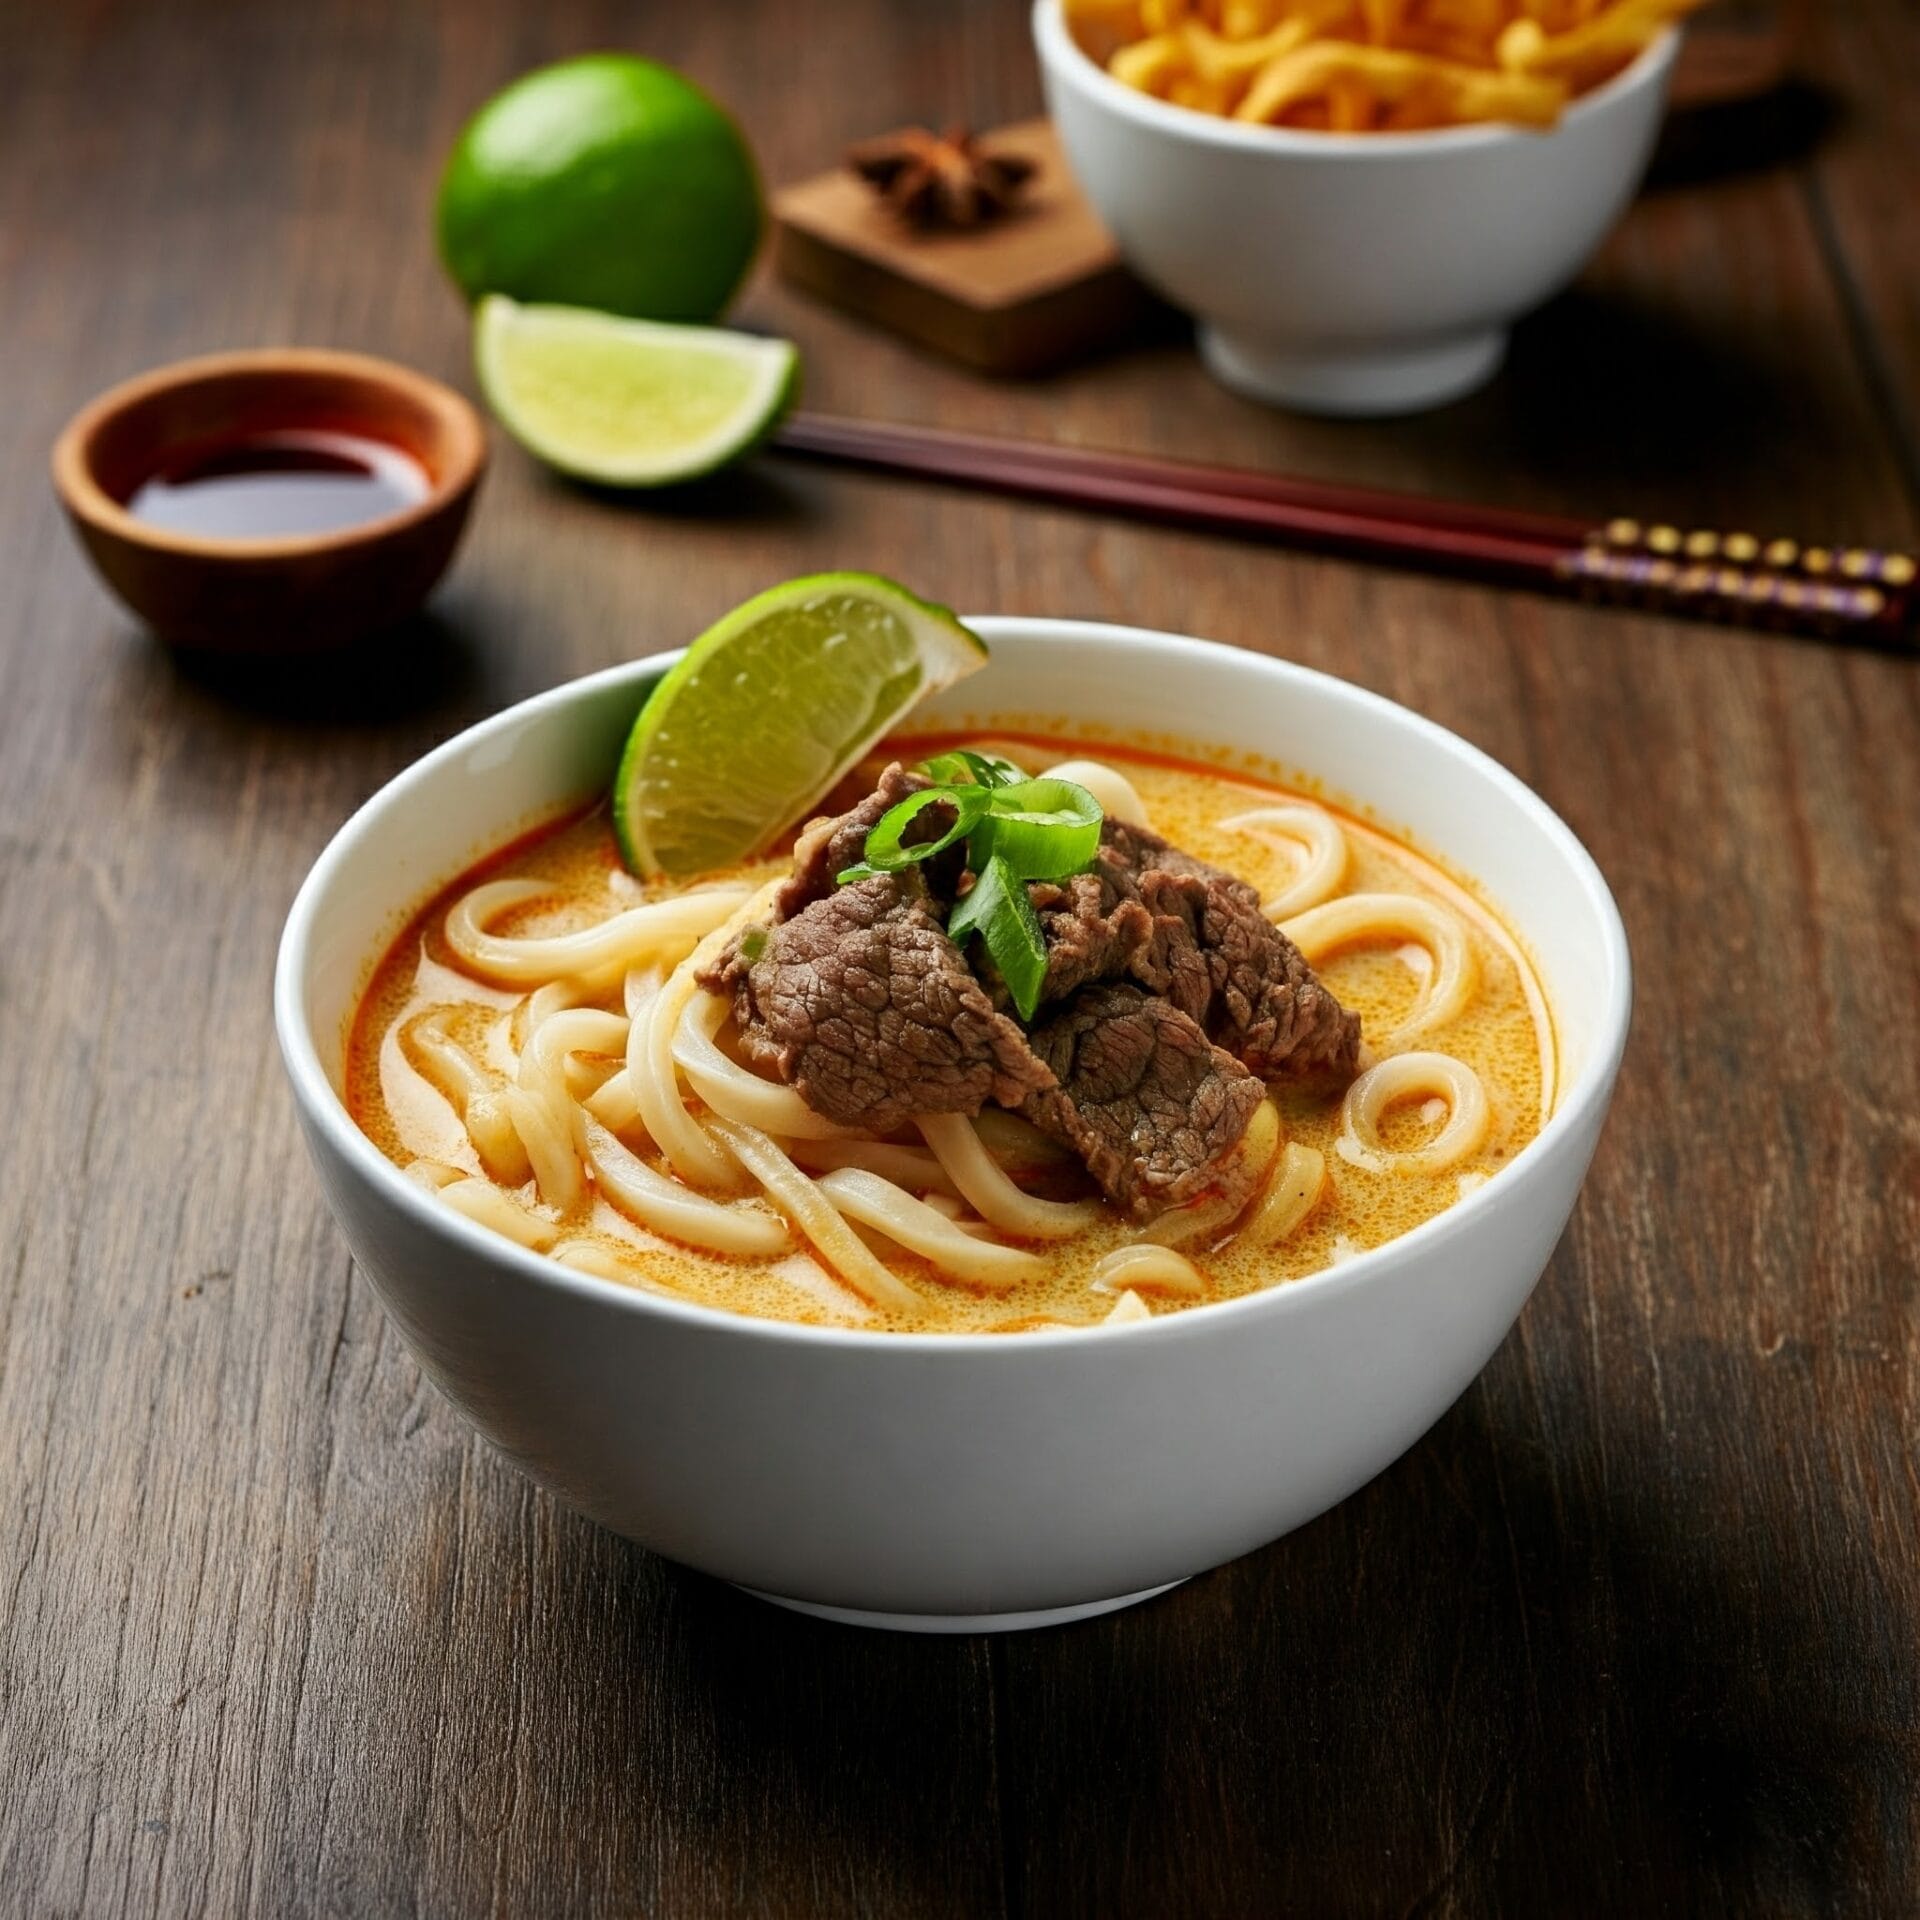
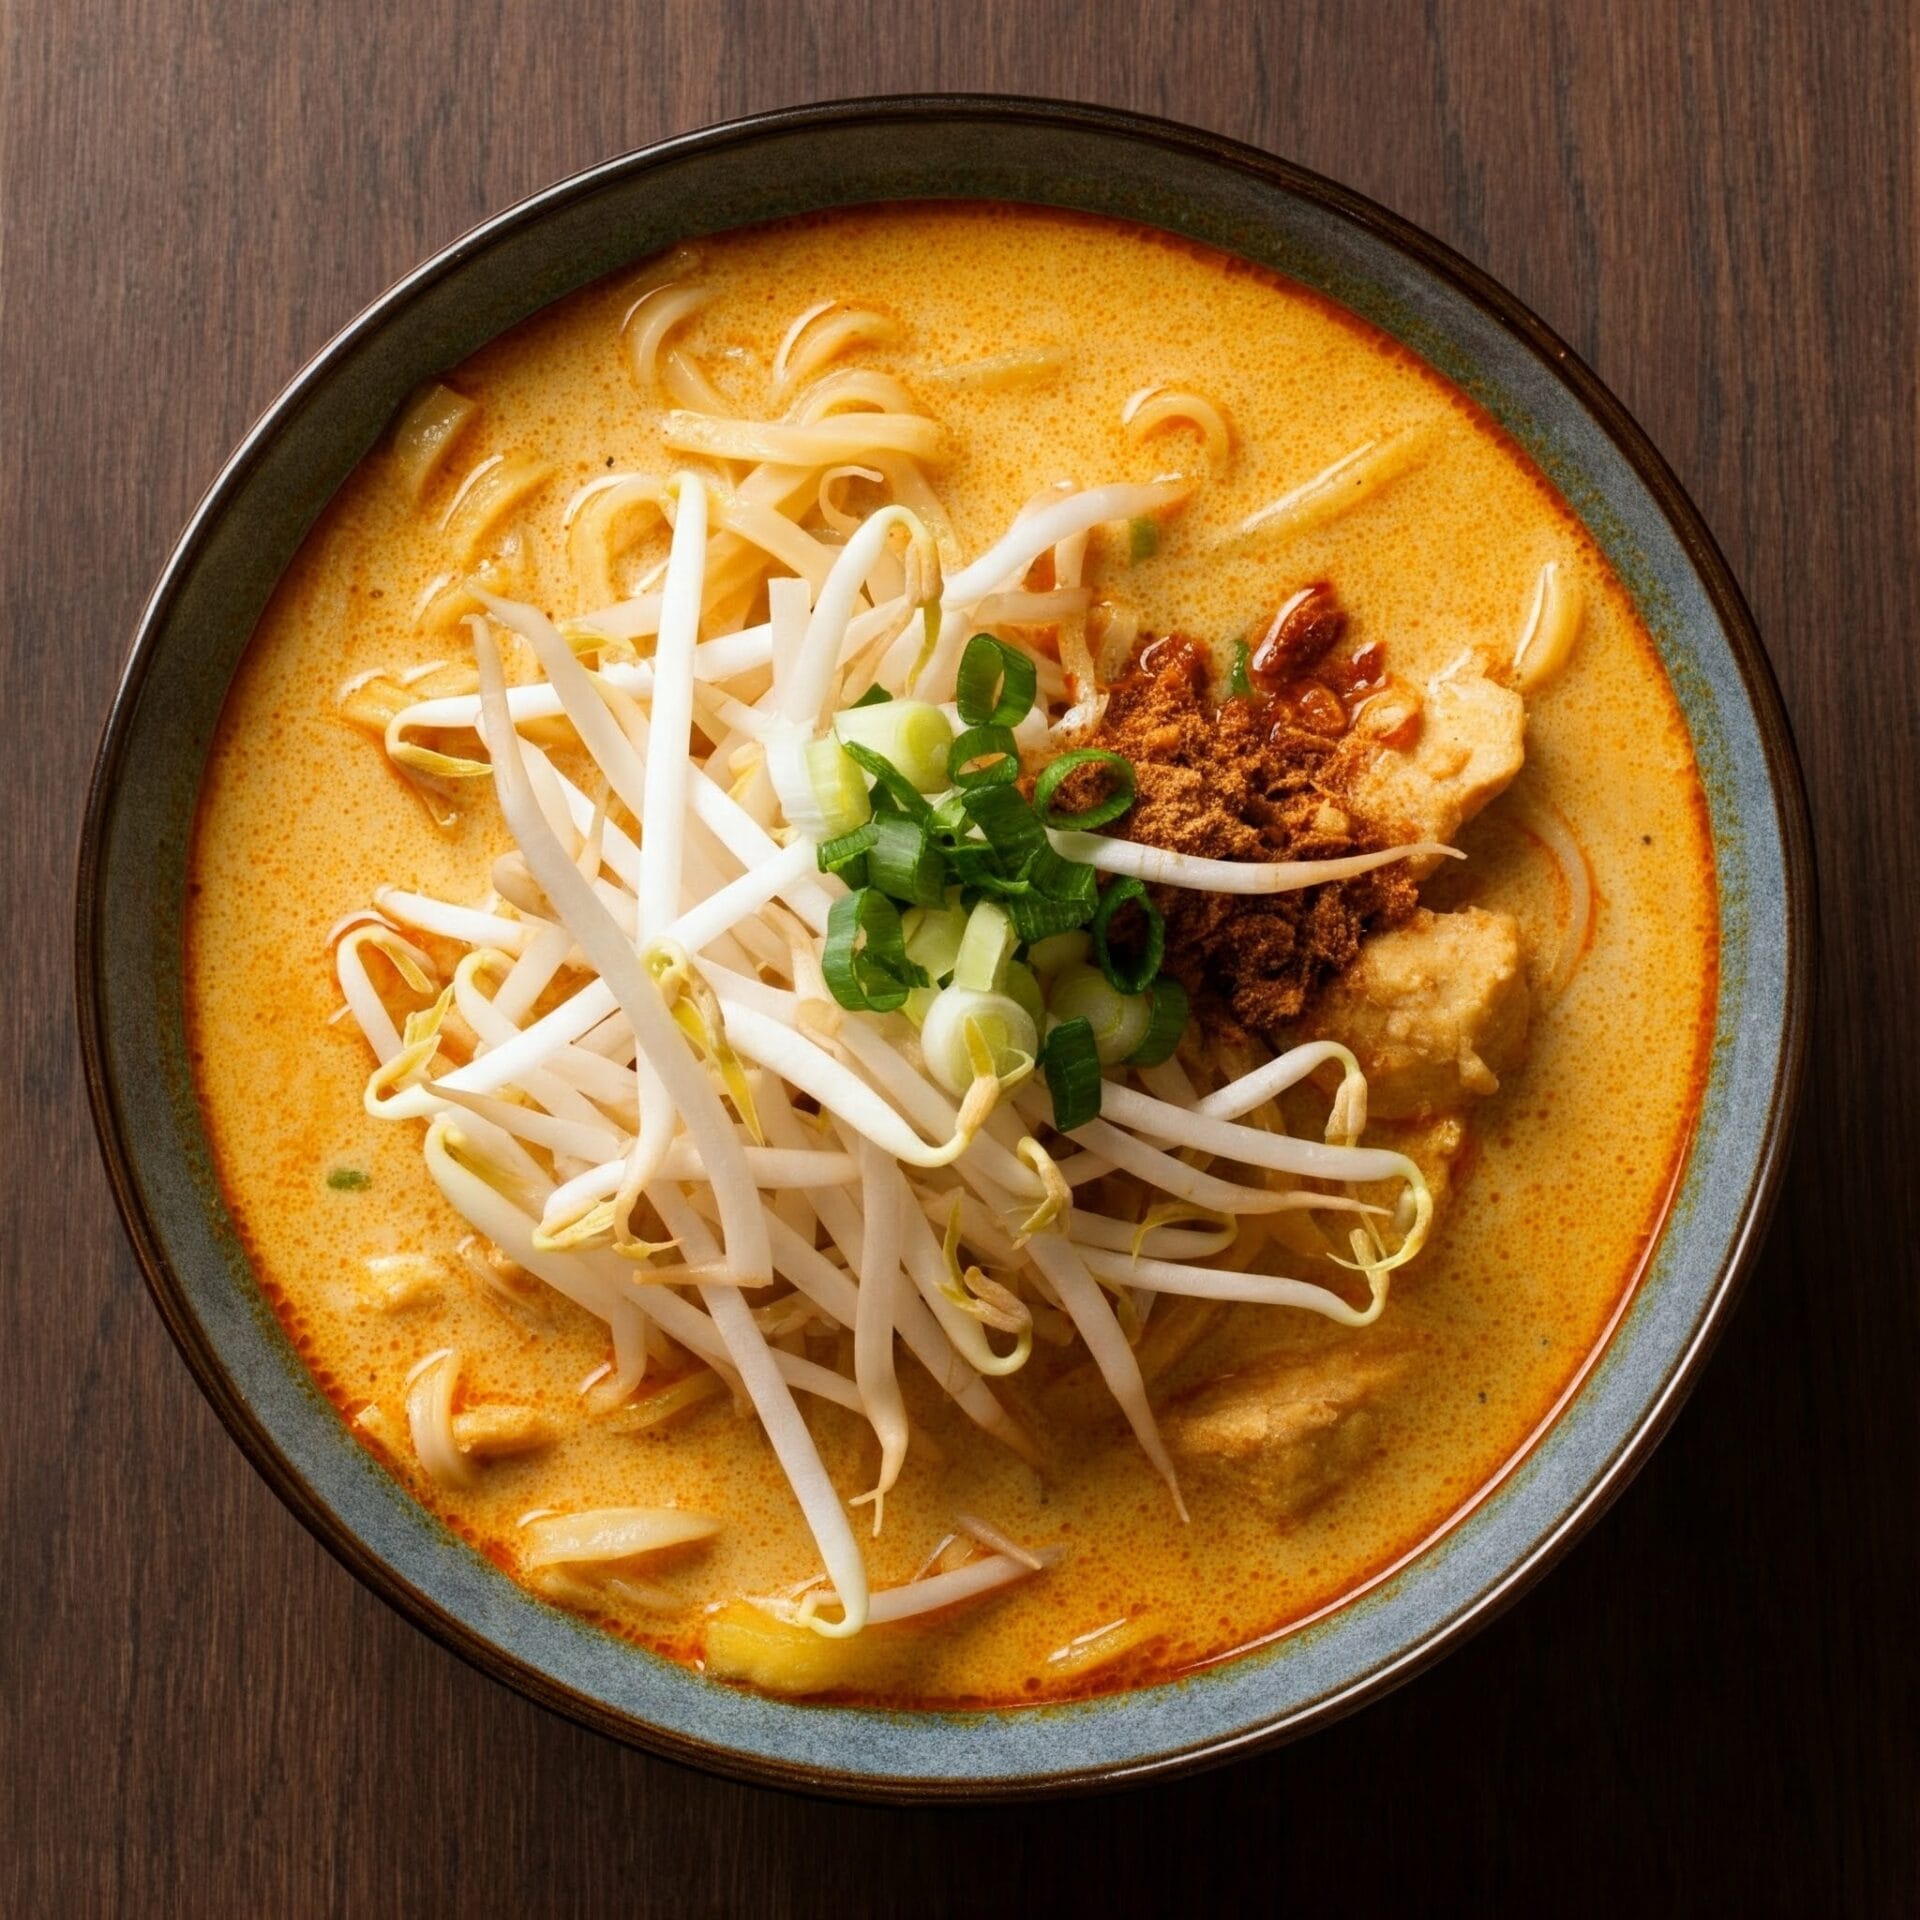
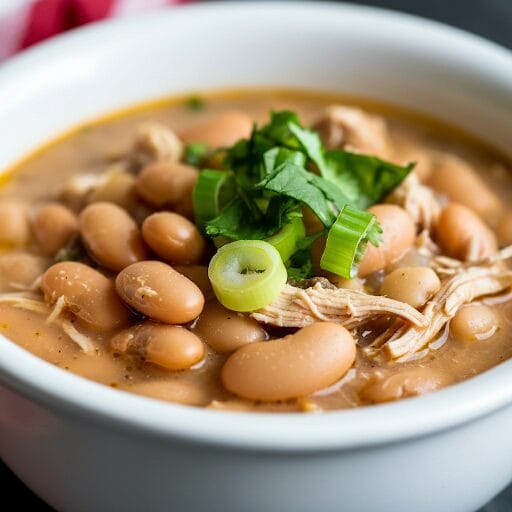
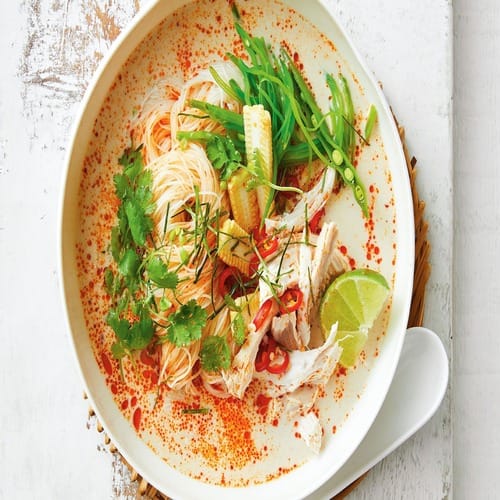
Transport your taste buds to Thailand with this bold and aromatic Thai Coconut Curry Noodle Soup. Creamy coconut milk meets fragrant red curry paste, creating a rich and spicy broth that’s bursting with flavor. Tender rice noodles, crisp vegetables, and your choice of protein (chicken, shrimp, or tofu) come together in one comforting, soul-warming bowl.

Balanced with a touch of lime, a hint of sweetness, and fresh herbs like cilantro and Thai basil, this soup is a perfect harmony of spicy, savory, and soothing. Whether you’re craving something cozy or looking to spice up your weeknight dinner routine, this one-pot wonder delivers big flavor with minimal effort.

Thai Coconut Curry Noodle Soup

No ratings yet
Thai coconut curry noodle soup is a vibrant and flavorful dish featuring creamy coconut milk, fragrant red curry paste, rice noodles, and colorful vegetables like peas, red peppers, and carrots. It's a satisfying and comforting meal with a touch of heat and a refreshing finish from lime juice and Thai basil.
Prep Time 10 minutes
Cook Time 10 minutes
Servings: 6 People
Course: Appetizer, Dinner, Lunch, Main Course
Cuisine: Asian, Northern Thailand, Thai
Calories: 351

Ingredients
  

  •  
    1 tbsp Coconut oil
  • ¼ Large Red Onion
  • 3 Cloves Garlic Minced
  •  
    3 tbsp Thai Red Curry Paste
  •  
    ½ tsp Turmeric
  •  
    Cups Coconut milk
  • 2 Cups Vegetable Broth
  • 2 tbsp Soy Sauce
  •  
    tsp sugar
  •  
    7 oz Dry Rice Noodles
  •  
    1 Cup Snap Peas frozen is fine
  •  
    4 Mini red pepper Sliced
  •  
    1 Cup Matchstick Carrots
  • 1 Large Lime Juiced
  •  
    1 Bunch Thai Basil

Method
 

  1. In a medium nonstick pot over medium heat, sauté onions in oil for 2 minutes. Add garlic and cook 1 minute more, being careful not to brown.
    1 tbsp Coconut oil, ¼ Large Red Onion, 3 Cloves Garlic
  2. Stir in red curry paste, turmeric, coconut milk, vegetable broth, soy sauce, and sugar. Bring the mixture to a simmer, then add your noodles and cook for about 4 minutes.
    3 tbsp Thai Red Curry Paste, ½ tsp Turmeric, 3½ Cups Coconut milk, 2 Cups Vegetable Broth, 2 tbsp Soy Sauce, 2½ tsp sugar, 7 oz Dry Rice Noodles
  3. Toss in the snap peas, red pepper, and carrot. Continue to simmer until the vegetables are tender-crisp and the noodles are cooked through, about 3-4 minutes.
    1 Cup Snap Peas, 4 Mini red pepper, 1 Cup Matchstick Carrots
  4. Turn off the heat and brighten the flavors with a splash of lime juice. Toss in fresh Thai basil and/or cilantro for an aromatic finish.
    1 Large Lime, 1 Bunch Thai Basil
  5. Ladle into bowls and savor the vibrant flavors immediately. For a heartier meal, top with grilled chicken, tofu, or shrimp.

Nutrition

Serving: 8ozCalories: 351kcalCarbohydrates: 33gProtein: 5gFat: 24gSaturated Fat: 21gPolyunsaturated Fat: 0.5gMonounsaturated Fat: 1gSodium: 618mgPotassium: 348mgFiber: 3gSugar: 4gVitamin A: 4278IUVitamin C: 9mgCalcium: 51mgIron: 4mg

Notes

Spice Level:
  • The amount of Thai red curry paste determines the spice level. Start with 2 tablespoons and adjust to your preference. You can always add more later if desired.
Protein Options:
  • While not included in the specific ingredients you listed, feel free to add protein like cooked chicken, shrimp, tofu, or tempeh for a more substantial meal.
Vegetable Variations:
  • The listed vegetables are just suggestions. You can add other vegetables like broccoli, mushrooms, zucchini, or baby corn for additional variety and nutrients.
Noodles:
  • Rice noodles are common, but you can experiment with other types like egg noodles or even ramen noodles. Adjust cooking time according to the specific noodle variety.
Sweetness & Acidity:
  • The sugar helps balance the savory and spicy flavors. Adjust the amount to your taste.
  • Lime juice adds a refreshing brightness. You can adjust the amount based on your preference.
Garnishes:
  • Fresh Thai basil is a classic garnish, but you can also use cilantro, chopped peanuts, or a dollop of chili oil for an extra kick.
Leftovers:
  • This soup reheats well, making it a great option for meal prep.
Additional Tips:
  • Use full-fat coconut milk for the richest flavor.
  • Simmer the soup gently to avoid curdling the coconut milk.
  • Taste the soup throughout and adjust seasonings as needed.
  • Serve with a side of rice or crusty bread for dipping.
By following these notes and personalizing the recipe to your liking, you can create a delicious and satisfying Thai coconut curry noodle soup that perfectly suits your taste buds!

Tried this recipe?

Let us know how it was!

Related Recipes

Ingredients

For the Soup:

  • 1 tablespoon coconut oil
  • ¼ large red onion, thinly sliced
  • 3 cloves garlic, minced
  • 3 tablespoons Thai red curry paste
  • ½ teaspoon turmeric
  • 3 ½ cups coconut milk
  • 2 cups vegetable broth
  • 2 tablespoons soy sauce
  • 2 ½ teaspoons sugar
  • 7 ounces dry rice noodles
  • 1 cup snap peas (fresh or frozen)
  • 4 mini red peppers, sliced
  • 1 cup matchstick carrots
  • 1 large lime, juiced
  • 1 bunch Thai basil, leaves picked

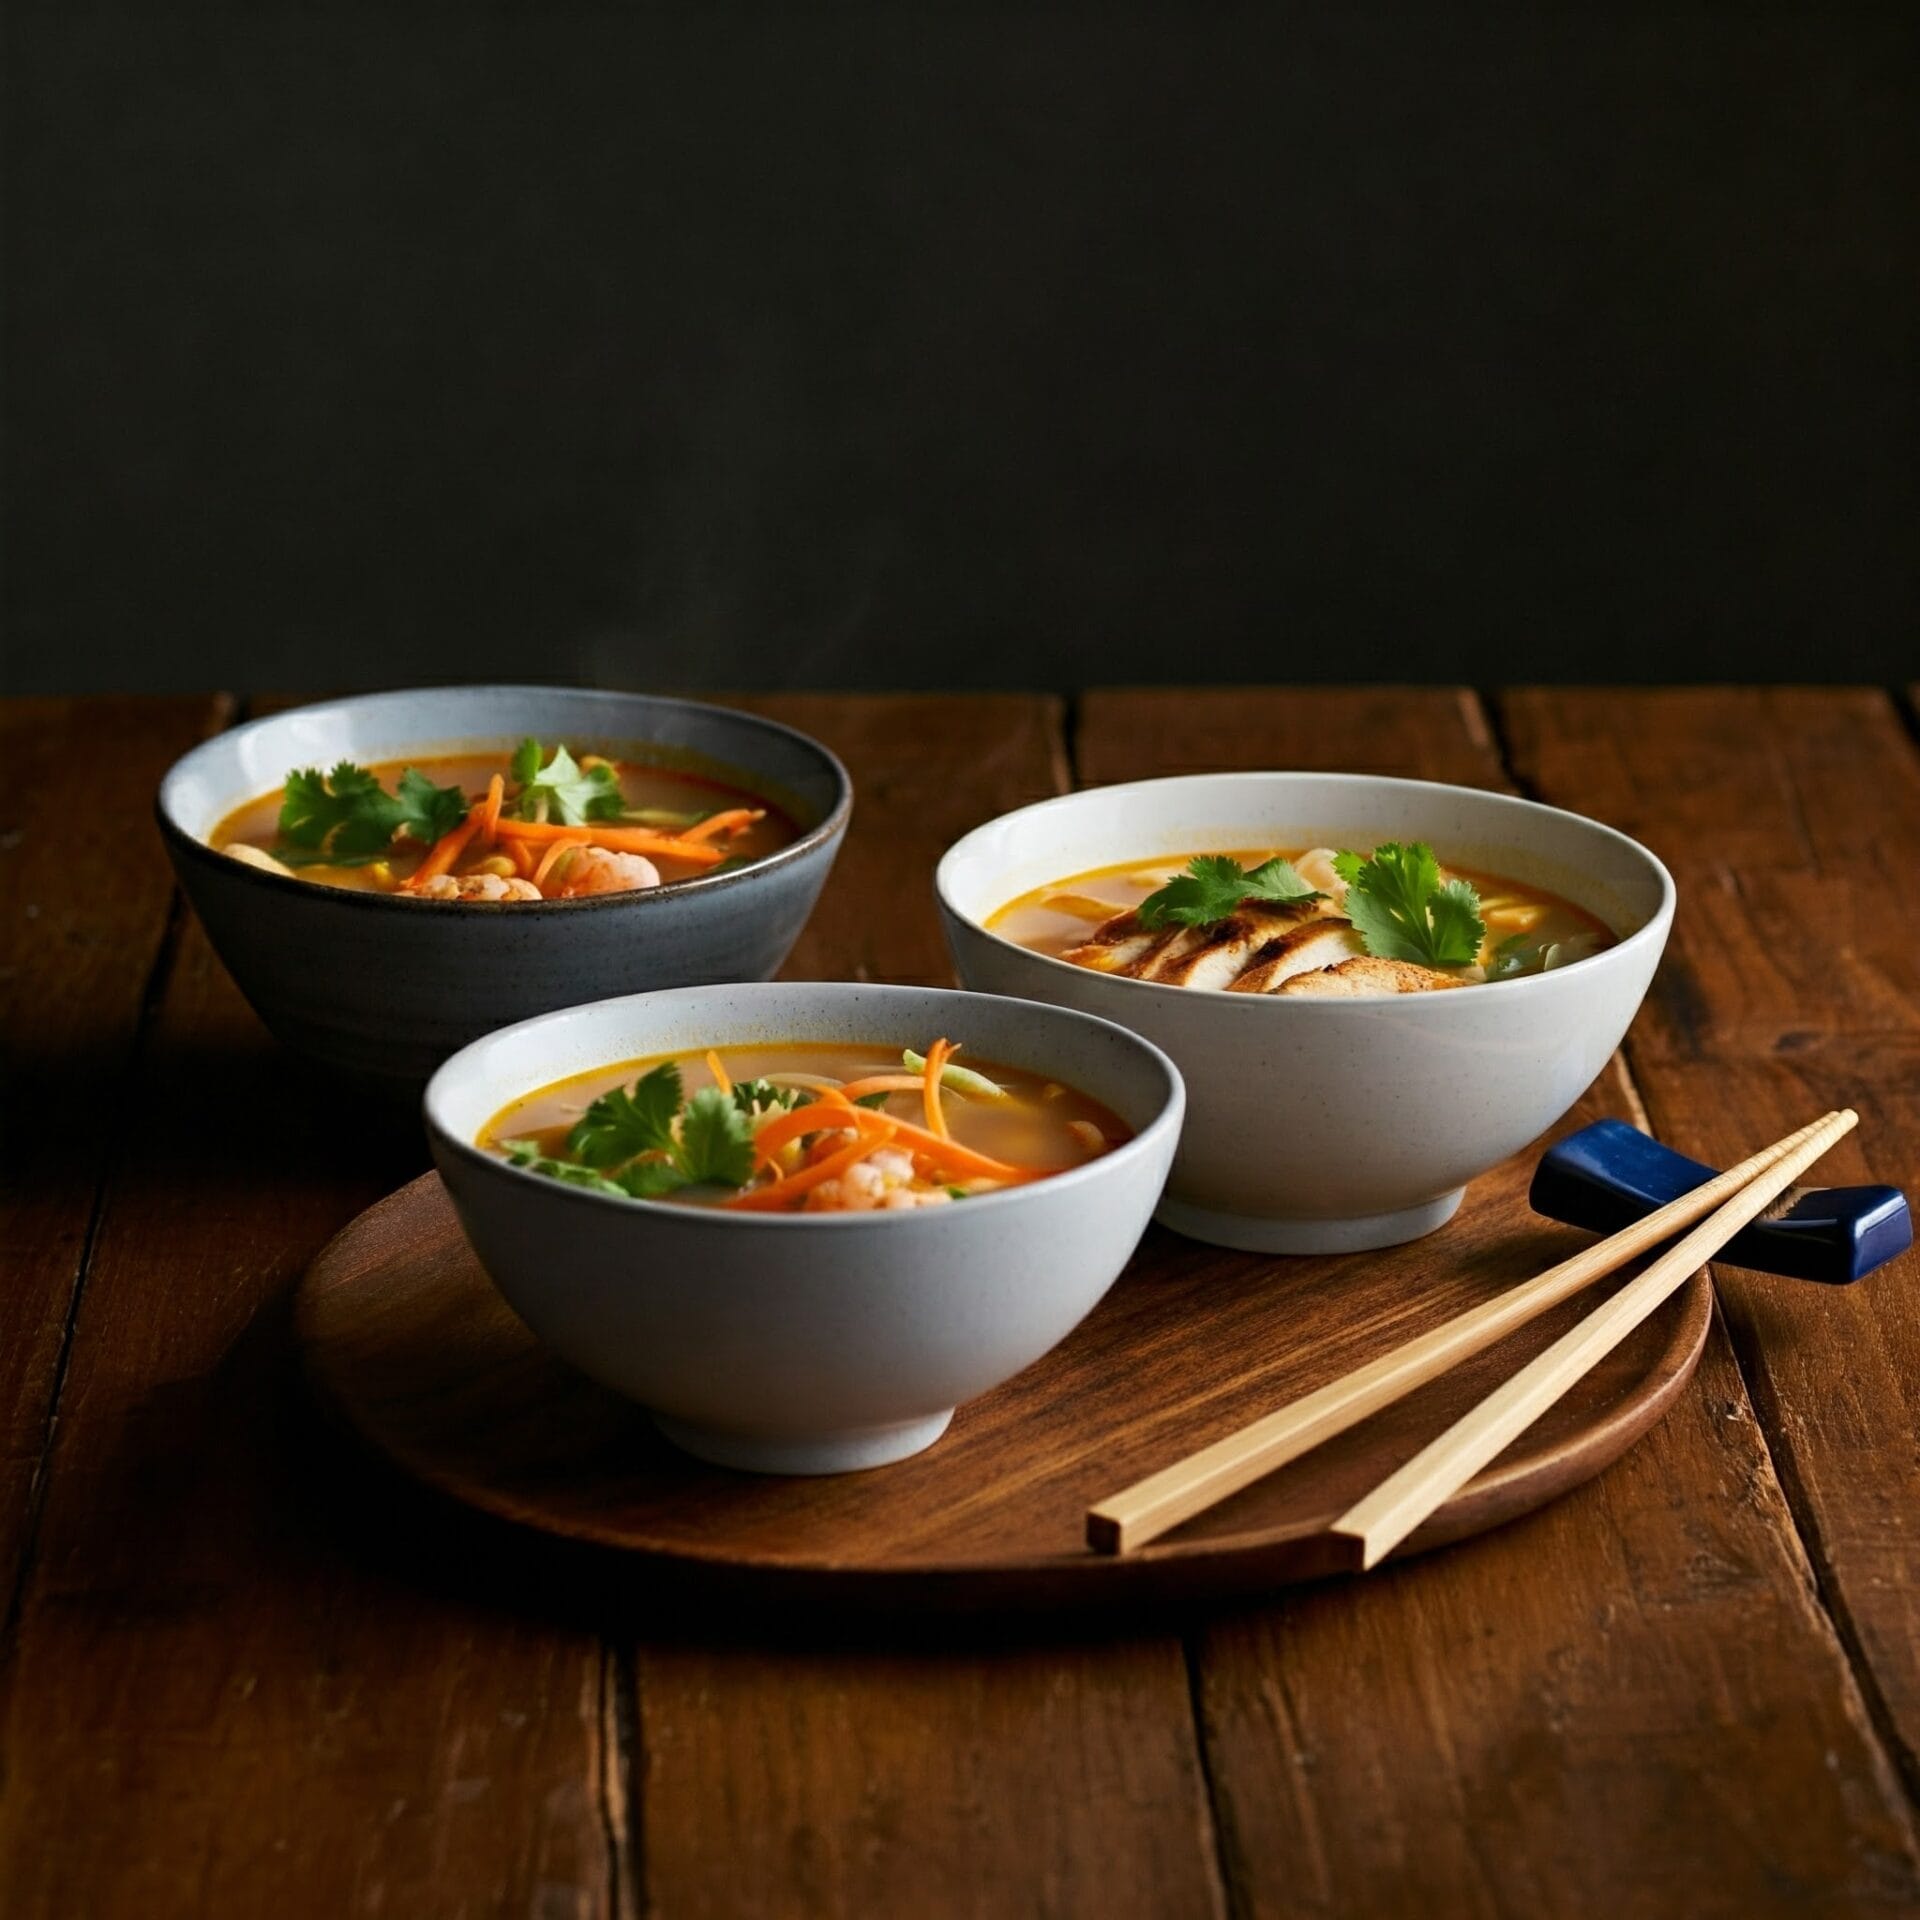
Image Gallery Thai Coconut Curry Noodle Soup

Storage & Leftovers

🧊 Storage:

  • Store leftover soup (without noodles, if possible) in an airtight container in the refrigerator for up to 3–4 days.

  • If noodles are already mixed in, they may absorb liquid and become soft—still tasty, but with a different texture.

🔥 Reheating:

  • Reheat gently on the stovetop over medium heat, stirring occasionally. Add a splash of coconut milk or broth to thin the soup if it thickened in the fridge.

  • Microwave in short bursts, stirring between intervals, until hot throughout.

🥡 Freezing:

  • You can freeze the broth only (without noodles or delicate veggies) for up to 2 months.

  • When ready to serve, reheat the broth and add fresh-cooked noodles for best texture.

💡 Pro Tip:
If meal prepping, store noodles separately and add them right before serving to keep them from getting mushy.

Please follow and like us:
onpost_follow
fb-share-icon197
Tweet120
Pinterest20
Share 20
submit to reddit

Subscribe for New Recipes

* indicates required

Intuit Mailchimp

White Chicken Chili

White Chicken Chili

Creamy, comforting, and packed with bold flavor, this White Chicken Chili is a delicious twist on the classic. Tender chunks of chicken simmer with white beans, sweet corn, and a medley of warming spices in a rich, creamy broth. It’s hearty, satisfying, and perfect for cozy nights or casual get-togethers.

This recipe isn’t just crave-worthy—it’s versatile, too. You can easily dial up the heat, toss everything in a slow cooker for a hands-off approach, or pile on your favorite toppings like shredded cheese, avocado, lime, and tortilla chips.


Why You’ll Love It:

✔️ Busy weeknights – Quick, simple, and family-friendly
✔️ Feeding a crowd – Makes a big batch and reheats like a dream
✔️ Chilly nights in – The ultimate bowl of comfort
✔️ Totally customizable – Adjust spices, toppings, or even make it dairy-free


Get ready to warm up with a bowl of creamy, soul-soothing White Chicken Chili—your new go-to comfort food!

White Chicken Chili

No ratings yet
White chicken chili is a creamy, comforting twist on traditional chili. It features tender chicken, white beans, and a blend of spices in a rich, flavorful broth. Often simmered with green chiles and corn, it's a delicious and satisfying meal.
Prep Time 15 minutes
Cook Time 20 minutes
Servings: 6 People
Course: Dinner, Main Course
Cuisine: American, Tex-Mex
Calories: 152

Ingredients
  

  • 2 15.5oz Cannellini Beans drained & rinsed.
  • 3 ½ cups Chicken Broth
  • 1 ½ Tbsp Olive Oil
  • 1 Small Yellow Onion
  • 4 Cloves Garlic minced
  • 2 tsp Ground Coriander
  • 1 ½ tsp Ground Cumin
  • 1 tsp Chili Powder
  • 1 tsp Kosher Salt
  • ½ tsp Dried Oregano
  • ½ tsp Ground Black Pepper
  • 1 15oz Yellow Corn
  •  
    2 4oz Green Chiles (canned)
  •  
    1 8oz Cream Cheese dice into small cubes
  • 2 ½ cups Chicken Breast shredded
  • 2 Tbsp Fresh Cilantro chopped
  • 1 Tbsp Lime Juice

Method
 

  1. Take 1 cup of the cooked cannellini beans and 1/2 cup of the chicken broth. In a blender, process these ingredients until they form a smooth puree. Set the puree aside for later use.
    2 15.5oz Cannellini Beans, 3 ½ cups Chicken Broth
  2. Warm the olive oil in a large pot or Dutch oven over medium-high heat. Once the oil is shimmering, add the chopped onion. Sauté the onion for about 3 minutes, stirring occasionally, until it begins to soften. Next, add the minced garlic. Sauté for another 30 seconds, or until the garlic becomes fragrant.
    1 ½ Tbsp Olive Oil, 1 Small Yellow Onion
  3. Now, it's time to add the spices. Sprinkle in the coriander, cumin, chili powder, salt, oregano, and black pepper. Stir the spices into the onion and garlic mixture, and cook for 1 minute. Stir a few times to prevent the spices from burning.
    4 Cloves Garlic, 2 tsp Ground Coriander, 1 ½ tsp Ground Cumin, 1 tsp Chili Powder, 1 tsp Kosher Salt, ½ tsp Dried Oregano, ½ tsp Ground Black Pepper
  4. Next, add the corn and diced green chiles to the pot. Stir to combine with the other ingredients. Cook for 2 minutes, stirring occasionally, to allow the flavors to meld.
    1 15oz Yellow Corn, 2 4oz Green Chiles (canned)
  5. Pour the smooth bean puree and the remaining 3 cups of chicken broth into the pot. Stir to combine the ingredients. Bring the mixture to a boil over medium-high heat. Once boiling, reduce the heat to low, cover the pot partially, and let it simmer gently for 10 minutes.
    1 8oz Cream Cheese
  6. Add the cream cheese to the pot and stir gently until it melts completely and is fully incorporated into the chili.
    2 ½ cups Chicken Breast
  7. Add the remaining cannellini beans and shredded chicken to the pot. Stir gently to combine all the ingredients. Cook for an additional 2 minutes to allow the flavors to meld and the chicken to warm through.
    1 Tbsp Lime Juice
  8. Take the pot off the heat. Stir in the chopped cilantro and lime juice, distributing them evenly throughout the chili. Ladle the chili into bowls and serve hot. Top with tortilla chips, shredded cheese, and diced avocado, if desired.
    2 Tbsp Fresh Cilantro

Nutrition

Serving: 12ozCalories: 152kcalCarbohydrates: 7gProtein: 19gFat: 6gSaturated Fat: 1gPolyunsaturated Fat: 1gMonounsaturated Fat: 4gTrans Fat: 0.01gCholesterol: 54mgSodium: 1944mgPotassium: 443mgFiber: 1gSugar: 2gVitamin A: 134IUVitamin C: 3mgCalcium: 38mgIron: 1mg

Notes

  • 1. Flavor Boosters:
    • Spice It Up: Don't be afraid to experiment with different chiles. Jalapeños, poblanos, or even a touch of chipotle powder can add a kick.
    • Aromatics are Key: Sautéing onions and garlic in oil or butter before adding other ingredients builds a flavorful foundation for your chili.
    • Toast the Spices: Toasting spices like cumin, coriander, and chili powder in a dry pan for a few minutes before adding them to the chili deepens their flavor.
    • Zest It Up: A squeeze of lime juice or a tablespoon of white wine vinegar added at the end brightens the flavors of the chili.
    • Umami Bomb: For an extra layer of savory depth, add a tablespoon or two of white miso paste to the chili.
    2. Chicken:
    • Bone-In, Skin-On for Flavor: Using bone-in, skin-on chicken thighs or breasts adds more flavor to the broth. Just be sure to remove the skin and bones before shredding the chicken.
    • Rotisserie Chicken Shortcut: For a quick and easy option, use a rotisserie chicken.
    • Don't Overcook: Overcooked chicken can be dry. Simmer the chicken until it's just cooked through, then shred it.
    3. Beans:
    • Variety is Key: Use a mix of white beans, such as cannellini, Great Northern, or navy beans, for a variety of textures and flavors.
    • Canned or Dried: Canned beans are convenient, but if you have time, cooking dried beans from scratch adds even more flavor.
    • Smooth Operator: For a creamier chili, puree a portion of the beans before adding them to the pot.
    4. Liquids:
    • Broth Matters: Use a good-quality chicken broth for the best flavor.
    • Adjust as Needed: If the chili becomes too thick, add more broth or water to thin it out.
    5. Toppings:
    • Garnish Generously: Toppings add texture and flavor. Consider shredded cheese, sour cream, avocado, chopped cilantro, tortilla strips, or a dollop of guacamole.
    • Fresh is Best: Freshly chopped cilantro and a squeeze of lime juice added just before serving brighten the flavors.
    Bonus Tip:
    • Slow Cooker Magic: White chicken chili is perfect for the slow cooker. Simply add all the ingredients to the slow cooker and cook on low for 6-8 hours, or until the chicken is cooked through.
    With these tips and tricks, you'll be creating bowls of white chicken chili that are both comforting and bursting with flavor! 

Tried this recipe?

Let us know how it was!

Related Recipes

Ingredients

Ingredients:

  • 2 (15.5-ounce) cans cannellini beans, drained and rinsed
  • 3 ½ cups chicken broth
  • 1 ½ tablespoons olive oil
  • 1 small yellow onion, chopped
  • 4 cloves garlic, minced
  • 2 teaspoons ground coriander
  • 1 ½ teaspoons ground cumin
  • 1 teaspoon chili powder
  • 1 teaspoon kosher salt
  • ½ teaspoon dried oregano
  • ½ teaspoon ground black pepper
  • 1 (15-ounce) can yellow corn, drained
  • 2 (4-ounce) cans chopped green chiles
  • 1 (8-ounce) package cream cheese, cut into small cubes
  • 2 ½ cups shredded cooked chicken breast
  • 2 tablespoons chopped cilantro
  • 1 tablespoon lime juice

Image Gallery White Chicken Chili

Storage & Leftovers

Storing Your Leftover White Chicken Chili:

  • Cool Down: Allow the chili to cool to room temperature before storing. This prevents condensation, which can water down the chili.
  • Proper Container: Use an airtight container to maintain freshness and prevent the chili from absorbing other flavors in your fridge.  
  • Refrigerator Storage: Store leftover white chicken chili in the refrigerator for up to 4 days.
  • Freezer-Friendly: You can freeze it for up to 3 months.  

Reheating Tips:

  • Thaw if Frozen: If frozen, thaw the chili in the refrigerator overnight or in a bowl of cold water. 
  • Stovetop Reheating: Reheat gently in a saucepan over medium-low heat, stirring occasionally. You might need to add a little chicken broth or water to thin it out. 
  • Microwave Reheating: Heat in short bursts, stirring between each burst, until warmed through.

Extra Tips for Chili Connoisseurs:

  • Cream Cheese Consideration: If you’ve frozen the chili, the cream cheese might separate slightly upon thawing. Just give it a good stir when reheating, and it should come back together.
  • Flavor Revival: When reheating, add a squeeze of fresh lime juice and a sprinkle of fresh cilantro to brighten the flavors.
  • Spice Adjustment: If you want to adjust the spice level when reheating, add more chili powder or a pinch of cayenne pepper for extra heat.

With these tips, you can enjoy your homemade white chicken chili even days after you’ve made it!

Please follow and like us:
onpost_follow
fb-share-icon197
Tweet120
Pinterest20
Share 20
submit to reddit

Subscribe for New Recipes

* indicates required

Intuit Mailchimp

Italian Meatball Soup

Italian Meatball Soup

Warm, hearty, and full of classic Italian flavor, this Italian Meatball Soup is the ultimate comfort food for chilly nights. Juicy, tender meatballs made with ground beef, Parmesan, breadcrumbs, and herbs are simmered in a rich tomato-based broth alongside pasta and vegetables, creating a soul-satisfying dish the whole family will love.

This one-pot wonder is as cozy as it is customizable. Use pasta shapes like conchiglie or ditalini for a satisfying bite, and toss in your favorite veggies—spinach, zucchini, or kale all work beautifully. It’s a perfect weeknight meal that tastes like it’s been simmering all day.

Whether you’re feeding a hungry family or craving a cozy bowl of homemade goodness, this Italian Meatball Soup delivers comfort by the spoonful.

Italian Meatball Soup

No ratings yet
Italian Meatball Soup is a comforting classic! Tender meatballs, a rich tomato broth, and your favorite pasta combine for a hearty and flavorful meal. It's easy to make and perfect for chilly evenings.
Prep Time 15 minutes
Cook Time 25 minutes
Servings: 6 People
Course: Appetizer, Dinner, Lunch, Main Course
Cuisine: Italian American
Calories: 692

Ingredients
  

Meatballs
  • 1 lb Ground Beef
  • 4 Cloves Garlic Minced
  • 2 Tbsp Parsley Chopped
  • 2 Tbsp Yellow Onion Grated
  • ½ Cup Italian Breadcrumbs
  • 1 Tbsp Tomato Paste
  • 1 Large Egg
  • 1 tsp Salt
  • ½ tsp Black Pepper
Soup
  • 2 Tbsp Olive Oil
  • ¾ Cup Yellow Onion Chopped
  • 4 Cloves Garlic Minced
  • 1 Tbsp Tomato Paste
  • 36 oz Marinara Sauce
  • ½ tsp Fennel Seeds Crushed
  • 1 Pinch Crushed Red Pepper Flakes
  • 32 oz Vegetable Broth or Chicken Broth
  • 8 oz Conchiglie Pasta
For Service
  • 1 Loaf Sourdough

Method
 

Making the meatballs
  1. In a medium-sized bowl, add the breadcrumbs, grated onions, parsley, garlic, egg, salt, and pepper. Do not add the ground beef yet. Use a fork to thoroughly mix the ingredients together until they are evenly distributed and well combined. This mixture will help to bind the meatballs and add flavor.
    4 Cloves Garlic, 2 Tbsp Parsley, 2 Tbsp Yellow Onion, 1/2 Cup Italian Breadcrumbs, 1 Large Egg, 1 tsp Salt, 1/2 tsp Black Pepper, 1 Tbsp Tomato Paste
  2. Add the ground beef to the bowl with the other meatball ingredients. Use your hands or a fork to gently incorporate the ground beef into the mixture. Be careful not to overwork the mixture, as this can make the meatballs tough. Mix just until the ground beef is evenly distributed throughout the other ingredients.
    1 lb Ground Beef
  3. Use a tablespoon or a cookie scoop to measure out the meatball mixture. Roll each portion between your palms to form meatballs that are about 1 inch in diameter. You should end up with approximately 30-32 meatballs. Place the shaped meatballs on a plate or baking sheet lined with parchment paper. This will prevent them from sticking. Set the meatballs aside while you prepare the sauce.
Cooking the meatballs
  1. Heat the olive oil in a large Dutch oven or pot over medium heat. Once the oil is hot, add half of the meatballs to the pot, making sure they are in a single layer and not overcrowded. Cook the meatballs, turning them occasionally with a spoon or tongs, until they are browned on all sides. This should take about 6 minutes. Don't worry if the meatballs aren't fully cooked through at this point; they will finish cooking later in the soup. Remove the browned meatballs from the pot and set them aside. Repeat the process with the remaining meatballs.
    2 Tbsp Olive Oil
  2. Once all the meatballs are browned, you can choose to drain off some of the excess grease from the pot. Carefully tilt the pot and use a spoon to remove most of the grease, leaving about 1 teaspoon of oil in the pot for flavor. If you're browning the meatballs in batches, repeat the browning process with the remaining meatballs. Add more oil to the pot if necessary. Set the cooked meatballs aside for now.
Build the soup
  1. Add the remaining olive oil to the pot and heat over medium heat. Once the oil is hot, add the chopped onions to the pot. Sauté the onions for about 5 minutes, stirring occasionally, until they become translucent and softened. Then, add the minced garlic to the pot. Cook the garlic for another 30 seconds, or until it becomes fragrant, being careful not to let it burn.
    ¾ Cup Yellow Onion, 4 Cloves Garlic
  2. Add the tomato paste to the pot with the onions and garlic. Stir in the red pepper flakes and the crushed fennel seeds, if you are using them. Sauté the mixture for about 30 seconds, stirring constantly, to allow the flavors of the tomato paste and spices to meld and intensify.
    1 Tbsp Tomato Paste, 1 Pinch Crushed Red Pepper Flakes, 1/2 tsp Fennel Seeds
  3. Now it's time to add the liquid to the pot. Pour in your favorite marinara sauce, the chicken broth, and 1 cup of water. Stir the mixture well to combine the flavors of the tomato paste, spices, and broth. Bring the mixture to a rolling boil over medium-high heat.
    36 oz Marinara Sauce, 32 oz Vegetable Broth
  4. It's time to reintroduce the meatballs! Carefully add the cooked meatballs back to the pot with the sauce and broth. Reduce the heat to medium and bring the mixture to a gentle simmer. Allow the meatballs to simmer in the sauce, which will allow them to finish cooking and absorb the flavors of the broth and spices.
  5. Add the pasta to the pot with the meatballs and sauce. Cook the pasta for 10-12 minutes, or until it is tender but still has a slight bite to it. Be sure to stir the soup occasionally to prevent the pasta from sticking to the bottom of the pot. If the soup seems too thick, you can add up to 1 cup of water to thin it out. If you do add water, make sure to bring the soup back to a boil to ensure that the pasta is cooked through.
    8 oz Conchiglie Pasta
  6. Taste the soup and season it to your liking with salt and pepper. You may also want to add a pinch of red pepper flakes for a touch of heat. Ladle the soup into bowls and garnish with a sprinkle of fresh parsley for a touch of color and freshness. Serve the soup hot with slices of crusty bread on the side. The bread is perfect for dipping into the flavorful broth and soaking up all the delicious flavors.
    1 Loaf Sourdough

Nutrition

Serving: 10ozCalories: 692kcalCarbohydrates: 99gProtein: 35gFat: 16gSaturated Fat: 4gPolyunsaturated Fat: 2gMonounsaturated Fat: 6gTrans Fat: 0.3gCholesterol: 78mgSodium: 2551mgPotassium: 1129mgFiber: 10gSugar: 20gVitamin A: 1621IUVitamin C: 14mgCalcium: 150mgIron: 7mg

Notes

Ingredients:
  • Meatballs: Use a combination of ground beef, pork, or veal for the meatballs. You can also use ground turkey or chicken for a leaner option.
  • Breadcrumbs: Use fresh breadcrumbs for the best texture. You can also use dried breadcrumbs, but make sure to soak them in milk or water before adding them to the meatball mixture.
  • Cheese: Parmesan cheese adds a salty and savory flavor to the meatballs. You can also use other grated cheeses, such as Pecorino Romano or Asiago.
  • Seasonings: Italian seasoning, garlic powder, onion powder, salt, and pepper are essential for flavoring the meatballs. You can also add other herbs and spices, such as oregano, basil, or red pepper flakes.
  • Broth: Use a good quality chicken or beef broth. You can also use vegetable broth for a vegetarian option.
  • Pasta: Small pasta shapes like conchiglie (shells), ditalini, or orzo work well in this soup.
  • Vegetables: You can add a variety of vegetables to the soup, such as onions, carrots, celery, spinach, kale, or zucchini.
Cooking Tips:
  • Don't Overmix the Meatballs: When mixing the meatball ingredients, be careful not to overmix. This can make the meatballs tough.
  • Brown the Meatballs: Browning the meatballs before adding them to the soup adds flavor and helps them hold their shape.
  • Simmer Gently: Simmer the soup gently to prevent the meatballs from falling apart.
  • Cook Pasta Separately: Cook the pasta separately and add it to the soup at the end. This will prevent the pasta from becoming mushy.
  • Adjust Consistency: If the soup is too thick, add more broth or water. If it's too thin, simmer it uncovered for a few minutes to reduce the liquid.
  • Taste and Adjust: Taste the soup before serving and adjust the seasonings as needed.
Serving Suggestions:
  • Garnish: Garnish with fresh parsley, grated Parmesan cheese, or a drizzle of olive oil.
  • Sides: Serve with crusty bread or a side salad for a complete meal.
Variations:
  • Spicy: Add a pinch of red pepper flakes to the meatballs or the soup for heat.
  • Vegetarian: Use a plant-based meat substitute for the meatballs and vegetable broth for the soup.
  • Beans: Add a can of drained and rinsed cannellini beans or chickpeas to the soup for extra protein and fiber.
With these tips, you'll be able to create a delicious and satisfying Italian Meatball Soup that's perfect for any occasion!

Tried this recipe?

Let us know how it was!

Related Recipes

Ingredients

Ingredients:

  • For the Meatballs:

    • 1 lb ground beef
    • 4 cloves garlic, minced
    • 2 tablespoons parsley, chopped
    • 2 tablespoons yellow onion, grated
    • ½ cup Italian breadcrumbs
    • 1 tablespoon tomato paste
    • 1 large egg
    • 1 teaspoon salt
    • ½ teaspoon black pepper
  • For the Soup:

    • 2 tablespoons olive oil
    • ¾ cup yellow onion, chopped
    • 4 cloves garlic, minced
    • 1 tablespoon tomato paste
    • 36 oz marinara sauce
    • ½ teaspoon fennel seeds, crushed
    • 1 pinch red pepper flakes
    • 32 oz vegetable broth or chicken broth
    • 8 oz conchiglie pasta (or other small pasta)
  • For Serving:

    • 1 loaf sourdough bread

Image Gallery Italian Meatball Soup

Storage & Leftovers

Storing:

  • Cool Down: Allow the soup to cool completely before storing. This helps prevent condensation and bacterial growth.
  • Airtight Container: Transfer the cooled soup to an airtight container or a freezer-safe bag.
  • Refrigerate: Store the container in the refrigerator for up to 3-4 days.  
  • Freeze: For longer storage, you can freeze the soup for up to 2-3 months. 

Reheating:

  • Stovetop: Reheat the soup gently in a saucepan over medium heat, stirring occasionally, until heated through.
  • Microwave: If using the microwave, reheat in short bursts, stirring in between, to prevent overheating and ensure even heating.

Tips for Best Quality:

  • Separate Pasta: If you added pasta to the soup, it’s best to store it separately from the broth and meatballs. This will prevent the pasta from becoming mushy when reheated.
  • Add Fresh Herbs: When reheating, add a sprinkle of fresh parsley or other herbs to brighten the flavors.
  • Adjust Consistency: If the soup has thickened after refrigeration, you can add a little broth or water to thin it out when reheating.

Using Leftovers:

  • Meatball Sandwiches: Use leftover meatballs to make meatball sandwiches. 
  • Pasta Sauce: Use the leftover soup as a base for a pasta sauce. 
  • Stuffed Peppers: Stuff bell peppers with the meatball mixture and bake.  

By following these tips, you can ensure that your Italian Meatball Soup stays delicious and satisfying, even as leftovers!

Please follow and like us:
onpost_follow
fb-share-icon197
Tweet120
Pinterest20
Share 20
submit to reddit


Subscribe for New Recipes

* indicates required

Intuit Mailchimp

Shrimp & Sausage Gumbo

Shrimp & Sausage Gumbo

This Shrimp & Sausage Gumbo is a bold, soul-satisfying Southern classic that brings the rich flavors of Louisiana straight to your kitchen. Smoky andouille sausage, tender shrimp, and the “holy trinity” of Cajun cooking—onion, celery, and bell pepper—are simmered in a deeply flavorful, slow-cooked roux-based broth.

Seasoned with Cajun spices and served over a bed of fluffy white rice, this gumbo is hearty, comforting, and loaded with authentic Creole flavor. Whether you’re serving it up for Sunday supper, game day, or a cozy night in, it’s the kind of dish that gets better with every bite—and even better the next day.

Customizable, freezer-friendly, and guaranteed to impress, this Shrimp & Sausage Gumbo is a must-make for anyone craving real Southern comfort.

Shrimp & Sausage Gumbo

No ratings yet
Shrimp & Sausage Gumbo is a flavorful and hearty dish that embodies the vibrant flavors of Louisiana Cajun cuisine. This comforting stew features tender shrimp, savory sausage, a rich and flavorful broth, and the "holy trinity" of vegetables (onions, celery, and bell peppers). It's a delicious and satisfying meal that's perfect for a chilly evening or a Mardi Gras celebration.
Prep Time 20 minutes
Cook Time 1 hour
Servings: 4 people
Course: Dinner, Main Course
Cuisine: American, Cajun, Creole
Calories: 590

Ingredients
  

  • 4 Tbsp Unsalted Butter
  • ¼ Cup All-Purpose Flour
  • 1 Small Yellow Onion
  • 1 Medium Green Bell Pepper Seeds and ribs removed, chopped.
  • 1 Stalks Celery Finely Sliced
  • 12 oz Andouille sausage Sliced into 1/2 inch rounds
  • 2 Cloves Garlic Finely chopped
  • 1 tbsp Cajun seasoning Without salt
  • 1 pinch Kosher Salt To taste
  • 1 pinch Black Pepper to taste
  • 4 Cup Chicken Broth Low Sodium
  •  
    15 oz Diced Tomatoes Fire Roasted
  • 1 Bay Leaf
  • 1 lb Medium shrimp 26/30 or 31/40 is the size for medium. Peeled & deviened.
  • 3 Scallions Sliced for serving.
Optional
  • 1 White rice Pre-Cooked for serving.

Method
 

  1. The foundation of any great gumbo is the roux. In a large skillet, melt butter over medium heat. Whisk in flour and cook for 12-15 minutes, stirring constantly, until the mixture turns a deep, dark caramel color. This will give your gumbo a rich, complex flavor.
    4 Tbsp Unsalted Butter, ¼ Cup All-Purpose Flour
  2. Add the chopped onions, bell peppers, and celery to the pot. These three vegetables are known as the "holy trinity" in Cajun and Creole cooking, and they form the flavor base of many dishes. Cook the vegetables, stirring occasionally, until they are softened and fragrant. Then, add the sliced sausage to the pot. Cook until the sausage is browned, then stir in the minced garlic, Cajun seasoning, and a pinch of salt and pepper.
    1 Small Yellow Onion, 1 Medium Green Bell Pepper, 1 Stalks Celery, 12 oz Andouille sausage, 2 Cloves Garlic, 1 tbsp Cajun seasoning, 1 pinch Kosher Salt, 1 pinch Black Pepper
  3. Pour the chicken broth and the diced tomatoes into the pot with the vegetables and sausage. Add a bay leaf for an extra layer of flavor. Stir the mixture well to combine all the ingredients. Bring the mixture to a boil over medium-high heat. Once boiling, reduce the heat to low and simmer the gumbo uncovered for about an hour, stirring occasionally. This simmering process allows the flavors to meld and deepen, and the gumbo will thicken slightly as it simmers.
    4 Cup Chicken Broth, 15 oz Diced Tomatoes, 1 Bay Leaf
  4. In the final 6 minutes of cooking, add the shrimp to the pot. Stir gently to distribute the shrimp throughout the gumbo. Cook until the shrimp turn pink and are opaque throughout, about 6 minutes. Be careful not to overcook the shrimp, as they can become tough and rubbery. Taste the gumbo and adjust the seasonings if needed. You may want to add more salt, pepper, or hot sauce to your liking.
    1 lb Medium shrimp, 3 Scallions
  5. Stir most of the chopped scallions into the gumbo, reserving a small amount for garnish. Divide the cooked white rice among serving bowls. Ladle the flavorful gumbo over the rice, making sure to include plenty of shrimp and sausage in each serving. Top each bowl with the remaining chopped scallions. This will add a pop of color and a fresh onion flavor to the dish. Serve the gumbo immediately while it's hot.
    1 White rice, 3 Scallions

Nutrition

Serving: 12ozCalories: 590kcalCarbohydrates: 21gProtein: 46gFat: 37gSaturated Fat: 15gPolyunsaturated Fat: 5gMonounsaturated Fat: 14gTrans Fat: 1gCholesterol: 286mgSodium: 1096mgPotassium: 983mgFiber: 3gSugar: 6gVitamin A: 1919IUVitamin C: 30mgCalcium: 151mgIron: 4mg

Notes

Ingredients:
  • Shrimp: Use fresh or frozen shrimp, peeled and deveined. If using frozen, thaw completely before adding to the gumbo.
  • Sausage: Andouille sausage is traditional, but you can use other smoked sausages like kielbasa or chorizo.
  • Roux: The roux is the foundation of gumbo. It's made with butter and flour cooked until a deep brown color.
  • Vegetables: The "holy trinity" of Cajun cooking—onions, bell peppers, and celery—is essential for flavor.
  • Broth: Use a good quality chicken or seafood broth.
  • Tomatoes: Diced tomatoes add acidity and sweetness to the gumbo.
  • Seasonings: Cajun seasoning is a must, along with salt, pepper, and a bay leaf.
  • Rice: Serve the gumbo over cooked white rice.
Cooking Tips:
  • Make the Roux: Cook the roux slowly and stir constantly to prevent burning. The darker the roux, the deeper the flavor of the gumbo.
  • Don't Overcrowd the Pot: When sautéing the vegetables and sausage, avoid overcrowding the pot. This will ensure that they cook evenly and brown properly.
  • Simmer Gently: Simmer the gumbo gently to allow the flavors to meld and the sauce to thicken.
  • Add Shrimp Last: Add the shrimp towards the end of the cooking time to prevent overcooking.
  • Adjust Seasonings: Taste the gumbo before serving and adjust the seasonings as needed.
Serving Suggestions:
  • Garnish: Garnish with chopped scallions or fresh parsley.
  • Sides: Serve with crusty bread or potato salad.
  • Hot Sauce: Offer hot sauce on the side for those who like extra heat.
Variations:
  • Chicken and Sausage Gumbo: Add cooked chicken to the gumbo along with the sausage.
  • Seafood Gumbo: Use a variety of seafood, such as crab, oysters, or fish.
  • Vegetarian Gumbo: Omit the sausage and use vegetable broth. Add okra for thickening.
With these tips, you'll be able to create a delicious and authentic Shrimp & Sausage Gumbo that will transport your taste buds to Louisiana!

Tried this recipe?

Let us know how it was!

Related Recipes

Ingredients

  • For the Roux:

    • 4 tablespoons unsalted butter
    • ¼ cup all-purpose flour
  • For the Gumbo:

    • 1 small yellow onion, chopped
    • 1 medium green bell pepper, seeds and ribs removed, chopped
    • 1 stalk celery, finely sliced
    • 12 oz andouille sausage, sliced into ½-inch rounds
    • 2 cloves garlic, finely chopped
    • 1 tablespoon Cajun seasoning (without salt)
    • Pinch of kosher salt, to taste
    • Pinch of black pepper, to taste
    • 4 cups low-sodium chicken broth
    • 1 (15 oz) can fire-roasted diced tomatoes
    • 1 bay leaf
    • 1 lb medium shrimp (26/30 or 31/40 count), peeled and deveined
    • 3 scallions, sliced for serving
  • Optional:

    • Cooked white rice, for serving

Image Gallery Shrimp & Sausage Gumbo

Storage & Leftovers

🧊 Storage:

  • Let the gumbo cool completely before storing.

  • Transfer to an airtight container and refrigerate for up to 4 days.

  • Store rice separately if possible to prevent it from soaking up too much broth.

🔥 Reheating:

  • Reheat gently on the stovetop over medium heat, stirring occasionally.

  • You can also microwave in short bursts, stirring between intervals, until heated through.

  • Add a splash of broth or water if the gumbo thickens too much in the fridge.

❄️ Freezing:

  • Gumbo freezes very well!

  • Freeze in individual portions or larger batches (minus the rice) for up to 3 months.

  • Thaw overnight in the fridge, then reheat on the stovetop.

💡 Pro Tip:
If using shrimp, try to undercook them slightly before freezing—this prevents overcooking when reheating.

Please follow and like us:
onpost_follow
fb-share-icon197
Tweet120
Pinterest20
Share 20
submit to reddit

Subscribe for New Recipes

* indicates required

Intuit Mailchimp

Honey Garlic Shrimp

Honey Garlic Shrimp

Sweet, savory, and ready in minutes, this Honey Garlic Shrimp is a flavor-packed dish that’s perfect for busy weeknights or quick entertaining. Tender shrimp are coated in a sticky glaze made from honey, garlic, soy sauce, and a hint of ginger—creating the perfect balance of sweet and salty with just a touch of heat.

Served over rice, noodles, or a bed of sautéed veggies, this shrimp recipe is incredibly versatile and cooks in under 15 minutes. It’s light, vibrant, and loaded with flavor, making it a go-to favorite for fast, delicious meals.

Whether you’re looking for an easy dinner or a showstopping appetizer, this Honey Garlic Shrimp delivers big taste with minimal effort.

Honey Garlic Shrimp

No ratings yet
This recipe creates a delicious Honey Garlic Shrimp dish in just a few steps. Shrimp are coated in a flavorful sauce made with honey, garlic, soy sauce, and other seasonings. It's a quick and easy meal that's perfect for any night!
Prep Time 10 minutes
Cook Time 15 minutes
Total Time 1 day
Servings: 4 people
Course: Appetizer, Dinner, Main Course
Cuisine: Asian American, Asian American Fusion
Calories: 199

Ingredients
  

  •  
    Cup Honey
  • ¼ Cup Soy Sauce Reduced Sodium is preferred.
  • 2 Cloves Garlic Minced
  •  
    1 tsp Ginger Minced fresh.
  •  
    1 Lb Raw shrimp Large Peeled & Deveined
  • 2 tsp Olive Oil
Optional
  • 1 Bunch Scallions Chopped for Garnish

Method
 

Make the Marinade
  1. Whisk together honey, soy sauce, garlic, and optional ginger for a double-duty sauce - half for marinating, half for cooking.
    ⅓ Cup Honey, ¼ Cup Soy Sauce, 2 Cloves Garlic, 1 tsp Ginger
Marinate the Shrimp
  1. Marinate your shrimp in half the sauce for 15 minutes to 12 hours (longer for deeper flavor).
    1 Lb Raw shrimp
Cook the Shrimp
  1. Heat oil, sear the shrimp, then add the remaining sauce and cook until pink and delicious.
    2 tsp Olive Oil
  2. Plate your shrimp with the cooked sauce, garnish with green onions, and savor it over rice and veggies.
    1 Bunch Scallions

Nutrition

Serving: 8ozCalories: 199kcalCarbohydrates: 26gProtein: 17gFat: 3gSaturated Fat: 0.4gPolyunsaturated Fat: 0.4gMonounsaturated Fat: 2gTrans Fat: 0.01gCholesterol: 143mgSodium: 1466mgPotassium: 199mgFiber: 0.4gSugar: 24gVitamin A: 264IUVitamin C: 2mgCalcium: 73mgIron: 1mg

Notes

Ingredients:
  • Shrimp: Choose large, high-quality shrimp for the best flavor and texture.
  • Garlic: Freshly minced garlic is key for the best flavor.
  • Honey: Use a good-quality honey for the best flavor.
  • Soy Sauce: Use low-sodium soy sauce to control the saltiness.
  • Optional additions: Ginger, red pepper flakes, and sesame oil can add extra depth and complexity to the dish.
Preparation:
  • Develop the best flavor: Marinate the shrimp in a mixture of honey, soy sauce, garlic, and any optional ingredients for at least 15-20 minutes. This allows the shrimp to absorb the flavors and become more tender.
  • Don't overcrowd the pan: When cooking the shrimp, make sure not to overcrowd the pan. This will ensure that they cook evenly and develop a nice sear.
  • Cook shrimp properly: Shrimp cook quickly, so don't overcook them. They should be pink and opaque when done.
  • Reduce the sauce: Allow the sauce to simmer and reduce slightly to concentrate the flavors and create a glaze.
Serving:
  • Garnish: Garnish with chopped green onions or sesame seeds for added flavor and visual appeal.
  • Serve with: Serve the honey garlic shrimp over rice, noodles, or with your favorite sides.
Other Tips:
  • Devein the shrimp: If your shrimp hasn't been deveined, use a small knife to make a shallow cut along the back of the shrimp and remove the dark vein.
  • Adjust the sweetness: If you prefer a less sweet dish, reduce the amount of honey in the recipe.
  • Add some heat: For a spicy kick, add a pinch of red pepper flakes or a dash of your favorite hot sauce to the marinade or sauce.
By following these tips, you'll be able to create a delicious and flavorful Honey Garlic Shrimp dish that's sure to impress!

Tried this recipe?

Let us know how it was!

Related Recipes

Ingredients

  • 1 pound large shrimp, peeled and deveined
  • 1/3 cup honey
  • 1/4 cup reduced-sodium soy sauce
  • 2 cloves garlic, minced
  • 1 teaspoon fresh ginger, minced
  • 2 teaspoons olive oil
  • Optional: 1 bunch scallions, chopped for garnish

Image Gallery Honey Garlic Shrimp

Storage & Leftovers

🧊 Storage:

  • Let the shrimp cool completely before storing.

  • Place in an airtight container and refrigerate for up to 3 days.

  • Store any leftover sauce separately if possible to preserve flavor and texture.

🔥 Reheating:

  • Reheat shrimp gently in a skillet over low heat for best texture.

  • You can also microwave in short 30-second bursts, stirring between each, to avoid overcooking.

  • Add a splash of water or soy sauce to loosen the glaze if it thickened in the fridge.

⚠️ Avoid Overheating:

  • Shrimp can become rubbery if reheated too aggressively. Low and slow is best.

❄️ Freezing:

  • Not recommended. Cooked shrimp can become tough and the sauce may separate when thawed.

💡 Pro Tip:
Revive leftovers by tossing with fresh steamed rice or stir-fried veggies for a fast second-day meal.

Please follow and like us:
onpost_follow
fb-share-icon197
Tweet120
Pinterest20
Share 20
submit to reddit

Subscribe for New Recipes

* indicates required

Intuit Mailchimp