Garlic Tuscan Chicken

Garlic Tuscan Chicken

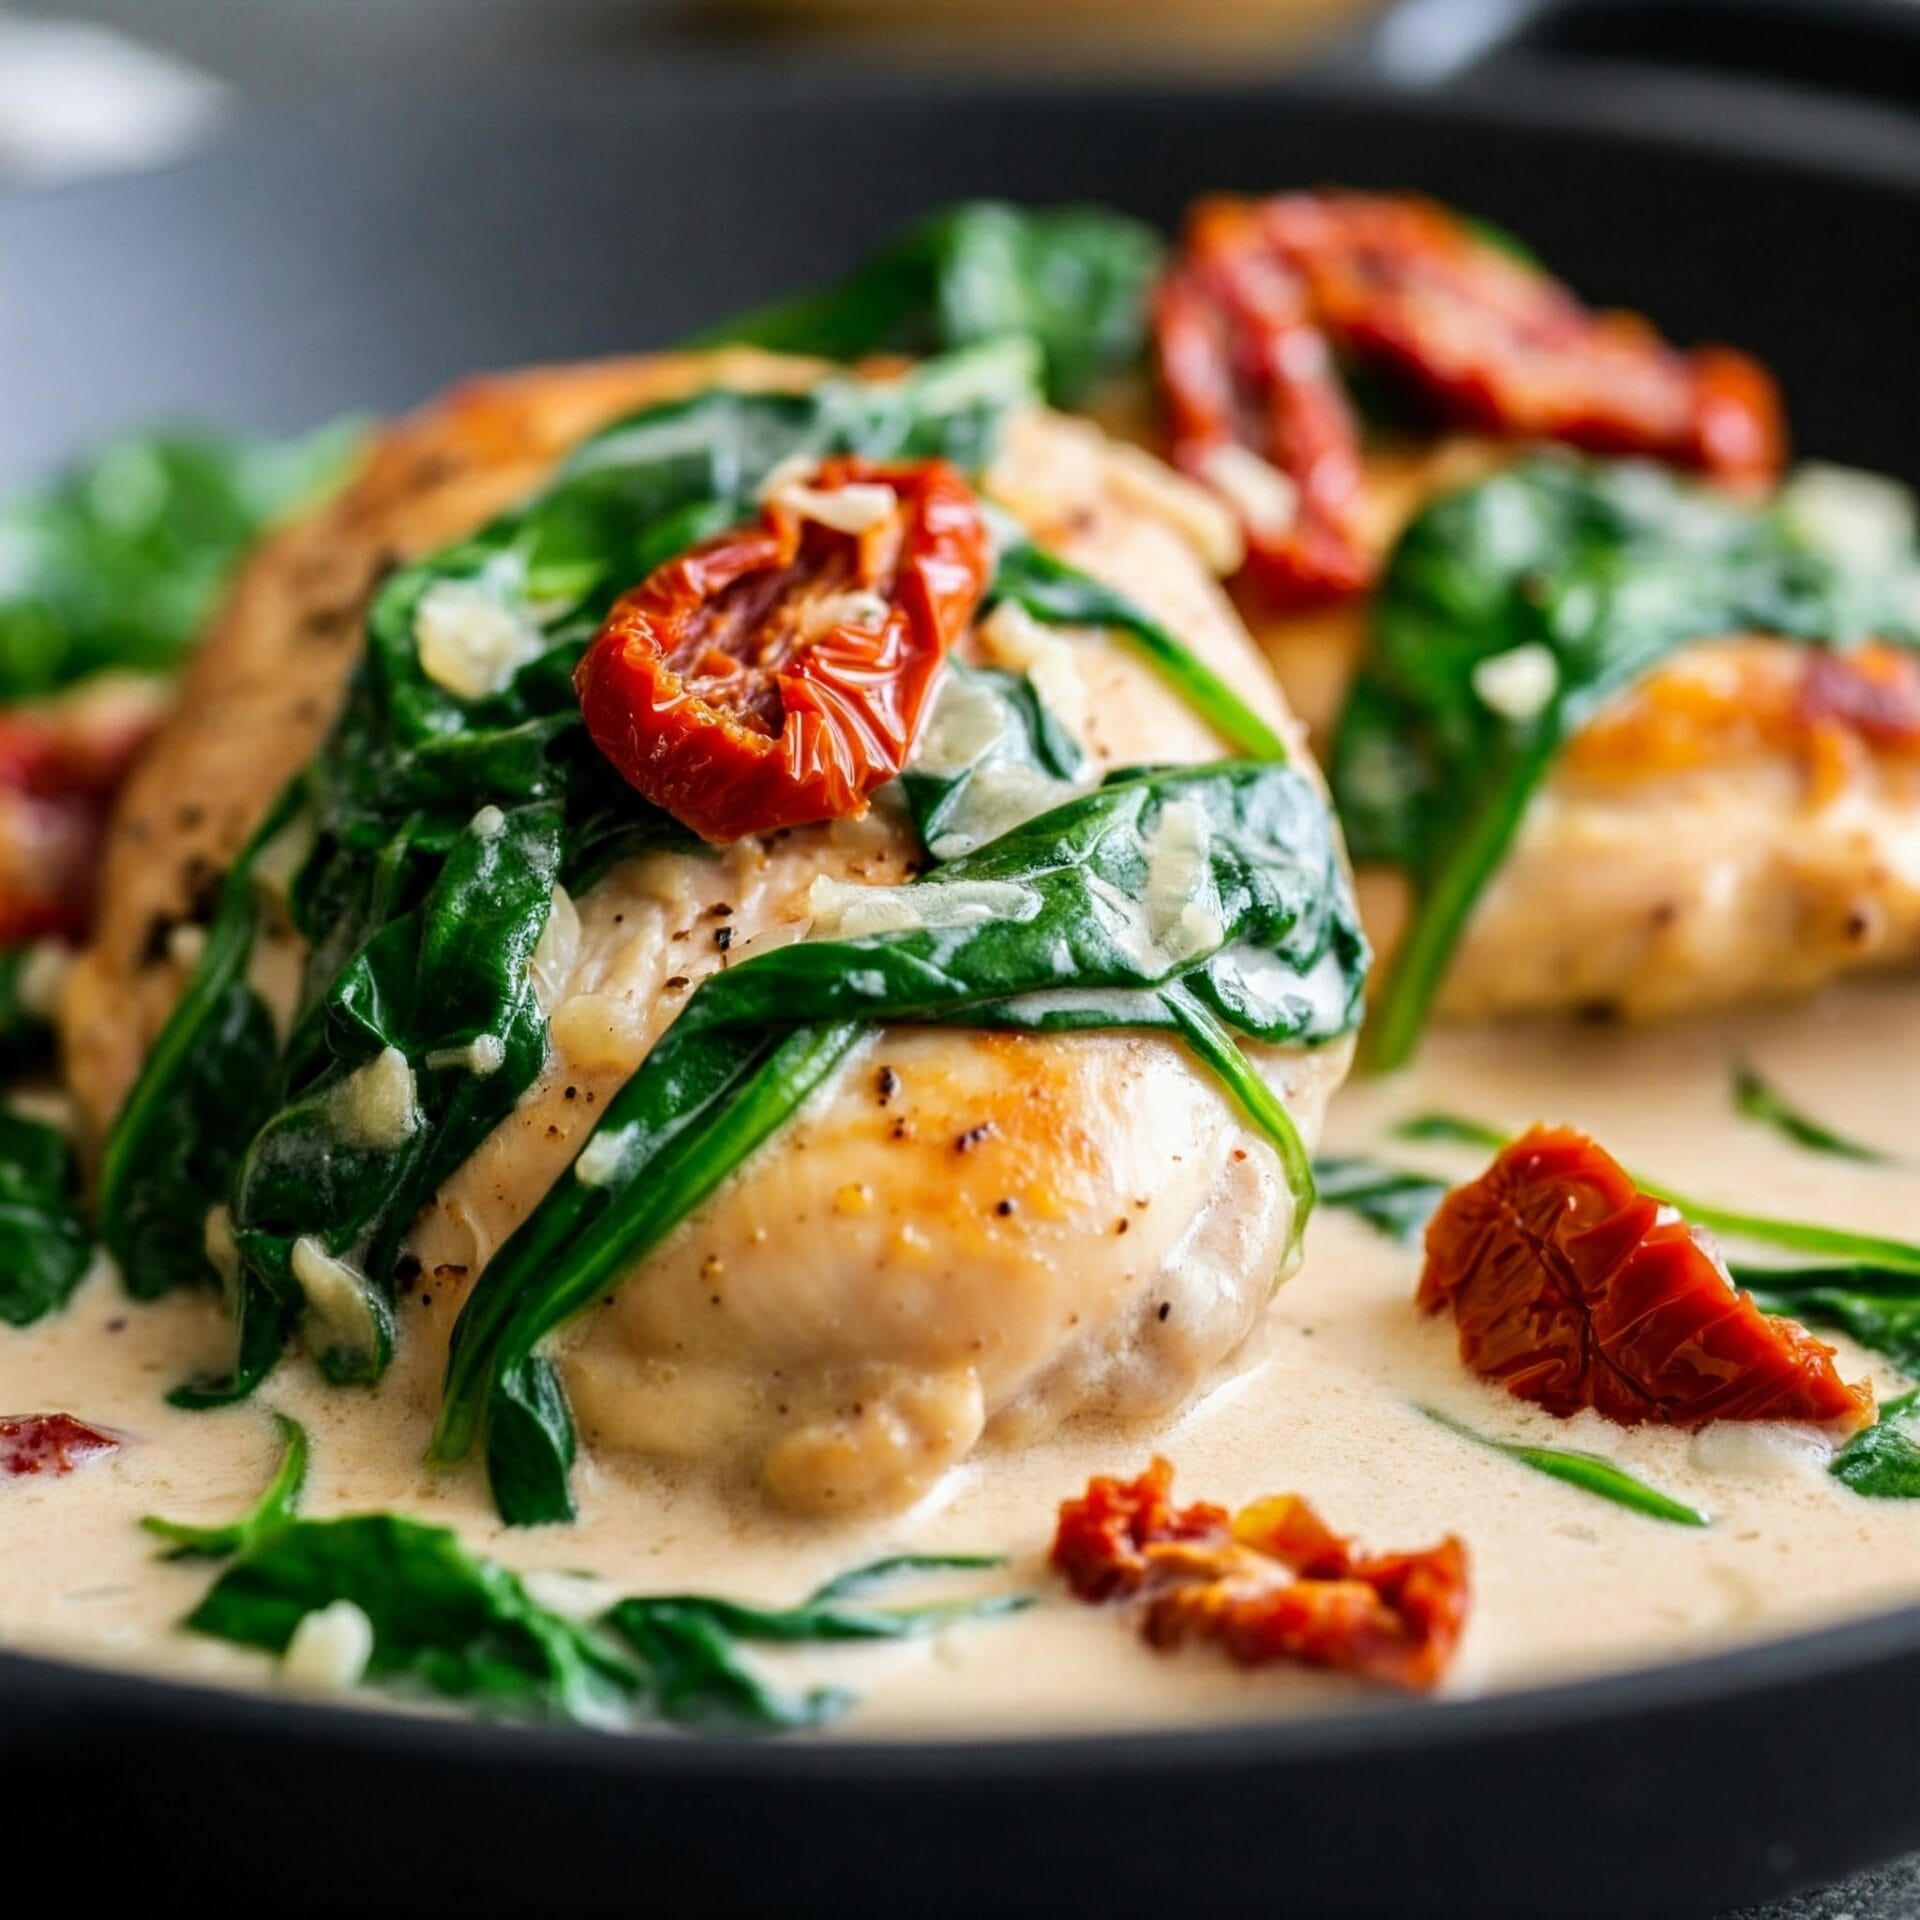
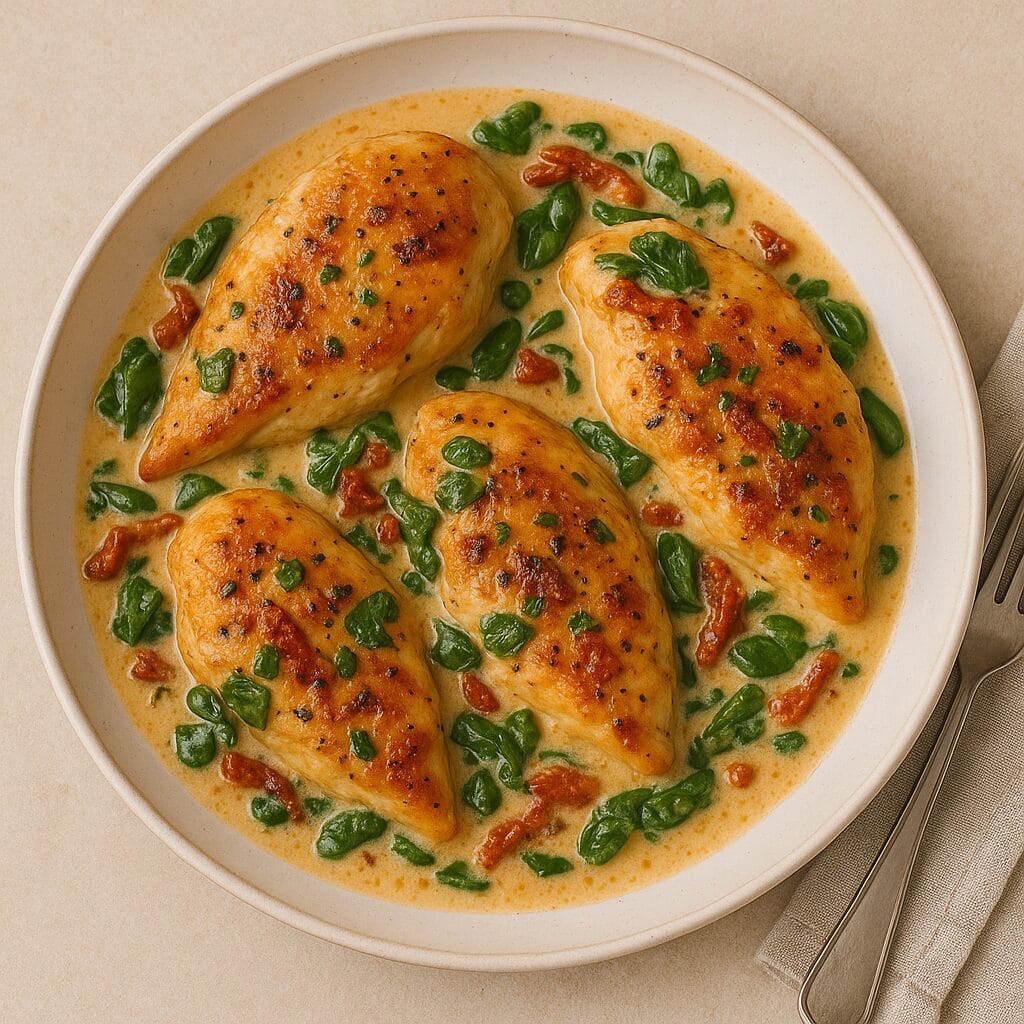
Creamy, garlicky, and packed with bold Italian flavor—this Garlic Tuscan Chicken is pure comfort in every bite. Tender, pan-seared chicken breasts are smothered in a luscious parmesan cream sauce infused with garlic, sun-dried tomatoes, and fresh spinach. It’s the kind of dish that feels fancy enough for a dinner party but comes together easily on a weeknight. Serve it over pasta, mashed potatoes, or crusty bread to soak up every last drop of that dreamy sauce.

Garlic Tuscan Chicken

5 from 1 vote
Embark on a culinary adventure to Tuscany with this exquisite Garlic Tuscan Chicken dish! Imagine tender, juicy chicken breasts enveloped in a luscious, creamy sauce infused with the aromatic flavors of garlic, spinach, and sun-dried tomatoes. Each bite is a delightful symphony of textures and tastes, combining the savory chicken with the richness of the sauce and the vibrant vegetables. This dish is a culinary masterpiece that will transport your taste buds to the heart of Italy.
Prep Time 12 minutes
Cook Time 15 minutes
Servings: 4 people
Course: Main Course
Cuisine: American, Italian American
Calories: 2206

Ingredients
  

  • 2 Tbsp Olive Oil
  • lbs Chicken Breast skinless, boneless. sliced thin
  • 1 Cup Heavy Cream
  • ½ Cup Chicken Broth
  • ½ Cup Parmesan Cheese
  • 1 tsp Garlic Powder
  • 1 tsp Italian Seasoning
  • 1 Cup Spinach chopped. fresh is preferred
  •  
    ½ Cup Sun-Dried Tomatoes in Oil

Method
 

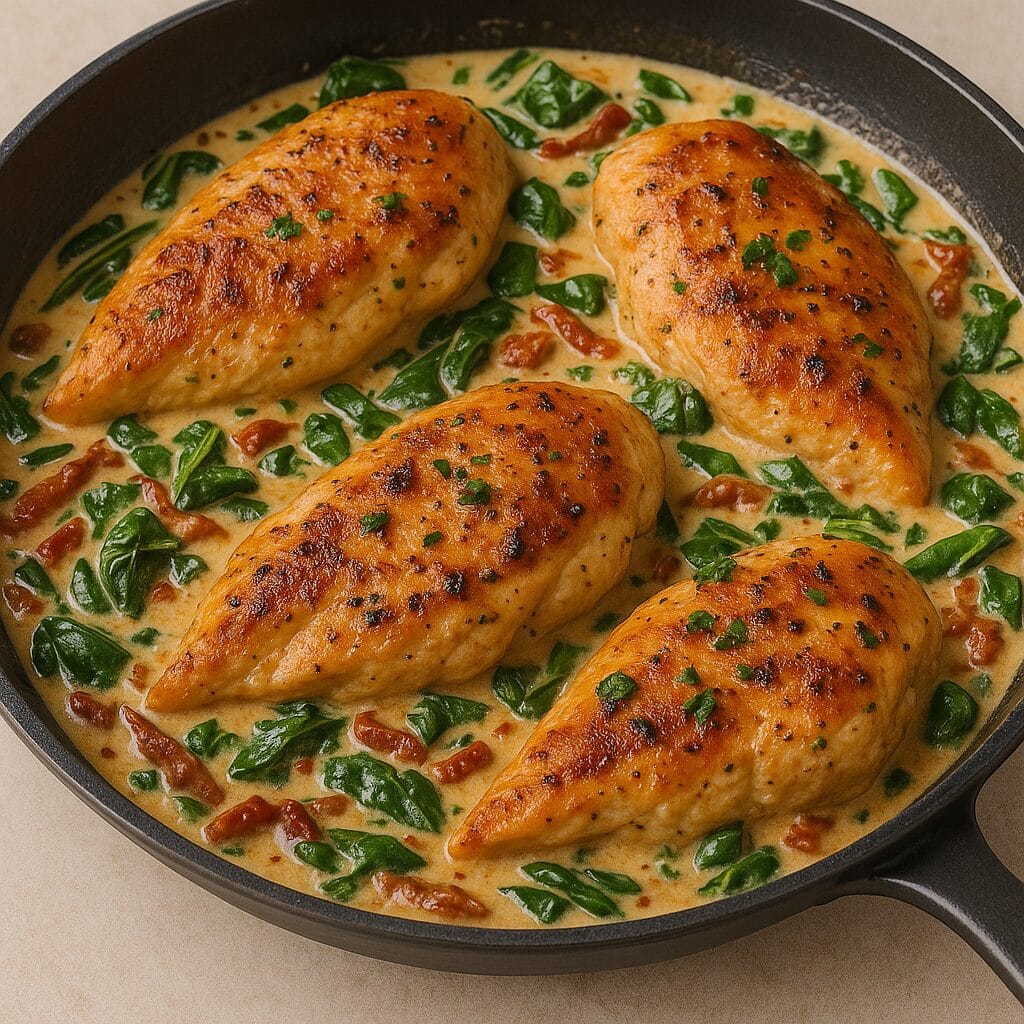
  1. Heat the olive oil in a large skillet over medium-high heat. Cook the chicken until it's golden brown on the outside and cooked through, about 3 to 5 minutes per side. Make sure the juices run clear when you pierce the chicken with a fork. Remove the chicken and set it aside.
    1½ lbs Chicken Breast, 2 Tbsp Olive Oil
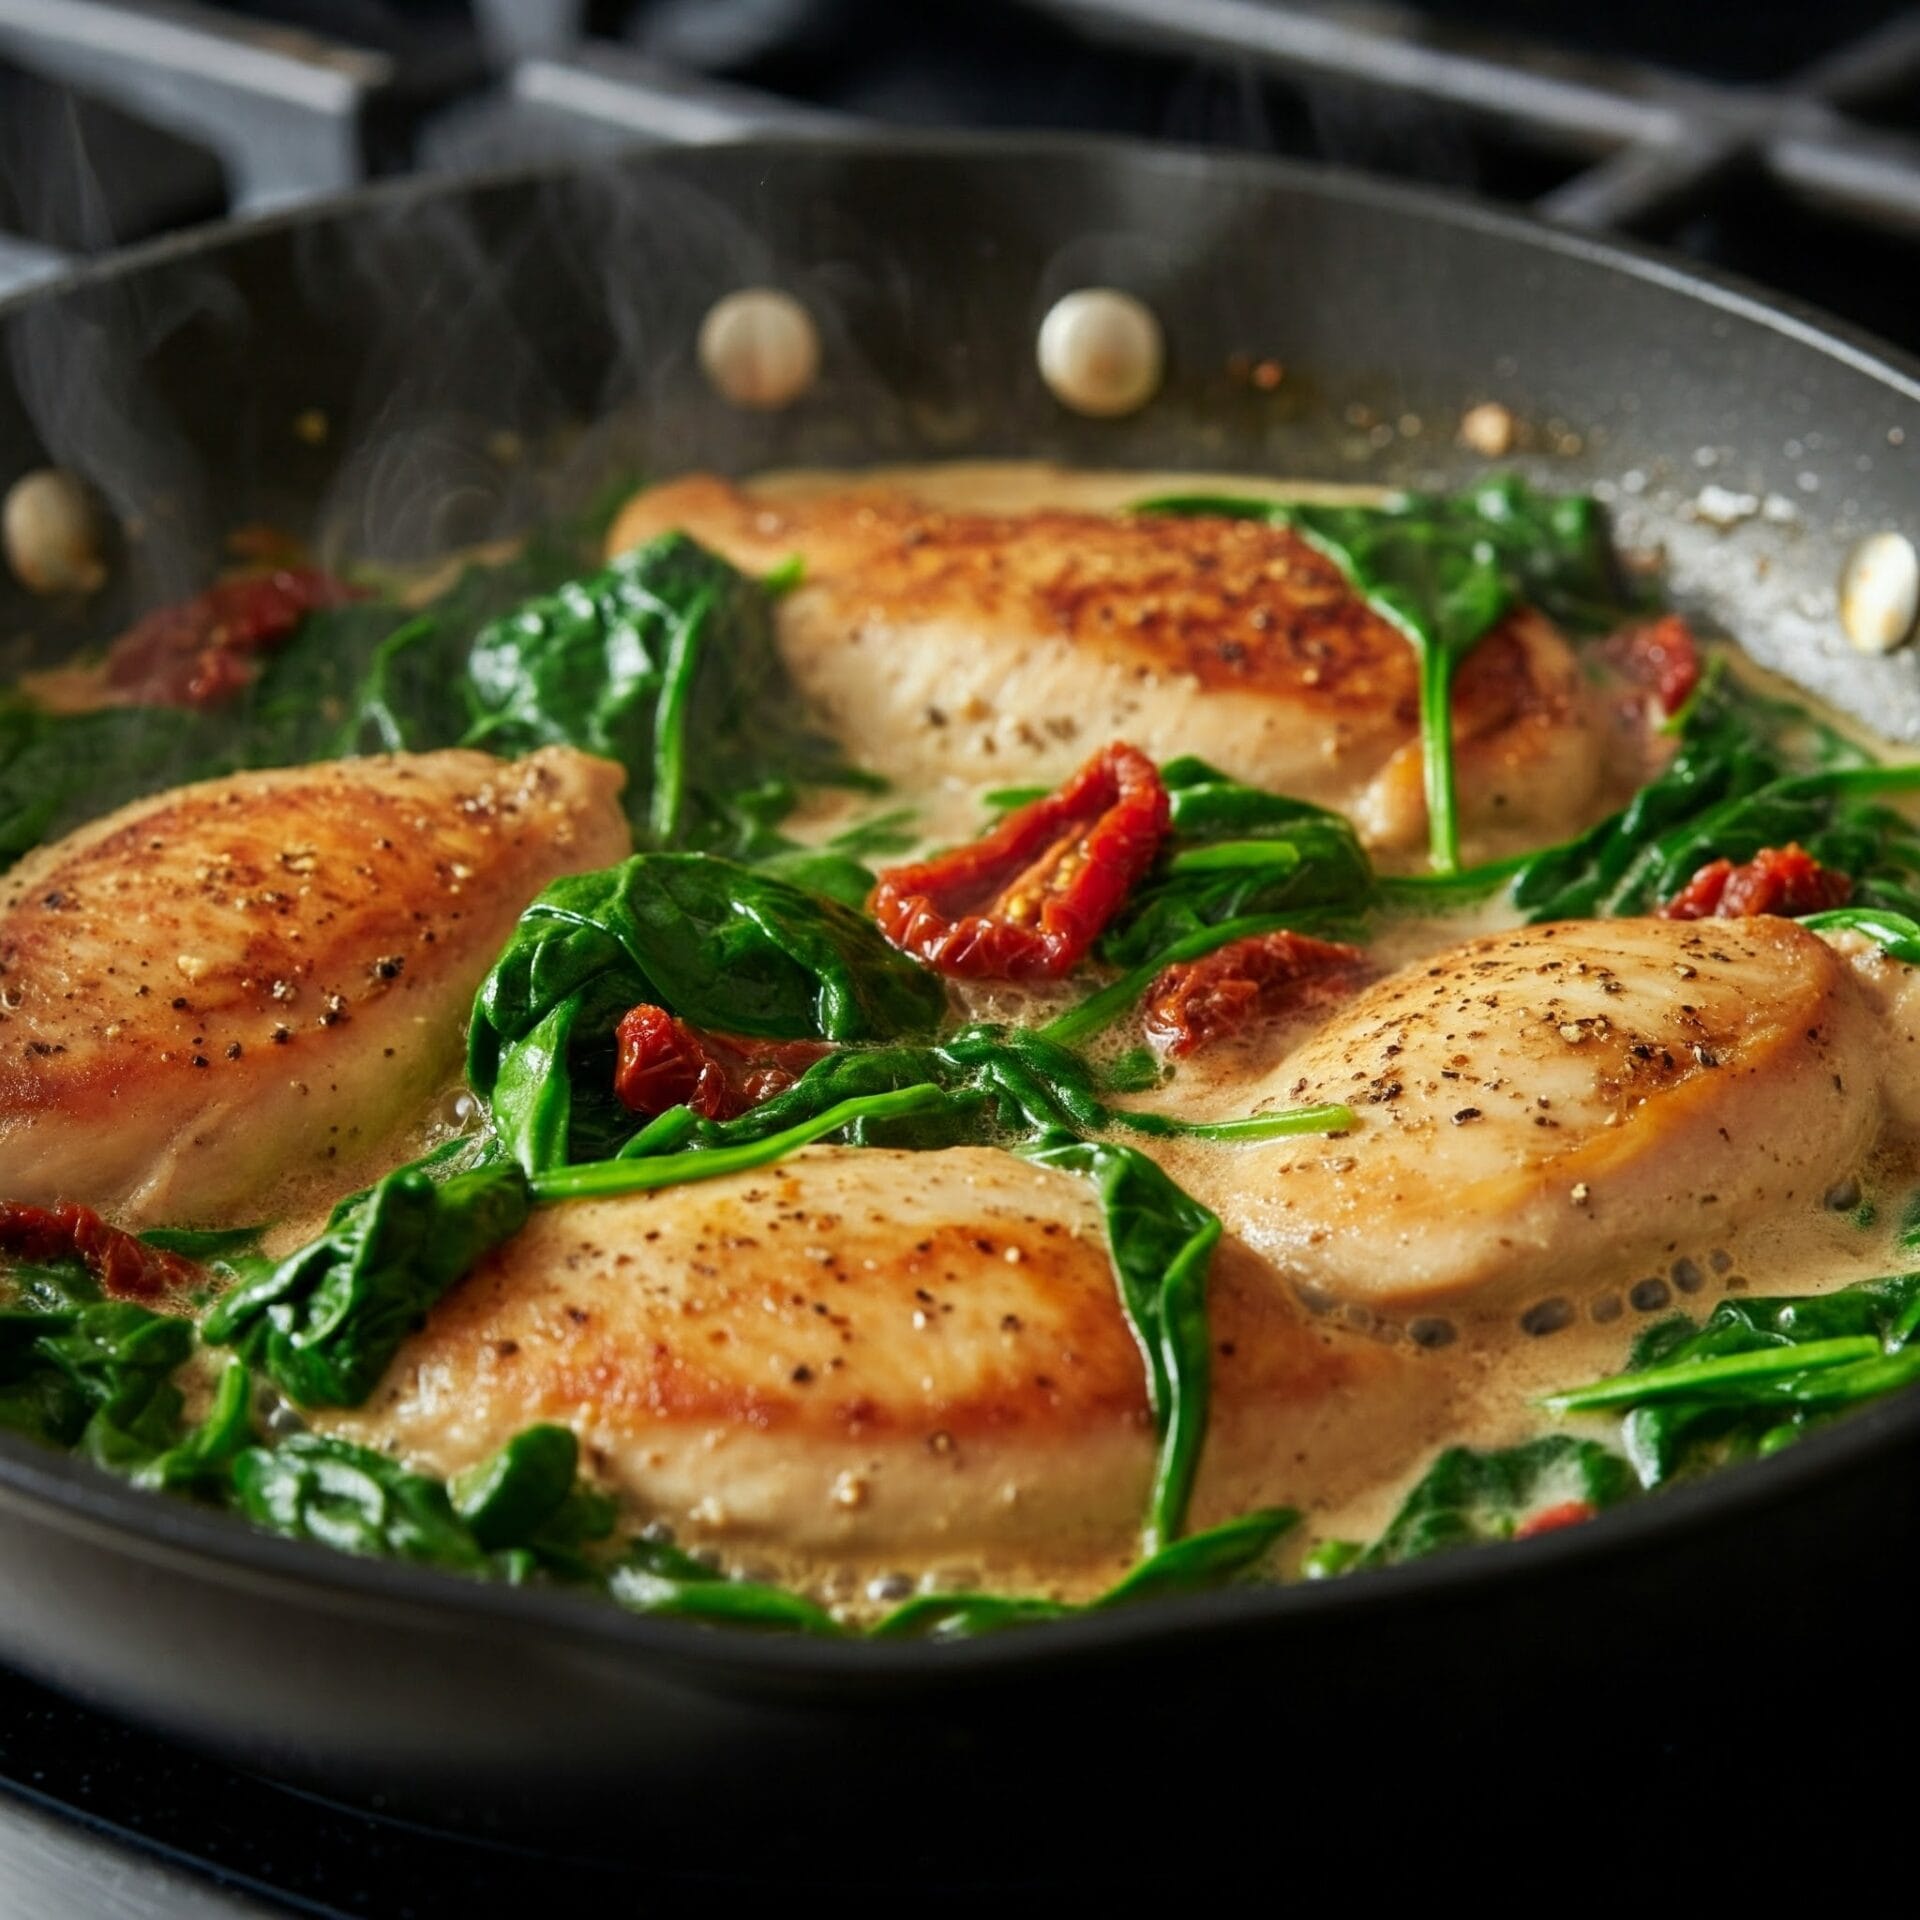
  2. It's time to build the sauce! Add the heavy cream, chicken broth, Parmesan cheese, garlic powder, and Italian seasoning to the skillet. Whisk the sauce constantly over medium-high heat until it starts to thicken, about 5 minutes. Next, add the spinach and sun-dried tomatoes to the skillet. Simmer until the spinach wilts, about 1 minute. Finally, return the chicken to the skillet and cook until it's heated through, 2 to 3 minutes.
    1 Cup Heavy Cream, ½ Cup Chicken Broth, ½ Cup Parmesan Cheese, 1 tsp Garlic Powder, 1 tsp Italian Seasoning, 1 Cup Spinach, ½ Cup Sun-Dried Tomatoes in Oil
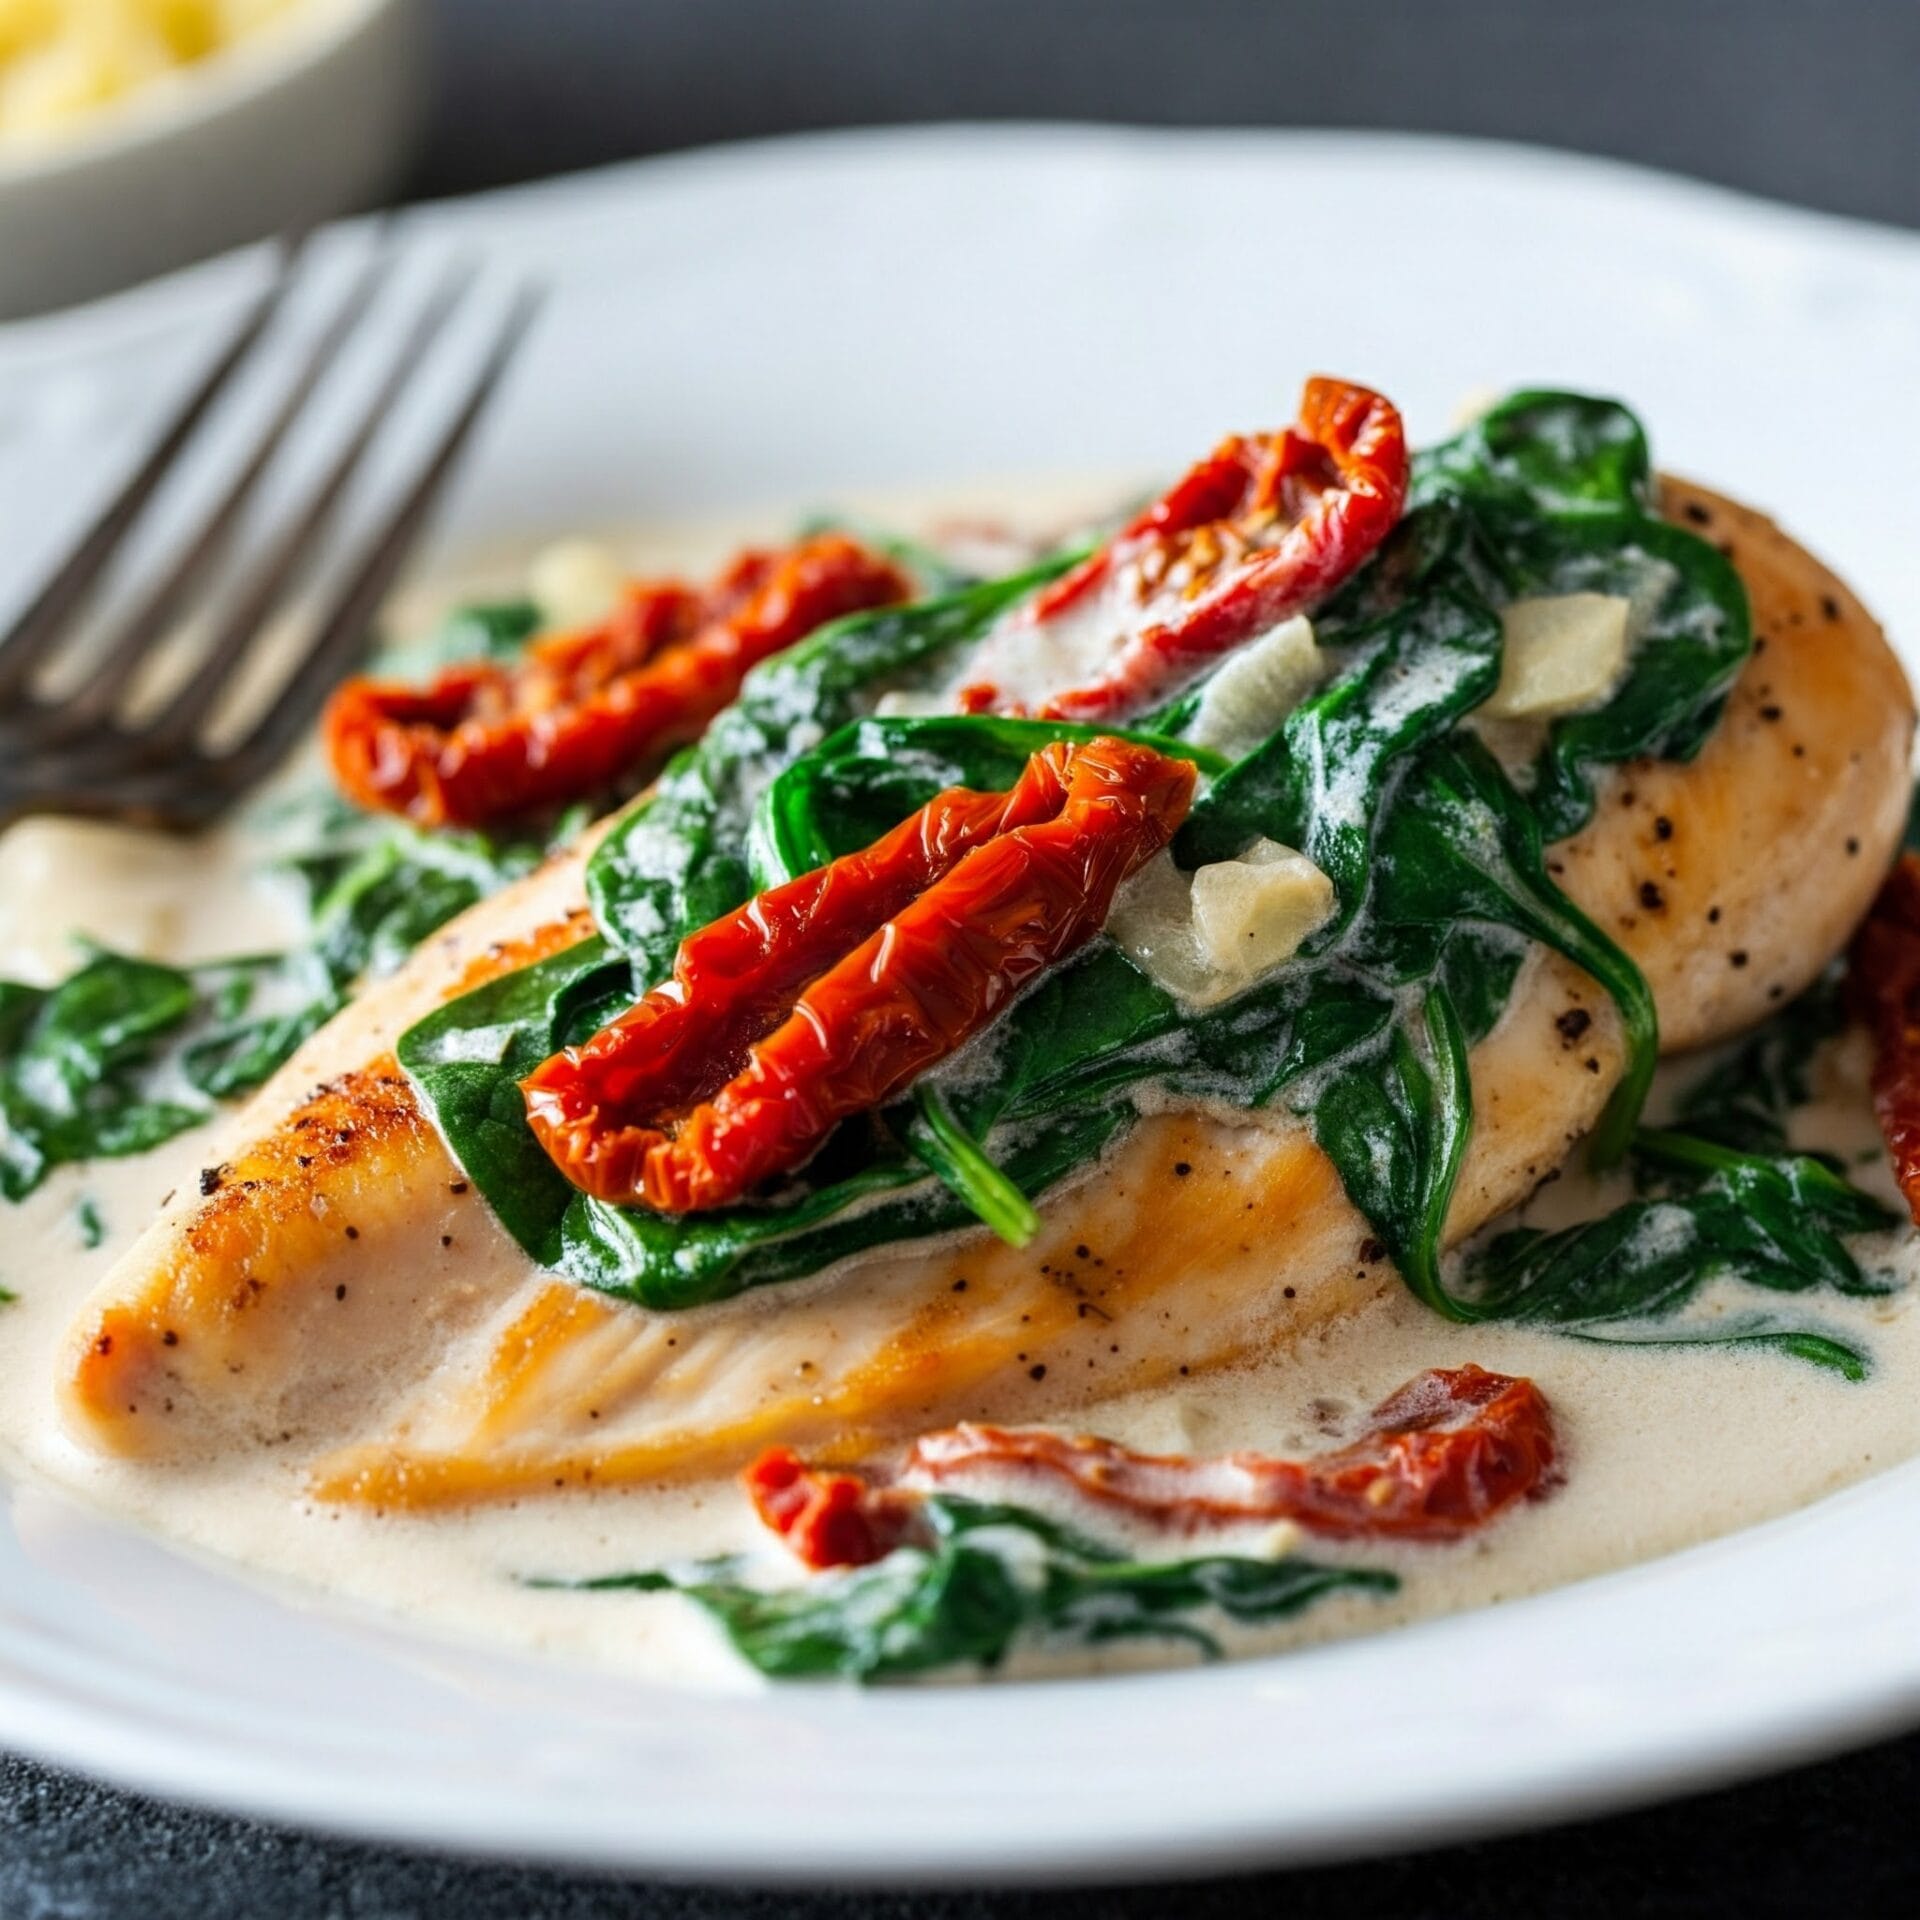
  3. Once the chicken is cooked through, transfer it to a serving platter. Spoon the creamy sauce generously over the chicken, ensuring that the spinach and sun-dried tomatoes are evenly distributed. Garnish with fresh parsley and a sprinkle of Parmesan cheese for an extra touch of flavor and visual appeal.

Nutrition

Serving: 14ozCalories: 2206kcalCarbohydrates: 31gProtein: 171gFat: 155gSaturated Fat: 72gPolyunsaturated Fat: 11gMonounsaturated Fat: 56gTrans Fat: 0.1gCholesterol: 755mgSodium: 2360mgPotassium: 3966mgFiber: 5gSugar: 8gVitamin A: 7799IUVitamin C: 75mgCalcium: 737mgIron: 6mg

Notes

Ingredients:
  • Chicken: Use boneless, skinless chicken breasts. You can also use chicken thighs, but adjust the cooking time accordingly.
  • Olive Oil: Use a good quality olive oil for cooking the chicken.
  • Heavy Cream: Heavy cream creates a rich and creamy sauce. You can substitute with half-and-half for a lighter option.
  • Chicken Broth: Use low-sodium chicken broth to control the saltiness of the dish.
  • Parmesan Cheese: Freshly grated Parmesan cheese is best.
  • Garlic Powder and Italian Seasoning: These add flavor to the sauce. You can also use fresh garlic and herbs if you have them on hand.
  • Spinach: Fresh spinach is best. If using frozen spinach, thaw and squeeze out excess water before adding it to the sauce.
  • Sun-Dried Tomatoes: Use oil-packed sun-dried tomatoes for the best flavor. You can also use dried sun-dried tomatoes, but rehydrate them in hot water before using.
Cooking Tips:
  • Don't Overcrowd the Pan: When cooking the chicken, make sure not to overcrowd the pan. This will ensure that the chicken browns properly and doesn't steam.
  • Cook Chicken Thoroughly: Cook the chicken until it's golden brown on the outside and no longer pink in the center. Use a meat thermometer to check that the internal temperature reaches 165 degrees Fahrenheit (74 degrees Celsius).
  • Whisk the Sauce: Whisk the sauce constantly while it's cooking to prevent lumps from forming.
  • Don't Overcook the Spinach: Simmer the spinach just until it wilts. Overcooked spinach will become mushy.
  • Reheat Gently: If reheating leftovers, do so gently over low heat to prevent the sauce from separating.
Serving Suggestions:
  • Pasta or Rice: Serve over your favorite pasta or rice.
  • Garnish: Garnish with fresh parsley, grated Parmesan cheese, or a drizzle of olive oil.
  • Sides: Serve with a side salad or roasted vegetables.
Variations:
  • Spicy: Add a pinch of red pepper flakes to the sauce for heat.
  • Mushrooms: Add sliced mushrooms to the sauce for extra flavor.
  • Wine: Add a splash of white wine to the sauce for depth of flavor.
  • Lemon: Add a squeeze of lemon juice to the finished dish for brightness.
With these tips, you'll be able to create a delicious and satisfying Garlic Tuscan Chicken dish!

Tried this recipe?

Let us know how it was!

Related Recipes

Ingredients

Ingredients:

  • 2 tablespoons olive oil
  • 1 ½ pounds skinless, boneless chicken breasts, thinly sliced
  • 1 cup heavy cream
  • ½ cup chicken broth
  • ½ cup grated Parmesan cheese
  • 1 teaspoon garlic powder
  • 1 teaspoon Italian seasoning
  • 1 cup spinach, chopped
  • ½ cup chopped sun-dried tomatoe

Image Gallery Garlic Tuscan Chicken

Storage & Leftovers

Storage:

  • Refrigerator: Allow the chicken and sauce to cool completely, then store in an airtight container in the fridge for up to 4 days.

  • Freezer: For longer storage, freeze in a freezer-safe container for up to 2 months. Note: the cream sauce may separate slightly upon reheating, but a gentle stir while warming can help bring it back together.

Reheating:

  • Stovetop (Best): Reheat gently over medium-low heat in a covered skillet. Add a splash of milk, cream, or chicken broth to loosen the sauce and keep it smooth.

  • Microwave: Reheat in short intervals (30–45 seconds), stirring in between, to avoid overcooking the chicken or breaking the sauce.

Pro Tips:

  • Great over leftover pasta, rice, or even baked potatoes.

  • If the sauce thickens too much, stir in a bit of warm broth or cream when reheating.

  • Add fresh herbs or a squeeze of lemon juice to refresh the flavor.

Please follow and like us:
onpost_follow
fb-share-icon197
Tweet120
Pinterest20
Share 20
submit to reddit

Subscribe for New Recipes

* indicates required

Intuit Mailchimp

Nashville Hot Chicken

Nashville Hot Chicken

Bring the heat with this fiery Southern classic! Our Nashville Hot Chicken features ultra-crispy, golden-fried chicken drenched in a signature spicy oil blend made with cayenne, paprika, and a hint of brown sugar for a touch of sweet heat. Served atop soft white bread, with tangy pickles, creamy coleslaw, and buttery biscuits on the side, this dish delivers a bold crunch, a smoky burn, and soul-satisfying Southern comfort in every bite. Perfect for spice lovers and comfort food fans alike!

Nashville Hot Chicken

No ratings yet
Get ready for a flavor explosion with Nashville Hot Chicken! This iconic dish is not for the faint of heart, but if you crave bold, spicy flavors, you're in for a treat.
Imagine crispy, juicy fried chicken coated in a fiery red oil that will set your taste buds ablaze. The heat is balanced by a touch of sweetness and a hint of smokiness, creating a complex and addictive flavor profile. Served on a bed of white bread with pickles to cool the burn, Nashville Hot Chicken is a culinary adventure that will leave you wanting more.
Are you brave enough to take on the heat? 🔥🐔
Prep Time 20 minutes
Cook Time 16 minutes
Additional Time 2 hours 25 minutes
Servings: 6 people
Course: Lunch, Main Course
Cuisine: American, Southern
Calories: 903

Ingredients
  

Ingredients
  •  
    1 Whole Chicken Cut into 8 pieces
Marinade
  •  
    1 Cup Buttermilk
  •  
    ¼ Cup Pickle Brine
  • 2 Tbsp. Hot Sauce Louisiana style of course
  • 1 Large Egg
Flour
  • 2 Cups All-Purpose Flour
  • 2 Tsp. Salt
Sauce
  • ¼ Cup Unsalted Butter
  •  
    ¼ Cup Lard
  • 2 Tbsp. Cayenne Pepper
  •  
    1 Tbsp. Light Brown Sugar packed
  •  
    1 Tsp. Smoked Paprika
  • ½ Tsp Garlic Powder
  • ½ Tsp. Kosher Salt
  • ½ Tsp. Ground Black Pepper
  • 1 Cup Vegetable Oil for frying

Method
 

  1. To marinate the chicken, place the pieces in a large bowl. Whisk together the buttermilk, pickle brine, hot sauce, and egg in a separate bowl. Pour the marinade over the chicken, making sure each piece is fully coated. Cover and refrigerate for at least 2 hours, and up to 4 hours.
    1 Whole Chicken, 1 Cup Buttermilk, ¼ Cup Pickle Brine, 2 Tbsp. Hot Sauce, 1 Large Egg
  2. In a shallow dish, combine the flour and salt. Remove the chicken from the marinade and use paper towels to gently pat off any excess marinade. This will help the flour adhere better. Toss the chicken in the flour mixture until each piece is thoroughly coated. Next, return the chicken to the marinade, turning to coat all sides. Remove the chicken from the marinade, allowing any excess to drip back into the bowl. Finally, coat the chicken once again in the flour mixture. Place the breaded chicken on a wire rack and let it sit at room temperature for about 15 minutes. This will allow the coating to dry out slightly, which will help it become extra crispy when fried.
    2 Cups All-Purpose Flour, 2 Tsp. Salt
  3. In a large pot or Dutch oven, combine the butter, lard, cayenne pepper, brown sugar, paprika, garlic powder, kosher salt, and black pepper. Place the pot over medium-high heat. Cook the mixture, stirring constantly, until the butter and lard are completely melted and the spices are fragrant. This will help to bloom the spices and create a more flavorful sauce. Remove the pot from the heat and set it aside. Keep the sauce warm while you prepare the chicken. You can do this by placing the pot in a warm oven or over a very low heat setting on the stovetop.
    ¼ Cup Unsalted Butter, ¼ Cup Lard, 2 Tbsp. Cayenne Pepper, 1 Tbsp. Light Brown Sugar, 1 Tsp. Smoked Paprika, ½ Tsp Garlic Powder, ½ Tsp. Kosher Salt, ½ Tsp. Ground Black Pepper
  4. Pour enough vegetable oil into a large cast iron skillet to fill it about 1/3 of the way. Heat the oil to 350 degrees Fahrenheit over medium-high heat. It's important to use a thermometer to monitor the oil temperature, as it can fluctuate during cooking. Carefully place the chicken pieces in the hot oil, skin-side down. Maintain an oil temperature of 325 degrees Fahrenheit, adjusting the heat as needed to keep it within that range. Fry the chicken until an instant-read thermometer inserted into the thickest part registers 160 degrees Fahrenheit, which should take about 8 to 10 minutes per side.
    1 Cup Vegetable Oil
  5. When the chicken has reached an internal temperature of 160 degrees Fahrenheit, carefully remove the pieces from the hot oil using tongs or a slotted spoon. Transfer the chicken to a wire rack set over a baking sheet. This will allow any excess oil to drain off and keep the chicken crispy. Brush the chicken generously with the hot sauce, making sure to coat both sides evenly. The chicken will continue to cook slightly as it rests. Serve the Nashville Hot Chicken immediately while it's hot and crispy.

Nutrition

Serving: 13ozCalories: 903kcalCarbohydrates: 57gProtein: 11gFat: 71gSaturated Fat: 18gPolyunsaturated Fat: 33gMonounsaturated Fat: 17gTrans Fat: 1gCholesterol: 84mgSodium: 1846mgPotassium: 260mgFiber: 3gSugar: 7gVitamin A: 1948IUVitamin C: 3mgCalcium: 110mgIron: 4mg

Notes

Ingredients:
  • Chicken: Bone-in, skin-on chicken pieces are traditional. You can use a whole chicken cut into pieces, or individual pieces like thighs, drumsticks, and breasts.
  • Marinade: Buttermilk, pickle brine, hot sauce, and egg create a flavorful marinade that tenderizes the chicken.
  • Coating: A double coating of seasoned flour helps create an extra crispy crust.
  • Frying Oil: Use an oil with a high smoke point, such as vegetable oil or peanut oil.
  • Hot Sauce: This is where the magic happens! The sauce is typically made with butter, lard, cayenne pepper, brown sugar, paprika, garlic powder, and other spices.
  • Sides: Classic accompaniments include white bread and dill pickle chips.
Cooking the Chicken:
  • Marinate: Marinate the chicken for at least 2 hours to allow the flavors to penetrate and the chicken to tenderize.
  • Double Dredge: The double coating of flour helps create an extra crispy crust.
  • Fry Carefully: Fry the chicken in batches to avoid overcrowding the pan and ensure even cooking. Maintain a consistent oil temperature for optimal results.
  • Check for Doneness: Use a meat thermometer to ensure the chicken is cooked through. The safe internal temperature for cooked chicken is 165 degrees Fahrenheit (74 degrees Celsius).
  • Drain and Sauce: Drain the fried chicken on a wire rack to remove excess oil. Brush generously with the hot sauce while still hot.
Serving:
  • Serve Immediately: Nashville Hot Chicken is best served immediately while it's hot and crispy.
  • Traditional Sides: Serve with white bread slices and dill pickle chips to help balance the heat.
  • Additional Sides: Consider adding other Southern sides like coleslaw, baked beans, or mac and cheese.
  • Heat Levels: Nashville Hot Chicken is traditionally served in varying levels of heat, from mild to "burn-your-mouth" hot. Adjust the amount of cayenne pepper in the sauce to control the heat level.
Important Notes:
  • Safety: Be cautious when working with hot oil. Use a deep-fry thermometer to monitor the temperature and avoid splattering.
  • Spice Level: Adjust the amount of cayenne pepper in the sauce to your preferred heat level. Start with less and add more gradually to taste.
  • Freshness: Use fresh, high-quality ingredients for the best flavor.
With these tips, you'll be able to create a delicious and authentic Nashville Hot Chicken experience at home!

Tried this recipe?

Let us know how it was!

Related Recipes

Ingredients

Ingredients:

  • For the Chicken:
    • 1 whole chicken, cut into 8 pieces
  • For the Marinade:
    • 1 cup buttermilk
    • ¼ cup pickle brine
    • 2 tablespoons Louisiana-style hot sauce
    • 1 large egg
  • For the Flour Coating:
    • 2 cups all-purpose flour
    • 2 teaspoons fine table salt
  • For the Hot Sauce:
    • ¼ cup butter
    • ¼ cup lard
    • 2 tablespoons cayenne pepper
    • 1 tablespoon packed light brown sugar
    • 1 teaspoon paprika
    • ½ teaspoon garlic powder
    • ½ teaspoon kosher salt
    • ½ teaspoon freshly ground black pepper
  • For Frying:
    • 1 cup vegetable oil, or as needed

Image Gallery Nashville Hot Chicken

Storage & Leftovers

Storage:

  • Refrigerator: Let the chicken cool completely, then store in an airtight container. Keeps well for up to 3–4 days.

  • Separate Sides: Store coleslaw separately in its own sealed container (up to 3 days), and keep biscuits in a zip-top bag or airtight container at room temp for 1–2 days, or refrigerate up to 5 days.

Reheating:

  • Oven (Best method): Preheat to 375°F. Place chicken on a wire rack over a baking sheet and bake for 10–15 minutes, or until heated through and crispy.

  • Air Fryer: Reheat at 350°F for about 5–7 minutes for a quick crisp.

  • Microwave: Not recommended if you want to preserve the crunch, but usable in a pinch—reheat in 30-second bursts until hot.

Pro Tips:

  • Reheat biscuits wrapped in foil in the oven for 5 minutes.

  • Stir coleslaw before serving again; add a splash of vinegar or mayo if needed.

  • For next-day magic: use leftovers to make spicy chicken sandwiches or toss chopped hot chicken into a wrap or salad!

Please follow and like us:
onpost_follow
fb-share-icon197
Tweet120
Pinterest20
Share 20
submit to reddit

Subscribe for New Recipes

* indicates required

Intuit Mailchimp

White Chicken Chili

White Chicken Chili

Creamy, comforting, and packed with bold flavor, this White Chicken Chili is a delicious twist on the classic. Tender chunks of chicken simmer with white beans, sweet corn, and a medley of warming spices in a rich, creamy broth. It’s hearty, satisfying, and perfect for cozy nights or casual get-togethers.

This recipe isn’t just crave-worthy—it’s versatile, too. You can easily dial up the heat, toss everything in a slow cooker for a hands-off approach, or pile on your favorite toppings like shredded cheese, avocado, lime, and tortilla chips.


Why You’ll Love It:

✔️ Busy weeknights – Quick, simple, and family-friendly
✔️ Feeding a crowd – Makes a big batch and reheats like a dream
✔️ Chilly nights in – The ultimate bowl of comfort
✔️ Totally customizable – Adjust spices, toppings, or even make it dairy-free


Get ready to warm up with a bowl of creamy, soul-soothing White Chicken Chili—your new go-to comfort food!

White Chicken Chili

No ratings yet
White chicken chili is a creamy, comforting twist on traditional chili. It features tender chicken, white beans, and a blend of spices in a rich, flavorful broth. Often simmered with green chiles and corn, it's a delicious and satisfying meal.
Prep Time 15 minutes
Cook Time 20 minutes
Servings: 6 People
Course: Dinner, Main Course
Cuisine: American, Tex-Mex
Calories: 152

Ingredients
  

  • 2 15.5oz Cannellini Beans drained & rinsed.
  • 3 ½ cups Chicken Broth
  • 1 ½ Tbsp Olive Oil
  • 1 Small Yellow Onion
  • 4 Cloves Garlic minced
  • 2 tsp Ground Coriander
  • 1 ½ tsp Ground Cumin
  • 1 tsp Chili Powder
  • 1 tsp Kosher Salt
  • ½ tsp Dried Oregano
  • ½ tsp Ground Black Pepper
  • 1 15oz Yellow Corn
  •  
    2 4oz Green Chiles (canned)
  •  
    1 8oz Cream Cheese dice into small cubes
  • 2 ½ cups Chicken Breast shredded
  • 2 Tbsp Fresh Cilantro chopped
  • 1 Tbsp Lime Juice

Method
 

  1. Take 1 cup of the cooked cannellini beans and 1/2 cup of the chicken broth. In a blender, process these ingredients until they form a smooth puree. Set the puree aside for later use.
    2 15.5oz Cannellini Beans, 3 ½ cups Chicken Broth
  2. Warm the olive oil in a large pot or Dutch oven over medium-high heat. Once the oil is shimmering, add the chopped onion. Sauté the onion for about 3 minutes, stirring occasionally, until it begins to soften. Next, add the minced garlic. Sauté for another 30 seconds, or until the garlic becomes fragrant.
    1 ½ Tbsp Olive Oil, 1 Small Yellow Onion
  3. Now, it's time to add the spices. Sprinkle in the coriander, cumin, chili powder, salt, oregano, and black pepper. Stir the spices into the onion and garlic mixture, and cook for 1 minute. Stir a few times to prevent the spices from burning.
    4 Cloves Garlic, 2 tsp Ground Coriander, 1 ½ tsp Ground Cumin, 1 tsp Chili Powder, 1 tsp Kosher Salt, ½ tsp Dried Oregano, ½ tsp Ground Black Pepper
  4. Next, add the corn and diced green chiles to the pot. Stir to combine with the other ingredients. Cook for 2 minutes, stirring occasionally, to allow the flavors to meld.
    1 15oz Yellow Corn, 2 4oz Green Chiles (canned)
  5. Pour the smooth bean puree and the remaining 3 cups of chicken broth into the pot. Stir to combine the ingredients. Bring the mixture to a boil over medium-high heat. Once boiling, reduce the heat to low, cover the pot partially, and let it simmer gently for 10 minutes.
    1 8oz Cream Cheese
  6. Add the cream cheese to the pot and stir gently until it melts completely and is fully incorporated into the chili.
    2 ½ cups Chicken Breast
  7. Add the remaining cannellini beans and shredded chicken to the pot. Stir gently to combine all the ingredients. Cook for an additional 2 minutes to allow the flavors to meld and the chicken to warm through.
    1 Tbsp Lime Juice
  8. Take the pot off the heat. Stir in the chopped cilantro and lime juice, distributing them evenly throughout the chili. Ladle the chili into bowls and serve hot. Top with tortilla chips, shredded cheese, and diced avocado, if desired.
    2 Tbsp Fresh Cilantro

Nutrition

Serving: 12ozCalories: 152kcalCarbohydrates: 7gProtein: 19gFat: 6gSaturated Fat: 1gPolyunsaturated Fat: 1gMonounsaturated Fat: 4gTrans Fat: 0.01gCholesterol: 54mgSodium: 1944mgPotassium: 443mgFiber: 1gSugar: 2gVitamin A: 134IUVitamin C: 3mgCalcium: 38mgIron: 1mg

Notes

  • 1. Flavor Boosters:
    • Spice It Up: Don't be afraid to experiment with different chiles. Jalapeños, poblanos, or even a touch of chipotle powder can add a kick.
    • Aromatics are Key: Sautéing onions and garlic in oil or butter before adding other ingredients builds a flavorful foundation for your chili.
    • Toast the Spices: Toasting spices like cumin, coriander, and chili powder in a dry pan for a few minutes before adding them to the chili deepens their flavor.
    • Zest It Up: A squeeze of lime juice or a tablespoon of white wine vinegar added at the end brightens the flavors of the chili.
    • Umami Bomb: For an extra layer of savory depth, add a tablespoon or two of white miso paste to the chili.
    2. Chicken:
    • Bone-In, Skin-On for Flavor: Using bone-in, skin-on chicken thighs or breasts adds more flavor to the broth. Just be sure to remove the skin and bones before shredding the chicken.
    • Rotisserie Chicken Shortcut: For a quick and easy option, use a rotisserie chicken.
    • Don't Overcook: Overcooked chicken can be dry. Simmer the chicken until it's just cooked through, then shred it.
    3. Beans:
    • Variety is Key: Use a mix of white beans, such as cannellini, Great Northern, or navy beans, for a variety of textures and flavors.
    • Canned or Dried: Canned beans are convenient, but if you have time, cooking dried beans from scratch adds even more flavor.
    • Smooth Operator: For a creamier chili, puree a portion of the beans before adding them to the pot.
    4. Liquids:
    • Broth Matters: Use a good-quality chicken broth for the best flavor.
    • Adjust as Needed: If the chili becomes too thick, add more broth or water to thin it out.
    5. Toppings:
    • Garnish Generously: Toppings add texture and flavor. Consider shredded cheese, sour cream, avocado, chopped cilantro, tortilla strips, or a dollop of guacamole.
    • Fresh is Best: Freshly chopped cilantro and a squeeze of lime juice added just before serving brighten the flavors.
    Bonus Tip:
    • Slow Cooker Magic: White chicken chili is perfect for the slow cooker. Simply add all the ingredients to the slow cooker and cook on low for 6-8 hours, or until the chicken is cooked through.
    With these tips and tricks, you'll be creating bowls of white chicken chili that are both comforting and bursting with flavor! 

Tried this recipe?

Let us know how it was!

Related Recipes

Ingredients

Ingredients:

  • 2 (15.5-ounce) cans cannellini beans, drained and rinsed
  • 3 ½ cups chicken broth
  • 1 ½ tablespoons olive oil
  • 1 small yellow onion, chopped
  • 4 cloves garlic, minced
  • 2 teaspoons ground coriander
  • 1 ½ teaspoons ground cumin
  • 1 teaspoon chili powder
  • 1 teaspoon kosher salt
  • ½ teaspoon dried oregano
  • ½ teaspoon ground black pepper
  • 1 (15-ounce) can yellow corn, drained
  • 2 (4-ounce) cans chopped green chiles
  • 1 (8-ounce) package cream cheese, cut into small cubes
  • 2 ½ cups shredded cooked chicken breast
  • 2 tablespoons chopped cilantro
  • 1 tablespoon lime juice

Image Gallery White Chicken Chili

Storage & Leftovers

Storing Your Leftover White Chicken Chili:

  • Cool Down: Allow the chili to cool to room temperature before storing. This prevents condensation, which can water down the chili.
  • Proper Container: Use an airtight container to maintain freshness and prevent the chili from absorbing other flavors in your fridge.  
  • Refrigerator Storage: Store leftover white chicken chili in the refrigerator for up to 4 days.
  • Freezer-Friendly: You can freeze it for up to 3 months.  

Reheating Tips:

  • Thaw if Frozen: If frozen, thaw the chili in the refrigerator overnight or in a bowl of cold water. 
  • Stovetop Reheating: Reheat gently in a saucepan over medium-low heat, stirring occasionally. You might need to add a little chicken broth or water to thin it out. 
  • Microwave Reheating: Heat in short bursts, stirring between each burst, until warmed through.

Extra Tips for Chili Connoisseurs:

  • Cream Cheese Consideration: If you’ve frozen the chili, the cream cheese might separate slightly upon thawing. Just give it a good stir when reheating, and it should come back together.
  • Flavor Revival: When reheating, add a squeeze of fresh lime juice and a sprinkle of fresh cilantro to brighten the flavors.
  • Spice Adjustment: If you want to adjust the spice level when reheating, add more chili powder or a pinch of cayenne pepper for extra heat.

With these tips, you can enjoy your homemade white chicken chili even days after you’ve made it!

Please follow and like us:
onpost_follow
fb-share-icon197
Tweet120
Pinterest20
Share 20
submit to reddit

Subscribe for New Recipes

* indicates required

Intuit Mailchimp

Shrimp & Sausage Gumbo

Shrimp & Sausage Gumbo

This Shrimp & Sausage Gumbo is a bold, soul-satisfying Southern classic that brings the rich flavors of Louisiana straight to your kitchen. Smoky andouille sausage, tender shrimp, and the “holy trinity” of Cajun cooking—onion, celery, and bell pepper—are simmered in a deeply flavorful, slow-cooked roux-based broth.

Seasoned with Cajun spices and served over a bed of fluffy white rice, this gumbo is hearty, comforting, and loaded with authentic Creole flavor. Whether you’re serving it up for Sunday supper, game day, or a cozy night in, it’s the kind of dish that gets better with every bite—and even better the next day.

Customizable, freezer-friendly, and guaranteed to impress, this Shrimp & Sausage Gumbo is a must-make for anyone craving real Southern comfort.

Shrimp & Sausage Gumbo

No ratings yet
Shrimp & Sausage Gumbo is a flavorful and hearty dish that embodies the vibrant flavors of Louisiana Cajun cuisine. This comforting stew features tender shrimp, savory sausage, a rich and flavorful broth, and the "holy trinity" of vegetables (onions, celery, and bell peppers). It's a delicious and satisfying meal that's perfect for a chilly evening or a Mardi Gras celebration.
Prep Time 20 minutes
Cook Time 1 hour
Servings: 4 people
Course: Dinner, Main Course
Cuisine: American, Cajun, Creole
Calories: 590

Ingredients
  

  • 4 Tbsp Unsalted Butter
  • ¼ Cup All-Purpose Flour
  • 1 Small Yellow Onion
  • 1 Medium Green Bell Pepper Seeds and ribs removed, chopped.
  • 1 Stalks Celery Finely Sliced
  • 12 oz Andouille sausage Sliced into 1/2 inch rounds
  • 2 Cloves Garlic Finely chopped
  • 1 tbsp Cajun seasoning Without salt
  • 1 pinch Kosher Salt To taste
  • 1 pinch Black Pepper to taste
  • 4 Cup Chicken Broth Low Sodium
  •  
    15 oz Diced Tomatoes Fire Roasted
  • 1 Bay Leaf
  • 1 lb Medium shrimp 26/30 or 31/40 is the size for medium. Peeled & deviened.
  • 3 Scallions Sliced for serving.
Optional
  • 1 White rice Pre-Cooked for serving.

Method
 

  1. The foundation of any great gumbo is the roux. In a large skillet, melt butter over medium heat. Whisk in flour and cook for 12-15 minutes, stirring constantly, until the mixture turns a deep, dark caramel color. This will give your gumbo a rich, complex flavor.
    4 Tbsp Unsalted Butter, ¼ Cup All-Purpose Flour
  2. Add the chopped onions, bell peppers, and celery to the pot. These three vegetables are known as the "holy trinity" in Cajun and Creole cooking, and they form the flavor base of many dishes. Cook the vegetables, stirring occasionally, until they are softened and fragrant. Then, add the sliced sausage to the pot. Cook until the sausage is browned, then stir in the minced garlic, Cajun seasoning, and a pinch of salt and pepper.
    1 Small Yellow Onion, 1 Medium Green Bell Pepper, 1 Stalks Celery, 12 oz Andouille sausage, 2 Cloves Garlic, 1 tbsp Cajun seasoning , 1 pinch Kosher Salt, 1 pinch Black Pepper
  3. Pour the chicken broth and the diced tomatoes into the pot with the vegetables and sausage. Add a bay leaf for an extra layer of flavor. Stir the mixture well to combine all the ingredients. Bring the mixture to a boil over medium-high heat. Once boiling, reduce the heat to low and simmer the gumbo uncovered for about an hour, stirring occasionally. This simmering process allows the flavors to meld and deepen, and the gumbo will thicken slightly as it simmers.
    4 Cup Chicken Broth, 15 oz Diced Tomatoes, 1 Bay Leaf
  4. In the final 6 minutes of cooking, add the shrimp to the pot. Stir gently to distribute the shrimp throughout the gumbo. Cook until the shrimp turn pink and are opaque throughout, about 6 minutes. Be careful not to overcook the shrimp, as they can become tough and rubbery. Taste the gumbo and adjust the seasonings if needed. You may want to add more salt, pepper, or hot sauce to your liking.
    1 lb Medium shrimp, 3 Scallions
  5. Stir most of the chopped scallions into the gumbo, reserving a small amount for garnish. Divide the cooked white rice among serving bowls. Ladle the flavorful gumbo over the rice, making sure to include plenty of shrimp and sausage in each serving. Top each bowl with the remaining chopped scallions. This will add a pop of color and a fresh onion flavor to the dish. Serve the gumbo immediately while it's hot.
    1 White rice, 3 Scallions

Nutrition

Serving: 12ozCalories: 590kcalCarbohydrates: 21gProtein: 46gFat: 37gSaturated Fat: 15gPolyunsaturated Fat: 5gMonounsaturated Fat: 14gTrans Fat: 1gCholesterol: 286mgSodium: 1096mgPotassium: 983mgFiber: 3gSugar: 6gVitamin A: 1919IUVitamin C: 30mgCalcium: 151mgIron: 4mg

Notes

Ingredients:
  • Shrimp: Use fresh or frozen shrimp, peeled and deveined. If using frozen, thaw completely before adding to the gumbo.
  • Sausage: Andouille sausage is traditional, but you can use other smoked sausages like kielbasa or chorizo.
  • Roux: The roux is the foundation of gumbo. It's made with butter and flour cooked until a deep brown color.
  • Vegetables: The "holy trinity" of Cajun cooking—onions, bell peppers, and celery—is essential for flavor.
  • Broth: Use a good quality chicken or seafood broth.
  • Tomatoes: Diced tomatoes add acidity and sweetness to the gumbo.
  • Seasonings: Cajun seasoning is a must, along with salt, pepper, and a bay leaf.
  • Rice: Serve the gumbo over cooked white rice.
Cooking Tips:
  • Make the Roux: Cook the roux slowly and stir constantly to prevent burning. The darker the roux, the deeper the flavor of the gumbo.
  • Don't Overcrowd the Pot: When sautéing the vegetables and sausage, avoid overcrowding the pot. This will ensure that they cook evenly and brown properly.
  • Simmer Gently: Simmer the gumbo gently to allow the flavors to meld and the sauce to thicken.
  • Add Shrimp Last: Add the shrimp towards the end of the cooking time to prevent overcooking.
  • Adjust Seasonings: Taste the gumbo before serving and adjust the seasonings as needed.
Serving Suggestions:
  • Garnish: Garnish with chopped scallions or fresh parsley.
  • Sides: Serve with crusty bread or potato salad.
  • Hot Sauce: Offer hot sauce on the side for those who like extra heat.
Variations:
  • Chicken and Sausage Gumbo: Add cooked chicken to the gumbo along with the sausage.
  • Seafood Gumbo: Use a variety of seafood, such as crab, oysters, or fish.
  • Vegetarian Gumbo: Omit the sausage and use vegetable broth. Add okra for thickening.
With these tips, you'll be able to create a delicious and authentic Shrimp & Sausage Gumbo that will transport your taste buds to Louisiana!

Tried this recipe?

Let us know how it was!

Related Recipes

Ingredients

  • For the Roux:

    • 4 tablespoons unsalted butter
    • ¼ cup all-purpose flour
  • For the Gumbo:

    • 1 small yellow onion, chopped
    • 1 medium green bell pepper, seeds and ribs removed, chopped
    • 1 stalk celery, finely sliced
    • 12 oz andouille sausage, sliced into ½-inch rounds
    • 2 cloves garlic, finely chopped
    • 1 tablespoon Cajun seasoning (without salt)
    • Pinch of kosher salt, to taste
    • Pinch of black pepper, to taste
    • 4 cups low-sodium chicken broth
    • 1 (15 oz) can fire-roasted diced tomatoes
    • 1 bay leaf
    • 1 lb medium shrimp (26/30 or 31/40 count), peeled and deveined
    • 3 scallions, sliced for serving
  • Optional:

    • Cooked white rice, for serving

Image Gallery Shrimp & Sausage Gumbo

Storage & Leftovers

🧊 Storage:

  • Let the gumbo cool completely before storing.

  • Transfer to an airtight container and refrigerate for up to 4 days.

  • Store rice separately if possible to prevent it from soaking up too much broth.

🔥 Reheating:

  • Reheat gently on the stovetop over medium heat, stirring occasionally.

  • You can also microwave in short bursts, stirring between intervals, until heated through.

  • Add a splash of broth or water if the gumbo thickens too much in the fridge.

❄️ Freezing:

  • Gumbo freezes very well!

  • Freeze in individual portions or larger batches (minus the rice) for up to 3 months.

  • Thaw overnight in the fridge, then reheat on the stovetop.

💡 Pro Tip:
If using shrimp, try to undercook them slightly before freezing—this prevents overcooking when reheating.

Please follow and like us:
onpost_follow
fb-share-icon197
Tweet120
Pinterest20
Share 20
submit to reddit

Subscribe for New Recipes

* indicates required

Intuit Mailchimp